Table of Contents
Advertisement
Quick Links
Assembly, Installation, Care, Maintenance and Use Instructions
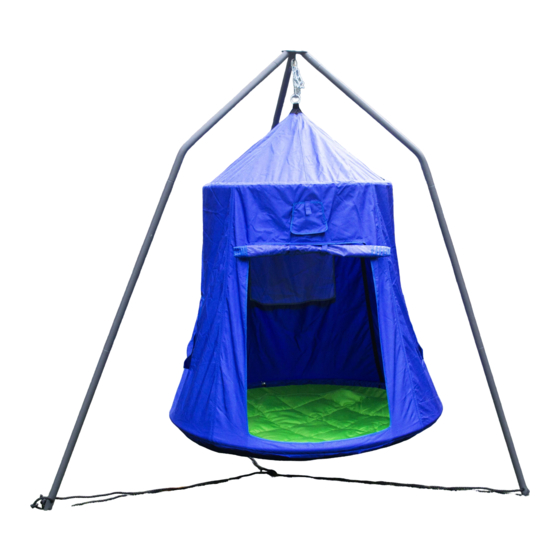
Sky Pod 44" diameter
Model # CP-4979-S
For customer service or replacement parts, please call 1-866-370-2131 Monday
through Friday 9am-5pm EST. Visit our website: www.sportspowerltd.net
or e-mail: customerservice@sportspowerltd.net .
RETAIN THIS MANUAL FOR FUTURE REFERENCE
Advertisement
Table of Contents

Related Manuals for SPORTSPOWER CP-4979-S


Summary of Contents for SPORTSPOWER CP-4979-S
- Page 1 Assembly, Installation, Care, Maintenance and Use Instructions Sky Pod 44" diameter Model # CP-4979-S For customer service or replacement parts, please call 1-866-370-2131 Monday through Friday 9am-5pm EST. Visit our website: www.sportspowerltd.net or e-mail: customerservice@sportspowerltd.net . RETAIN THIS MANUAL FOR FUTURE REFERENCE...
-
Page 2: Important Safety Instructions
IMPORTANT SAFETY INSTRUCTIONS • Adult assembly and installation required. • Holds up to 250 lbs. • Not intended for use as a swing, tent, spinner, gymnastics/playground equipment, climbing frame, or any combination. • Not recommended for extended outdoor use. CARE AND MAINTENANCE •... -
Page 3: Parts List
Parts List Part Description Picture Flat circular metal piece Curved metal poles Straight metal poles without ropes attached Straight metal poles with stabilizing ropes attached Small tubes Large tubes Sky pod Chain (10) Hook... - Page 4 Assembly 1. Set up the stand as shown below. Make sure that all pop locks are securely locked.
- Page 5 Assembly 2. Turn the top of the Sky Pod inside out. Thread the four small tubes into the top sleeve.
- Page 6 Assembly 3. Connect the four small tubes by pop lock and make sure that all pop locks are securely locked. Then turn the Sky Pod over. Push together as shown in image for easier insertion of pop lock...
- Page 7 Assembly 4. Hang the Sky Pod so that it is touching the ground slightly.
- Page 8 Assembly 5. Thread the six large tubes into the bottom sleeve and connect them by pop lock. Make sure that all pop locks are securely locked. Push together as shown in image for easier insertion of pop lock...
- Page 9 Assembly 6. Put the pad into the Sky Pod and enjoy!
-
Page 10: Warranty Information
Warranty Information • Sportspower Ltd warrants its products to be free from defects in material and workmanship under normal use and service conditions for ninety (90) days after the date of purchase. • All warranty coverage extends only to the original purchaser of the product and is not assignable or transferable. -
Page 11: Warranty Registration
• To the extent allowed by the applicable local law, the remedies in the limited warranty are the purchaser’s sole and exclusive remedies. • Sportspower is not responsible or liable for indirect, special or consequential damages arising out of or in connection with the use or performance of the product or...
Need help?
Do you have a question about the CP-4979-S and is the answer not in the manual?
Questions and answers