Table of Contents
Advertisement
Quick Links
Advertisement
Table of Contents

Subscribe to Our Youtube Channel
Related Manuals for Clarion CJ-5600E


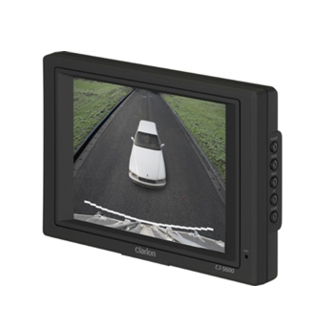
Summary of Contents for Clarion CJ-5600E
-
Page 2: Table Of Contents
1. Before Use... 3 2. Features ... 3 3. Names of the Buttons ... 4 4. Operations ... 4 5. Connections... 7 6. Installation ... 8 7. Troubleshooting... 9 8. Specifications ... 9 This unit has been tested and found to comply with the limits for a Class B digital device, pursuant to Part 15 of the FCC Rules. -
Page 3: Before Use
Before Use Warning • Do Not Back Up Vehicle While Relying Only on the Monitor Image • Use Slow Speeds When Backing Up • The rear-view monitor image has the same right-left inversion as your vehicle’s rearview mirrors. Depending on the vehicle, the field and angle of view may differ. Precautions (when you use the monitor) Do not touch the LCD panel. -
Page 4: Names Of The Buttons
Names of the Buttons Operations POWER MODE (Camera Selection) It is a function to change CAMERA (CAM1/CAM2). STAND BY LED (1) Press [POWER] button to on the power. (STAND BY state is OFF) (2) Press [POWER] button again to off the power. - Page 5 MENU It is a function to select MAIN MENU (SETUP, PICTURE CAMERA) (1) Press [MENU] button to select MAIN MENU, changed color in red when it is selected. • Every time the button is pressed, the setting changes. SETUP (2) Press [MODE] button to select SUB MENU, changed color in red when it is selected. •...
-
Page 6: Picture (Sub Menu)
DIRECTION (Inverted upside down) DIMMER LANGUAGE ENGLISH DIRECTION RESET RESET A factory default reset will clear all of OSD information PICTURE (SUB MENU) (3) Press [UP]/[DOWN] button to change Settings. CONTRAST CONTRAST BRIGHTNESS COLOR TINT TINT CONTRAST BRIGHTNESS COLOR TINT CAMERA (SUB MENU) (3) Press [UP]/[DOWN] button to change Settings. -
Page 7: Connections
(CAMERA1) BLACK GROUND BLACK (CAMERA-1, priority) GREEN (CAMERA-2) CAMERA2 CAMERA1 Use a Clarion camera. A relay cable, sold separately, is required POWER for connecting the camera. DC12V Use tape to keep the connection between the monitor cable and the camera relay cable secure. -
Page 8: Installation
Installation 1. Choose a location where you install the Monitor. Clean the place for the Stand with cleanser and remove the Protective Tape. And then attach it exactly where you want. 2. Fasten the Monitor with Tapping Screw. 3. Adjust angle of Stand and install Monitor. 4. -
Page 9: Troubleshooting
Troubleshooting Problem Is camera connected No image is displayed. properly? Is power cable connected properly? Power does not turn on. Is a fuse blown out? Operating Color is washed-out. environment is inappropriate. Specifications ITEM SCREEN SIZE NUMBER OF PIXELS DOT PITCH PANEL BRIGHTNESS DISPLAY AREA... - Page 10 Clarion Co., Ltd. All Rights Reserved. Copyright 2007: Clarion Co., Ltd. Printed in Korea / Gedruckt in Korea / Stampato in Corea / Imprimé en Corée / Impreso en Corea CJ-5600E 2007/2...
Need help?
Do you have a question about the CJ-5600E and is the answer not in the manual?
Questions and answers