
Related Manuals for Clarion VMA 5894 VMA5894 VMA5894


Summary of Contents for Clarion VMA 5894 VMA5894 VMA5894
- Page 1 VMA5894 and VMA7194 5.8” or 7” Wide Screen Color LCD Monitor Owner’s Manual Installation Guide...
-
Page 2: About Installation
If this equipment does cause harmful interference to radio or television reception, which can be determined by turning the equipment off and on, the user is encouraged to consult the dealer or an experienced radio/TV technician for help. Copyright 2004 Clarion Corporation of America. All rights reserved. -
Page 3: Table Of Contents
Contents About Installation ... 2 FCC Approval ... 2 1. Introduction ... 5 Features ... 5 Precautions ... 5 Please note ... 6 2. Using the monitor ... 6 Front panel controls ... 7 Wireless headphones ... 8 Playing a video or game ... 8 Adjusting the picture ... - Page 4 4. Installation and Wiring ... 13 What is included in the box ... 13 Before Starting ... 13 Installing the monitor ... 14 Wiring the monitor ... 16 5. Troubleshooting ... 19 6. Specification ... 20 VMA5894 General Specifications ... 20 VMA5894 Specifications ...
-
Page 5: Introduction
1. INTRODUCTION The Clarion 5.8-inch VMA5894 and 7-inch VMA7194 are high- performance video monitors designed specifically for the mobile environment. Intended for use with other Clarion multimedia products, they can also be integrated with many other products as part of a complete mobile video solution. -
Page 6: Please Note
If you have any questions about compatible components, such as system controllers, source units, FM modulators, or other audio/video products, please contact your authorized Clarion dealer. To operate the monitor, the vehicle ignition key switch must be in the ACC or ON (run) position. -
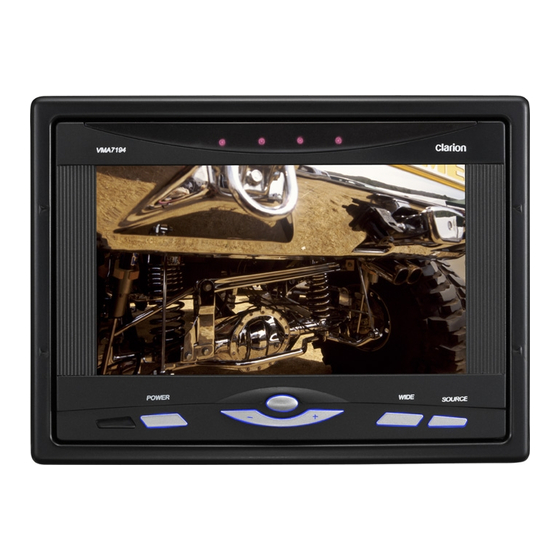
Page 7: Front Panel Controls
IR (infrared) receiver for use with Clarion remote control. Turns power to the monitor on and off Transmit infrared signals to the headphones Increases, decreases or selects... -
Page 8: Wireless Headphones
Wireless headphones Power OFF ON turns the headphones power on and off. CH.A and CH.B select the infrared channel if you have two monitors and two video source units (Configuration 2). Configuration 1 Monitor Monitor Monitor IR CH A IR CH A IR CH A Video source Video source... -
Page 9: Adjusting The Picture
WIDE stretches the image horizontally to fit the screen (aspect ratio of 16:9). 5. Adjust the volume on your headphones. Notes: When using a DVD player as the source, make sure that the unit’s output mode is set to “Wide” or “16:9.” This ensures that the DVD player will generate a video signal, which can take advantage of the monitor’s aspect ratio. -
Page 10: Turning The Unit Off And On
Each setting has 30 steps of adjustment range and is preset at the factory to 15. Once you’ve adjusted the picture, wait a moment and the adjustment menus disappear. Turning the unit off and on Press at any time to turn the unit off. POWER When you turn the vehicle’s ignition off, the monitor automati- cally shuts off. -
Page 11: Disabling Automatic Power On
AUX2. Using a remote control The LCD monitor comes with an IR receiver that works with Clarion remote control devices. Aim the remote control at the IR receiver during use. Note: The IR receiver only functions with select Clarion multime- dia equipment. -
Page 12: Care And Maintenance
3. CARE AND MAINTENANCE Cleaning the cabinet Use a soft, dry cloth to gently wipe dust and dirt from the cabinet. Do not use benzene, thinner, car cleaner, or other cleaners. These substances may damage the cabinet or cause the paint to peel. -
Page 13: Installation And Wiring
12V power supply. Do not open the case. There are no user-serviceable parts inside. If you require assistance, consult your Clarion dealer or an authorized Clarion service center. Use a soft, dry cloth to clean the screen. Never use a rough cloth, thinner, benzene, alcohol, or other solvent. -
Page 14: Installing The Monitor
The PQE023 positions the monitor on the back of a vehicle headrest. Note: The Clarion HRM100 and HRM150 headrest mounting kits are not compatible with this monitor. Flush mounting in the headrest You may use the included trim bezel to flush-mount the monitor. - Page 15 4. Insert the trim bezel and route the wiring harness through the opening in the rear. 5. Firmly attach the bezel to the mounting surface and/or to the interior of the mounting surface. Mounting tabs Mounting screw holes Wire harness opening 6.
-
Page 16: Wiring The Monitor
Custom Mounting using the threaded insert The monitor base has a threaded insert (1/4 - 20) that can be used with the optional Clarion ZMT009 gooseneck mounting kit or with a 1/4 -20 machine screw in custom applications. VMA5894 and VMA7194... -
Page 17: Monitor Connections
Some non-Clarion automotive DVD and VCP source units use a similar connector for an external IR receiver, but use different pin po- larity than the Clarion uses. Connecting non- Clarion source equipment to this connector could cause equipment damage not cov-... -
Page 18: Connections Diagram
Connections diagram From VCR, DVD player, etc. From game port, camcorder + (positive) - (negative) 1. Audio L 6. 12V GND 2. IR GND 7. IR 3. Audio R 8. 12V 4. VIDEO GND 9. GND 5. VIDEO To monitor VMA5894 and VMA7194... -
Page 19: Troubleshooting
5. TROUBLESHOOTING The system does not work A fuse may be blown. Replace the external fuse with a fuse of the same value. The power wires may not be connected. Check the wiring connections and retest. No picture. Press to make sure the proper input is selected. SOURCE If there is still no picture, press PICTURE... -
Page 20: Specification
6. SPECIFICATION Note: The technical data and the design of the equipment may change for the sake of technical improvements without prior notice. VMA5894 General Specifications Power requirement: 12V DC (9V-16V) Power consumpaion: 6.5 watts, power on 0.6 amps (600mA) Weight: 345 g Dimensions (w x h x d):... - Page 21 Notes VMA5894 and VMA7194...
- Page 22 Notes VMA5894 and VMA7194...
-
Page 23: Limited Warranty Information
For USA and Canada only This product is warranted against all defects in material workmanship for a period of one year from the date of original purchase. Clarion ProAudio products, except for speakers, are covered by a two year limited warranty when installed by an authorized Clarion dealer. The conditions of this limited warranty and the extent of responsibility of Clarion Corporation of America (“Clarion”) under this limited warranty... - Page 24 VMA5894 and VMA7194...
Need help?
Do you have a question about the VMA 5894 VMA5894 VMA5894 and is the answer not in the manual?
Questions and answers