Mindray DC-32 Service Manual

Mindray DC-32 Service Manual

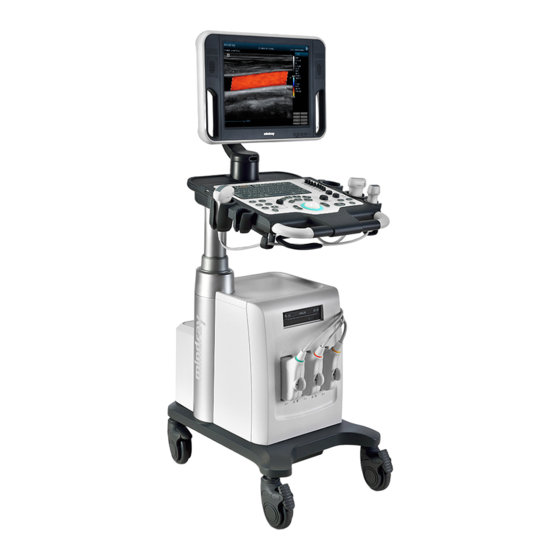
Digital ultrasound system
Table of Contents

Advertisement

DC-32/DC-30/DC-28/DC-26/DC-25
Digital Ultrasound System
Service Manual
Revision 11.0

Advertisement

Table of Contents
loading

Summary of Contents for Mindray DC-32

  • Page 1 DC-32/DC-30/DC-28/DC-26/DC-25 Digital Ultrasound System Service Manual Revision 11.0...
  • Page 3: Table Of Contents

    Table of Content Table of Content ........................i Revision History ........................I Intellectual Property Statement ..................II Applicable for ........................II Statement ..........................II Responsibility on the Manufacturer Party ................ III Customer Service Department ..................III Preface ........................1-1 Meaning of Signal Words ..................... 1-1 Meaning of Symbols ......................
  • Page 4 3.4.4 Video Printer Installation .................... 3-16 System Configuration ......................3-17 3.5.1 Running the System ....................3-17 3.5.2 Enter Doppler ......................3-17 3.5.3 System Preset ......................3-18 3.5.4 Exam Mode Preset ..................... 3-22 3.5.5 Measurement Preset ....................3-22 3.5.6 Print Preset ......................... 3-23 3.5.7 Network Preset ......................
  • Page 5 6.5.1 Preset Manage Settings ....................6-7 6.5.2 Patient Data Backup and Restore ................6-8 Software Maintenance ......................6-9 6.6.1 Product Configuration ....................6-9 6.6.2 Log Maintenance ......................6-10 Display Parameter Setting ....................6-11 HDD Partition ........................6-12 Structure and Assembly/Disassembly ..............7-1 Structure of the Complete System ..................
  • Page 6 9.3.4 Fan Alarming ........................ 9-9 9.3.5 Battery Alarming ......................9-10 9.3.6 PHV Related Alarming ....................9-11 10 Care and Maintenance .................... 10-1 10.1 Overview ..........................10-1 10.1.1 Tools, Measurement Devices and Consumables ............10-1 10.1.2 Care and Maintenance Frequency ................10-2 10.2 Cleaning the System ......................
  • Page 7 Appendix C Requirements of Performance Indices ..........C-1 Appendix D Boot Screen ..................D-1...
  • Page 9: Revision History

    Revision History Mindray may revise this publication from time to time without written notice. Revision Date Reason for Change 2016.3.13 Initial release Add assembly instructions for 4D module, ECG module, left 2016.4 side-panel and right side-panel. 2016.6 Update short screen.
  • Page 10: Intellectual Property Statement

    This manual may Refer to information protected by copyright or patents and does not convey any license under the patent rights or copyright of Mindray, or of others. Mindray intends to maintain the contents of this manual as confidential information.
  • Page 11: Responsibility On The Manufacturer Party

    Responsibility on the Manufacturer Party Mindray is responsible for the effects on safety, reliability and performance of this product, only if:  All installation operations, expansions, changes, modifications and repairs of this product are conducted by Mindray authorized personnel; ...
  • Page 13: Preface

    Preface This chapter describes important issues related to safety precautions, as well as the labels and icons on the ultrasound machine. Meaning of Signal Words In this operator’s manual, the signal words DANGER, WARNING, CAUTION and NOTE are used regarding safety and other important instructions. The signal words and their meanings are defined as follows.
  • Page 14: Meaning Of Symbols

    Meaning of Symbols The meaning and location of the safety symbols and warning labels on the ultrasound machine are described in the following tables, please read them carefully before using the system. 1.2.1 Meaning of Safety Symbols Symbol Meaning Location Type-BF applied part Below probe port...
  • Page 15: Warning Labels

    1.2.2 Warning Labels Warning Labels Meaning a. Do not place the device with the mobile trolley on a sloped surface. Otherwise the device may slide, resulting in personal injury or the device malfunction. Two persons are required to move the device over a sloped surface.
  • Page 16: General Symbols

    1.2.3 General Symbols This system uses the symbols listed in the following table, and their meanings are explained as well. Symbol Description Location Equipotentiality On the power supply panel Power button On the control panel Network port On the IO panel USB ports Video output Video...
  • Page 17: Safety Precautions

    Safety Precautions Please read the following precautions carefully to ensure the safety of the patient and the operator when using the probes. Do not operate this system in an atmosphere containing flammable DANGER or explosive gases such as anesthetic gases, oxygen, and hydrogen because an explosion may occur.
  • Page 18: Mechanical Safety

    The user is not allowed to open the covers and panel of the system, neither NOTE: device disassemble is allowed. To ensure the system performance and safety, only Mindray engineers or engineers authorized by Mindray can perform maintenance. Only technical professionals from Mindray or engineers authorized by Mindray after training can perform system maintenance.
  • Page 19: Specifications

    Specifications Overview 2.1.1 Intended Use The DC-30/DC-32/DC-28/DC-26/DC-25 diagnostic ultrasound system is intended for use in clinical ultrasonic diagnosis. 2.1.2 Introduction of Each Unit Specifications 2-1...
  • Page 20 Name Function Displays the image and parameters during scanning (tilt LCD Display angle adjustable) Control Panel Refer to the 2.1.2.3 Control Panel. Support arm Used to support the control panel and the display(optional) Probe and gel Used to place the probe or gel holder Handle Used for pushing when moving the system.
  • Page 21 2.1.2.1 IO Panel Symbol Function <1>. USB ports. <2>. Separate video output, connecting video printer. <3>. Composite video signal output, connecting video printer. <4>. Remote control port. <5>. Audio output (left channel). <6>. Audio output (right channel). VGA signal output. <7>.
  • Page 22 Name Function Power inlet AC power inlet 2.1.2.3 Control Panel Name Description Function Off: when system is turned off; <1>. Power button Green: when system is turned on by pressing this button. Indicator Battery status indicator Charging: light in orange Full: light in green Discharge (capacity >20%): light in green <2>.
  • Page 23 Name Description Function AC indicator <3>. Indicator AC supply: light green; Battery supply: light off. <4>. Indicator Standby indicator HDD status indicator Read/ write: blinking in green Other status: light off <5>. Indicator NOTE: DO NOT move the machine when the indicator is blinking in green.
  • Page 24 Name Description Function <25>. Arrow / Press to enter or exit the arrow comment status. Press to clear the comments or measurement <26>. Clear calipers on the screen. <27>. Scale Press to adjust image parameter of Scale. <28>. Baseline Press to adjust image parameter of Baseline. <29>.
  • Page 25: Peripherals Supported

    2.1.3 Peripherals Supported Item Model MITSUBISHI P93W-Z Analog SONY UP-X898MD Black/white Video Printer Digital SONY UP-D897 Color Video Printer (analog) SONY UP-D23/25MD Graph / text printer HP DESKJET INK ADVANTAGE 2020hc 1-pedal: FS-81-SP-2 Footswitch (USB type) 2-pedal: 971-SWNOM 3-pedal: 971-SWNOM Specifications 2-7...
  • Page 26: Specifications

    Specifications 2.2.1 Dimensions and Weight  Size: 670mm×520mm×(1265~1415)mm (Depth× Width×Height) (Adjustable control panel is configured) 670mm×520mm×1315mm (Depth×Width×Height) (Standard configuration) Net Weight: ≤55kg (including one battery)  2.2.2 Electrical Specifications 2.2.2.1 AC Input Voltage 220-240V~,100-127V~ Frequency 50/60Hz Power consumption 420VA 2.2.2.2 Battery (optional) Direct Current 14.8V...
  • Page 27: System Installation

    System Installation Preparations for Installation Do not install the machine in the following locations: NOTE: Locations near heat generators; Locations of high humidity; Locations with flammable gases. 3.1.1 Electrical Requirements 3.1.1.1 Requirement of Regulated Power Supply Due to the difference of the power supply stability of different districts, please advise the user to adopt a regulator of good quality and performance such as an on-line UPS.
  • Page 28: Installation Condition

    3.1.2 Installation Condition 3.1.2.1 Space Requirements Place the system with the necessary accessories at a proper position for convenient use. 1. Place the system in a room with good ventilation or having an air conditioning unit. 2. Leave at least 20cm clearance around the system to ensure effective cooling. 3.
  • Page 29: Unpacking

    Unpacking Tool: scissors Installation duration: 2 persons, ten minutes. 3.2.1 Unpacking 3.2.1.1 Unpacking Sketch LCD protecting CS05 wooden foam cover LARIS control panel protecting foam POLARIS LCD protecting foam Probe case DP-5 series close Package (480 X 340 X 135) carton POLARIS bottom CS05 main unit...
  • Page 30 3.2.1.2 Procedure 1. Remove the 4 baling band. 2. Remove the cover. Remove the cover 3. Remove the LCD protecting card. 3-4 System Installation...
  • Page 31 4. Take out protecting foam around the control panel.  If the height is enough, you can remove the carton from the crate pallet upwards directly.  If the height is not enough, do it as follows: Clamp a plastic locking clip from two sides to middle with two figures, meanwhile pull it out until you can remove the clip(there are five clips).
  • Page 32 5. Take out the accessory box and probe box. Accessory box Probe box 6. Remove protecting foam and plastic covers. 7. Remove the strainer; unlock the four casters. Press the part of strainer with thumb to let the spring shrink to the bottom(as shown in figure ①), then turn upwards until loose the strainer(as shown in figure ②).
  • Page 33: Installation Of Main Unit

    8. Take out the handle protecting foam. 9. Release the caster brake and carry the machine from the board. You will need the help of two persons to carry the machine from the board with. Installation of Main Unit NOTE: Lock the caster to avoid accidental movement which may result in damage when do the following operations.
  • Page 34: Connecting The Power Cord

     Adjusting Brightness / Contrast on the Monitor  Brightness adjust <1>, <2> refer to the brightness control keys with a sun marked at the top side; key <1>, which marked a “-” on the top side, can be used to decrease the brightness;...
  • Page 35: Installing Transducer& Gel Holder

    3. Plug the other end power plug into an appropriate power socket on the wall. The grounding terminal should be connected with a power grounding cable to ensure that protective grounding works normally. 3.3.3 Installing Transducer& Gel Holder The system provide 2 groups of 5 holders (one holder is for the gel, and the other four are for the transducers).The installation method is easy, so the process is not described any more.
  • Page 36: Installing Peripherals

    Installing Peripherals For the models of the supported peripherals, please refer to “2.1.3 Supported Peripherals”. 3.4.1 Footswitch Installation Connecting: insert the USB connector to the system applicable USB ports (in the rear of the machine or left of control panel). For settings of footswitch, please refer to 3.5.3 System Preset.
  • Page 37 5. Return to “Print Service” page, and select “Report Print” in the list, and set attributes in the Property box under the screen: Select the printer model from the drop-down list right to the “Printer”;   Set Paper Size. 6.
  • Page 38 3.4.2.2 Add Network Printer 1. Make sure the target network printer and the ultrasound system are both connected into the same LAN. 2. Check the IP address of the network printer (for details, please refer to the accompanying documents of the printer). 3.
  • Page 39: Installing Printer Adapter

    3.4.3 Installing Printer Adapter  Overview Name Function Power Button Powers on the printer adapter. USB port Connects the printer to the printer adapter. Network port Connects the printer adapter to the Ultrasound system. Power inlet Connects the printer adapter to power by using the auxiliary output port of the Ultrasound system.
  • Page 40  Environment Operation Storage and Transportation Ambient 0° C-40° C -20° C-55° C temperature Relative 30%-85% (no condensation) 20%-95% (no condensation) humidity Atmospheric 700hPa-1060hPa 700hPa-1060hPa pressure  System Connection Note: A maximum of 6 text/graph printers can be connected to the printer adapter at the same time.
  • Page 41  Power On Note: Before power on, ensure that the Ultrasound system, printer adapter, and printers are correctly connected and properly powered on. When powering on the printer adapter, do not abnormally power off the printer adapter, which may cause device damage and malfunction. Press the power button of the graph/text printer, and ensure that the printer works normally.
  • Page 42: Video Printer Installation

     Printer Adapter Preset Open the Printer Adapter page via [Setup]  [Print Preset]  [Printer Adapter]. Set the IP Address to 192.168.1.10 and Port number to 6666. Click [Add], and the Printer Adapter name is displayed in the Service List. ...
  • Page 43: System Configuration

    Connect the printer (Video input port) and the ultrasound system (Video output on IO panel) with the signal cable; Connect the Remote cable on printer to the Remote port on the ultrasound system. Connect the power cord to a power supply receptacle that is well grounded or with the auxiliary power output port on the system.
  • Page 44: System Preset

    3.5.3 System Preset Press the <Setup> key to enter the [Setup] menu. Click [System Preset]  Region In the Region page, set the system language, date format, date, time and hospital related information, etc.  General 3-18 System Installation...
  • Page 45 You can set patient information, exam setting, patient/exam management, image storage and system dormancy.  Image Setting Set shared parameters for imaging modes.  Application System Installation 3-19...
  • Page 46 Set ruler, measurement setting and follicle calculating method.  OB (not suitable for vet type) Set GA, FG,EFW. 3-20 System Installation...
  • Page 47  Key Config Function of keyboard keys Print, Save1, Save2, F1 and the footswitch keys (left, mid, right) are user-defined. Key lightness, key volume and trackball sensitivity can be adjusted.  Access Control Set administrator or operator authority information. System Installation 3-21...
  • Page 48: Exam Mode Preset

    3.5.4 Exam Mode Preset Press <Setup>->[Exam Preset] to enter the following screen. You can set exam modes for different probes. 3.5.5 Measurement Preset Press <Setup>->[Measure Preset] to enter the following screen. 3-22 System Installation...
  • Page 49: Print Preset

    You can set measurement tools adopted under each mode (B/M/Doppler) 3.5.6 Print Preset For details, please refer to “3.4.2 Installing a Graph / Text Printer” chapter. 3.5.7 Network Preset 3.5.7.1 Network Preset Open “[Setup] → [Network Preset] to enter the preset screen. System Installation 3-23...
  • Page 50 Please select the network type according the actually status, Select “DHCP”, click [OK]. Or, select “Static”, and input the IP address, subnet mask and gateway, then click [OK]. Name Description Current Network To select the network connection mode Adapter If “DHCP” is selected, IP address will be automatically DHCP obtained from DNS server;...
  • Page 51 3.5.7.2 DICOM Preset Only if DICOM basic option is configured, [DICOM Local], [DICOM Server], NOTE: [DICOM Service] are available. Click [DICOM Preset] to open the DICOM preset screen.  DICOM setting Enter the AE Title of the ultrasound system, port and PDU according to the actual situation, and then click [OK] to exit the screen.
  • Page 52 Only when the system is configured with DICOM basic function module, and installed DICOM Worklist, MPPS, DICOM Structured Reporting and Query/ Retrieve modules, can the corresponding preset settings be found in DICOM Service screen. The DICOM Service Setting is used to set properties of DICOM services as Storage, Print, Worklist, MPPS, Storage Commitment and Query/ Retrieve.The detail setting for DICOM refer to User Manual chapter 10.
  • Page 53: System Information

    3.5.8 System Information In System Information screen, it displays the product configuration, the optional installation status, software version, hardware & boards, and driver related information. You can check the product information here. 1. Press the <Setup> and click [About]. 2. Click [About Detail] to check the detailed board information select [Preset]->[Maintenance]->[Option] to see the detailed optional information of the system.
  • Page 54 3. Click [Save] or click [Exit] to exit the preset menu. 4. Select <Setup>->[Maintenance]->[Others]->[Export] to see the current system information of the exported log Be sure to confirm the system information before and after the software NOTE: maintenance. Ask the user to save the current system information if necessary. 3-28 System Installation...
  • Page 55: Hardware Principle

    Hardware Principle General Structure of Hardware System Main power supply Power AC-DC Isolation supply Auxiliary power output control transformer AC auxiliary output module board Auxiliary output control Battery BAT+ +12V module Machine DC-DC power Communication & Rotating feedback & control connecting board Connect to USB port on the...
  • Page 56: Probe Board

     Probe Connected Assembly  Main board  IO Interface board  IO Rear board  ECG board  4D drive board 4.2.1 Probe Board A+5V A+95V +95V OE_N BOARD ID PRB_A_ID[6:1] A-95V -95V Drive PRB_A_ID[6:1] BOARD_ID[7:0] D+3V3 PRB_A_ON PRB_A_ON Drive RELAY_EN drive...
  • Page 57: Main Board

    4.2.3 Main board The main board could be divided into two parts: front-end of the main board and back-end of the main board. 4.2.3.1 Front-end of the main board High-voltage CPLD control signal Drive pulse output circuit circuit High-voltage control signal Probe Probe Control signal...
  • Page 58  BF FPGA combines 32 channel echo signal to output to DSP FPGA, and DSP FPGA is sent to signal processing to a single image which is uploaded to CPU module by PCIE_PHY, then CPU module performs post processing.  PCI_PHY implements PCIE interface switching.
  • Page 59: Io Interface Board

     Multifunction FPGA on the back-end of the main board is to implement the REMOTE port on the IO interface board.  The CPU module implements interfaces including USB, Ethernet and VGA on the IO interface board  System monitor circuit connects Multifunction FPGA though smbus. ...
  • Page 60: Io Rear Board

     IO interface board supports REMOTE signal, which is obtained by Multifunction FPGA on the main board.  USB signal, Ethernet signal and VGA signal on the IO interface board are obtained by CPU module output.  Transfer the audio output signal of the main board to the speakers on both sides of the monitor.
  • Page 61: Driving Board

     The ECG signal, 2D image and color flow image are simultaneously displayed on the system.  After amplification, filtering and sampling, the ECG signal will be sent to DSP board and R-wave detection is conducted at the same time. ...
  • Page 62: Power Supply Module

    Power supply Module Power supply DC-DC power board Main board Module PHV control signal BF FPGA ARM control signal Multifunction Control BAT+ Power management FPGA signal control & status signal Battery connecting Power on/off control signal board CPU module Power management Fan status signal System monitor...
  • Page 63: System Power-On Control

    Power Support circuit module or function Remarks description CPU module, Monitor, Fan, Control panel, +12V DVD-RW No use -12V HDD, Control panel, Front-end of the main board, Probe board, DVD-RW, Probe, Monitor Front-end of the main board 5VSTB CPU module Front-end of the main board, back-end of the main board Back-end of the main board (FPGA core...
  • Page 64 Figure Diagram of System Power-on Supported Circuit 4-10  Related controlling signal comment: Controlling Description Remarks signal PWR_BTN_N The pulse generated by the power button on the control panel is sent to CPU module through power management FPGA, to power on the system.
  • Page 65 Pressing power switch (Control panel) Receiving PWR_BTN_N effect (Power management FPGA) Is AC in place? (Power management FPGA) PWR_5VSTB_EN is valid CPU_PWR_BTN_N is valid (Power management (Power management FPGA) FPGA) S3_N and S4_N is invalid 5VSTB start-up ( CPU module) (Power supply module) Indicating PWR_5VSTB_OK_N is...
  • Page 66: Monitor

    Monitor Photographic Storage LCD screen board board High- sensitive voltage LVDS 3.3V 3.3V 3.3V signal ON/OFF signal Key board Light control +12V Inverter board +12V Control board Speakers left/right monitor Power signal +12V +5V DVI I2C Control signal Video signal I/O interface board Figure 4-12 Principle Diagram of Monitor Monitor mainly consists of the control board, inverter board, LCD screen, photographic...
  • Page 67: Control Panel

    Control Panel Control panel Trackball TGC board PCBA Status ADC circuit indicator *5 Key LED FPGA Trackball backlight scan scan Port connecting interfac Control panel with IO LED backlight drive e board connecting board circuit +12V,+5V Main Functional controller Single- button encoder scan...
  • Page 68: Ultrasound System Monitoring

    Ultrasound System Monitoring Multifunction -12V FPGA module 5VSTB SMBUS 1V8V voltage Main unit front-end BF FPGA temperature module temperature Main unit Temperature sensor Power supply module Machine Figure 4-14 Principle Diagram of Ultrasound System Monitoring Ultrasound system monitoring is mainly to monitor every voltage of interior machine, Temperature Monitoring Function:...
  • Page 69: Ultrasound System Indicator

    Ultrasound System Indicator 5VSTB Power supply Control panel module Drive AC power indicator Power management Drive Power on indicator FPGA Drive Standby indicator Battery status Drive indicator HDD indicator Drive module +12V Power indicators 3.3V interface IO rear Main board board board Figure 4-15 Principle Diagram of Ultrasound System Indicator...
  • Page 71: Function Checking And Testing

    Personnel For the reference, the chapter describes the detailed testing ways for the function and performance of the product. Function checking and testing of this part shall be carried out by Mindray service engineers and the user together. 5.1.2 Tool N/A.
  • Page 72: General Exam

    Please refer to Chapter 2.2.3 Environmental Conditions to see whether the humidity and the temperature meet the environmental conditions. If the insulation feature of the system deteriorates due to the increase of system service time or system malfunctions, the fluctuation range of measurement results are likely to increase with the increase in humidity.
  • Page 73 5.3.2.2 Check the LCD Procedure Standard  Press “+”, the brightness increases; and press “-”,  Adjust LCD brightness  the brightness decreases. Adjust LCD contrast  Press “+”, the contrast increases; and press “-”, the Press<Setup> enter [System Preset]→[ General], contrast decreases.
  • Page 74: Function Checks

    5.3.2.4 Check ECG Module Procedure Standard  Confirm if the ECG module is ECG trace is displayed; the heart icon is configured, then: displayed at the upper right corner of the screen. Set [ECG] as “On”.  The parameters [Speed], [ECG Gain] can be adjusted.
  • Page 75: Check Flow

    5.4.1 Check Flow 5.4.2 Checking Content 5.4.2.1 B Mode  In B Mode scanning, the image parameter area on the corner of the screen will display the real-time parameter values as follows: Parameters F Meaning Frequency Depth Gain Frame Rate B Dynamic Range ...
  • Page 76 Control Panel Procedure Standard Press <B> Enter B mode, and B image displays Gain adjustment. Rotate clockwise to increase Rotate <Gain/iTouch> Rotate anticlockwise to decrease The adjusting range is 0-100.The real-time value will be displayed in the image parameter area in the upper right corner of the screen.
  • Page 77 Menu Procedure Standard Acoustic power Click [A.power] and rotate the multifunctional knob to adjust. mode menu AP value is displayed in real time in the upper part of the [A.power] screen. You should perform exams according to actual situation and follow the ALARA Principle.
  • Page 78  Parameters that can be adjusted to optimize the M Mode image are indicated in the following. Adjustment Items Control Panel Gain, TGC, Depth Speed, Colorize, Colorize Map, Acoustic Power, Edge Enhance, Menu Frequency, Gray Map, Focus Position, Dyn Range, M Soften, Display Format.
  • Page 79  Parameters that can be adjusted to optimize the Color Mode image are indicated in the following. Adjustment Items Control Panel Color Gain、Frequency、Depth、Steer, Scale Frequency、Acoustic Power, Persistence, Line Density,Packet Menu Size, Priority , B/C Align, Smooth, Wall Filter,Scale, Baseline,Invert,Color Map、Dual Live 5.4.2.4 PW Mode ...
  • Page 80 file Roll the trackball Manual cine review Click image menu cine Activate auto cine play status mode->[Auto Play] Manually review the images until the frame which you want to set it as start Set first frame: point, and then click [Set First Frame] to set a start mark.
  • Page 81: Performance Test

    5.4.2.7 Patient Information Management Procedure Standard Press <Save1/2> in image scanning The image will be saved to corresponding process (preset already). patient database and the saving icon will be displayed in the right of the screen.   Press <Review> To enter Review: ...
  • Page 82: Test Content

    5.5.2 Test Content The image used here is only for reference, stick to the image effect in the NOTE: real situation. Requirements: Display: set the contrast and brightness at the clinical application value (or the default status) Operation environment: dark room, simulating the clinical application environment. Scanning techniques: contact the probe with the acoustic window of the phantom, no spacing nor pressing.
  • Page 83  Axial resolution Test Step: Cover the scan surface of the phantom with water or couple gel, gently contact the probe with the scan surface, making the longitudinal resolution testing targets to be displayed around the midline of the image. Adjust the focus point focuses at the position where the longitudinal resolution testing targets are displayed.
  • Page 84 When using the convex probe, keep the transverse resolution testing NOTE: targets to be displayed near the midline. When using a linear probe with steer function, do not turn on the steer function when perform the transverse resolution test. Zoom in the region where the targets located if necessary. The diameter of the target point at a certain depth is equal to the transverse resolution at the depth.
  • Page 85 5.5.2.3 Geometric positioning accuracy  Longitudinal geometric positioning accuracy Test Step: Do adjustments as the way in testing the maximum depth. Record the distance by 20mm each segment on the longitudinal targets line using the measurement caliper; Select the value with the greatest error (to 20mm), calculate the accuracy using the formula below Function Checking and Testing 5-15...
  • Page 86 The measurement caliper should be positioned at the upper edge of NOTE: the target, not the middle nor the lower edge. The scanning plane should be vertical to the target line, that means the scanning plane is parallel with the cross-section of the phantom As shown in figure below.
  • Page 87 The measure caliper should be posited at the upper side or lower side of the target center. As shown in figure below. 5.5.2.4 Blackout Area Test Step: Cover the scan surface of the phantom with water or couple gel, gently contact the probe with the scan surface Adjust the depth at a lower value, and set the focus at the nearest place to the scan surface.
  • Page 88 5-18 Function Checking and Testing...
  • Page 89: Software Installation And Maintenance

    Software installation and Maintenance WARNING: DO NOT directly remove a USB memory device; otherwise, the USB memory device and / or the system may be damaged. Enter the Maintenance Window Log on the system with the identity of Service before perform system NOTE: maintenance.
  • Page 90: Set Installment

    Set Installment If the customer purchases the product with the installment, the service can set installment and the installment password will be generated by the system automatically. Log on the system with the identity of Service before perform system NOTE: maintenance.
  • Page 91 Take the Figure above as an example. Note: the first time installment is the down payment. The system creates each 4 installment password for 4 times installment. First installment password: After the user paying off the down payment, the installment dialog box appears after turning on the device.
  • Page 92 [Start] to log in the system. The system is no longer limited to the installment. Global password: used to protect the installment from being changed. The global password is displayed only once, please CAUTION: remember the global password carefully. If you forget the global password, you cannot log on the system with the identity of service and reset the installment after setting the installment and restarting the system.
  • Page 93: System Recovery And Doppler Recovery

    System Recovery and Doppler Recovery Please refer to the Recovery Guide document. Advanced-Parameter Configuration (Reg Version) and Normal Configuration 1. Log in the system with the account of Service and select [Preset]->[Maintenance]. Press Ctrl+Shift+F. Check [Reg version], and then click [Save]. The device is ready to reboot.
  • Page 94 6-6 Software installation and Maintenance...
  • Page 95: Data Backup And Storage

    Data Backup and Storage 6.5.1 Preset Manage Settings Press <Setup> to open the Setup menu, click [Other] to open the Preset Manage Setting interface. System preset can be performed here. Image parameters can be exported, imported or restored to factory. 6.5.1.1 Back up the Preset Data 1.
  • Page 96: Patient Data Backup And Restore

    6.5.2 Patient Data Backup and Restore 6.5.2.1 Patient Data Backup 1. Press [iStation] on the control panel to open the iStation dialogue box. 2. Click [Select All] to select all the data or select the target data one by one. 3.
  • Page 97: Software Maintenance

    Software Maintenance 6.6.1 Product Configuration [Config] is available on the Maintenance menu only if the operator logged on NOTE: the system as Service. 1. Make the product configuration file—PCF file (generated by the production line or already archived PCF file) according to specific requirements and copy to the USB disk.
  • Page 98: Log Maintenance

    6.6.2 Log Maintenance 6.6.2.1 Export the Log Connect the USB disk. Click [Export Log] on the Maintenance menu. Select the path in the Browse page to save the log, and click [OK]. When the log is exported, the system prompts “Export succeed!” click [OK] to return to the Maintenance menu.
  • Page 99: Display Parameter Setting

    Display Parameter Setting In normal condition, when changing display assembly or main board NOTE: assembly, the hardware will update the display data automatically. If synchronization fails, please load display parameters manually to assure image effect. 1. Log in as Service user. 2.
  • Page 100: Hdd Partition

    HDD Partition  The storage capacity of the system HDD is 1TB or more, and the partition information is as follows: Blocks(G) system Notes Linux Linux ≥700 Linux Log data Catalog Data Illustration \DcmLog DICOM log \Operation Operation log \log \SystemSt Power on/off log D:\DCN2Plus OR...
  • Page 101: Structure And Assembly/Disassembly

    Structure and Assembly/Disassembly Structure of the Complete System Fig 7-1 Product Explosion View Structure and Assembly/Disassembly 7-1...
  • Page 102: Field Replaceable Unit

    No. Name No. Name No. Name Machine HDD Assembly Control Panel Module Assembly Power Supply Front cover screw cap DVD Assembly Module Battery Assembly I/O Connecting module Front cover Main Unit Box Left side-panel Probe Board Assembly Module Assembly Machine fan Monitor support arm rear Keyboard handle assembly...
  • Page 103 Classificat Applicabl Assembly/Dis Part description Order Number Figure Comments e models assembly Including Refer to 2137 mainboard button 115-038721-00 chapter assembly(FRU) 7.4.6.4 battery Refer to M05-100R29-0 Main unit Button Battery,PM8 CR2032 chapter related 7.4.12.5 Refer to Including CPU Module(FRU) 115-038722-00 chapter heatsink 7.4.6.3...
  • Page 104 Classificat Applicabl Assembly/Dis Part description Order Number Figure Comments e models assembly Refer to 2137 IO interface 051-002467-00 chapter board PCBA 7.4.6.2 probe board Refer to 115-038723-00 assembly(FRU) chapter 7.4.7 Optional. Support maintenance Refer to DVD assembly 115-012082-00 and upgrade. chapter 7.4.11 Including wire and metal...
  • Page 105 Classificat Applicabl Assembly/Dis Part description Order Number Figure Comments e models assembly Refer to probe connected 115-010537-00 chapter assembly 7.4.6.3 Refer to IO back board PCBA 051-000795-00 chapter 7.4.2 Refer to Battery Connect 801-1150-0000 chapter Board PCBA 4-00 7.4.12.5 Structure and Assembly/Disassembly 7-5...
  • Page 106 Classificat Applicabl Assembly/Dis Part description Order Number Figure Comments e models assembly Refer to 7.4.3 for Machine Part numbers assembly/disa FAN 12V 28.9CFM of main unit ssembly; 22dB 80*80*25mm box fan and 024-000187-00 Refer to 160mm main unit fan 7.4.6.1 for are the same main unit fan assembly/disa...
  • Page 107 Classificat Applicabl Assembly/Dis Part description Order Number Figure Comments e models assembly POWER WIRES FOR 009-001521-00 MAIN CABLE 009-006818-00 ASSEMBLY Optional, support 4D board assembly 115-038183-00 maintenance and upgrade Structure and Assembly/Disassembly 7-7...
  • Page 108 ECG Upgrade Kit(IEC 115-038752-00 Lead) Optional. Including lead wire and host cable, support upgrade ECG Upgrade Kit 115-038753-00 (AHA Lead) DC-30 115-038747-00 (DC-30/CE/FRU) DC-32 115-038746-00 (DC-32/CE/FRU) When applying, DC-28 115-038748-00 please Refer to (DC-28/CE/FRU) chapter remark: Model DC-26 7.4.12.4 name,...
  • Page 109 Classificat Applicabl Assembly/Dis Part description Order Number Figure Comments e models assembly (DC-32/FDA/FRU) DC-30 115-052360-00 (DC-30/FDA/FRU) DC-28 115-052361-00 (DC-28/FDA/FRU) DC-26 115-052362-00 (DC-26/FDA/FRU) DC-25 115-052363-00 (DC-25/FDA/FRU) Battery Kit 115-012080-00 Optional, (CFDA/CE) Refer to support chapter maintenance 7.4.12.5 and upgrade Battery Kit (FDA)
  • Page 110 Classificat Applicabl Assembly/Dis Part description Order Number Figure Comments e models assembly TRANS INSULATE 006-000163-00 32V 200VA T-SHAPE 115V Power Module 801-9970-0000 Assembly 3-00 CE(Only for Brazil) 230V Power Module 801-9970-0000 Assembly 4-00 Refer to chapter 7.4.5 230V Power Module 115-061502-00 Assembly CE(Except...
  • Page 111 Classificat Applicabl Assembly/Dis Part description Order Number Figure Comments e models assembly AC-DC board(230V 115-050691-01 FRU) CE(Except Brazil) AC-DC board(115V 115-050692-01 FRU) AC-DC board (230V CE(Only for Refer to 115-050691-00 FRU) Brazil) chapter 7.4.5 Structure and Assembly/Disassembly 7-11...
  • Page 112 Classificat Applicabl Assembly/Dis Part description Order Number Figure Comments e models assembly AC-DC board (115V CE(Only for Refer to 115-050692-00 FRU) Brazil) chapter 7.4.5 Refer to DC-DC board (FRU) 115-050693-00 chapter 7.4.5 15" LCD Monitor Monitor Including Refer to 115-038725-00 (FRU)...
  • Page 113 Classificat Applicabl Assembly/Dis Part description Order Number Figure Comments e models assembly 15" Monitor Front Refer to 115-038727-00 Cover(FRU) chapter 7.4.1 15" Monitor Back Including Refer to 115-038729-00 Cover(FRU) cable cover chapter 7.4.1 Including Damping 15" Monitor Arm Refer to 115-038731-00 Shaft, not chapter 7.4.1...
  • Page 114 Classificat Applicabl Assembly/Dis Part description Order Number Figure Comments e models assembly 17" LCD Monitor Including Refer to 115-038726-00 (FRU) cable cover chapter 7.4.1 17" Monitor Front Refer to 115-038728-00 chapter 7.4.1 Cover(FRU) 17" Monitor Back Including Refer to 115-038730-00 Cover(FRU)...
  • Page 115 Classificat Applicabl Assembly/Dis Part description Order Number Figure Comments e models assembly Including Damping 17" Monitor Arm Refer to 115-038732-00 Shaft, not Assembly(FRU) chapter 7.4.1 including Back cover Damping 115-038755-00 Shaft(17"/FRU) Refer to Speakers and cables 020-000026-00 chapter 7.4.1.1 Refer to 1-3 Back cover of steps in 043-007193-00...
  • Page 116 Classificat Applicabl Assembly/Dis Part description Order Number Figure Comments e models assembly Top cover assembly 115-038724-00 Not including of keyboard(FRU) trackball assembly Refer to TGC board, chapter Top cover assembly single 7.4.10.4 115-052404-00 of keyboard (Russian) encoder, dual encoder silica gel key (2137) 049-001149-00 silica gel key Control...
  • Page 117 Classificat Applicabl Assembly/Dis Part description Order Number Figure Comments e models assembly Refer to Single Encoder Board Not including chapter 051-000788-00 PCBA wire 7.4.10.1 Refer to Dual Encoder Board 801-1150-0001 Not including chapter (FRU) 3-00 wire 7.4.10.1 Refer to 801-2119-0002 Not including TGC Board (FRU) chapter...
  • Page 118 Classificat Applicabl Assembly/Dis Part description Order Number Figure Comments e models assembly Refer to 801-2300-0000 Buzzer chapter 8-00 7.4.10.5 Refer to TGC Cap 043-007185-00 chapter 7.4.10.1 Refer to Encoder big knob 043-007186-00 chapter 7.4.10.1 Refer to Encoder small knob 043-007187-00 chapter 7.4.10.1 Refer to...
  • Page 119 Mobile Trolley left 043-007201-00 probe holder right cover assembly(DC-30/FR 115-038733-00 DC-30 right cover assembly(DC-25/FR 115-038734-00 DC-25 right cover Refer to assembly(DC-26/FR 115-038735-00 DC-26 chapter 7.4.9 right cover assembly(DC-28/FR 115-038736-00 DC-28 right cover assembly(DC-32/FR 115-038737-00 DC-32 Structure and Assembly/Disassembly 7-19...
  • Page 120 Classificat Applicabl Assembly/Dis Part description Order Number Figure Comments e models assembly left cover assembly Refer to 115-041711-00 (FRU) chapter 7.4.8 Refer to 1 115-038739-00 Front cover(FRU) step in 7.4.7 Refer to 2 Rear cover 043-007190-00 step in 7.4.3 7-20 Structure and Assembly/Disassembly...
  • Page 121 Classificat Applicabl Assembly/Dis Part description Order Number Figure Comments e models assembly Screw plug for front 043-007192-00 cover Cable-ARM 043-007181-00 shaft cover 043-007178-00 top cover 043-007179-00 handle plastic cover 043-007180-00 Structure and Assembly/Disassembly 7-21...
  • Page 122 Classificat Applicabl Assembly/Dis Part description Order Number Figure Comments e models assembly height adjusted lever 044-000899-00 Including Caster (FRU) 115-038740-00 wrench Optional, support maintenance Coupling gel heating Installation 024-000796-00 and upgrade, cup 34~40°C unavailable. including power cord and adapter 7-22 Structure and Assembly/Disassembly...
  • Page 123: Preparation

    —Refer to the parts to be pulled out (cable port, encoder or lock) —Refer to the movement orientation. 7.3.2 Engineers Required Only technical professionals from Mindray or engineers authorized by Mindray after training can perform maintenance and check. 7.3.3 Preparations for Installation You should perform the following preparations before the disassembling of ultrasound equipment.
  • Page 124: Monitor Assembly

    This section describes the disassembling and assembling of the main modules and boards. The assembling is the inverse process of disassembling if not mentioned in particular.  Sketch IO backpanel Main unit rear cover Power input Power module Hard Disk assembly Main Unit Box Module Control panel...
  • Page 125 Fig 7-3 Disassemble the Monitor Module (1) 2. Remove the fixing clips, ground wire clip, and the M4X12 screws (3 pcs) securing the ground wire holder; take out the cable plug. Fig 7-4 Disassemble the Monitor Module (2) 3. Remove the M4X12 screws (6 pcs) for fixing the monitor. Fig 7-5 Disassemble the Monitor Module (3) 4.
  • Page 126 Fig 7-6 Disassemble the Monitor Module (4) After removing the monitor assembly, you could do the steps as described in the following. 7.4.1.1 Speaker 1. Remove the M4X12 screws (4 pcs) securing the rear cover of the monitor, and then remove the rear cover.
  • Page 127: Io Rear Board

    PCB shielding cover. 2. Remove the self-tapping screw PT3X10 (2 pcs) for fixing the keyboard first, then take out the keyboard. Fig 7-9 Disassemble the monitor keyboard 7.4.2 IO Rear Board Tool: Cross-headed screwdriver. Please refer to Chapter 7.3.1 Tools Required for tools’ specifications.
  • Page 128: Machine Fan

    M3X8 (X4) PT2X8 (X4, each with a flat washer) Facing Facing IO Module ECG socket fixing component 7.4.3 Machine Fan Tool: Cross-headed screwdriver. Please refer to Chapter 7.3.1 Tools Required for tools’ specifications. 1. Remove the IO module. (Refer to step 1 in 7.4.2 IO Rear Board). 2.
  • Page 129: Power Input Assembly

    Fig 7-13 Disassemble the main unit fan assembly 4. Remove the fixing M4X8 flat head screws (2 pcs); cut the fan cable ties to remove the fan. Fig 7-14 Disassemble the main unit fan During installation, pay attention to the main unit fan label, which should NOTE: be facing outwards.
  • Page 130: Power Module Assembly

    Figure 7-15 Power Supply Module Assembly Note: IF you need to replace Power Input Assembly, please refer to the previous assembly, and select the corresponding label. Then, stick it to the monitor assembly. Figure 7-16 Power supply assembly 7.4.5 Power Module Assembly Tool: Cross-headed screwdriver .
  • Page 131: Main Unit Box Module

    Fig 7-17 Disassemble the Power Module Assembly 3. Pull out the 4 cable plugs at the left side, and then pull out the 2 cable plugs at the right side facing outwards, and then remove the screws M4X8 (2 pcs) for fixing ground line terminal.
  • Page 132 connecting cables outwards and ground lines to remove the power input module. Figure 7-20 and figure 7-21 power input module disassembly figure (1) (2) 4. Pull out the cable plug connecting the main unit module, remove the M3X8 screws (4 pcs) fixing the main unit, grasp the handle to pull out the main unit assembly.
  • Page 133 Figure 7-24 Disassemble the Main Unit fan During installation, pay attention to the main unit fan label, which should NOTE: be facing inwards. 7.4.6.2 IO Interface Board Remove the M3X8 screws (6 pcs) fixing IO interface board, pull out the two plugs, and lift upwards to remove the IO interface board.
  • Page 134 Fig 7-26 Disassemble the Probe Connected assembly (1) 3. Remove the M3X8 screws (12 pcs) on the upper part of the main unit and 2 M3X8 screws at the front side (shown in the image, on the left side) to remove the top cover.
  • Page 135 FIG 7-29 Removing the CPU Module 7.4.6.4 Main board assembly 1. Remove the IO interface board, probe connected assembly and CPU module assembly (refer to 7.4.6.3 Probe Connected Assembly and CPU Module Assembly). 2. Remove the fixing screws (11 pcs) to remove the main unit assembly. Fig 7-30 Disassemble the main Board Assembly Structure and Assembly/Disassembly 7-35...
  • Page 136 7.4.6.5 4D Module 1. Turn over the main unit box, remove the 5 screws locking the 4D board cover. 2. Remove the 4 cross panhead screw M3X6 and take out the socket pressing board to take out the 4D board. Main board Socket pressing 4D Board board...
  • Page 137: Probe Board Assembly

    7.4.6.6 ECG Module Remove the 4 M3X8 screws. Unplug the ECG cable and signal connecting IO board to ECG board and cut the 5 cable ties. Remove the 4 screws to take out the ECG board. Cross panhead screw (M3X8 x4) Cable tie Signal cable connecting IO board to ECG board...
  • Page 138: Left Side-Panel Assembly

    Fig 7-33 Disassemble the front cover 2. Remove the M4x8 screws (16 pcs) which are used to secure the probe board module, hold the two handles and stably pull out the probe board module. Fig 7-34 Disassemble the Probe Board Assembly 7.4.8 Left Side-Panel Assembly Remove the cross panhead screws (M4X8 X 2) fixing the mounting bracket to the left...
  • Page 139: Right Side-Panel Assembly

    Back mounting ear Cross panhead screws (M4X8 x 2) Cross panhead screw (M4X8 x 1) Left side-panel mounting bracket Left Cross panhead screw (M4X8 x 1) side-panel Front mounting ear Fig 7-35 Disassemble the Left Side-panel Assembly 7.4.9 Right Side-panel Assembly There is a M4X8 cross panhead screw fixing the mounting ear to the right side-panel, remove this screw to take out the right side-panel assembly.
  • Page 140: Control Panel Assembly

    7.4.10 Control Panel Assembly Tool: cross-headed screwdriver. Please refer to Chapter 7.3.1 Tools Required for tools’ specifications. 1. Remove the M4X12 screws (17 pcs) fixing the surrounding and center control panel assembly at the panel base. Fig 7-37 Disassemble the control panel assembly (1) 2.
  • Page 141 Fig 7-39 Disassemble the control panel assembly (3) Fig 7-40 Control panel assembly view After removing the control panel assembly, you could do the steps as described in the following. 7.4.10.1 Single/dual-encoder Board 1. Remove the 4 knob caps and 8 TGC rod caps on the control panel. Structure and Assembly/Disassembly 7-41...
  • Page 142 Figure 7-41 Knob and TGC slider position 2. Pull out the connecting cable plug, remove the M3X8 fixing screws (6 pcs) as shown in the figure, and two single-encoder board and a dual-encoder board can be disassembled. Fig 7-42 Disassemble the Encoder Board 7.4.10.2 TGC Board 1.
  • Page 143 7.4.10.4 Keyboard Top Cover Assembly 1. Remove the single/dual-encoder board (refer to 7.4.10.1 chapter). 2. Take out the TGC board (refer to 7.4.10.2 chapter). 3. Take out the trackball assembly (refer to 7.4.10.3 chapter). 4. The residual parts are keyboard top cover assembly, as shown in the following. Note: IF you need to replace Keyboard Top Cover Assembly, please refer to the previous assembly, and select the corresponding label.
  • Page 144: Dvd Assembly

    Fig 7-47 Disassemble the USB adapter board 7.4.11 DVD Assembly Tool: cross-headed screwdriver. Please refer to Chapter 7.3.1 Tools Required for tools’ specifications. Remove the IO module and the rear cover (refer to chapter 7.4.2 IO Rear Board and 7.4.3 Machine Fan). 2.
  • Page 145 3. Adjust the height to the highest. Align the rack with the spacing hole of the lifting column. Put the inner hexagon spanner or screw into the hole to resist the ascending or descending of the lifting column, and prevent the part above the keyboard of disassembly of gas spring assembly from falling.
  • Page 146 Figure 7-51 Disassemble the gas spring assembly (part 2) 6. Pull the gas spring assembly upwards. Figure 7-52 Disassemble the gas spring assembly (part 3) 7.4.12.2 Cable of the main unit 1. Remove the monitor cable cover (refer to step 1 to 2 in 7.4.1 Monitor assembly). 2.
  • Page 147 Figure 7-53 Disassemble the cable of the main unit (part 1) 5. Remove the screws M4 X 12 (2 pcs) of decorative cover of the keyboard, and pull the cable out of the decorative cover. Then, remove it. Figure 7-54 Disassemble the cable of the main unit (part 2) 6.
  • Page 148 Figure 7-56 Disassemble the cable of the main unit (part 4) 10. Pull the cable of main unit out of the bottom of the keyboard slowly. Figure 7-57 Disassemble the cable of the main unit (part 5) 7.4.12.3 Isolation Transformer Remove the IO module and the rear cover (Refer to chapter 7.4.2 IO Rear Board and 7.4.3 Machine Fan).
  • Page 149 Fig 7-58 Disassemble the isolation transformer 7.4.12.4 Hard Disk Remove the IO module and the rear cover (refer to chapter 7.4.2 IO Rear Board and 7.4.3 Machine Fan). Remove the M4X8 screws (2 pcs) and cut off the cable tie, hold the handle to pull out the hard disk assembly.
  • Page 150 Figure 7-61 Disassembly of HDD (2) 7.4.12.5 Battery Assembly Remove the IO module and the rear cover (refer to chapter 7.4.2 IO Rear Board and 7.4.3 Machine Fan). Disconnect the cable connection on the battery connecting board, remove the fixing screws M3X8 (2 pcs) and hold the handle to draw out the battery assembly.
  • Page 151: Options Installation

    Options Installation Installation of Optional Devices Copy the optional devices to the U disk, then insert it to the USB port of the ultrasound system; Enter [Preset], click [Maintenance] to enter [Option] menu to select the option module to be installed, click [Install]. Select the corresponding key file in the prompted “Load File”...
  • Page 152 Click [Promote]. The following image appears: Note: the promotion function is only applied to the uninstalled key. If the optional key is installed, the promotion function is disabled. Select the key to be promoted. Click [OK] to complete the promotion. Note: it is unavailable to use promotion for multiple optional keys.
  • Page 153 Return to the system preset interface. The option status changes into Uninstalled. The uninstalling function is exclusive to internal users. The service engineers must Note: log in the system with the account of Service, and then conduct the uninstallation. Options Installation 8-3...
  • Page 154: Installation Of Hardware Optional Function

    Installation of Hardware Optional Function Hardware configuration list that the product supports is displayed below: Material Installation Material No. Material and pictures Description reference Battery Kit 115-012080-00 7.4.12.5 4D board 115-038183-00 7.4.6.5 assembly ECG Upgrade 115-038753-00 Kit(AHA Lead) 7.4.6.6 Remark: connect the ECG lead to ECG port...
  • Page 155: Printer Adapter

    Type-2 screwdriver screws. 8.3.3 Engineers Required Only technical professionals from Mindray or engineers authorized by Mindray after training can perform the maintenance and the check. 8.3.4 Requirements You should perform the following preparations before disassembling the ultrasound device. Power off the printer adapter, disconnect all the AC power, and pull out the auxiliary power cables.
  • Page 156: Assembling/Disassembling

    8.3.5 Assembling/Disassembling Tools required: type-2 screwdriver Unscrew the four M2.5 flat-headed screws and remove the rear cover of the printer adapter, as shown in the following figure: The disassembled printer adapter is shown as follows: 8-6 Options Installation...
  • Page 157: System Diagnosis And Support

    System Diagnosis and Support General Status Indicator 9.1.1 The Status Indicators on the Control Panel Status Icon Status definition and indicators Position indicators Power-on The indicator is not on when the system is The Control status turned off; Panel indicator Press the key, the indicator blinks green at on the upper power on.
  • Page 158 There is no operation for the freezing status, the Screen-saver default is Screen-s time set firstly, and then the brightness and the “mindray” showing on aver system would enter into the backlight of the the monitor. status screen-saver status from the control panel both freezing status automatically.
  • Page 159: Starting Process Of The Whole System

    The system is on the power-off status: when Press the power button for a connected the AC power short time, and then the Starting the system by Power-off supply the AC indicator system is turned off by pressing the power status is on, else refer to the choosing from the status...
  • Page 160: Start Process Of Complete System

    9.2.1 Start Process of Complete System 9.2.1.1 Powered on by AC Basic Procedures Phenomenon The original status: no indication Finishing loading The AC status indicator on the control panel lights on, but 3.3VSTB,Finishing the indicators of HDD and standby are off. loading 5VSTB Press the power button, The Power-on status indicator flashes continuously on...
  • Page 161: The Start-Up Process Of Bios

    9.2.2 The start-up Process of BIOS The start-up process of BIOS is a black-box operation, and the primary description is as following: Basic Procedures Basic phenomenon Self-test after the system power-on& The LCD is blank screen in a short time. Initialization&...
  • Page 162 9.2.4.2 Details of Procedures Now, DOPPLER starting is in increments of 20dB, and the detailed course is as following: Basic Procedures Sub-procedures Basic phenomenon Description Linux APP Display Linux boot screen with The progress initialization no progress bar bar does not appears unit PC hardware Display Linux boot screen with...
  • Page 163 Turn on the bus device BackboneDev and Initialize the time and the processing function of Multilanguage Initialize peripheral file system, network and the driver Enumerate peripheral ports Config timer, Initialize soft interruption, construct maintenance servicer and config static data of the system Config system font Load layout information Initialize UI management, and Initialize UI...
  • Page 164: Alarming And Abnormal Information

    Load printing mark Construct low power consumption Construct the USB management and writing management Initialize video replay device Initializing ultrasound Set the virtual machine device, and In increments of 2. image… initialize the virtual machine Construct object trees of the front-end and the back-end (ultrasys and so on) Initializing ultrasound Add function package of measure menu...
  • Page 165: Temperature Alarming

    the current value, and [LLL]-[HHH] represents the lower and upper limits. The voltage names respectively are: +12V、-12V、-5V、2V5、1V8、1V8A、1V5、1V2. 9.3.3 Temperature Alarming Alarming tips LOG record Suggestion ××× System Monitor: Temperature Alert! Check the fan log [XXX], Current voltage: [VVV] degree, Limit D:/DCN2PLus/Log/PeriLog temperature: [LLL]-[HHH] degree (if the fan stops...
  • Page 166: Battery Alarming

    service engineers ×××represents time, e.g. 2010-12-25 14:15:25 again/remove the barrier [XXX] Represents fan name, [VVV] represents the which causes current value, and [LLL] represents the limit. The the fan detailed fan names are as following: malfunction Main Board Fan (Main unit box fan)、Power Fan (Machine fan) 9.3.5 Battery Alarming...
  • Page 167: Phv Related Alarming

    9.3.6 PHV Related Alarming Alarming tips LOG record Suggestion Something is wrong with the Alarm! programmed voltage of power High-voltage module, which make either of the transmission is PHVX supply voltage error, PHVX both PHV circuits or multi-path abnormal, and is XX(upper limit is XX) voltage 1.1 more than the limit of images display...
  • Page 169: Care And Maintenance

    Care and Maintenance 10.1 Overview These procedures in this chapter are recommended. 10.1.1 Tools, Measurement Devices and Consumables Table 10-1 Tools and Measurement Devices Tool/Measurement Devices Qty. Remarks Resin or plastic container Can accommodate two probes Soft brush About a toothbrush size Small plastic basin Used to fill the soapy water Table 10-2 Consumable List...
  • Page 170: Care And Maintenance Frequency

    10.1.2 Care and Maintenance Frequency Table 10-3 Maintenance Frequency Maintain content Frequency Method Transducer cleaning Every time after using, 1 Refer to 10.2.2 time/day Cleaning the cover and control 1 time/month Same as the above panel Cleaning LCD 1 time/month Same as the above Cleaning the trackball 1 time/month...
  • Page 171: Cleaning The System

    10.2 Cleaning the System 10.2.1 Flow of Cleaning Power off and pull out the power cables Turn off peripherals and Disassemble accessories Clean power swicth Clean display Clean trackball Clean cover and operation panel Clean probe Fig 10-1 View of Cleaning Maintenance WARNING: Before cleaning the system, be sure to turn off the power and disconnect the power cord from the outlet.
  • Page 172  Method: Surface of monitor and touch screen should be cleaned with soft dry cloth. Remained stain should be washed out by cloth with clear water or soapy water, and then air-dry the surface. Cleaning Trackball  Tool: Soft paper or dry soft cloth, soapy water ...
  • Page 173 Clamping ring click cover notch Cover and control panel  Tools: dry soft cloth, soapy water  Method: Use dry soft cloth to clean the surface of the system. If the system is dirty, moisten the soft cloth with mild soapy water and wipe off any stains. Use dry soft cloth to remove any moisture and allow all hard surfaces to completely air-dry.
  • Page 174: Maintenance Check

    10.3 Maintenance Check Only technical professionals from Mindray or engineers authorized by Mindray after training can perform maintenance and check. 10.3.1 System Function Table 10-4 System function list Content Description Verify basic operation of B mode. Check basic software and B mode hardware controls affecting B mode operations.
  • Page 175: Peripherals And Options Check

    Verify software menu display function: if each operation menu Software menu check and page can be accessed. Remarks:refer to Chapter 5.4 for details. 10.3.2 Peripherals and Options Check Table 10-5 Peripherals and Options Check list Content Description Color and B/W video Check the output of video printer.
  • Page 176 Fig 10-4 View of Mechanical Safety Check Table 10-6 Mechanical Safety Check Item Standard Tool Caster Visually check to confirm there is no any crack. none Operate the casters to confirm the locking and releasing functions are normal. Connection of Visually check to confirm that there is no Caster fixing caster...
  • Page 177 support of looseness. assembly Fixing and Visually check to confirm if any inclination rotating happened to the monitor. mechanism of the monitor Manually operate the monitor to make sure the monitor can move normally when it is turned left/ right, lifted/ lowered, and no abnormal sound exists.
  • Page 179: Troubleshooting Of Regular Malfunctions

    Troubleshooting of Regular Malfunctions 11.1 System cannot be powered on 11.1.1 Module or Board Related Descriptions Remarks Battery assembly Power module CPU module Isolation transformer Failure rate: low 11.1.2 Key Points Supporting Troubleshooting Key Points Supporting Troubleshooting Remarks AC power indicator Located on control panel Power -on status indicator Backlight of the power button...
  • Page 180: System Cannot Start Up Normally

    up normally The AC input is normal ,AC power AC-DC power Replace power indicator remains off; board fails module Power indicators: off AC power indicator: ON; AC_DC power Replace power board: function module Power–on status indicator: off after normal; power button pressed DC-DC power Power indicators: off board: fails...
  • Page 181: Troubleshooting

    11.2.3 Troubleshooting Fault Description Cause Analysis Measure Control panel backlight System powers on Replace CPU module normal; LCD blank and normally, enter BIOS display “No signal” self-checking but BIOS screen cannot display. CPU module failure. CPU module failure BIOS start-up graphics is Replace CPU module normally displayed, but it cannot continue.
  • Page 182: Image Fault

    11.3 Image Fault 11.3.1 Module or Board Related No. Descriptions Remarks Power module Main board Ultrasound front-end receiving and transmitting physical channels are Probe board High-voltage switch on the probe board 11.3.2 Key Points Supporting Troubleshooting Key Points Supporting Troubleshooting Remarks Image feature, including dark strips and noise Images appearance when contact occurs...
  • Page 183: Probe Socket System Malfunction

    image shielding etc. Confirm by connecting another probe. There are other electrical Confirm the cause of equipments working in the power failure by turning off grid, which introduces the electrical equipment of all common-mode interference to peripherals connected to the probe. the system Displays ripple-shaped interference signal on the image...
  • Page 184: Io Interface System

    All probes cannot be recognized in all probe Replace the sockets; probe board or main board Probe board ID cannot be read correctly by the assembly. system information; Main board or probe board malfunction. 11.5 IO Interface System 11.5.1 Module or Board Related Descriptions Remarks Main board...
  • Page 185: Control Panel

    Speaker errors Replace the speaker. Only one speaker is mute. USB device cannot be recognized while Replace main connecting to the USB Main board malfunction board. port Control panel works well; CPU module or IO interface Confirm by replacing Network disconnected or board malfunction if there is CPU module and IO abnormal...
  • Page 186: Troubleshooting

    11.6.3 Troubleshooting Fault Description Cause Analysis Measure Silicon key damage; or Some or a certain Try replacing silicon key or Control panel malfunction. key failures control panel if no key blocks.; Trackball failed or Dirt or obstacles jam in the Open and clean the groove abnormal trackball groove...
  • Page 187: Troubleshooting

    Points Supporting Remarks Troubleshooting Backlight of the LCD More evident in dark VGA output port on IO interface Need external LCD board Blank screen, or “No Signal” displayed, or Display mode of the LCD disordered screen, etc. 11.7.3 Troubleshooting Fault Description Cause Analysis Measure Control panel powered on normally;...
  • Page 188 Failure Description Cause Analysis Measure The ultrasound system and the Connect the ultrasound printer adapter are system to the printer adapter not properly again using Ethernet cables. connected. Check whether the indicator on the printer adapter flashes normally after The following icon is displayed at the power-on, and whether the bottom right corner of the ultrasound Ethernet cable is correctly...
  • Page 189 The indicator on the printer adapter Errors occur turns orange, and the printing fails. when the printer Disconnect and connect the adapter runs. power adapter, power on the printer adapter again, and verify whether the printing is normal after 1 minute. Troubleshooting of Regular Malfunctions 11-11...
  • Page 191 Appendix A ELECTRICAL SAFETY INSPECTION The following electrical safety tests are recommended as part of a comprehensive preventive maintenance program. They are a proven means of detecting abnormalities that, if undetected, could prove dangerous to either the patient or the operator. Additional tests may be required according to local regulations.
  • Page 192: Electrical Safety Inspection

    ELECTRICAL SAFETY INSPECTION 1- Power Cord Plug TEST PROCEDURE  The Power Plug The Power Plug Pins No broken or bent pin. No discolored pins. The Plug Body No physical damage to the plug body. No physical damage to the strain relief. No The Strain Relief plug warmth for device in use.
  • Page 193 ELECTRICAL SAFETY INSPECTION Device Enclosure And Accessories TEST PROCEDURE  Visual Inspection No physical damage to the enclosure and accessories. No physical damage to meters, switches, connectors, etc. The Enclosure and Accessories No residue of fluid spillage (e.g., water, coffee, chemicals, etc.). No loose or missing parts (e.g., knobs, dials, terminals, etc.).
  • Page 194 ELECTRICAL SAFETY INSPECTION Device Labeling TEST PROCEDURE Check the labels provided by the manufacturer or the healthcare facility is present and legible.  Main Unit Label  Integrated Warning Labels  Slope and High Voltage Caution Label  Don’t Stress Label A-4 ELECTRICAL SAFETY INSPECTION...
  • Page 195 ELECTRICAL SAFETY INSPECTION 4- Protective Earth Resistance VOERVIEW Protective Earth Resistance is measured using the RED test lead attached to the DUT Protective Earth terminal or Protective Earth Metal enclosure or equipotential terminal. Select the test current by pressing SOFT KEY 3 to toggle between 1AMP, 10AMP, and 25AMP.
  • Page 196 ELECTRICAL SAFETY INSPECTION 4- Protective Earth Resistance exposed metal area. Press shortcut key 3. The Protective Earth Resistance test is displayed. Press SOFT KEY 3 to select a test current (1AMP, 10AMP, or 25AMP). The selected test current is displayed in the upper right corner of the display. Press START TEST to start the test.
  • Page 197 ELECTRICAL SAFETY INSPECTION Earth Leakage Test OVERVIEW Run an Earth Leakage test on the device being tested before performing any other leakage tests. Leakage current is measured the following ways: ♦ Earth Leakage Current, leakage current measured through DUT outlet Earth ♦...
  • Page 198 ELECTRICAL SAFETY INSPECTION Earth Leakage Test Earth leakage test (for illustration only) Figure 1  Failure Check any short-circuits of the Y capacitor on power unit. Replace a new one if any portion defective. Check any broken of the Power Unit. Replace a new one if any portion defective. Inspect mains wiring for bad crimps, poor connections, or damage.
  • Page 199 ELECTRICAL SAFETY INSPECTION Patient Leakage Current OVERVIEW Patient leakage currents are measured between a selected applied part and mains earth. All measurements may have either a true RMS response. TEST PROCEDURE  Prepare Perform a calibration from the Mains on Applied Part menu. The following outlet conditions apply when performing this test: Normal Polarity, Earth Open, Outlet ON Normal Polarity, Outlet ON...
  • Page 200 ELECTRICAL SAFETY INSPECTION Patient Leakage Current KEY on the 601PRO. Press the print data key at any time to generate a printout of the latest measurement. (for illustration only) Figure 2 patient leakage Current  Note 1, In addition to Probes ,Patient leakage current test should be perform if ECG or PCG parts used;...
  • Page 201 ELECTRICAL SAFETY INSPECTION Patient Leakage Current For BF :transducer 100μA Normal Condition 500μA Single Fault Condition ELECTRICAL SAFETY INSPECTION A-11...
  • Page 202 ELECTRICAL SAFETY INSPECTION Mains on Applied Part Leakage OVERVIEW The Mains on Applied Part test applies a test voltage, which is 110% of the mains voltage, through a limiting resistance, to selected applied part terminals. Current measurements are then taken between the selected applied part and earth. Measurements are taken with the test voltage (110% of mains) to applied parts in the normal and reverse polarity conditions as indicated on the display.
  • Page 203 ELECTRICAL SAFETY INSPECTION Mains on Applied Part Leakage Press shortcut key 7. The Mains on Applied Part test is displayed. Select the desired outlet configuration and applied part to test using the appropriate SOFT KEYS: Press START TEST (SOFT KEY 1) to begin the test. Press the print data key to generate a printout of the latest measurement.
  • Page 204 ELECTRICAL SAFETY INSPECTION Mains on Applied Part Leakage Inspect wiring for bad crimps, poor connections, or damage. If the leakage current measurement tests fail on a new unit and if situation cannot be corrected, submit a Safety Failure Report to document the system problem. Remove unit from operation.
  • Page 205 ELECTRICAL SAFETY INSPECTION FORM (Class I equipment) Overall assessment: Scheduled inspection Test item: 1, 2, 3, 4, 5, 6, 7 Unopened repair type Test item: 1, 2, 3 Opened repair type, not modify the power part including Test item: 1, 2, 3, 4 transformer or patient circuit board Opened repair type, modify the power part including Test item: 1, 2, 3, 4, 5...
  • Page 207: Appendix B Phantom Usage Illustration

    Appendix B Phantom Usage Illustration Targets Disposal of Phantom KS107BD A1——A5: Axial resolution target group B: Blind-area target group C: Longitudinal target group D: Horizontal target group E: Mimic tumor F: Mimic sac (diam 10mm) and stone Mimic sac (diam 6mm) 4.
  • Page 208 Targets disposal- KS107BD A1——A4 Axial resolution target group B1——B4 Lateral resolution target group Longitudinal target group Horizontal target group E1——E3 Mimic sacs with diameters of 2, 4, 6mm 4. Line Target System There are 8 groups of line targets disposed in TM material as shown in the figure. 1.A1——A4:...
  • Page 209 Appendix C Requirements of Performance Indices Blin Detecti Geometric Lateral Axial Probe positioning Freq. resolution resolution model area depth accuracy % (mm) (mm) (mm) (mm) ≤2 ( depth≤80) ≤1 (depth≤ ≤3 ≥170 35C50P transverse≤5 80) lateral≤3 ≤4 (80<depth ≤130) ≤2 (80< depth≤130)...
  • Page 210 Blin Detecti Geometric Lateral Axial Probe positioning Freq. resolution resolution model area depth accuracy % (mm) (mm) (mm) (mm) ≤4(80<depth≤ ≤2(80<depth ≤170) 160) ≤1(depth≤40) ≤1(depth≤ ≤3 ≥80 P12-4P transverse≤3 lateral≤3 ≤1(depth≤60) ≤1(depth≤ ≤2 ≥80 6LB7P(li transverse≤3 near) lateral≤3 ≤1(depth≤40) ≤1(depth≤ ≤3 ≥80 6LB7P(c...
  • Page 211 Appendix D Boot Screen BIOS Boot Screen LINUX Boot Screen Boot Screen D-1...
  • Page 212 Doppler Boot Screen D-2 Boot Screen...
  • Page 213 P/N: 046-009019-00 (11.0)

This manual is also suitable for:

Dc-30Dc-28Dc-26Dc-25

Table of Contents