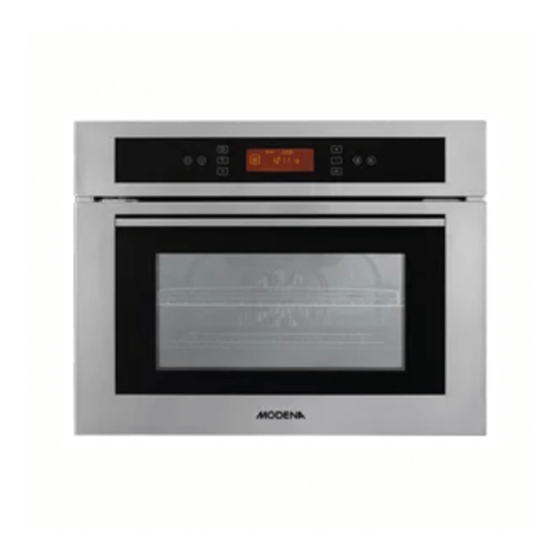
Part 6: Troubleshooting Part 7: Precaution Advice and Precautions General Safety Instructions Part 8: Specification This guide book explains everything you need to know about your new product. Please contact our Customer Care should you need further assistance through www.modena.com...
PART 1: SAFETY WARNINGS • Please independently use sockets with rated current above 25A. Reliable grounding must be guaranteed. Please do not use loose or poor contact power sockets, or it easily leads to electric shock, short circuit and fire; if the equipment share one socket with other electric appliances, fire may be caused for abnormal heating.
PART 2: NAME OF PARTS Information: 1 Display screen 2 Control Panel Rack stand Control Panel Information: 1 Power Button 6 Up 2 Program Button 7 Down 3 Timer 8 Select 4 Temperature (°C)/Power (Watts)/ 9 Light / Child Lock Weight (grams) 5 Auto Cooking 10 Start / Pause...
Pull the plug out of the power socket before installation or maintenance process. Installation can only be done according to the guide by a certified professional technician. MODENA disclaims any responsibility on any human, animal, or property damage due to improper installation. Installing the Oven into Kitchen Set •...
Page 6
• Put / insert oven into the kitchen set hole by installing a screw type A into the four holes in the oven. Screws can be found on the side of the oven frame. • For the most efficient air circulation, the oven must be installed in accordance with the dimensions shown in Figure 1-2.
NOTE: If the oven will be installed together with another oven, follow the instructions on the other oven’s guide book. • The oven will become hot when in use. Be careful and avoid touching the heating elements inside the oven. •...
MODENA or their service agent, or a similar qualified technician to avoid electrical hazard. MODENA is not taking any responsibilities after any accidents caused by the grounding that is not installed or not functioned properly. Call a professional electrician if you need some changes on your house’s electricity installation.
Page 9
Light Function Press the button once to turn the internal microwave oven light on & off. The lights will automatically turn off after 3 minutes of idle. When the light is activated symbol will be shown on display. Child Lock Hold the button for 2-3 seconds to activate the child lock.
Page 10
Setting the time To set the time, turn the oven on, and then press and hold the button for 3 seconds until the time begins to flash. Adjust the time using the keys and then press to confirm. When the oven is first turned on or restarts, the time must be set before using the oven.
Microwave Oven Functions Function Description Display Microwave – Default power P100 ( power range P10 – P100 ) To adjust the power, press until the correct power is reached followed by Default time is 30 seconds. To adjust the time press the button followed by the and to confirm.
Page 12
Function Description Display Turbo Grill – Default temperature 200 °C (Temperature range 50 - 220 °C) To adjust the temperature press the button followed by the to confirm. The default time is 1.00 hr. To adjust the time, press the button followed by the and to confirm.
Page 13
Function Description Display Microwave & Turbo Grill – Microwave Default power P50 (Power range P10 – P50) heat default temperature °C (Temperature range 50 - 220°C) Press once to enter the microwave power mode, and then again to enter the fan heat temperature mode.
Auto Cooking Example Milk (Auto Program) Press the auto program button until the milk symbol is displayed. Press to enter the Weight selection. to adjust the weight and to confirm. The default time will be adjusted according to the weight selected. Finally press to start the program.
Defrost Time Table The maximum weight for defrost is 2000g. The default defrost time will be adjusted according to different weight selected. Weight (Grams Time (Minutes) Weight (Grams) Time (Minutes) 1100 1200 1300 1400 1500 1600 1700 1800 1900 1000 2000 PART 5: MAINTENANCE •...
Check the seals around the doors on a regular basis. If the seal is damaged, contact the service center MODENA for repair or replacement. It is advisable not to use the oven for separately seals have not been replaced or repaired.
Page 18
Make a check against the things below before contacting our Service Center, if there is interference on your gas oven: Problem Possible Cause Recommended Action • Use the natural convection position The upper crust is • Not enough heat Use deeper cake tins dark and the lower •...
PART 7: PRECAUTION Advice and precautions This unit is designed and manufactured in compliance with international safety standards. Warnings and instructions below is for safety reasons and must be read and followed carefully. General Safety Instructions • The unit is designed for household use and for use indoors and is not intended for commercial use or industry.
Page 20
Contact MODENA authorized service center for repair. • Do not laying or leaning heavy objects on the oven door. • Do not let the children play with the unit. • Units are not to be used by people (including children) with a lack of physical...
PART 8: SPECIFICATION MODEL BV 3435 BV 6435 Combination oven (Microwave Combination oven (Microwave with convection with convection Oven type Oven) Oven) Installation Built-in Built-in Universal, automatic, Universal, automatic, Cooking program microwave microwave Color Stainless Black Oven capacity (liter) Power levels Oven Electric Electric...
Need help?
Do you have a question about the Vicino Series and is the answer not in the manual?
Questions and answers