Table of Contents
Advertisement
Quick Links
Advertisement
Table of Contents

Related Manuals for Leviton MLC 128R


Summary of Contents for Leviton MLC 128R
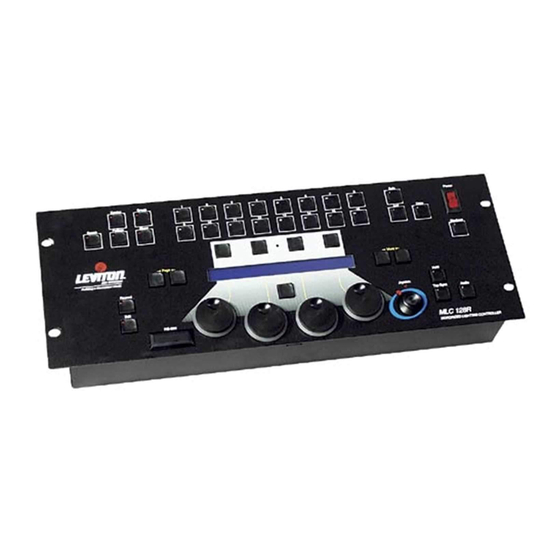
- Page 1 User Guide MLC 128R OTORIZED IGHTING ONTROLLER Software revision 2.01 and above Device Group Solo Power Scene Pattern Show Copy Blackout Page More Default Record Hold Joystick Edit Tap Sync Audio RS-232...
-
Page 2: Table Of Contents
Setting Joystick Sensitivity............14 Setting Mouse Resolution ............14 Entering Test Mode..............15 Clearing and Initializing Memory ..........15 Resetting the Console ............. 16 /RS-232 PLOADING AND OWNLOADING ILES Overview ................16 Downloading a Device Definition..........17 Leviton MLC 128R Motorized Lighting Controller... -
Page 4: Devices
• LCD contrast adjust. The small hole located between Function buttons 2 and 3 provides allows you to adjust the contrast of the LCD display. Use a small flat- blade screwdriver to carefully make adjustments. Leviton MLC 128R Motorized Lighting Controller Page 3 of 43... - Page 5 When you turn on power to the console, the LCD display shows the current release version and build number of the software, followed by the MLC 128 Main Screen. Scn Pg: 1 < MLC 128 > Aud: 0 GM: 100 Leviton MLC 128R Motorized Lighting Controller Page 4 of 43...
-
Page 6: Installation And Setup
Edit or Blackout button. Installation and Setup Power Supply The MLC 128R requires a 12 VDC power supply (included) to operate. To turn the console on: Connect the female end of the supplied AC power cable to the power input connector on the rear panel of the MLC 128R. -
Page 7: Using Audio Input
You can control the audio gain using Modify wheel 3 and the LCD display. A higher value increases the gain. Enabling Safety Locks The MLC 128R console allows you to set three safety locks: Disables the Record button and prevents editing of patterns and Record lock. -
Page 8: Configuration
Configuration Assigning Devices The first time you use the MLC 128R, you must assign device personalities to the Select buttons corresponding to the devices you are using. To assign a device from the Device Definition Library (DDL): Press the Edit button. -
Page 9: Inverting Traits
Modify wheel 4 to Select <Cancel> to cancel the action. When you have inverted all the desired traits, press the Blackout or Edit button to exit Setup mode. Leviton MLC 128R Motorized Lighting Controller Page 8 of 43... -
Page 10: Defining Devices
User Guide Defining Devices One of the keys to the ease of use of the MLC 128R is the ability to define personalities for devices you wish to control. Instead of having to remember that a device starts on channel 50 and that the dimmer trait is the seventh channel of... -
Page 11: Assigning Additional Attributes To Traits
Device button. If device 1 is assigned to DMX512 channel 20 and a trait is assigned to channel 1, it will end up being assigned to channel 20 not 21. Leviton MLC 128R Motorized Lighting Controller Page 10 of 43... - Page 12 • provides, based on the number of indexes specified. Assigns the number of index values the console IV2-IVX (Index Value 2-X). • provides, based on the number of indexes specified. Leviton MLC 128R Motorized Lighting Controller Page 11 of 43...
-
Page 13: Assigning And Editing Groups
Press F2, above Device. Press F1, above Group. Turn Modify wheel 1 to scroll through the groups. Currently assigned devices are shown with an "X" under the number of each device. Leviton MLC 128R Motorized Lighting Controller Page 12 of 43... -
Page 14: Setting The Maximum Dimmers
Blackout or Edit button to exit Setup mode. Setting the Maximum Dimmers The MLC 128R can control up to 512 dimmers or control channels. If you are using fewer, you should reduce the Maximum Dimmers setting to the number needed, to prevent the console from sending needless information. -
Page 15: Setting Joystick Sensitivity
Press the Blackout or Edit button to exit Setup mode. Setting Mouse Resolution To change the mouse resolution: Press the Edit button. Press F4, above Setup. Press F3, above Console. Press the More button three times. Leviton MLC 128R Motorized Lighting Controller Page 14 of 43... -
Page 16: Entering Test Mode
Choose Init Devices to restore the factory default Device Definition Library. Choose Clear MIDI to clear all MIDI assignments including the factory default settings. Leviton MLC 128R Motorized Lighting Controller Page 15 of 43... -
Page 17: Resetting The Console
Uploading and Downloading Files/RS-232 Overview In order to upload and download files to and from the MLC 128R, you will need a terminal program on your computer. From Windows®, you can use Hyper- Terminal, or we recommend Tera-Term®, which can be downloaded from the Web at http://www.hp.vector.co.jp/authors/VA002416/teraterm.html. -
Page 18: Downloading A Device Definition
Press F2, above Define. Select the DDL to upload from the floppy disk supplied with the console, or select from a saved computer file. Send it to the MLC 128R using the terminal program. The LCD display should show the following messages: <RS232>... - Page 19 To download new software code: Make sure the serial cable supplied with the console is plugged in to both the computer and the MLC 128R before powering up the console. Hold down F1 and F2 while turning on the power to the console.
- Page 20 Turn Modify wheel 3 to set a fade time if desired. Turn Modify wheel 4 to select <All>. Press F4, above Traits <All>. The scene is recorded. Leviton MLC 128R Motorized Lighting Controller Page 19 of 43...
- Page 21 Selective Traits mode, you can re-record just those selective pan and tilt traits from the new venue into those scene locations, which can greatly reduce setup time. Leviton MLC 128R Motorized Lighting Controller Page 20 of 43...
- Page 22 Turn Modify wheel 2 to select the desired scene. In Scene Step mode, turn Modify wheel 1 to select Count 2, and Note: enter the next scene; continue until you have entered the desired number of scenes. Leviton MLC 128R Motorized Lighting Controller Page 21 of 43...
- Page 23 Time menu and the Device menu without losing any captures. Continue entering Fade, Hold, and Delay times, creating stage looks, and pressing the Record button until all the steps are recorded. Leviton MLC 128R Motorized Lighting Controller Page 22 of 43...
- Page 24 Edit session. Press the More button. Insert [Pg/Pat] Delete Press F2, above Insert, to add a Pattern step, or press F3, above Delete, to remove a Pattern step. Leviton MLC 128R Motorized Lighting Controller Page 23 of 43...
- Page 25 Choose <Exit> to return to the previous menu. Press F4, above Select. Repeat steps 7-10 until you have selected all the desired patterns. Press the Blackout button to exit Record mode. Leviton MLC 128R Motorized Lighting Controller Page 24 of 43...
- Page 26 This gives the Scene section a Last Action takes Precedence operation style. Leviton MLC 128R Motorized Lighting Controller Page 25 of 43...
- Page 27 To release or deactivate a show, press the corresponding Select button or press the Blackout button. MIDI The MLC 128R allows you to use MIDI commands to activate and deactivate the playback of scenes, patterns, and shows. Activating MIDI The MLC 128R factory default setting for MIDI is inactive.
- Page 28 Turn Modify wheel 2 clockwise to view the default second command. Once you have selected the item to edit, press F4, above Select Edit. [Pg/Scn] Assign <MIDI> Select On:<Program >< 32> < Save > Leviton MLC 128R Motorized Lighting Controller Page 27 of 43...
- Page 29 Assignments” on page 27. Troubleshooting If you are having trouble with the MLC 128R and you have not been able to find an answer in this guide or the checklist below, our technical support staff is available Monday through Friday, 8:00 A.M.-5:00 P.M. PST.
- Page 30 More button. Software Updates As we continue to update and enhance the MLC 128R, new software is released. Check our Web site (www.nsicorp.com) periodically for possible software updates. See “Downloading New Software Code” on page 18 to install new code.
- Page 31 • The device may have multiple operating modes and is set to one that is different from the one defined within the MLC 128R. To determine which mode to use for the device, see the addendum of currently defined devices (consult the factory or visit the Web site).
- Page 32 However, in order for the information to be understood by the console, certain rules must followed. These rules form the syntax that is used by the MLC 128R to describe its programming. By following these rules, you can write your own programming or device definitions offline and load them into the console through the RS-232 port.
- Page 33 Defines the value that Default 128 16 bit: 0-65,535 the Default button assigns to the trait. Maximum 8 bit: 0-255 Defines the maximum Maximum 255 16 bit: 0-65,535 value of a continuous trait. Leviton MLC 128R Motorized Lighting Controller Page 32 of 43...
- Page 34 "snap to color" indexed range. Once assigned and activated, the MLC 128R compares the current value of the trait to values defined by the traits within the Union/EndUnion structure until a match is found. If no match is found, the actual value is displayed, placed in brackets.
- Page 35 Minimum 100 Trait Color Type EndUnion Gobo Trait Gobo Type Indexed Channel 4 Black No BoValue 0 Default 0 Index Open,0 Index Stars,30 Index Circle,60 Index Triangle,90 Index Dot,120 Index Dots,150 Leviton MLC 128R Motorized Lighting Controller Page 34 of 43...
- Page 36 Maximum 255 Minimum 0 The MLC 128R LCD display shows traits in the order they are defined. Traits assigned to either axis of the Joystick are not displayed. It is possible to define more than one trait for the same channel. This can be useful if you would like to have Pan and Tilt on both the LCD and the Joystick.
- Page 37 Non, Noff, CC: followed by a comma, followed by a number 0-127, followed by a comma, followed by a value 0-127 PC: followed by a comma, followed by a number 0-127 Leviton MLC 128R Motorized Lighting Controller Page 36 of 43...
- Page 38 Scene 2 Traits All device 1 ;Scanner T: Pan,200 T: Tilt,187 T: Color,White T: Gobo,Open T: Dimmer,255 device 2 ;Scanner T: Pan,120 T: Tilt,25 T: Color,White T: Gobo,Open T: Dimmer,255 Leviton MLC 128R Motorized Lighting Controller Page 37 of 43...
- Page 39 Scene 1 or 2. All other traits remain unchanged. The ;Scanner string after the device number is a comment for reference that is output from the console. Leviton MLC 128R Motorized Lighting Controller Page 38 of 43...
- Page 40 StepType FullStep Traits All Fade 1.0 Hold 0 Delay 0 Scene 0 device 1 ;Scanner T: Pan,25 T: Tilt,30 T: Color,Clr 100 T: Gobo,Dots T: Dimmer,255 device 2 ;Scanner T: Pan,240 Leviton MLC 128R Motorized Lighting Controller Page 39 of 43...
- Page 41 Scene 151 Scene 201 device 1 ;Scanner T: Pan,240 T: Tilt,30 T: Color,Clr 100 T: Gobo,Dots T: Dimmer,255 device 2 ;Scanner T: Pan,25 T: Tilt,30 T: Color,Yellow T: Gobo,Dots T: Dimmer,255 Leviton MLC 128R Motorized Lighting Controller Page 40 of 43...
- Page 42 Pattern 20 ten times. Pattern 1 Loop 10 Step 1 PatNum 1 Times 4 Step 2 PatNum 2 Times 5 Step 3 PatNum 80 Times 200 Step 4 PatNum 20 Times 10 Leviton MLC 128R Motorized Lighting Controller Page 41 of 43...
- Page 43 Memory Non-volatile FEPROM (at least 10 year retention) Dimmer Input DMX512 MIDI In/Out/Thru Input Power 12 VDC-15 VDC, 800 MA Approx. Dimensions 7" x 19" x 2.5" (HxWxD) Weight (lbs) Leviton MLC 128R Motorized Lighting Controller Page 42 of 43...
- Page 44 All products returned to NSI must have factory authorization for return prior to shipping. Leviton is not liable for any incidental or consequential damages resulting from defect or failure other than repairs of the NSI product subject to the terms of this warranty.
Need help?
Do you have a question about the MLC 128R and is the answer not in the manual?
Questions and answers