Mastercare Back-A-Traction CN-AH6 Heavy Duty Assembly Instructions Addendum
Hide thumbs
Also See for Back-A-Traction CN-AH6 Heavy Duty:
- Instruction manual (10 pages) ,
- Assembly instructions (4 pages)
Advertisement
Addition to the Assembly instructions!
¡Añadidura a las instrucciones para el montaje!
Important!
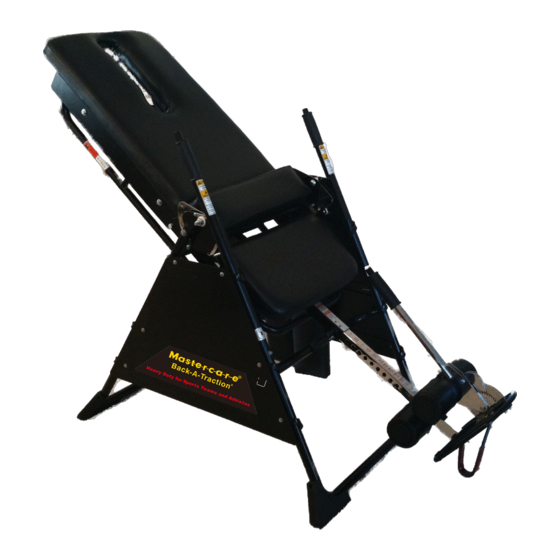
Before you use Back-A-Traction, model CN-AH6 Heavy Duty, the enclosed "Triangle Enforcements" are to be attached
on each side of the frame (A), as shown in the picture below.
Hang the "Triangle Enforcements" over the sides of the stands – see below pictures 1 & 2.
Modelo CN-AH6 Heavy Duty (Extra Fuerte)
¡Importante!
Antes de utilizar Back-A-Traction, modelo CN-AH6 Heavy Duty (Extra Fuerte), los "Triángulos de Aplicación"
adjuntos se van a adherir a cada lado del bastidor (A), como se muestra en la imagen siguiente.
Colgar el "Triángulo de Aplicación" a los lados de los soportes – ver las imágenes 1 y 2, más abajo.
A)
ONLY pertains to
Model CN-AH6 Heavy Duty
SÓLO pertenecen al
1)
2)
3)
Advertisement
Table of Contents

Related Manuals for Mastercare Back-A-Traction CN-AH6 Heavy Duty


Summary of Contents for Mastercare Back-A-Traction CN-AH6 Heavy Duty
- Page 1 Addition to the Assembly instructions! ¡Añadidura a las instrucciones para el montaje! ONLY pertains to Model CN-AH6 Heavy Duty Important! Before you use Back-A-Traction, model CN-AH6 Heavy Duty, the enclosed “Triangle Enforcements” are to be attached on each side of the frame (A), as shown in the picture below. Hang the “Triangle Enforcements”...
- Page 2 Enclosed Lumbar Support Pillows with Model CN-AH6 Heavy Duty With Mastercare Back-A-Traction, Model CN-AH6 Heavy Duty, there are 3 Lumbar Support Pillows in different heights included (A), as shown in the picture below. There are also 3 different positions in the back-rest to attach one of the Lumbar Pillows – to make it fit for best support and comfort (1 and 2).
- Page 3 Instrucciones para el Montaje: Pata de Soporte, SL1 Accesorio para Mastercare Back-A-Traction, para el Modelo A Coloque el respaldo en posición horizontal. Quite los tornillos (A) coloque la Pata de Soporte en el centro de la estructura tubular, por debajo del recorte para la cara en el respaldo (B) (ver la foto de arriba).
- Page 4 If you loosen this handle you can lengthen the Support Leg and thus reduce the inclination of Mastercare; for example to only 10 or 5 degree inclination or to horizontal position. Please note; when you use the reduced inclinations, the locking-devices will not function, but with the help of the bodyweight you will stay in place.
- Page 5 Si usted afloja la manigueta puede alargar la Pata de Soporte y de esta manera reducir el grado de inclinacion de Mastercare; por ejemplo a una inclinación de sólo 10 ó 5 grados o en pocision horisontal . Por favor tenga en cuenta; que cuando se utiliza la reducción de las inclinaciones los dispositivos de bloqueo no van a funcionar, pero con la ayuda del peso del cuerpo, se quedará...
Need help?
Do you have a question about the Back-A-Traction CN-AH6 Heavy Duty and is the answer not in the manual?
Questions and answers