
Subscribe to Our Youtube Channel
Related Manuals for Gardner Denver Governor


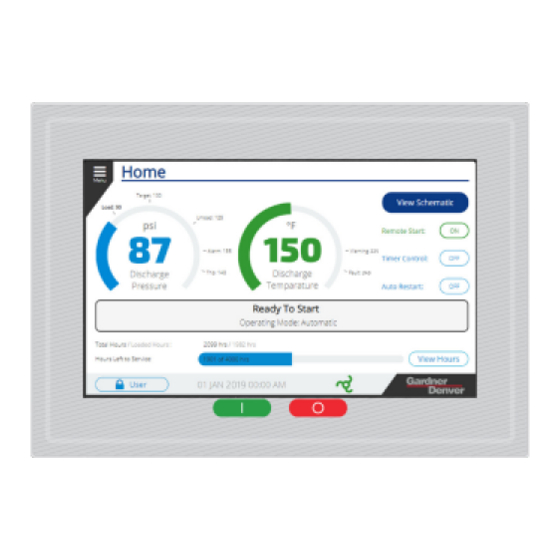
Summary of Contents for Gardner Denver Governor
- Page 1 13-17-625 Version: 00 July 15, 2020 Governor™ Controller MULTI-MACHINE SEQUENCING MANUAL 7” | 4.3” Governor Compressor Applications...
- Page 2 WARNING – PROHIBITION – MANDATORY LABEL INFORMATION Gardner Denver compressors are the result of advanced engineering and skilled manufacturing. To be assured of receiving maximum service from this machine, the owner must exercise care in its operation and maintenance. This book is written to give the operator and maintenance department essential information for day-to-day operation, maintenance and adjustment.
- Page 3 Indicates a hazard with a medium level of risk which, if not avoided, COULD result in death or serious injury. Asphyxiation Hazard – Poisonous Fumes or Toxic Gases in Compressed Air Indicates a hazard with a low level of risk which, if not avoided, MAY result in a minor or moderate injury.
- Page 4 SAFETY PRECAUTIONS The following text presents common safety issues of which the user should be aware. Though the list below includes unit and supporting equipment dangers present, the user must also be vigilant to other hazards introduced in an industrial environment, and ensure they have received the necessary safety training.
-
Page 5: Table Of Contents
Table of Contents 1. GENERAL INFORMATION ........................7 1.1 S ............................ 7 YSTEM ESIGN 1.2 H ............................7 ARDWARE 1.3 S ............................8 OFTWARE 1.4 S ......................... 8 YSTEM ONNECTIONS 2. SUPPORTED PROTOCOLS ........................10 2.1 A ......................... 10 MART ROTOCOL 2.3 D .......................... - Page 6 Table of Figures 1: S ..................8 IGURE EQUENCING RESSURE ONNECTIONS 2: E ................9 IGURE XAMPLE ASTER WITH THREE LAVE ACHINES 3: E RS485 ..10 IGURE XAMPLE CONFIGURATIONS OF THE ASTER LAVE CONTROLS FOR COMMUNICATIONS 4: S IO M VP1033693 .....
-
Page 7: General Information
This includes cable glands, cable, and components to add a system pressure sensor to the machine (utilized for the AirSmart protocol). If the Gardner Denver-supplied kit is not used, it is important that the communications cable is 3-wire Page 7... -
Page 8: Software
shielded cable suitable for industrial environments. The parts list for 317AUX6028 is shown in Table Table 1: 317AUX6028 Sequencing Kit Part Number Description Quantity 24CA2865 FITTING-ELECTRICAL .125-.25 1/2"CONDUIT 64EB368 COUPLING-PIPE 1/4FPT 3/J-16 COUPLING 88H369 TRANSDUCER-PRESSURE 15BAR 4-20mA, 1/4NPT 64AC2 PLUG 1/4" NPT HEX SOCKET HEAD PRESSURE 97J93 CABLE,3 COND,FOIL/SHIELD W/ 22 AWG TWIST 100 ft... -
Page 9: Figure 2: Example - M
When using the Delcos protocol, the master machine is dedicated and selected through the controller configuration. For any Delcos network using a Governor controller, a machine with a Governor controller must be configured as the master of the network. Figure 2: Example - Master with three Slave Machines Figure 3 shows example RS485 wiring connections from the master machine to each of the slave machines in the sequenced system of machines. -
Page 10: Supported Protocols
The AirSmart protocol is the native protocol for fixed and variable speed compressors using the AirSmart or AirSmart G2 controller. If you are connecting to other Gardner Denver compressors with these controllers, the AirSmart protocol should be used to allow for direct and optimal sequencing control. -
Page 11: Delcos Protocol
Gardner Denver compressors with one of these controllers, this is the protocol that should be used. It is also the protocol to select if you are using a Gardner Denver Connect 12™ system controller. The Delcos protocol can sequence up to 4 compressors. One of the compressors must be configured as the master, with up to 3 slaves connected, as shown above in Figure 2. -
Page 12: Sequencing Using The Airsmart™ Protocol
Delivery Pressure of the compressor may also be configured for sequencing in some cases and is explained in more detail below this section. The pressure transducer wiring to the Governor controller IO Module can be found in Figure 4 using the cable provided in the sequencing kit. The compressor network may be comprised of any combination of Governor, AirSmart, and AirSmart G2 controlled machines, as well as ES+ machines equipped with a PCM module. -
Page 13: Figure 5: Air Smart Rs485 C
Figure 5: AirSmart RS485 Communication Wiring Schematic Figure 6 is the hardware Interface for the RS485 Connections on the IO Module shown in the wiring diagram in Figure 5. Make sure that the machines at the end of the sequencing network have the RS485 terminating resistor DIP switch in the ‘ON’... -
Page 14: Communication Configuration
Figure 7: Blue is RS485 GND, Orange is RS485+, White is RS485- Figure 8 shows the serial connection on the communications module on AirSmart machines using the cable supplied in the sequencing kit. The communications module may be used on machines in the field using AirSmart control systems. -
Page 15: Figure 9: Menu Navigation To Communications Screen
“RS485-2” in the menu with the same settings available. Use the port that corresponds to the physical location of the wiring connections on the machine. Figure 9: Menu navigation to communications screen Please note that the controller may prompt the user to reboot following the mode change of the communication parameters. -
Page 16: Operating Mode Setting
3.3 Operating Mode Setting Next, the operating mode for machine control needs to be configured. Navigate to the control settings menu following Figure 11 by selecting Menu, Settings, and then Control. Change the operating mode to Sequencing, shown in Figure 12. Figure 11: Menu Navigation to Control Settings Figure 12: Operating Mode Setting in Control Settings Menu 3.4 Sequencing Settings... -
Page 17: Figure 13: Menu Navigation To Sequencing Screen
will be constant. For AirSmart mode the master/slave designation can change based on the capacity and total machine run hours for priority of master control. Figure 13: Menu navigation to sequencing screen Figure 14: Sequencing Settings Screen Page 17 13-17-625 v00... -
Page 18: Programmable Io Configuration
Table 2: AirSmart Multi-Machine Sequencing Settings Settings Default Values Description A number between one and eight assigned to each machine in sequence. No two Unit Number machines can share a unit number. Controls how frequent the Leader role is transferred. The leader role will be transferred Transfer 4 hours to another capable master of the same capacity when the difference between the run... -
Page 19: Airsmart System Operation
Figure 15: Programmable IO Settings Screen 3.6 AirSmart System Operation This section provides information on the operation of the AirSmart sequencing protocol. Note that only the main features of the system are discussed and this should not be considered a full description of the behavior. -
Page 20: Airsmart Sequencing Diagnostics
all slaves are loaded, the master will allow the system to run up to 100% load to maintain the target pressure. 2. If the master and one or more slaves are running, the master will keep the system running at or above the Transfer Load Decrement percent load. -
Page 21: Figure 17: Air Smart Sequencing
compressors are added to the sequenced network, the white space fills with additional compressor information. Only two compressors are shown in the example below. Figure 17: AirSmart Sequencing Diagnostics Page The machine shown with the blue border around its information is the current master of the network. Each compressor detected will have a status icon on the tile according to the legend in Table 3 below: Table 3: Sequencing Diagnostic Symbols... -
Page 22: Sequencing Using The Delcos Protocol
4. Sequencing Using the Delcos Protocol This section describes how to connect and configure machines for sequencing using the Delcos protocol. This protocol is also used for machines connected to a Connect 12 system controller. 4.1 Wiring Connections Wiring connections for the Delcos sequencing protocol are shown in Figure 18 below. Daisy chain the RS485 connections from the master machine to the first slave machine then second slave machine, etc. -
Page 23: Communication Configuration
Figure 19: IO Module DIP Switch Settings at RS485-1 Port 4.2 Communication Configuration The RS485 communications will need to be configured in the settings and the sequence mode will need to be selected. Delcos sequencing requires a baud rate of 9600, which will be set automatically once the protocol has been selected. -
Page 24: Operating Mode Setting
Figure 21: Delco's Communication Configuration Screen 4.3 Operating Mode Setting Next, the operating mode for machine control needs to be configured. Navigate to the control settings menu following Figure 22 by selecting menu, settings, and then control. Change the operating mode to Sequencing, shown in Figure 23. Figure 22: Menu Navigation to Control Settings Page 24 13-17-625 v00... -
Page 25: Sequencing Settings
RS485 communication settings. For Delcos systems, the Governor controller can be integrated into any existing control system as long as a Governor controller is the master-enabled machine and all other machines are configured as Slaves. -
Page 26: Figure 24: Menu Navigation To
Figure 24: Menu Navigation to Sequencing Screen Figure 25: Delcos Sequencing Settings Screen Table 4 below outlines each of the Delcos protocol settings in detail and their corresponding default values. Page 26 13-17-625 v00... -
Page 27: Delcos Sequencing System Operation
Table 4: Delcos Multi-Machine Sequencing Settings Settings Default Values Description Designates which machine in the sequenced network is the Master. Only a single Master Enable machine in the network can have Mater Enable turned on. Master Enable must also set to Off for sequencing with a Connect 12. Number between one and four assigned to each machine in sequence. -
Page 28: Delcos Sequencing Diagnostics
All machines are configured this way and the Connect 12 acts as the Master Control. To use the Governor with a Connect 4 system, an iPCB module is required. -
Page 29: Figure 26: Delcos Sequencing
Figure 26: Delcos Sequencing Diagnostics Meu Navigations The information on the sequencing diagnostics page is shown in Figure 27 below for a master enabled machine. This page gives an overview of the sequencing settings for the machine. The compressor name, run hours, BLS run hours, operating pressure, and pressure bands is also shown on this page for machines that are configured as a master. -
Page 30: Figure 27: Delcos Dequencing
Figure 27: Delcos Dequencing Diagnostics Page for a Master Figure 28: Delcos Sequencing Diagnostics Page for a Slave To change the name of the compressor or the BLS Run Hours for a master machine the user will need to be signed in as a technician and click on the box shown in Figure 29 that says ‘Master” or ‘0’... -
Page 31: Figure 29: Delcos Keyboard To
Figure 29: Delcos Keyboard to Change Name of Master Machine Figure 30: Delcos Change BLS Run Hours Page 31 13-17-625 v00... -
Page 32: This Section Provides Details On Configuration And Operation Of The System In Es+ Sequencing
Figure 32. Figure 31: ES+ RS485 Communication Wiring Schematic Figure 32 below shows how to connect a legacy ES+ machine to the Governor controller using the 6-conductor telecommunications cable that may already be included on existing ES+-controlled machines for communications (GD PN: 97J49 for reference). -
Page 33: Figure 32: Legacy Es+ Rs485 C
RJ-12 connector shown below in GD Kit 324AUX6028 in Table 5. Connect the cable between the RJ-12 terminal breakout and Governor Display at the IF5 interface as shown in Figure 32 above. The terminal breakout has a total of six terminals to wire into corresponding to the six wires on the telecommunications cable connected to the ES+ controller. -
Page 34: Communication Configuration
Figure 33: RJ-12 to Terminal Breakout Connector (GD PN: TEN023981) Gardner Denver provides a kit 324AUX6028 that includes all hardware required to add a machine to a new or existing ES+ sequencing network. The parts list for 324AUX6028 is listed in Table 5. -
Page 35: Operating Mode Setting
Figure 34: Menu navigation to communications screen Please note that the controller may prompt the user to reboot following the mode change of the communication parameters. Select OK and allow the controller to reboot before continuing with the additional settings. Figure 35: ES+ Communications Configuration Screen 5.3 Operating Mode Setting Next, the operating mode for machine control needs to be configured. -
Page 36: Sequencing Configuration
Figure 36: Menu Navigation to Control Settings Figure 37: Operating Mode Setting in Control Settings Menu 5.4 Sequencing Configuration Next, set the sequencing configuration for each controller on the network. Following Figure 38, navigate to the sequencing settings menu. Figure 39Figure 38 shows the sequencing settings screen and all of the different settings that can be configured. -
Page 37: Figure 38: Menu Navigation To
Figure 38: Menu Navigation to Sequencing Screen Figure 39: ES+ Sequencing Settings Screen The below table outlines each of the ES+ protocol settings in detail and their corresponding default values. Page 37 13-17-625 v00... -
Page 38: System Operation
Table 6: ES+ Multi-Machine Sequencing ES+ Protocol Settings Default Values Description *FIXED SPEED MACHINES ONLY* Number of Units Number of machines in the sequenced group. Maximum 8. The Transfer Interval controls how frequently the Lead role is transferred. A machine will run this many hours before releasing Transfer Interval 24 hours Leader control and becoming a Lag machine in the sequence. -
Page 39: How The Es+ Controls Pressure While Sequencing
Rotation numbers are displayed on the home screen in the Status Bar, as well as on the sequencing diagnostics page. 5.4.2 How the ES+ Controls Pressure While Sequencing Each compressor operates exactly the same as if it were in Automatic mode with one exception: it has a dynamic setpoint. -
Page 40: Sequencing Diagnostics
5.4.4 Other Features Any air system will exhibit pressure differences from one point to the next. Even a well-designed multi-compressor installation will show 'minor' pressure variations between one compressor's discharge point and another compressor's discharge. These points will also vary from the central system (normally the air storage receiver). -
Page 41: Figure 41: Es+ Sequencingd
the name of the machine, run hours, load hours, operation mode, and the sequence number (unit number). Figure 41: ES+ Sequencing Diagnostics Page for a Master/Slave Page 41 13-17-625 v00... - Page 42 NOTES: Page 42 13-17-625 v00...
- Page 43 NOTES: Page 43 13-17-625 v00...
- Page 44 For additional information, contact your local representative or visit: www.contactgd.com/compressors ©2020 Gardner Denver, Inc. Printed in U.S.A.
Need help?
Do you have a question about the Governor and is the answer not in the manual?
Questions and answers