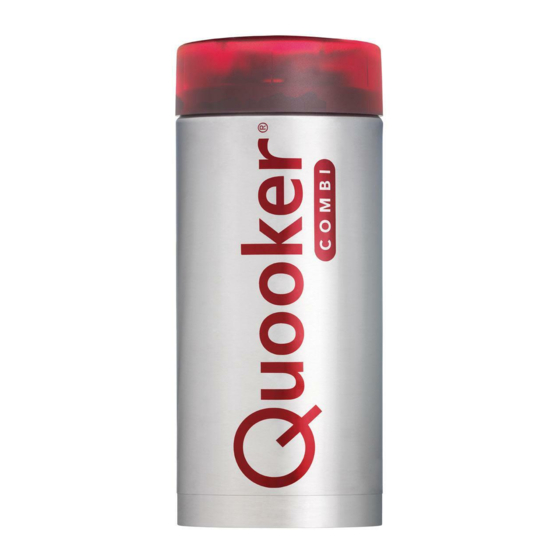
Quooker COMBI Installation Manual
Hide thumbs
Also See for COMBI:
- Manual (12 pages) ,
- Installation manual (12 pages) ,
- Installation manual (20 pages)
Advertisement
Quick Links
Advertisement

Summary of Contents for Quooker COMBI
- Page 1 Installation guide COMBI Read this guide before installation...
- Page 2 In addition to boiling water, the Quooker COMBI also supplies instant hot water. The COMBI supplies hot water by mixing boiling water from the Quooker tank with cold water from the water mains inside the mixing valve. A thermostatic control element inside the valve keeps the outgoing water temperature constant.
- Page 3 The fastest way to do this is as follows: turn off the Quooker system, but leave the plug in the socket. Then open the boiling-water tap and turn it off once the water runs cold. You can find a more detailed explanation for disconnecting the tank in chapter E.
- Page 4 Declaration of Conformity (UK) Quooker Nederland B.V., Staalstraat 1, 2984 AJ Ridderkerk (The Netherlands) herewith declares, on our own responsibility, that the products Quooker COMBI and Quooker COMBI+ are in accordance with the conditions of the following regulations: - The Electrical Equipment (Safety) Regulations 2016...
-
Page 5: Declaration Of Conformity (Eu)
Declaration of Conformity (EU) Quooker Nederland B.V., Staalstraat 1, 2984 AJ Ridderkerk (The Netherlands) herewith declares, on our own responsibility, that the products Quooker COMBI and Quooker COMBI+ are in accordance with the conditions of the following directives: - 2014/35/EU Low Voltage Directive (LVD) -
Page 6: Technical Specifications
Technical specifications Tank COMBI Voltage 230 V Wattage* 2200 W Capacity 7 litres Heating-up time* 20 minutes Standby power consumption* 10 W Tank height 50 cm Total tank height requirement 57 cm Tank diameter 20 cm Min. mains pressure 200 kPa (2 bar) Max. - Page 7 Contents of the pack 1. - Nordic single tap, fibre washer, centring ring, metal ring, threaded ring, and two screws - or Fusion tap, hoses, fibre washer, brass fixing plate, fixing nut, white tap support (for thin work tops), and two inlet hose screens - or Flex tap, hoses, fibre washer, metal ring, threaded ring with two screws, counterweight with boiling water hose, white tap support (for thin work tops), two inlet hose screens, and quick-release tool.
- Page 8 2. COMBI tank 3. Inlet reducing valve, inlet hose screens and fibre washer 4. Isolation valve with filter 5. Mixing valve and check valve...
- Page 9 Overview of Nordic single tap installation It is recommended that you install the Quooker system in the following order: A. Drilling hole B1. Fitting Nordic single tap C. Connecting water D. Connecting tank Note: Bear in mind that the tank, mixing valve and socket must remain accessible for servicing.
- Page 10 Overview of Fusion tap installation It is recommended that you install the Quooker system in the following order: A. Drilling hole B2. Fitting Fusion tap C. Connecting water D. Connecting tank Note: Bear in mind that the tank, mixing valve and socket must remain accessible for servicing.
- Page 11 Overview of Flex tap installation It is recommended that you install the Quooker system in the following order: A. Drilling hole B3. Fitting Flex tap C. Connecting water D. Connecting tank Note: Bear in mind that the tank, mixing valve and socket must remain accessible for servicing.
- Page 12 Drilling hole • Note: The tap hole for the Nordic single tap should be 32 mm in diameter. The Fusion and Flex tap hole should be 35 mm in diameter. • The Nordic single tap should ideally be positioned at the corner of the sink to enable use above the sink or the work top.
- Page 13 Fitting Nordic single tap • The total length of the hose between the boiling-water tap and tank is only 70 cm. The tank must therefore be fitted close to the tap. Extension hoses are available in different lengths but are not normally required. •...
- Page 14 Screw the fixing nut onto the tap thread. Adjust the position of the tap to ensure that the Quooker logo is facing the user. When the handle is in the cold position, it will be parallel to the edge of the work top.
- Page 15 Fitting Flex tap • When installing the tank it is necessary to take into account that the Flex tap counterweight must be able to move up and down freely. When the hose is not withdrawn it hangs approximately 40 cm below the work surface. •...
- Page 16 5. Attach the counterweight Click the pull-out hose into the counterweight’s quick-release fitting while ensuring that the hose pillar is fully inserted. 6. Connect the mixer water hose Click the mixer water hose into the counterweight’s quick-release fitting while ensuring that the hose pillar is fully inserted.
-
Page 17: Connecting Water
Connecting water • The Quooker system operates under mains water pressure and must always be installed on to the water pipe with the supplied inlet reducing valve. • The Nordic single tap, the Fusion tap, or the Flex tap must be installed according to the locally applicable regulations. - Page 18 Connecting tank to tap • The Quooker tank is supplied with a UK 3 pin plug and requires a standard 13 amp earthed socket. • The light ring on the boiling-water tap will light up to indicate when the water is being heated inside the tank.
- Page 19 Then close both taps. 3. Isolate Close the main shut-off valve or the isolation valve. Check that the Quooker system is depressurized by opening the boiling-water tap again. If it is On/off depressurized, no water should flow out of it.
- Page 20 Quooker UK Ltd. Beaumont Buildings Great Ducie Street Manchester M3 1PQ +44 345 833 3333 enquiries@quooker.co.uk www.quooker.co.uk...


