Table of Contents
Advertisement
MODEL : PB1000XLW1
PART : 75953
5005166
UL SUB.2728
ASSEMBLY AND OPERATION INSTRUCTIONS
WARNING: Please read the entire manual before installation and use of this electric, pellet fuel burning
appliance. Failure to follow these instructions could result in property damage, bodily injury or even death.
Contact local building or fire officials about restrictions and installation inspection requirements in your area.
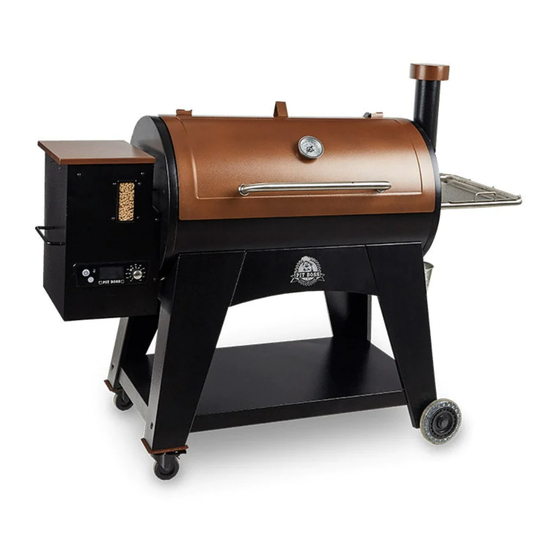
AUSTIN XL
WOOD PELLET GRILL
& SMOKER
IMPORTANT, READ CAREFULLY, RETAIN
FOR FUTURE REFERENCE. MANUAL MUST
BE READ BEFORE OPERATING!
FOR OUTDOOR AND HOUSEHOLD USE ONLY.
NOT FOR COMMERCIAL USE.
Advertisement
Table of Contents

Subscribe to Our Youtube Channel
Related Manuals for Dansons Group Pit Boss Austin XL PB1000XLW1


Summary of Contents for Dansons Group Pit Boss Austin XL PB1000XLW1
- Page 1 MODEL : PB1000XLW1 PART : 75953 5005166 UL SUB.2728 AUSTIN XL WOOD PELLET GRILL & SMOKER IMPORTANT, READ CAREFULLY, RETAIN FOR FUTURE REFERENCE. MANUAL MUST BE READ BEFORE OPERATING! FOR OUTDOOR AND HOUSEHOLD USE ONLY. NOT FOR COMMERCIAL USE. ASSEMBLY AND OPERATION INSTRUCTIONS WARNING: Please read the entire manual before installation and use of this electric, pellet fuel burning appliance.
-
Page 2: Safety Information
SAFETY INFORMATION MAJOR CAUSES OF APPLIANCE FIRES ARE A RESULT OF POOR MAINTENANCE AND A FAILURE TO MAINTAIN REQUIRED CLEARANCE TO COMBUSTIBLE MATERIALS. IT IS OF UTMOST IMPORTANCE THAT THIS PRODUCT BE USED ONLY IN ACCORDANCE TO THE FOLLOWING INSTRUCTIONS. Please read and understand this entire manual before attempting to assemble, operate or install the product. - Page 3 6. Parts of the barbecue may be very hot and serious injury may occur. Keep young children and pets away while in use. Do not enlarge igniter holes or burn pots. Failure to follow this warning could lead to a fire hazard and bodily harm and will void your warranty.
- Page 4 SAFETY LISTING In accordance with the procedures and specifications listed in the UL SUBJECT 2728-2009 "pellet fuel cooking appliances" and ULC/ORD C272 and CANADIAN CSA C22.2 #3 "for electrical features of fuel burning equipment. " Pit Boss Grills pellet cooking appliances have been independently tested and listed by INTERTEK (an accredited testing laboratory) to ETL, UL, ULC and CSA standards.
-
Page 5: Table Of Contents
TABLE OF CONTENTS Safety Information ............2 Care & Maintenance ............17 Parts & Specs ..............6 Using Wood Pellet Fuel ..........18 Assembly Preparation ............7 Cooking Guidelines ............18 Assembly Instructions Tips & Techniques ............20 Installing The Bottom Shelf ............7 Troubleshooting ..............21 Completing The Cart ..............8 Connecting The Wheels To The Cart ........8... -
Page 6: Parts & Specs
PARTS & SPECS Part# Description Porcelain-Coated Cast-Iron Cooking Grids (x3) Porcelain-Coated Steel Upper Cooking Rack (x1) Chimney Gasket (x1) Chimney Cap (x1) Chimney Stack (x1) Lid Handle Bezel (x2) Lid Handle (x1) Flame Broiler Slider (x1) Flame Broiler Main Plate (x1) Thermometer Kit (x1) Lid Stopper (x1) Grease Bucket (x1) -
Page 7: Assembly Preparation
ASSEMBLY PREPARATION Parts are located throughout the shipping carton, including underneath the grill. Inspect the grill, parts, and hardware blister pack after removing from the protective shipping carton. Discard all packaging materials from inside and outside of the grill before assembly, then review and inspect all parts by referencing the parts list. If any part is missing or damaged, do not attempt to assemble. -
Page 8: Completing The Cart
2. COMPLETING THE CART Parts Required: Long Support Plate (#20) Short Support Plate (#21) Screw (#H) 16 x Installation: • Install one long cart plate to the front two support legs of the unit. Secure using two screws on each side. Ensure the flat side of the support plate is facing outwards. -
Page 9: Securing The Lid Stopper
and the other person lifting from the opposing barrel end, carefully lift the main grill, and slowly lower onto the cart. Note illustration 4A. • Next, open the main grill lid and remove the four screws in the center of the large diffuser plate. Remove from main barrel and set aside. Adjust the rotation as needed to align the screw holes of the main barrel to the cart. -
Page 10: Placing The Grease Bucket
8. PLACING THE GREASE BUCKET Parts Required: Grease Bucket (#12) Installation: • Unscrew the six screws along the outside of the hopper that secure the hopper safety screen to the interior, and remove the safety screen to access the grease bucket. Replace the hopper safety screen, and re- install the six screws to secure. -
Page 11: Connecting To A Power Source
Flame Broiler Main Plate (#9) Flame Broiler Slider (#8) Installation: NOTE: Both flame broiler parts are lightly coated with oil to avoid rusting when shipped. • Insert the flame broiler main plate into the main grill, right side first. Rest the flame broiler main plate on the built-in ledge (on the inside right) of the main grill that directs grease towards the grease bucket. -
Page 12: Operating Instructions
OPERATING INSTRUCTIONS With today’s lifestyle of striving to eat healthy and nutritious foods, one factor to consider is the importance of reducing fat intake. One of the best ways to cut down on fat in your diet is to use a low fat method of cooking, such as grilling. As a pellet grill uses natural wood pellets, the savory wood flavor is cooked into the meats, reducing the need for high sugar content sauces. -
Page 13: Understanding The Control Board
GRILL TEMPERATURE RANGES Temperature readouts on the control board may not exactly match the thermometer. All temperatures listed below are approximate and are affected by the following factors: outside ambient temperature, the amount and direction of wind, the quality of pellet fuel being used, the lid being opened, and the quantity of food being cooked. PELLET GRILLS (WALMART) •... -
Page 14: Understanding The Probes
ACTUAL 225º 400º 200º 450º PROBE 2 PRIME AMORÇAGE 200º 450º SMOKE 475º PRIME FUMÉE AMORÇAGE HIGH 300º SMOKE 475º The "P" Set Button is used to select one of the eight fine tunings when the Temperature Control Dial is set ARRÊT ÉLEVÉ... -
Page 15: Understanding The "P" Setting
UNDERSTANDING THE "P" SETTING AUGER CYCLE (seconds) When the recessed "P" SET button is pushed, the “P” setting displayed on the LCD "P" SET screen will flash and change to the next value (upward). Once P7 is reached, it will restart at P0. -
Page 16: Manual Start-Up Procedure
open during the start-up cycle. To confirm the start-up cycle has begun properly, listen for a torchy roar, and notice some heat being produced. 3. Once the heavy, white smoke has dissipated, the start-up cycle is complete and you are ready to enjoy your grill at your desired temperature! IGNITER FAILURE PROCEDURE If for any reason your electric igniter fails or your grill's flame dies out during a cook, check the following steps, or... - Page 17 • Running all pellets out of your auger system is recommended if your grill will be unused for an extended period of time. This can be done by simply running your grill, on an empty hopper, until all pellets have emptied from the auger tube.
-
Page 18: Using Wood Pellet Fuel
USING WOOD PELLET FUEL Clean-burning barbecue wood pellets generate about 8200 BTU’s per pound with very little ash, a low moisture content (5-7%), and are carbon neutral. Barbecue wood pellets are produced by pure raw material (sawdust) being pulverized with a hammer-mill, and the material is pushed through a die with pressure. - Page 19 Precooked to Reheat Medium Well Done PORK SIZE 60°C / 140°F 66°C / 150°F 71°C / 160°F 2.5 cm / 1" 12 minutes (Fully Cooked & 1.36-1.81 kg / 3-4 lbs. 50 minutes - 1 hour Boneless Portion, 1.81-2.72 kg / 4-6 lbs. 1 - 2 hours Smoked Picnic 2.26-3.62 kg / 5-8 lbs.
-
Page 20: Tips & Techniques
TIPS & TECHNIQUES Follow these helpful tips and techniques, passed on from Pit Boss owners, our staff, and customers just like you, to become more familiar with your grill: 1. FOOD SAFETY • Keep everything in the kitchen and cooking area clean. Use different platters and utensils for the cooked meat than the ones you used to prepare or transport the raw meat out to the grill. -
Page 21: Troubleshooting
TROUBLESHOOTING Proper cleaning, maintenance and the use of clean, dry, quality fuel will prevent common operational problems. When your Pit Boss grill is operating poorly, or on a less frequent basis, the following troubleshooting tips may be helpful. For FAQ, please visit www.pitboss-grills.com . You may also contact your local Pit Boss authorized dealer or contact Customer Service for assistance. - Page 22 Press the Power Button to turn the unit off, and allow grill to cool. Follow Care and "ErH" Error Code The Unit Has Overheated, Possibly Maintenance instructions. After maintenance, remove pellets, and confirm positioning of Due To Grease Fire Or all component parts.
-
Page 23: Electrical Wire Diagram
ELECTRICAL WIRE DIAGRAM The Digital Control Board system is an intricate and valuable piece of technology. For protection from power surges and electrical shorts, consult the wire diagram below to ensure your power source is sufficient for the operation of the unit. PB –... -
Page 24: Replacement Parts
REPLACEMENT PARTS Part# Description Porcelain-Coated Cast-Iron Cooking Grids (x3) Porcelain-Coated Steel Upper Cooking Rack (x1) Chimney Gasket (x1) Chimney Cap (x1) Chimney Stack (x1) Lid Handle Bezel (x2) Lid Handle (x1) 12-A Lid Stopper (x1) Flame Broiler Slider (x1) 10-A Flame Broiler Main Plate (x1) 13-A 10-A... -
Page 25: Hopper Replacement Parts
REPLACEMENT PARTS Part# Description 1-PDH Hopper Lid (x1) 1-PDH Hopper Safety Screen (x1) 2-PDH 2-PDH Hopper Box Housing (x1) 3-PDH 4-PDH Hopper Access Panel (x1) 5-PDH Drop Chute Plate (x1) 3-PDH 5-PDH 6-PDH Drop Chute Cover (x1) 6-PDH Auger Motor (x1) 7-PDH 7-PDH 8-PDH Nylon Bushing (x1) -
Page 26: Exceptions
This warranty is based on normal domestic use and service of the grill and neither limited warranty coverage’s apply for a grill which is used in commercial applications. EXCEPTIONS There is no written or implied performance warranty on Pit Boss grills, as the manufacturer has no control over the installation, operation, cleaning, maintenance or the type of fuel burned. -
Page 27: Accessories Sold Separately
ACCESSORIES SOLD SEPARATELY Available for purchase separately. Accessories not available and supplied by all authorized Pit Boss dealers. ITEM DESCRIPTION ITEM DESCRIPTION GRILL COVER Form-fitting, full length cover. Heavy-duty polyester with PVC backing for long-term GRILLING APRON use. Weatherproof. Includes draw-string lock for easy tightening. -
Page 28: Recipes
RECIPES CLASSIC BRISKET SAUSAGE WITH MANGO CHUTNEY Makes 4 - 6 Servings Makes 4 - 6 Servings A whole beef brisket weighs 7.25-3.62 kg / 16-18 pounds and has three Ingredients: separate parts: the cap, the point, and the flat. Use the flat section, Mangoes (finely chopped) as it is lean, compact, and creates nice slices when carved. - Page 29 BBQ RIBS Suggested Wood Pellet Flavor: Hickory / Competition Makes 4 - 6 Servings Instructions: Preheat grill, then leave or reduce slightly (204-260°C / Ingredients: 400-500°F) 1.3-1.8 kg / 3-4 lbs Ribs Meaty pork spareribs / loin back ribs Combine meat, seasoning, eggs and bread crumbs in a mixing 45 ml / 3 tbsp bowl and blend together.
- Page 30 CORNISH HENS WITH MANDARIN RICE Suggested Wood Pellet Flavor: Mesquite / Competition Makes 4 Servings Instructions: Soak wooden skewers in water for 1 hour. Ingredients: Preheat grill, then reduce to 135-163°C / 275-325°F. 4 whole Cornish Game Hens 750 ml/ 3 c. Mandarin Rice Prepare curry butter by melting butter in small pan over 15 ml / 1 tbsp Olive Oil...
- Page 31 WHOLE SMOKED TURKEY brown and crispy; internal temperature should reach 74°C/165°F. Using tongs, carefully remove the upright chicken and can from Feeds a small army - leftovers are great! the grill. Let rest for five minutes, then carefully remove the can Ingredients: from the cavity of the chicken.
- Page 32 IMPORTANT DO NOT RETURN PRODUCT TO STORE For all questions, comments, or inquiries, please contact Dansons directly. Our Customer Service department is available: Monday through Sunday, 4am - 8pm PST (EN/FR/ES) TOLL FREE: 1-877-303-3134 | TOLL FREE FAX: 1-877-303-3135 service@pitboss-grills.com WARNING: This product can expose you to chem- icals including wood dust, which is known to the state of California to cause cancer.
Need help?
Do you have a question about the Pit Boss Austin XL PB1000XLW1 and is the answer not in the manual?
Questions and answers