Fagor Kore 900 Series Installation, Usage And Maintenance Instructions
Hide thumbs
Also See for Kore 900 Series:
Table of Contents
Advertisement
Available languages
Available languages
ES: INSTRUCCIONES DE INSTALACIÓN, USO Y MANTENIMIENTO
FR: INSTRUCTIONS D'INSTALLATION, D'UTILISATION ET D'ENTRETIEN
EN: INSTALLATION, USAGE AND MAINTENANCE INSTRUCTIONS
DE: INSTALLATIONS, GEBRAUCHS UND WARTUNGSANLEITUNG
IT: ISTRUZIONI PER L'INSTALLAZIONE, L'USO E LA MANUTENZIONE
TR: KURULUM, KULLANIM VE BAKIM TALİMATLARI
PL: INSTRUKCJA MONTAŻU I UŻYTKOWANIA
M-G910
M-G910 BM
MP-G910
M-G915
M-G915 BM
MP-G915
M-G920
MP-G920
M-G710
M-G710 BM
12159967
1
Advertisement
Chapters
Table of Contents

Related Manuals for Fagor Kore 900 Series


Summary of Contents for Fagor Kore 900 Series
- Page 1 ES: INSTRUCCIONES DE INSTALACIÓN, USO Y MANTENIMIENTO FR: INSTRUCTIONS D'INSTALLATION, D'UTILISATION ET D'ENTRETIEN EN: INSTALLATION, USAGE AND MAINTENANCE INSTRUCTIONS DE: INSTALLATIONS, GEBRAUCHS UND WARTUNGSANLEITUNG IT: ISTRUZIONI PER L'INSTALLAZIONE, L'USO E LA MANUTENZIONE TR: KURULUM, KULLANIM VE BAKIM TALİMATLARI PL: INSTRUKCJA MONTAŻU I UŻYTKOWANIA M-G910 M-G910 BM MP-G910...
- Page 2 SPANNUNG GRÜNDLICH LESEN TENSIONE LEGGERE LE TERRA DI PRECAUZIONE EQUIPOTENZIALITÀ PERICOLOSA ISTRUZIONI PROTEZIONE DİKKAT TEHLİKELİ VOLTAJ TALİMATLARI EŞGERİLİM KORUMA OKUYUNUZ TOPRAKLAMASI PROSZĘ PRZYŁĄCZE UWAGA WYSOKIE UZIEMIENIE NAPIĘCIE PRZECZYTAĆ EKWIPOTENCJALNE INSTRUKCJĘ Fagor Industrial S.Coop. Barrio Santxolopetegi 22 20560, Oñati (Gipuzkoa) SPAIN...
- Page 3 1. CARACTERÍSTICAS TÉCNICAS GENERALES - GENERAL TECHNICAL SPECIFICATIONS - ALLGEMEINE TECHNISCHE DATEN - CARACTERISTIQUES GENERALES - CARATTERISTICHE GENERALI - CHARAKTERYSTYKA I SPECYFIKACJE TECHNICZNE (1) Dimensiones generales y acometidas - General dimensions and connections -Allgemeine ABMessungen und Anschlüsse - Dimensions générales et raccordements - Dimensioni generali e le connessioni - Wymiary i przyłącza M-G910 M-G910 BM...
- Page 4 M-G915 M-G915 BM M-G920...
- Page 5 MP-G910 MP-G915 & MP-G920...
- Page 6 M-G710 M-G710 BM Entrada de Agua Fría Cold water Inlet Entrada de Agua Caliente Hot water Inlet Conexión eléctrica Electric connection Desagüe Drainage Entrada de Gas Gas Inlet Manómetro Manometer Válvula de seguridad Safety valve Válvula de presión Pressure Valve Grifo válvula de gas Gas valve tap Regulador de energia...
- Page 7 (2) Características técnicas - Technical specifications - Tabelle mit den Geräteeigenschaften - Caractéristiques techniques- Caratteristiche tecniche Specyfikacje techniczne M-G910, M-G915, MP- M-G920, MP- M-G910 M-G915 M-G710 Modelo/Model/Modelle/Modèle/Modelo/ Model M-G710 MP-G910 G915 G920 Dimensiones externas/ External dimensions/ L (mm) Äußere Abmessungen/ Dimensions externes/ W (mm) Dimensioni esterne/ Wymiary...
- Page 8 (3) Diametro de inyectores y regulación/Diameter of injectors and adjustment/Durchmesser der Injektoren und Regulierung/Diamètre des injecteurs et réglage/Diametro degli iniettori e regolazione/ Średnica dysz i regulacja M-G910, M-G910 BM, MP-G910 : Presion nominal entrada/Inlet gas pressure : Regulación presión de gas/Gas valve regulated pressure : Potencia nominal máxima n max ...
- Page 9 M-G915, M-G915 BM, MP-G915, M-G920, MP-G920 : Presion nominal entrada/Inlet gas pressure : Regulación presión de gas/Gas valve regulated pressure : Potencia nominal máxima n max : Inyector quemador/Burner nozzle/Injecteurs du bruler/Brennerduse/Ugello bruciatore H: Regulación aire (R aire D: Regulación Venturi : Potencia nominal reducida n min ...
- Page 10 M-G710, M-G710 BM : Presion nominal entrada/Inlet gas pressure : Regulación presión de gas/Gas valve regulated pressure : Potencia nominal máxima n max : Inyector quemador/Burner nozzle/Injecteurs du bruler/Brennerduse/Ugello bruciatore H: Regulación aire (R aire D: Regulación Venturi : Potencia nominal reducida n min ...
- Page 11 (4) Consumo de aire/Air consumption/Luft verbraucht/Consommation d’air/ Consumo di aria/ Zużycie powietrza do spalania. Consumo de aire necesario para la combustión/ Air consumption necessary for combustión/ Für die Verbrennung erforderlicher Luftverbraucht/ Consommation d’air nécessaire á la combustión/ Modelo/Model/Modelle/Modèle/Modelo/ Model Consumo di aria necessario per la combustion/ Zużycie powietrza wymaganego do spalania M-G910, M-G910 BM, MP-G910 M-G915, M-G915 BM, MP-G915, M-G920, MP-G920...
- Page 12 (5) Gases/presiones de suministros / Country/Supply pressures / Land/Betriebsdrücke / Pays/Pressions d’alimentation / Paese/Pressioni di erogazione/ Nominalne cisnienie gazu zasilajacego FAMILIA 1ª FAMILIA 2ª FAMILIA 3ª FAMILIA GRUPO GAS / PRESION (mbar) AUSTRIA BÉLGICA 20 / 25 28-30/37 BULGARIA SUIZA CHIPRE 28-30/37 CHEQUIA...
- Page 13 (6) Categorías/Categories/Kategorien/Catégories/Categoria/ Kategoria gazu Categorías – Categories – Presión – Pressure – País – Country – Land – Pays – Kategorien – Catégories Bertriebsdrücke – Pressions – Paese - Kraj – Categoria - Kategoria Pressioni - Ciśnienie znamionowe gazu AUSTRIA 20*50 2H3B/P BÉLGICA...
- Page 14 (7) Distintos gases de referencia/Different types of gas/Verschiedenen Bezugsgasen/Gaz de référence/Gas di riferimento/ Różnice typów gazów Gas natural/Natural gas/Erdgas/ G.L.P./L.P.G./ Gas Ciudad/ Gaz natural/Gas naturale/ Gaz Verflüssigtes Town Gas naturalny Petroleumgas (MJ/m³) (MJ/m³) (MJ/kg) G-110 G-20 G-25 G-25.1 GZ-35 G-30 G-31 Poder calorífico inferior/Lower calorific value/Unterer...
-
Page 15: Table Of Contents
1. ÍNDICE ÍNDICE ..............................15 INFORMACIÓN Y ADVERTENCIAS GENERALES ................16 DATOS DEL PRODUCTO ........................16 INSTRUCCIONES DE INSTALACIÓN ....................18 4.1 Desembalaje ............................18 4.2 Emplazamiento y nivelación ........................18 4.3 Montaje de equipos en bloques ....................... 18 4.4 Conexión eléctrica ........................... 19 4.5 Conexión de gas ............................ -
Page 16: Información Y Advertencias Generales
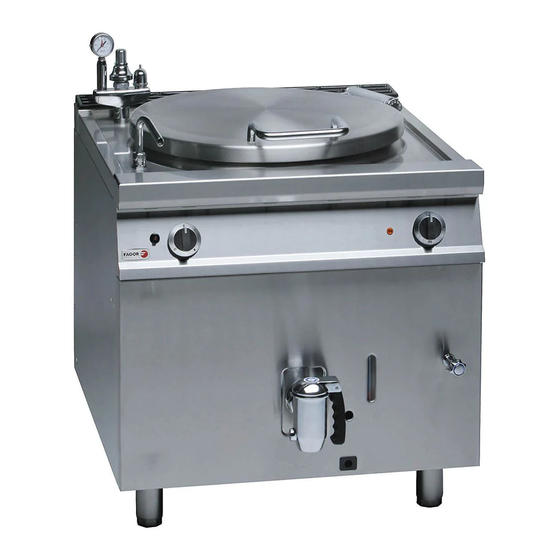
2. INFORMACIÓN Y ADVERTENCIAS GENERALES Este manual ha sido creado para facilitar la completa comprensión del funcionamiento, instalación y mantenimiento de la máquina. En él dispone de la información y las advertencias necesarias para una correcta instalación y uso del aparato, así como de información acerca de las características y posibilidades que ofrece, a fin de que pueda aprovechar todo el potencial a su disposición. - Page 17 PLACA DE CARACTERISTICAS NOMBRE DEL APARATO REFERENCIA DEL APARATO Nº DE SERIE+FECHA FABRICACIÓN CARACTERÍSTICAS ELÉCTRICAS CARACTERÍSTICAS GAS NÚMERO DE EXPEDIENTE DE CERTIFICACIÓN Mencione las características indicadas al contactar con el servicio técnico. DESCRIPCIÓN GENERAL DEL EQUIPO 1. Chimenea 2. Tapa marmita 3.
-
Page 18: Instrucciones De Instalación
4. INSTRUCCIONES DE INSTALACIÓN El emplazamiento y la instalación, así como reparaciones o transformaciones, deben realizarse siempre por un TÉCNICO AUTORIZADO, atendiendo a la reglamentación en vigor en cada país. La instalación, ajuste incorrecto, el servicio ó el mantenimiento inapropiado del aparato así... -
Page 19: Conexión Eléctrica
• Atar las máquinas mediante tornillos y tuercas tanto en la parte posterior (pestañas) como en la parte anterior (agujeros en los paneles laterales a los cuales se accede una vez retirados los paneles portamandos) (véase imagen). • Atar las máquinas mediante tornillo y tuerca en la parte anterior inferior (véase imagen). •... -
Page 20: Transformación A Distintos Gases
• La instalación general deberá estar provista de una llave de paso y un regulador de presión, siendo aconsejable además poner una llave de corte por cada aparato de consumo. • Para la conexión de gas debe emplearse un tubo que como mínimo sea de Ø12x10mm y acabado en una tuerca de ¾”... -
Page 21: Reciclaje
4.8 Reciclaje El embalaje de este producto está formado por: • Palet de madera. • Cantoneras de cartón. • Fleje de polipropileno. • Bolsa de plástico. Todos los embalajes utilizados en el empaquetado de esta máquina son reciclables, con lo que la eliminación correcta de estos productos contribuirá... -
Page 22: Descripción De Los Mandos
5.2.1 Descripción de los mandos Mando Mr Mando Ma 5.2.2 Encendido de quemadores • Encedido de piloto: Girar el mando del regulador de energía Mr en sentido anti-horario hasta la posición “max”. En ese momento se iluminará la lámpara “L1” indicándonos que está preparada para encender el piloto (figura anterior). -
Page 23: Llenado De Agua En La Cámara (En Marmitas De Baño María)
5.3.2 Mantenimiento FAGOR INDUSTRIAL recomienda realizar al menos una vez al año, una revisión de los componentes funcionales de la marmita para comprobar su estado y el buen funcionamiento del aparato. Esta revisión debe ser realizada por un SERVICIO TÉCNICO OFICIAL Y/O AUTORIZADO. -
Page 24: No Uso Prolongado
• En los módelos de baño maría mantener límpias las válvulas de presión y seguridad. • Es conveniente limpiar periódicamente la cuba por su interior con una solución de agua y detergente, que se dejará hervir durante algunos minutos. A continuación, proceder a su aclarado con abundante agua y secado. -
Page 25: Reciclaje Del Producto
NOTA: si se produce una avería no presente en la tabla, contacte con su servicio de asistencia técnica. El fabricante se reserva el derecho de modificar las características sin previo aviso. 7. RECICLAJE DEL PRODUCTO La norma Europea 2012/19/EU sobre la eliminación de aparatos eléctricos y electrónicos, indica que los electrodomésticos no deben ser eliminados de la misma manera que los desechos sólidos urbanos. - Page 26 1. INDEX INDEX ..............................26 GENERAL INFORMATION AND WARNINGS ..................27 PRODUCT DETAILS ..........................27 INSTALLATION INSTRUCTIONS ......................29 4.1 Removal of packaging ..........................29 4.2 Positioning and levelling .......................... 29 4.3 Assembly of equipment in blocks ......................29 4.4 Electrical connection ..........................30 4.5 Gas connection ............................
- Page 27 2. GENERAL INFORMATION AND WARNINGS This manual has been created to help you understand the operation, installation and maintenance of the machine. It contains all the necessary information and warnings to ensure that the appliance is installed and used correctly, together with information about the characteristics and possibilities offered, so that you may enjoy your machine to the full.
- Page 28 SPECIFICATIONS PLATE NAME OF APPLIANCE APPLIANCE REFERENCE SERIAL NUMBER + DATE OF MANUFACTURE ELECTRICAL SPECIFICATIONS CHARACTERISTICS OF GAS APPLIANCE CERTIFICATION NUMBER These details should be quoted when the technical service is called. GENERAL DESCRIPTION OF THE EQUIPMENT 1. Chimney 2. Cooking pot cover 3.
- Page 29 4. INSTALLATION INSTRUCTIONS The positioning and installation, and all repairs or modifications, should always be carried out by an AUTHORISED TECHNICIAN, in accordance with the applicable legislation of the country. The installation, incorrect adjustment, inappropriate maintenance or use of the appliance may cause material damages and injuries.
- Page 30 • Replace the control holder panels and the controls. 4.4 Electrical connection An AUTHORISED TECHNICIAN should always carry out the appliance’s electrical connection. The legal standards in force in each country regarding connection to the mains should be taken into account.
- Page 31 4.5 Gas connection An AUTHORISED TECHNICIAN should always carry out the gas connection of the appliance. • The general installation must have a main tap and a pressure regulator and it is also advisable to install a shut-off cock on each individual appliance. •...
- Page 32 4.8 Recycling The product packaging consists of: • A wooden pallet. • Cardboard edge protectors. • A polypropylene band. • A plastic bag. All the packaging used around the machine can be recycled; The correct disposal of these products will help to protect the environment. For further information regarding the recycling of these products, please refer to the relevant office of the local government.
- Page 33 5.2.1 Description of the controls Mr control Ma control 5.2.2 Burner ignition • Pilot ignition: Turn the Mr energy control anticlockwise to the "max" position. Now lamp “L1” lights up, indicating that the pilot is ready to be lit (above figure). Next press the solenoid valve control M, while turning it anticlockwise to the pilot position .
- Page 34 5.3.2 Maintenance FAGOR INDUSTRIAL recommends a service of all the operating components of the cooking pot at least once a year to check their condition and the correct operation of the appliance. This service must be carried out by an OFFICIAL AND/OR AUTHORISED TECHNICAL SERVICE.
- Page 35 • It is advisable to regularly clean the inner part of the tub with soapy water that is left to boil for a few minutes. and then rinse it with plenty of water. Then rinse it with plenty of water and dry.
- Page 36 NOTE: If a fault occurs and is not listed in the above table, please call the technical service. The manufacturer reserves the right to modify the technical characteristics with prior warning. 7. RECYCLING THE PRODUCT The European standard 2012/19/EU on the disposal of electrical and electronic appliances, must not be disposed of in the same way as solid urban waste.
- Page 37 1. TABLE DES MATIÈRES TABLE DES MATIÈRES .......................... 37 INFORMATIONS ET AVERTISSEMENTS GÉNÉRAUX ................ 38 DONNÉES DU PRODUIT ........................38 INSTRUCTIONS D'INSTALLATION ......................40 4.1 Déballage ..............................40 4.2 Mise en place et nivellement ........................40 4.3 Montage d'équipements par blocs ......................40 4.4 Connexion électrique ..........................
-
Page 38: Informations Et Avertissements Généraux
2. INFORMATIONS ET AVERTISSEMENTS GÉNÉRAUX Ce manuel a été créé pour faciliter la complète compréhension du fonctionnement, de l'installation et de l'entretien de la machine. Il contient les informations et les avertissements nécessaires pour une correcte installation et utilisation de l'appareil, ainsi que des informations concernant les caractéristiques et possibilités qu'il offre, afin de profiter de tout le potentiel à... - Page 39 PLAQUE SIGNALÉTIQUE NOM DE L'APPAREIL RÉFÉRENCE DE L'APPAREIL Nº DE SÉRIE+DATE FABRICATION CARACTÉRISTIQUES ÉLECTRIQUES CARACTÉRISTIQUES GAZ NUMÉRO DE PROCÈS-VERBAL DE CERTIFICATION Indiquez les caractéristiques indiquées si vous contactez le service technique. DESCRIPTION GÉNÉRALE DE L'ÉQUIPEMENT 1. Cheminée 2. Couvercle marmite 3.
-
Page 40: Instructions D'installation
• Soupape de sûreté. Si la pression dans la chambre du bain-marie dépasse 0,5 bar, elle laisse sortir de la vapeur vers l'extérieur. 4. INSTRUCTIONS D'INSTALLATION La mise en place et l'installation, ainsi que les réparations ou transformations doivent toujours être réalisées par un TECHNICIEN AUTORISÉ, en fonction de la réglementation en vigueur dans chaque pays. -
Page 41: Connexion Électrique
• Retirer les enjoliveurs de cheminée. • Mettre du ruban adhésif sur les bords des plans de travailler à unir. • Mettre un matériau scellant à usage alimentaire sur les côtés à unir. • Unir les machines. • Attacher les machines à l'aide de vis et écrous aussi bien à l'arrière (languettes) qu'à l'avant (orifices dans les panneaux latéraux auxquels vous accédez après avoir retiré... -
Page 42: Raccordement Au Gaz
solidement le câble d'alimentation électrique au presse-étoupes. Ne pas respecter les spécifications du fabricant ou une installation inadéquate, dégage ce dernier de toute responsabilité, ne pouvant être tenu pour responsable des dommages personnels ou matériels que pourraient subir la machine. 4.5 Raccordement au gaz La connexion de gaz de l'appareil doit toujours être réalisée par un TECHNICIEN AUTORISÉ. -
Page 43: Raccordement À L'eau
4.7 Raccordement à l’eau L'installation générale doit être équipée d'un robinet à passage. Les prise d'eau sont définies dans l'appareil « Dimensions générales et raccordements » par la lettre A. Nous vous recommandons d'utiliser une pression d'eau de 2 à 4 bar, et une température maximale de 60 °C. -
Page 44: Fonctionnement
5.2 Fonctionnement Indications pour un usage approprié de la machine: • Ne pas utiliser de gros sel, car il se dissout lentement et peut oxyder le fond de la cuve. • L'utilisation excessive de fruits de mer peut endommager l'appareil. •... -
Page 45: Extinction Des Brûleurs
Tourner la commande Mr jusqu'à la position souhaitée. Dans les modèles de bain-marie, la pression de la chambre augmentera jusqu'à 0,4 kg/cm. Une fois cette valeur atteinte, la marmite régulera automatiquement la pression de la chambre. 5.2.3 Extinction des brûleurs •... -
Page 46: Conseils Utiles
5.3 Conseils utiles Lisez attentivement les conseils utiles indiqués ci-dessous pour pouvoir profiter de tout le potentiel dont votre marmite dispose. 5.3.1 Nettoyage initialUne fois l'appareil installé, avant d'introduire des aliments dans la cuve, vous devez la remplir avec une solution à base d'eau et de détergent que vous laisserez bouillir durant quelques minutes. -
Page 47: Recyclage Du Produit
Problème Cause Solution Fuite de gaz occasionnelle due au fait Fermer le robinet d'alimentation de gaz Odeur à gaz que la flamme s'est éteinte. et ventiler le local. Allumer manuellement le marmite. Le train d'étincelles ne fonctionne pas Contacter le service d'assistance technique. -
Page 48: Inhaltsangabe
1. INHALTSANGABE INHALTSANGABE ........................... 48 ALLGEMEINE INFORMATION UND HINWEISE ..................49 ANGABEN ZUM GERÄT ......................... 49 INSTALLATIONSANWEISUNG....................... 51 4.1 Auspacken ............................... 51 4.2 Aufstellung und Nivellierung ........................51 4.3 Montage der Geräte in Blockbauweise ....................52 4.4 Elektrischer Anschluss ..........................52 4.5 Gasanschluss ............................ -
Page 49: Allgemeine Information Und Hinweise
2. ALLGEMEINE INFORMATION UND HINWEISE Das vorliegende Handbuch soll Ihnen dabei behilflich sein, alle zur Verfügung gestellten Informationen in Bezug auf Funktionsweise, Installation und Wartung des Gerätes vollständig verstehen zu können. Hier finden Sie alle notwendigen Informationen und Hinweise zur ordnungsgemäßen Installation und zum richtigen Gebrauch des Gerätes, sowie alle erforderlichen Angaben in Bezug auf die technischen Eigenschaften, damit Sie alle Möglichkeiten Ihres neuen Gerätes optimal nutzen können. - Page 50 TYPENSCHILD GERÄTENAME ARTIKELNUMMER DES GERÄTES SERIENNUMMER UND HERSTELLUNGSDATUM ELEKTRISCHE EIGENSCHAFTEN GASRELEVANTE EIGENSCHAFTEN REGISTRIERUNGSNUMMER DER ZERTIFIZIERUNG Halten Sie bitte diesen Angaben bereit, wenn Sie sich an den Kundendienst wenden. ALLGEMEINE BESCHREIBUNG DES GERÄTES 1. Abluftkamin 2. Deckel des Kochkessels 3. Abfluss 4.
-
Page 51: Installationsanweisung
• Sicherheitsventil: Sollte der Druck in der Doppelwand der Bain-Mary den Wert von 0,5 bar überschreiten, so wird entsprechend Dampf abgelassen. 4. INSTALLATIONSANWEISUNG Aufstellung und Installation, sowie Reparaturen oder Umrüstungen dürfen nur von AUTORISIERTEN FACHTECHNIKERN bei Einhaltung der im jeweiligen Land geltenden Gesetzgebung vorgenommen werden. -
Page 52: Montage Der Geräte In Blockbauweise
4.3 Montage der Geräte in Blockbauweise Zur Montage der Geräte in Blockbauweise sind die folgenden Anweisungen zu befolgen: • Die Bedienelemente entfernen. • Die Panele mit den Bedienfeldhaltern ausbauen. • Die Blenden am Abluftkamin entfernen. • Klebeband an den Abdeckplatten anbringen, die miteinander verbunden werden sollen. •... -
Page 53: Gasanschluss
Gerätes bei Installations-, Reparatur- und Reinigungs- bzw. Wartungsarbeiten am Gerät. Es sollten Möglichkeiten zum Sperren bzw. eine entsprechende Etikettierung vorhanden sein. Der Hersteller lehnt jede Verantwortung für mögliche Schäden ab, die auf die Nichteinhaltung dieser Voraussetzung zurückzuführen sind. • In Gerätenähe ist eine leicht zugängliche Differentialschutzvorrichtung vorzusehen. Diese muss ausreichend bemessen sein. -
Page 54: Wasseranschluss
4. Nach der Umrüstung des Geräts auf eine andere als die bisher verwendete Gas- oder Druckart müssen die Angaben der neuen Einstellung am selben Ort und an der gleichen Stellung wie zuvor angebracht werden, so dass der neue Gerätezustand eindeutig gekennzeichnet ist und Verwechslungen ausgeschlossen werden. -
Page 55: Funktionsweise
Der Füllstand im Kessel sollte regelmäßig kontrolliert werden. Ein nicht ausreichendes Füllen kann zu einer zu hohen Temperatur führen und somit eine Überhitzung des Geräts auslösen. Die Behälter der Marmiten haben mehrere Marken von Füllständen. G-900-Marmiten beträgt jede Markierung zwischen vorgeschlagenen Mindestlevel (niedrigste Stufe) und dem Maximum (höchste Stufe) 50L. -
Page 56: Ausschalten Der Brenner
Gerätebereitschaft zum Zünden des Pilotbrenners P angezeigt wird (siehe die vorherige Abbildung). Danach das zum Elektroventil gehörende Bedienelement M drücken und gleichzeitig entgegen dem Uhrzeigersinn in die Stellung für den Pilotbrenner drehen. Das Bedienelement in dieser Stellung so lange gedrückt halten, bis der Pilotbrenner dauerhaft brennt (ungefähr 20 Sekunden). -
Page 57: Nützliche Ratschläge Und Tipps
Den Kessel zum Abschluss gründlich trocknen. 5.3.2 Wartung FAGOR INDUSTRIAL rät dazu, einen autorisierten Fachtechniker einmal pro Jahr alle Funktionsbauteile des Kochkessels gründlich überprüfen zu lassen, um den Zustand aller Bauteile und die ordnungsgemäße Funktionsweise des Gerätes sicherzustellen. Diese Inspektion muss... -
Page 58: Störungen Und Alarme
6. STÖRUNGEN UND ALARME Bei Auftreten von Störungen oder Funktionsfehlern befolgen Sie bitte die folgenden Schritte. Die folgende Tabelle enthält die möglichen Ursachen und Behebungsmaßnahmen. Wenden Sie sich bitte bei Zweifeln an Ihren zuständigen Kundendienst. Gleiches gilt, wenn Sie den Fehler nicht selbst beseitigen können. Nehmen Sie auf keinen Fall Eingriffe an den elektrischen Komponenten vor. -
Page 59: Indice
1. INDICE INDICE ..............................59 INFORMAZIONI E AVVERTENZE GENERALI ..................60 DATI PRODOTTO ........................... 60 ISTRUZIONI PER L’INSTALLAZIONE ....................62 4.1 Disimballaggio ............................62 4.2 Posizionamento e livellamento ........................ 62 4.3 Montaggio delle attrezzatura in blocchi ....................62 4.4 Connessione elettrica ..........................63 4.5 Allacciamento del gas .......................... -
Page 60: Informazioni E Avvertenze Generali
2. INFORMAZIONI E AVVERTENZE GENERALI Il presente manuale è stato redatto per favorire la comprensione del funzionamento, l'installazione e la manutenzione della macchina. Il manuale contiene tutte le informazioni e le avvertenze necessarie per la corretta installazione e l'uso dell'apparecchio, così come le informazioni sulle sue caratteristiche e le possibilità, per sfruttare tutto il potenziale a sua disposizione. - Page 61 TARGHETTA DELLE CARATTERISTICHE NOME DELL'APPARECCHIO RIFERIMENTO DEL PRODOTTO NUMERO DI SERIE+DATA DI COSTRUZIONE CARATTERISTICHE ELETTRICHE CARATTERISTICHE GAS NUMERO DI PRATICA DELLA CERTIFICAZIONE Menzionare le caratteristiche elencate quando viene contattato il servizio tecnico. DESCRIZIONE GENERALE DELL'APPARECCHIO 1. Cappa 2. Coperchio marmitta 3.
-
Page 62: Istruzioni Per L'installazione
Quando la pressione nella camera del bagnomaria non supera i 0,5 bar, consente l'uscita del vapore verso l'esterno. 4. ISTRUZIONI PER L’INSTALLAZIONE L'ubicazione e l'installazione, nonché le riparazioni o modifiche devono sempre essere effettuate da un TECNICO AUTORIZZATO, sulla base della normativa in vigore in ogni paese. -
Page 63: Connessione Elettrica
• Mettere del nastro adesivo sui bordi dei ripiani da accoppiare. • Mettere del materiale sigillante per uso alimentare sui lati da accoppiare. • Mettere insieme le macchine. • Collegare le macchine con le viti e i bulloni sia sulla parte posteriore (linguette) che sulla quella anteriore (fori sui pannelli laterali ai i quali si accede quando vengono smontati i pannelli) (vedere l'immagine). -
Page 64: Allacciamento Del Gas
tubo flessibile di alimentazione elettrica al premitreccia. La mancata osservanza delle specifiche del costruttore o un'installazione non corretta, lo esonera da qualsiasi responsabilità di eventuali danni personali o materiali della macchina. 4.5 Allacciamento del gas La connessione a gas dell’apparecchio deve essere realizzata sempre da un TECNICO AUTORIZZATO. -
Page 65: Allacciamento Dell'acqua
4.7 Allacciamento dell’acqua L’installazione generale dovrà essere fornita di un rubinetto d’intercettazione. La presa dell'acqua vengono illustrate nella sezione "Dimensioni generali e connessioni" dalla lettera A. Si consiglia di inserire la pressione dell'acqua fra 2 e 4 bar e la temperatura massima a 60ºC. Le prese di ingresso dell'acqua degli apparecchi sono di 3/4”. -
Page 66: Descrizione Dei Comandi
• Nei bollitori, per ottenere il riscaldamento ottimale del serbatoio, si consiglia di pulire la camera del bagnomaria durante il primo utilizzo della macchina. Per fare questo, premere la valvola di pressione sul piano di cottura del bollitore fino a quando tutta l'aria nella camera viene evacuata. Per un buon funzionamento dei bruciatori, è... -
Page 67: Spegnimento Dei Bruciatori
Per togliere il coperchio si devono spegnere prima i bruciatori. Quando il vapore smette di uscire, allentare e muovere i manici. 5.3 Consigli utili FAGOR consiglia di leggere attentamente i consigli utili descritti qui di seguito per sfruttare tutto il potenziale della pentola. -
Page 68: Pulizia Iniziale
Infine, asciugare la vasca. 5.3.2 Manutenzione FAGOR INDUSTRIAL raccomanda di realizzare almeno una volta l'anno, la revisione dei componenti funzionali della pentola per verificare il loro stato e il buon funzionamento dell'apparecchio. Tale revisione deve essere eseguita dal SERVIZIO TECNICO UFFICIALE E/O AUTORIZZATO. -
Page 69: Riciclaggio Del Prodotto
Non manipolare i componenti elettrici, poiché esiste il pericolo di morte per trovarsi sotto tensione. Problema Causa Soluzione Perdita occasionale del gas a causa Chiudere il rubinetto di alimentazione Odore a gas dello spegnimento della fiamma. del gas e arieggiare il locale. Accendere manualmente la pentola. -
Page 70: İndeks
1. İNDEKS İNDEKS ..............................70 GENEL BİLGİ VE UYARILAR........................71 ÜRÜN BİLGİLERİ ............................ 71 KURULUM TALİMATLARI ........................73 4.1 Ambalajın çıkarılması ..........................73 4.2 Yerleştirme ve yüksekliğin ayarlaması ....................73 4.3 Blok halindeki cihazın montajı ......................... 73 4.4 Elektrik bağlantısı ............................ 74 4.5 Gaz bağlantısı... -
Page 71: Genel Bi̇lgi̇ Ve Uyarilar
2. GENEL BİLGİ VE UYARILAR Bu kullanım kılavuzu makinanın işleyişi, kurulumu ve bakımını tam anlamıyla anlamayı sağlamak için oluşturulmuştur. Bu kılavuzda, cihazın doğru kurulumu ve kullanımı için gereki bilgi ve uyarıların yanında, cihazınızın tüm potansiyelinden yararlanabilmeniz adına cihazın sunduğu özellik ve olasılıklar hakkında bilgiler de yer almaktadır. - Page 72 ÖZELLİKLER PLAKASI CİHAZIN ADI CİHAZIN REFERANSI SERİ NUMARASI+ÜRETİM TARİHİ ELEKTRİKSEL ÖZELLİKLER GAZ ÖZELLİKLERİ SERTİFİKA NUMARASI Teknik servisle iletişime geçtiğinizde belirtilen özellikleri söyleyiniz. CİHAZIN GENEL TANIMI 1. Baca 2. Kapaklı güveç 3. Boşaltım 4. Düğme paneli 5. Gaz Girişi 6. Yükseklik ayarlı ayaklar GÜVENLİK CİHAZLARI •...
-
Page 73: Kurulum Tali̇matlari
4. KURULUM TALİMATLARI Yerleştirme ve kurulum, onarım ya da dönüştürme işlemleri her ülkede yürürlükte olan yasal düzenlemeler dikkate alınarak, her zaman YETKİLİ BİR TEKNİK uzman tarafından gerçekleştirilmelidir. Cihazın yanlış kurulumu, uygunsuz ayarı, servisi bakımı manipülasyonu, bozulmalar gibi maddi hasarlara neden olabilir. 4.1 Ambalajın çıkarılması... -
Page 74: Elektrik Bağlantısı
• Mühürleyici malzemenin fazlasını alın. • Yapışkan bandı çıkarın. • Kumanda paneli ve düğmeleri tekrar yerlerine yerleştirin. 4.4 Elektrik bağlantısı Cihazın elektrik bağlantısı her zaman YETKİLİ BİR TEKNİK eleman tarafından yapılmalıdır. Her ülkedeki elektrik ağına yapılacak bağlantılar konusunda yürürlükte olan yasal kurallar dikkate alınmalıdır. -
Page 75: Farklı Gazlara Dönüştürme
• Genel kurulum bir geçiş anahtarı ve basınç regülatörü ile gerçekleştirilmelidir ve aynı zamanda her bir tüketim aparatı için bir akım kesme anahtarının da konması önerilir. • Gaz bağlantısı için, güvece iliştirilmesi adına en az Ø12x10mm ve ¾” somun bitişten bir boru kullanılmalıdır. 4.6 Farklı... -
Page 76: Geri Dönüşüm
4.8 Geri dönüşüm Bu ambalaj şunlardan meydana gelmektedir: • Ahşap palet. • Karton köşe parçaları. • Polipropilen bağcık. • Plastik torba. Bu makinanın paketlenmesi için kullanılan tüm ambalajlar geri dönüşüme verilebilir, bu ürünlerin doğru şekilde atılması çevrenin korunmasına katkı sağlar. Bu ürünlerin geri dönüşümü hakkında daha fazla bilgi edinmek için ilgili yerel birim ile görüşün. -
Page 77: Düğmelerin Tanımı
Düğmelerin tanımı 5.2.1 Mr komut Ma komut Ocakların yakılması 5.2.2 • Pilot düğmenin yanması: Mr enerji regülatörü düğmesini 'maks.' pozisyonuna kadar saatin aksi yönünde çevirin .Bu sırada pilot düğmenin yanması için hazırlandığını belirten ''L1'' lambası yanar (bir önceki şekil). Sonrasında elektrovananın M düğmesine basın ve aynı anda pilot pozisyonuna kadar . -
Page 78: Bölmenin Su Ile Doldurulması (Benmarili Güveçlerde)
Son olarak kovayı kurulayın. Bakım 5.3.2 FAGOR INDUSTRIAL, cihazın durumunu ve iyi şekilde işlediğini kontrol etmek adına güvecin işlevsel parçalarının yılda en az bir kez revize edilmesini önerir. Bu revizyon, RESMİ VE/VEYA YETKİLİ BİR TEKNİK SERVİS tarafından yapılmalıdır. Hem makinanın hem de kullanıcının güvenliğini etkileyebilecek herhangi bir işlevsel parçanın değiştirilmesi, uygun orijinal yedek parçalar kullanılarak RESMİ... -
Page 79: Anormal Durumlar, Alarmlar Ve Arizalar
• Gaz girişi musluğunu kapatın. • Makinayı ve birleşme alanlarını iyi bir şekilde temizleyin. • Paslanmaz çelikten olan yüzeylere ve kovaya ince bir kat yemeklik yağ sürün. • Genel elektrik şalterini kapatın. 6. ANORMAL DURUMLAR, ALARMLAR VE ARIZALAR Aşağıda herhangi bir anormal durum ya da işleyiş hatası olması halinde izlenecek adımlar gösterilmektedir. Aşağıdaki tabloda olası... -
Page 80: Spis Treści
1. SPIS TREŚCI. SPIS TREŚCI............................80 INFORMACJE I OSTRZEŻENIA......................81 DETALE PRODUKTU..........................82 INSTRUKCJA INSTALACJI........................83 4.1 Usunięcie opakowania..........................83 4.2 Pozycjonowanie i poziomowanie......................83 4.3 Montaż urządzeń w blokach........................84 4.4 Podłączenie elektryczne.......................... 84 4.5 Podłączenie gazowe. -
Page 81: Informacje I Ostrzeżenia
2. INFORMACJE I OSTRZEŻENIA. Podręcznik ten został stworzony w celu ułatwienia pełnego zrozumienia działania, montażu i konserwacji maszyny. Zostały tu zawarte informacje i ostrzeżenia konieczne do prawidłowego montażu i użytkowania urządzenia, a także informacje na temat funkcji i możliwości, dzięki czemu można w pełni wykorzystać dostępny potencjał... -
Page 82: Detale Produktu
3. DETALE PRODUKTU. Maszyna, którą właśnie kupiłeś, jest urzadzeniem przemysłowym z misa uchylną, stosowanym w sektorze hotelarskim i gastronomicznym. Jako produkt przemysłowy charakteryzuje się wysoką pojemnością misy. Wszystkie urządzenia posiadają tabliczkę znamionową, która identyfikuje urządzenie i wskazuje jego charakterystykę techniczną. Znajduje się ona na frontowym panelu. Nigdy nie usuwaj tabliczki z urzadzenia i dbaj aby nie uległa zniszczeniu. -
Page 83: Instrukcja Instalacji
URZADZENIA BEZPIECZEŃSTWA. Termostat bezpieczeństwa. Modele z płaszczem wodnym wyposażone są w termostat bezpieczeństwa, który jest aktywny, gdy temperatura przekracza określoną wartość, odłączając zasilanie gazem. Przełącznik ogranicznika musi zostać załączony przez autoryzowanego technika, po zdjęciu panelu przedniego i naciśnięciu czerwonego przycisku na termostacie bezpieczeństwa. •... -
Page 84: Montaż Urządzeń W Blokach
4.3 Montaż urządzeń w blokach. Aby zmontować urządzenie w połączonych blokach, postępuj w następujący sposób: • Usunąć panel frontowy z elementami sterującymi. • Zdemontuj kominek. • Umieścić taśmę klejącą wokół krawędzi blatu roboczego, który ma być połączone. • Nałożyć szczeliwo odpowiednie do użycia w strefach kontaktu z żywnością na bokach, które mają... -
Page 85: Podłączenie Gazowe
4.5 Podłączenie gazowe. Podłączenie gazowe musi zawsze wykonać AUTORYZOWANY TECHNIK posiadajacy odpowiednie uprawnienia. • Instalacja ogólna musi być wyposażona w główny zawór zasilający i regulator ciśnienia, a także zaleca się zainstalowanie zaworów odcinających na każdym urządzeniu. • Do połączenia gazowego należy zastosować rurę o średnicy co najmniej Ø 12 x 10 mm wraz z nakrętką... -
Page 86: Podłączenie Wody
4. Po przystosowaniu urządzenia do innego rodzaju gazu lub innego ciśnienia, innego niż ten, dla którego został wcześniej ustawiony, stare instrukcje należy zastąpić instrukcjami dotyczącymi nowych ustawień, aby umożliwić jednoznaczną identyfikację stanu Po modyfikacji. 4.7 Podłączenie wody. Instalacja wodna ogólna musi być wyposażona w zawór odcinający. Wlot wody jest określony w sekcji "Ogólne wymiary i połączenia"... -
Page 87: Obsługa
ostrożność. Jedzenie może być gorące i istnieje ryzyko poparzenia. Nigdy nie uruchamiaj urządzenia, gdy nie ma odpowiedniego poziomu wody wewnątrz kotła i w płaszczu wodnym. Monitoruj poziom napełnienia zbiornika. Niewystarczające wypełnienie może spowodować nadmierny wzrost temperatury, powodując przegrzanie urządzenia. Minimalne napełnienie wnętrza kotła musi wynosić... -
Page 88: Wyłączenie Palników Głównych
Obrócić sterowania energią Mr w kierunku przeciwnym do ruchu wskazówek zegara do pozycji "max". Kontrolka "L1" zapali się, wskazując, że pilot jest gotowy do zapalenia (rysunek powyzej). Następnie naciśnij pokrętło zaworu elektromagnetycznego Mv, obracając go w lewo do . Przytrzymaj wciśniete pokretło w tej pozycji, dopóki płomień pilota nie pozycji pilota zapali się... -
Page 89: Przydatne Wskazówki
5.3.2 Konserwacja. Firma FAGOR INDUSTRIAL zaleca co najmniej raz w roku wykonanie przegladu wszystkich elementów roboczych urządzenia, aby sprawdzić ich stan i prawidłowe działanie. Usługa ta musi być przeprowadzona przez AUTORYZOWANEGO TECHNIKA SERWISU. Wymiana dowolnego elementu funkcjonalnego, który może mieć wpływ na bezpieczeństwo urządzenia lub użytkownika, musi być... -
Page 90: Przy Dłuższym Nie Używaniu
Ważne: Każde urządzenie gazowe bezwzględnie musi zostać poddane corocznej odpłatnej kontroli szczelności i niezawodności działania. Gwarant ma prawo zażądać przedstawienia faktury lub protokołu z wykonania w/w czynności przez osobę z odpowiednimi uprawnieniami. (autoryzowany serwis) pod rygorem utraty gwarancji. Przy dłuższym nie używaniu. 5.3.3 Jeśli maszyna jest przez dłuższy czas wyłączona z pracy (święta, tymczasowe zamknięcie, ...), należy przestrzegać...
Need help?
Do you have a question about the Kore 900 Series and is the answer not in the manual?
Questions and answers