Table of Contents
Advertisement
Quick Links
A V T E C H
E L E C T R O S Y S T E M S
L T D .
N A N O S E C O N D
W A V E F O R M
E L E C T R O N I C S
S I N C E
1 9 7 5
info@avtechpulse.com
Tel: 888-670-8729 (USA & Canada)
BOX 5120, LCD MERIVALE
http://www.avtechpulse.com/
or +1-613-686-6675 (Worldwide)
OTTAWA, CANADA K2C3H5
INSTRUCTIONS
MODEL AVR-EBF6-B
UP TO +1 Amp
FORWARD RECOVERY
t
/ V
MEASUREMENT SYSTEM
FR
FR
WITH IEEE 488.2 / RS-232 / ETHERNET CONTROL
SERIAL NUMBER:
14260
Advertisement
Table of Contents

Related Manuals for Avtech AVR-EBF6-B


Summary of Contents for Avtech AVR-EBF6-B
- Page 1 1 9 7 5 info@avtechpulse.com Tel: 888-670-8729 (USA & Canada) BOX 5120, LCD MERIVALE http://www.avtechpulse.com/ or +1-613-686-6675 (Worldwide) OTTAWA, CANADA K2C3H5 INSTRUCTIONS MODEL AVR-EBF6-B UP TO +1 Amp FORWARD RECOVERY MEASUREMENT SYSTEM WITH IEEE 488.2 / RS-232 / ETHERNET CONTROL SERIAL NUMBER: 14260...
-
Page 2: Warranty
Avtech product is found to be defective, Avtech shall at its option repair or replace said defective item. This warranty does not apply to units which have been dissembled, modified or subjected to conditions exceeding the applicable specifications or ratings. -
Page 3: Table Of Contents
TABLE OF CONTENTS WARRANTY........................2 TECHNICAL SUPPORT....................2 TABLE OF CONTENTS....................3 INTRODUCTION......................6 SPECIFICATIONS......................8 SPECIFICATIONS – INCLUDED TEST JIGS..............9 REGULATORY NOTES....................10 FCC PART 18........................10 EC DECLARATION OF CONFORMITY................10 DIRECTIVE 2011/65/EU (RoHS)...................11 DIRECTIVE 2002/96/EC (WEEE)..................11 FIRMWARE LICENSING.......................12 INSTALLATION......................13 VISUAL CHECK........................13 POWER RATINGS........................ - Page 4 PCB 235D - HIGH VOLTAGE DC POWER SUPPLY............47 PCB 104H - KEYPAD / DISPLAY BOARD................48 PCB 201C - INTERLOCK CONTROL...................49 MAIN WIRING........................50 TEST JIG WIRING (AVX-TFR-MIX)..................51 TEST JIG WIRING (AVX-TFR-SOD123W)................52 TEST JIG WIRING (AVX-TFR-SOD128)................53 PERFORMANCE CHECK SHEET................54 Manual Reference: /fileserver2/officefiles/instructword/avr-eb/avr-ebf6-b/AVR-EBF6-B,ed10.odt.
- Page 5 Last modified July 28, 2022. Copyright © 2022 Avtech Electrosystems Ltd, All Rights Reserved.
-
Page 6: Introduction
, and provides increased accuracy. Standard AVR-EBF6-B models include one AVX-TFR-MIX diode test jig. This standard test jig contains a variety of pin sockets and posts, which may be used to hold the diode device under test (DUT). The test jig has a hinged lid, which must be fully closed to protect the user from high voltages. - Page 7 While the provided test jig is intended to be flexible and easy to use, users can also develop their own test jigs easily. The AVR-EBF6-B includes an internal trigger source, but it can also be triggered or gated by an external source. A front-panel pushbutton can also be used to trigger the instrument.
-
Page 8: Specifications
ISO/IEC 17025:2005 accredited calibration laboratory. However, Avtech itself does not claim any accreditation. For applications requiring traceable performance, use a calibrated measurement system rather than relying on the accuracy of the pulse generator settings. -
Page 9: Specifications - Included Test Jigs
Type G (D-5C) packages, although the fit is less optimal. -STUD AVX-TFR-STUD TBD, 1A Stud jig. Accepts DO-4 and DO-5 stud packages. NOTE: All of the above jigs are suitable for light research and development use. Consult Avtech (info@avtechpulse.com) regarding the suitability of particular jigs for heavy production use. -
Page 10: Regulatory Notes
If interference is observed, check that appropriate well-shielded cabling is used on the output connectors. Contact Avtech (info@avtechpulse.com) for advice if you are unsure of the most appropriate cabling. Also, check that your load is adequately shielded. It may be necessary to enclose the load in a metal enclosure. -
Page 11: Directive 2011/65/Eu (Rohs)
< 1000 ppm (0.1% by mass) DIRECTIVE 2002/96/EC (WEEE) European customers who have purchased this equipment directly from Avtech will have completed a “WEEE Responsibility Agreement” form, accepting responsibility for WEEE compliance (as mandated in Directive 2002/96/EC of the European Union and local... -
Page 12: Firmware Licensing
Article 9 of Directive 2002/96/EC. Customers who have purchased Avtech equipment through local representatives should consult with the representative to determine who has responsibility for WEEE compliance. Normally, such responsibilities with lie with the representative, unless other arrangements (under Article 9) have been made. -
Page 13: Installation
INSTALLATION VISUAL CHECK After unpacking the instrument, examine to ensure that it has not been damaged in shipment. Visually inspect all connectors, knobs, liquid crystal displays (LCDs), and the handles. If the instrument has been damaged, file a claim immediately with the company that transported the instrument. -
Page 14: Protection From Electric Shock
Warning: Failure to use a grounded outlet may result in injury or death due to electric shock. This product uses a power cord with a ground connection. It must be connected to a properly grounded outlet. The instrument chassis is connected to the ground wire in the power cord. -
Page 15: Environmental Conditions
5. Do not attempt any repairs on the instrument, beyond the fuse replacement procedures described in this manual. Contact Avtech technical support (see page 2 for contact information) if the instrument requires servicing. Service is to be performed solely by qualified service personnel. -
Page 16: Fuses
FUSES This instrument contains four fuses. All are accessible from the rear-panel. Two protect the AC prime power input, and two protect the internal DC power supplies. The locations of the fuses on the rear panel are shown in the figure below: Fuses #1 and #2 Fuse #4 Fuse #3... -
Page 17: Dc Fuse Replacement
DC FUSE REPLACEMENT The DC fuses may be replaced by inserting the tip of a flat-head screwdriver into the fuse holder slot, and rotating the slot counter-clockwise. The fuse and its carrier will then pop out. FUSE RATINGS The following table lists the required fuses: Recommended Replacement Part Nominal Fuses... -
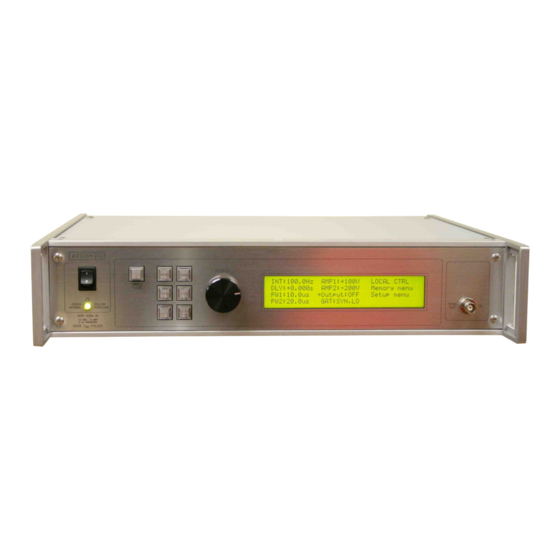
Page 18: Front Panel Controls
FRONT PANEL CONTROLS 1. POWER Switch . This is the main power switch. When turning the instrument on, there is normally a delay of 10 seconds before anything is shown on the main display, as the internal operating system boots up. 2. - Page 19 5. KEYPAD . Control Name Function MOVE This moves the arrow pointer on the display. CHANGE This is used to enter the submenu, or to select the operating mode, pointed to by the arrow pointer. ×10 If one of the adjustable numeric parameters is displayed, this increases the setting by a factor of ten.
-
Page 20: Rear Panel Controls
REAR PANEL CONTROLS GATE TRIG RS-232 CONTROL GPIB Note: some connectors may be in different positions than shown above, depending on the exact combination of options ordered. 1. AC POWER INPUT . An IEC-320 C14 three-pronged recessed male socket is provided on the back panel for AC power connection to the instrument. - Page 21 Ohm terminator is suggested for this purpose.) 6. GPIB Connector . A standard GPIB cable can be attached to this connector to allow the instrument to be computer-controlled. See the “Programming Manual for -B Instruments” for more details on GPIB control. 7.
-
Page 22: Timing Control
TIMING CONTROL BASIC TIMING CONTROL This instrument can be triggered by its own internal clock or by an external TTL trigger signal. In either case, two output channels respond to the trigger: OUT and SYNC. The OUT channel is the signal that is applied to the load. Its amplitude and pulse width are variable. -
Page 23: Trigger Modes
> 50 ns TRIG TTL LEVELS (external input) (0V and 3V-5V) PROPAGATION DELAY (FIXED) 100 ns, FIXED SYNC OUT 3V, FIXED DELAY > 0 PULSE WIDTH AMPLITUDE, VARIABLE MAIN OUTPUT Figure C As before, if the delay is negative, the order of the SYNC and OUT pulses is reversed. TRIGGER MODES This instrument has four trigger modes: ... - Page 24 will complete the full pulse width if the output is high, and then stop triggering. Pulses are not truncated.
-
Page 25: Basic Amplitude Control
BASIC AMPLITUDE CONTROL The basic test arrangement for the AVR-EBF6-B is shown in the figure below: VOLTAGE PULSE INPUT (V DIODE VOLTAGE (V +50V max. 0.7 V typ. 8, 10, 12, or 20 ns (10%-90%) AVX-FILT rise time filter / 10... -
Page 26: Setting The Amplitude Levels
The SYNC output of the mainframe should be used to trigger the oscilloscope. A 50 Ohm resistance (R in the diagram above) must be connected to ground on the output. This can be a discrete resistor, a feed-through terminator, or the input impedance of an oscilloscope (the latter method is shown in the diagram). -
Page 27: Incorrect Orientation
can be measured directly on the test jig (with the test jig disconnected) to determine calibrated relationships, if desired. R is provided by the user, and can be calibrated as required. INCORRECT ORIENTATION The instrument and the DUT will not be damaged if the diode is installed with the incorrect orientation (i.e., with the anode and cathode reversed). -
Page 28: Basic Measurement Theory
BASIC MEASUREMENT THEORY The basic procedure for measuring the forward recovery voltage and time is described in method 4026.3 of MIL-STD-750E. The user should familiarize themselves with this method before using this instrument. The basic parameters are shown in Figure 4026-1 of MIL-STD-750E, reproduced in part here: “Waveform B”... - Page 29 since 0.1 I actually occurs slightly after 0.1 V . This will slightly increase the measured value. If you prefer to not use this approximation, you will need to use the math functions of your oscilloscope to identify 0.1 (V –...
-
Page 30: Test Jig Mechanical Aspects
TEST JIG MECHANICAL ASPECTS ALL TEST JIGS The IN, MON, OUT, and CONTROL connectors are on the rear of the jig, below the hinges: AVX-TFR-MIX TEST JIG One AVX-TFR-MIX test jig is normally supplied with the mainframe, unless the customer has requested a different or additional test jigs. The AVX-TFR-MIX test jig accepts a range of through-hole and axial devices, using pin sockets and spring-loaded pins. - Page 31 Lid Closure Safety Sensors N/C Pins Anode (no connection) Pins Cathode Pins N/C Pins (no connection) The instrument and the DUT will not be damaged if the diode is installed with the incorrect orientation (i.e., with the anode and cathode reversed). However, incorrect waveforms will be generated.
- Page 32 This socket and spring For TO-3 packages pin provide mechanical with Case = Anode support only. They are not electrically active. This spring pin must contact the underside of the case. It provides the anode connection. The cathode pin of interest must be inserted into this socket.
-
Page 33: Specialty Test Jigs
SPECIALTY TEST JIGS AVX-TFR-SOD123W The AVX-TFR-SOD123W test jig will accept SOD123W packages. To install a DUT, open the main (black) lid like this: Raise the green lever on the left. This will raise the nylon screw over the DUT area on the right:... - Page 34 Using tweezers, position a DUT in the cavity of the raised circuit boards. Slots are provided for tweezer access. The DUT will rest on two spring pins, one contacting each DUT pad: The cathode should be on the right. The anode should be on the left. Lower the green lever on the left.
-
Page 35: Avx-Tfr-Sod128
It is possible to use a screwdriver to adjust the positioning of the nylon screw. This will vary the maximum mechanical pressure applied to the DUT. The lever should snap into place when fully down, with a firm locking effect. It may be necessary to occasionally adjust this screw. -
Page 36: Typical Results
TYPICAL RESULTS Obtaining meaningful results with the AVR-EBF6-B requires care, experience, and an understanding of diode transient behavior and the impact of inductive and capacitive parasitics. To assist the user, typical results are provided below. The user should be able to reliably duplicate these results. - Page 37 Top – Test jig MON output (V /10, +25.7V, with ~ 10 ns rise time). 1 V/div, 10 ns/div. Bottom – Test jig main output (V /10). 50 mV/div, 10 ns/div. Top – Test jig MON output (V /10, +25.7V, with ~ 12 ns rise time). 1 V/div, 10 ns/div. Bottom –...
-
Page 38: Mq1N5811Us Results
Filter Used 8 ns 1.489 V 0.70 V 15.28 ns 10 ns 1.355 V 0.70 V 16.55 ns 12 ns 1.257 V 0.70 V 20.61 ns MQ1N5811US RESULTS The Microsemi MQ1N5811US was tested with the amplitude set to +25.7V (such that the forward current I = 500 mA), using an 8 ns rise time filter and the AVX-TFR-MELF test jig. -
Page 39: Troubleshooting
TROUBLESHOOTING If you obtain “strange” output waveforms, or unexpected values of t , keep these points in mind: 1) The test jig output must be terminated with 50 Ohms. 2) Keep device lead lengths as short as possible, to minimize parasitic inductance. 3) The test jig lid must be closed, or the pulser output will be disabled. -
Page 40: Programming Your Pulse Generator
PROGRAMMING YOUR PULSE GENERATOR KEY PROGRAMMING COMMANDS The “Programming Manual for -B Instruments” describes in detail how to connect the pulse generator to your computer, and the programming commands themselves. A large number of commands are available; however, normally you will only need a few of these. -
Page 41: All Programming Commands
ALL PROGRAMMING COMMANDS For more advanced programmers, a complete list of the available commands is given below. These commands are described in detail in the “Programming Manual for -B Instruments”. (Note: this manual also includes some commands that are not implemented in this instrument. - Page 42 *ESR? [query only] *IDN? [query only] *OPC *SAV 0 | 1 | 2 | 3 [no query form] *RCL 0 | 1 | 2 | 3 [no query form] *RST [no query form] *SRE <numeric value> *STB? [query only] *TST? [query only] *WAI [no query form]...
-
Page 43: Mechanical Information
There are no user-adjustable internal circuits. For repairs other than fuse replacement, please contact Avtech (info@avtechpulse.com) to arrange for the instrument to be returned to the factory for repair. Service is to be performed solely by qualified service personnel. -
Page 44: Maintenance
MAINTENANCE REGULAR MAINTENANCE This instrument does not require any regular maintenance. On occasion, one or more of the four rear-panel fuses may require replacement. All fuses can be accessed from the rear panel. See the “FUSES” section for details. CLEANING If desired, the interior of the instrument may be cleaned using compressed air to dislodge any accumulated dust. -
Page 45: Wiring Diagrams
M a ins circuits - ha z ard ou s live . Do not attem pt any repairs on this instrument bey ond the fuse replacement procedures described in the m anual. Contact Avtech if the instrument A3 - BLACK requires serv icing. Serv ice is to be performed WARNING solely by qualified service personnel. -
Page 46: Pcb 158R4 - Low Voltage Power Supply
PCB 158R4 - LOW VOLTAGE POWER SUPPLY... -
Page 47: Pcb 235D - High Voltage Dc Power Supply
PCB 235D - HIGH VOLTAGE DC POWER SUPPLY... -
Page 48: Pcb 104H - Keypad / Display Board
PCB 104H - KEYPAD / DISPLAY BOARD... -
Page 49: Pcb 201C - Interlock Control
PCB 201C - INTERLOCK CONTROL... -
Page 50: Main Wiring
MAIN WIRING... -
Page 51: Test Jig Wiring (Avx-Tfr-Mix)
TEST JIG WIRING (AVX-TFR-MIX) K E Y P A D 1 S W 1 D B 9 P IN 1 S W 1 D B 9 P IN 6 R E F L - C D B 9 P IN 2 R E F L - E D B 9 P IN 7 N /C... -
Page 52: Test Jig Wiring (Avx-Tfr-Sod123W)
TEST JIG WIRING (AVX-TFR-SOD123W) -
Page 53: Test Jig Wiring (Avx-Tfr-Sod128)
TEST JIG WIRING (AVX-TFR-SOD128) -
Page 54: Performance Check Sheet
PERFORMANCE CHECK SHEET...
Need help?
Do you have a question about the AVR-EBF6-B and is the answer not in the manual?
Questions and answers