
Related Manuals for Avtech room alert 32e/w


Summary of Contents for Avtech room alert 32e/w
- Page 1 Alert Room ® Temperature & Environment Monitoring... Made Easy! Phone 401.628.1600 User’s Guide & 401.628.1601 Reference Manual AVTECH.com AVT-150401-06...
- Page 2 Analog Power & Temp Sensors Main / UPS Power Air Flow, Sound, Light Switch Sensors Flood / Water Motion, Room Entry Dry Contacts Current Loops (Amperage) Panic Button, Security Low Voltage Sensors AVTECH Software, Inc. Sales 888.220.6700 Store EnvironmentMonitor.com Web AVTECH.com...
- Page 3 On behalf of the entire team at AVTECH, we say, “Thank You!” It is our privilege to serve you, our valued customer.
- Page 4 All Rights Reserved. No part of this book may be used or reproduced for commercial benefi t in any form or by any means, or stored in a database or retrieval system, without prior written permission of AVTECH Software Inc., except in the case of brief quotations embodied in articles and reviews.
-
Page 5: Table Of Contents
How To Use Room Alert 32E’s Web Interface ................12 Status ............................12 Current Sensor Status Bar ....................13 Sensor Display Area ......................14 Settings .............................15 Network..........................16 SMTP Email........................19 Simple Network Management Protocol (SNMP) ..............21 Sensors ..........................24 Alarm Options ........................33 WiSH Sensors ........................37 WiSH Options ........................41 Security ..........................43 AVTECH Software, Inc. - Page 6 About............................50 Updating & Troubleshooting Your Room Alert 32E ..............51 How To Download Firmware & Software Updates From AVTECH.com ......51 How To Update Room Alert 32E’s Firmware .................51 How To Discover Room Alert 32E When Your Network Blocks UDP Broadcasts ....52 How To Reset Room Alert 32E To Factory Defaults ..............52...
-
Page 7: Introduction To Room Alert 32E
Configure, monitor and operate Room Alert 32E with its easy-to-use built-in web interface. Significantly expand its functionality with AVTECH’s Device ManageR, the powerful software bundled FREE with all Room Alert monitors. Have the flexibility to monitor with any SNMP-enabled 3 -party monitoring application. -
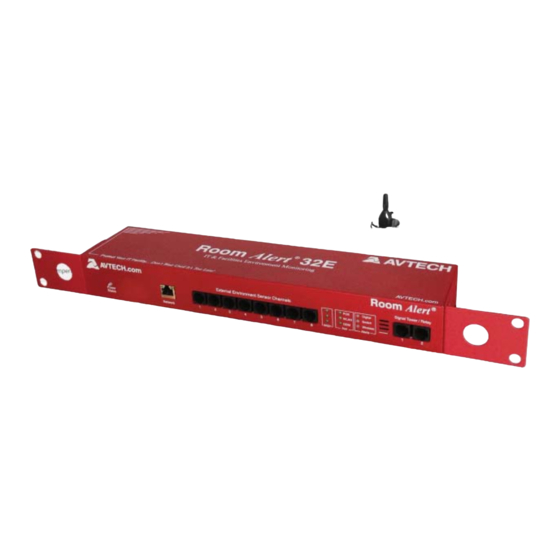
Page 8: Room Alert 32E/32W Package Contents
Ethernet Digital PoE, WLAN Light Tower & Port Ports & GSM Relay Adapter LEDs Ports Wireless Coaxial Port (RA32W only) Back Relay Analog Switch Reset Power Output Input Sensor Button Port Ports Ports Ports On/Off (16) Button AVTECH Software, Inc. -
Page 9: Front
An RJ-45 PoE-enabled port connects Room Alert 32E to your network via an RJ-45 network cable. Digital Sensor Ports Eight (8) standard RJ-11 jacks connect any AVTECH digital sensor to your Room Alert 32E via a standard RJ-11 (straight through) telephone cord. -
Page 10: Back
Two (2) set of contacts connect any low-voltage analog sensor to your Room Alert 32E via standard speaker wire. Coaxial Port (Wireless Model Only) A coaxial jack connects your Room Alert 32W to the included wireless antenna via the antenna’s built-in coaxial cable. AVTECH Software, Inc. - Page 11 Room Alert 32E Switch Sensors Sixteen (16) sets of dry contacts connect Room Alert 32E to any AVTECH switch sensor or dry contact on a device (e.g., HVAC, generator, pump, fan, etc.) via standard speaker wire or low-voltage 2-wire cable.
-
Page 12: How To Install Your Room Alert 32E
Connect the other end to a network jack. Front B. Then Connect To A Power Source Plug one end of AVTECH’s International Power Adapter into the Room Alert 32E’s power port. Plug the other end into a surge-protected power source. -
Page 13: Step 2: Open And View Your Room Alert 32E In Your Web Browser
Enter your Room Alert 32E’s IP address in your web browser’s address bar to access the interface. With Device ManageR For Advanced Functionality Download and install AVTECH’s Device ManageR via your customer account at AVTECH.com/Downloads. Launch it in your web browser at http://localhost:8080. -
Page 14: Step 3: Install Additional Components
Leads Room Alert 32W Model Only AVTECH’s wireless model, the Room Alert 32W, comes with the external sensors above, plus the External Antenna w/ 13' Cable & Magnetic Mount and a Wireless Sensor Hub (WiSH). External Antenna w/13' Cable &... -
Page 15: Connect Other Compatible Components
If you purchased additional components that are compatible, install them according to the Installation Notes included with them. NOTE Please refer to Status, Settings Alarm Options in this manual for instructions on viewing and configuring your external sensors. AVTECH Software, Inc. -
Page 16: How To Use Room Alert 32E's Web Interface
Your Room Alert 32E’s web interface has 4 tabs: Status Settings Help About Status To view your Room Alert 32E’s current sensor status, click Status in the navigation bar at the top of your screen. AVTECH Software, Inc. -
Page 17: Current Sensor Status Bar
To temporarily toggle the temperature scale between Fahrenheit (F) and Celsius (C), click Fahrenheit or Celsius. NOTE Refer to the Advanced section in this manual for instructions on setting the default status page refresh rate and temperature scale for Room Alert 32E. AVTECH Software, Inc. -
Page 18: Sensor Display Area
Wireless Sensors Room Alert 32W only NOTE Sensors connected to the Analog Input ports and Light Tower/Relay Switch ports do not appear in Status until you enable them in the Settings screen. Refer to Settings in this manual for instructions. AVTECH Software, Inc. -
Page 19: Settings
You’ll see a prompt for your username and password whenever you click Settings. If you have not set up a password for your Room Alert 32E, simply click without entering anything. AVTECH Software, Inc. -
Page 20: Network
You may now navigate to another screen; however, if you close the web interface before the next step, you will lose your changes. Save Settings 4. Click in the navigation bar to the left of your screen. Your Room Alert 32E will automatically reboot and commit your changes. AVTECH Software, Inc. - Page 21 Make sure that you do not use an IP address that is already assigned to another device. Also, set the IP address within your current subnet range; otherwise, you may not be able to discover your Room Alert 32E. AVTECH Software, Inc.
- Page 22 You may now navigate to another screen; however, if you close the web interface before the next step, you will lose your changes. Save Settings 5. Click in the navigation bar to the left of your screen. Your Room Alert 32E will automatically reboot and commit your changes. AVTECH Software, Inc.
-
Page 23: Smtp Email
Email Enabled. 1. Check Email Footer Enabled 2. Leave the checked to include AVTECH contact information with email messages. Use SMS 3. Check to send a shorter email with a reduced character count. 4. In “Mail Server Port,” enter your mail server’s SMTP port. The default is 25, a commonly-used port. - Page 24 SMTP relay messages. If you entered a domain name for the Mail Server Address, you may need to rename it to the IP address or assign a static IP setting and have a DNS server IP address set. AVTECH Software, Inc.
-
Page 25: Simple Network Management Protocol (Snmp)
Ensure that your application uses SNMPv1. Note that your Room Alert communicates with your SNMP monitoring application using the standard port for the SNMP protocol, 161. to open the “SNMP Settings” screen. Settings SNMP Navigate to AVTECH Software, Inc. - Page 26 You may now navigate to another screen; however, if you close the web interface before the next step, you will lose your changes. Save Settings 6. Click in the navigation bar to the left of your screen. Your Room Alert 32E will automatically reboot and commit your changes. AVTECH Software, Inc.
- Page 27 You may now navigate to another screen; however, if you close the web interface before the next step, you will lose your changes. Save Settings 4. Click in the navigation bar to the left of your screen. Your Room Alert 32E will automatically reboot and commit your changes. AVTECH Software, Inc.
-
Page 28: Sensors
Room Alert 32E in this screen. Your Room Alert 32E sends alerts based on these thresholds. NOTE For more information about AVTECH sensors and accessories, please refer to the Appendix at the back of this manual or visit the Sensors and Accessories sections of AVTECH.com. - Page 29 1. In “Sensor Label,” you may leave the default label, “Internal Sensor,” or rename it to something more descriptive, such as “Int Temp & Hum.” 2. The “Alarm On” field is set at the defaults of “Temperature (F)” and “Humidity (%RH).” AVTECH Software, Inc.
- Page 30 Sensors 2 and 3 are shown in their default state when those digital ports are unused. Sensors 4 through 8 are not shown. Notice that the web interface detects the type of digital sensor automatically and enters it in “Sensor Type.” AVTECH Software, Inc.
- Page 31 Relay Adapter Ports, you may leave the default, “Profile 1,” or choose another Alarm Profile from the drop-down menu. NOTE Configure Alarm Profiles in the Alarm Options screen of your web interface. Refer to the Alarm Options section in this manual for detailed instructions. AVTECH Software, Inc.
- Page 32 Analog Sensor Settings You may configure your 0-5 VDC analog sensor in these fields. In the example below, we are configuring AVTECH’s Current Loop. Work from right to left to configure the Analog Sensor. 1. In the set of fields on the right of the screen, click “Enable” to turn on the “Reference,”...
- Page 33 Profile from the drop-down menu. NOTE If you have a Light Tower or Relay Switch Sensor connected to your Room Alert, you may configure Alarm Profiles. Please refer to the Alarm Options section in this manual for further information. AVTECH Software, Inc.
- Page 34 Room Alert defaults to alarming on “Closed,” as you can see above; you may, however, need to change that depending on your sensor. AVTECH’s Motion Sensor, for example, is “Open” when it detects movement and “Closed” when it doesn’t; in that case, you’d likely want to configure the sensor to alarm on “Open”...
- Page 35 You may now navigate to another screen; however, if you close the web interface before the next step, you will lose your changes. Save Settings 5. Click in the navigation bar to the left of your screen. Your Room Alert 32E will automatically reboot and commit your changes. AVTECH Software, Inc.
- Page 36 32E will automatically reboot and commit your changes. Advanced Sensor Configuration You may configure your Room Alert to send an alert if any of the 8 external digital sensors are disconnected from the unit. This checkbox is blank by default. AVTECH Software, Inc.
-
Page 37: Alarm Options
Settings Alarm Options Navigate to to open the Alarm Options screen. Here you may configure devices connected through your 2 Light Tower & Relay Adapter ports and your Room Alert 32E’s 2 built-in relay output ports. AVTECH Software, Inc. - Page 38 Room Alert 32E via the Light Tower & Relay Adapter. A Light Tower & Relay Adapter gives you the option to add an AVTECH Light Tower, Light Tower w/Audio or Relay Switch Sensor. You may also connect a low-voltage device directly to the available relay port.
- Page 39 Light Tower & Relay Adapter). For our example, we’ve configured Profile 1 and Profile 2 out of the 5 available profiles. The alarm options available in the “Feature” column vary depending on the device you select. AVTECH Software, Inc.
- Page 40 Profile 2 with our external Room Entry sensor. Sensors. Settings 1. Navigate to 2. Find your sensor’s interface and choose the profile you’ve configured from the drop- down list in “Use Alarm Profile.” Note that the default for all sensors is Profile 1. AVTECH Software, Inc.
-
Page 41: Wish Sensors
Navigate to to access your wireless sensor hubs. A Wireless Sensor Hub (WiSH) is included with Room Alert 32W. AVTECH also offers a Wireless Sensor Hub & Powered Relay (WiSPR). Your web interface automatically detects WiSH and/or WiSPR hubs that are in range. Below you see the WiSH Sensor Settings screen at defaults and detecting a WiSH or WiSPR sensor. - Page 42 WiSH corresponds to what you’re seeing in the interface. Room Alert 32W can support up to 10 WiSH or WiSPR hubs at one time. This adds a capacity of 40 additional sensors. Visit the Sensors section of AVTECH.com to purchase additional WiSH or WiSPR hubs. AVTECH Software, Inc.
- Page 43 Room Alert 32E AVTECH – WiSH (Power) Sensor works with Room Alert 32W and 26W only. Do NOT leave powered when not in use. 123456789012 Serial # vX.X AVTECH.com * 401.628.1600 Reset This WiSH Sensor 5. Only click if you wish to clear your current WiSH settings and change them back to the defaults.
- Page 44 Repeat the steps above for each discovered WiSH. A maximum of ten WiSH or WiSPR hubs can be used with each Room Alert 32W monitor. Please see the next section, WiSH Options, for more configurable WiSH features. AVTECH Software, Inc.
-
Page 45: Wish Options
In this section, you may block your Room Alert 32W from communicating with some or all of your WiSH sensors. You may need this feature if you want only certain WiSHes recognized. 1. In “Enable WiSH Sensor Filter,” check the box to enable filtering. It is disabled (unchecked) by default. AVTECH Software, Inc. - Page 46 Your Room Alert 32W will automatically reboot and commit your changes. To unblock that WiSH, perform the same steps on it, moving it from the “Blocked WiSH Sensors” box back to the “Allowed WiSH Sensors box.” AVTECH Software, Inc.
-
Page 47: Security
If you forget your password, you can reset your Room Alert 32E settings to the factory defaults. Please see the How To Reset Room Alert 32E To Factory Defaults section of this manual for more information. There is no other alternative. AVTECH Software, Inc. -
Page 48: Advanced
You may configure a number of advanced options here, including Status screen defaults, Device ManageR “Push,” time & date, and trace output. to open the “Advanced Settings” screen. Settings Advanced Navigate to Status Page Configuration You may set defaults for the Status screen here. AVTECH Software, Inc. - Page 49 Device ManageR discovery interval. To enable Push to Device ManageR from your Room Alert 32E: 1. Select Enable Device ManageR Push. 2. In “Server IP Address,” enter the IP address of Device ManageR’s host system. AVTECH Software, Inc.
- Page 50 5. In “Time Server IP,” you may leave Room Alert’s default Network Time Protocol (NTP) server IP address, 198.82.1.201, or enter another time server IP address. 6. However, if you’d rather enter your NTP hostname, such as “time.nist.gov,” click Resolve hostname? AVTECH Software, Inc.
- Page 51 You may now navigate to another screen; however, if you close the web interface before the next step, you will lose your changes. Save Settings 9. Click in the navigation bar to the left of your screen. Your Room Alert 32E will automatically reboot and commit your changes. AVTECH Software, Inc.
- Page 52 Your Room Alert 32E will automatically reboot and commit your changes. You may then use any standard telnet or terminal application to view the trace on the configured port. AVTECH Software, Inc.
-
Page 53: Help
Click the tab to open the Room Alert 32E Help screen, which provides helpful links and contact information for AVTECH support resources. Day Month Year You may find the version number and release date of the firmware that is installed on your Room Alert 32E on this screen. -
Page 54: About
Click the tab to open the Room Alert 32E About screen, which provides helpful links and contact information for AVTECH sales and support resources. Day Month Year You may find the version number and release date of the firmware that is installed on your Room Alert 32E on this screen. -
Page 55: Updating & Troubleshooting Your Room Alert 32E
Software and firmware updates are available to licensed customers with current “Maintenance Support & Update Service” (MSUS). To download: 1. Go to AVTECH.com/Downloads, or click Downloads on the menu bar at the top of the screen at AVTECH.com. 2. In the Downloads page, enter the following user account information in the “Customer Access”... -
Page 56: How To Discover Room Alert 32E When Your Network Blocks Udp Broadcasts
If your network blocks UDP broadcast packets on port 30718, AVTECH’s Device ManageR might not be able to automatically locate the Room Alert 32E monitor. To manually discover your Room Alert 32E, use the Advanced Discovery option in AVTECH’s Device ManageR Application: 1. - Page 57 4. Your Room Alert 32E will automatically reboot and attempt to obtain an IP address via DHCP. 5. To automatically discover your Room Alert 32E on your network, open AVTECH’s Device ManageR. (If you don’t already have it installed, download it from your customer account at AVTECH.com/Downloads.)
-
Page 58: Introduction To Avtech's Device Manager
Automatically text or call contacts with alerts using a text, voice or GSM (satellite) modem. A license for Device ManageR is included FREE with the purchase of any AVTECH environment monitor. Download it now from your customer account at AVTECH.com/Downloads. - Page 59 Orders@AVTECH.com (Anytime) - Send your organization’s purchase order (PO), completed and scanned quote form or order instructions to AVTECH via email. We prefer to receive POs in PDF © Copyright 1988-2015 format although can accept Word and Excel formats if necessary. Other fi le formats are not accepted.
- Page 60 AVTECH.com Protect Your Facility... Don’t Wait Until It’s Too Late!
Need help?
Do you have a question about the room alert 32e/w and is the answer not in the manual?
Questions and answers