Table of Contents
Advertisement
Available languages
Available languages
Quick Links
Advertisement
Table of Contents

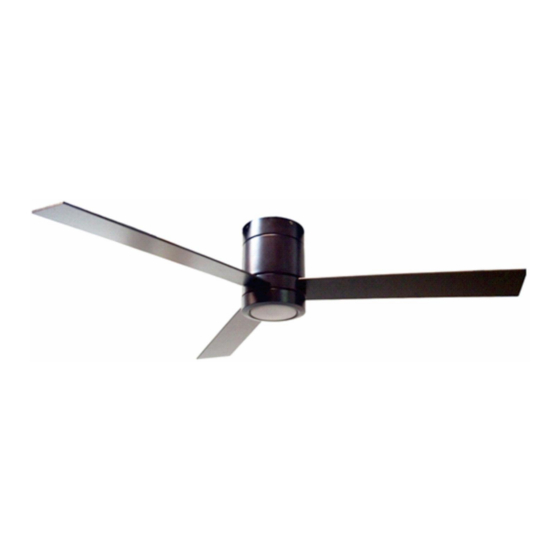
Related Manuals for HOMCOM B31-390V80


Summary of Contents for HOMCOM B31-390V80
- Page 2 1-Protection class I: The fitting has an earthing connection: The earth wire (yellow /green ) has to be connected to the clip marked with 2-This fitting should only be installed in rooms where direct contact with water is impossible. 3-Consumption in w, according to the speed of the motor. 4-May be operated with a remote control.
-
Page 3: Tools Required
IMPORTANT SAFETY PRECAUTIONS To ensure the success of installation, Be sure to read instructions and check parts for completeness before starting. NOTE: To reduce the risk of personal injury, only use the mounting kit provided with this ceiling fan. TOOLS REQUIRED Be sure to turn off the power before preparing for installation... -
Page 4: Preparing For Mounting
PREPARING FOR MOUNTING Remove the mounting bracket (A) from the Fan-motor assembly (B) by loosening the two canopy screws (JJ) located in the round holes. Remove and save the two canopy screws (II) in the “L” shaped slots. This will enable you to remove the mounting bracket (A). - Page 5 Carefully lift the fan-motor assembly (B) up to the slide-on mounting bracket (A). Put the fan-motor assembly (B) assembly onto the mounting plate’s J hook (MM). provided by utilizing one of the round holes at the outer rim of the Fan-motor assembly (B).hang the fan on the J hook (MM).
- Page 6 Carefully unhook the fan from the mounting bracket (A) and align the locking slots of the fan-motor assembly (B) with the two screws (II) in the mounting bracket (A). Push up to engage the slots and turn clockwise to lock in place.
-
Page 7: Remote Control
Connect blue wire from fan to black wire from LED light kit and then connect white wire from fan to white wire from LED light kit. (SS) Secure the LED light kit in the light kit pan (D). ... -
Page 8: Troubleshooting
Care and Cleaning WARNING: Make sure the power is off before cleaning your fan. Because of the fan’s natural movement, some connections may become loose. Check the support connections, brackets, and blade attachments twice a year. Make sure they are secure. It is not necessary to remove the fan from the ceiling. - Page 9 1-Classe de protection I : Le raccord est doté d'une connexion de mise à la terre : Le fil de terre (jaune /vert) doit être connecté au clip marqué avec 2- Installez le produit uniquement dans des pièces sèches et tenez-le à l'écart des substances humides. 3-La consommation de la vitesse du moteur est en Watts.
-
Page 10: Outils Requis
CONSIGNES IMPORTANTES DE SÉCURITÉ Lisez les instructions et vérifiez que toutes les pièces sont présentes avant de commencer. NOTE : Pour prévenir tout risque de blessure, utilisez le kit fourni. OUTILS REQUIS Couper l'alimentation électrique avant de procéder à l'installation. -
Page 11: Préparation Au Montage
PRÉPARATION AU MONTAGE ¨ Retirer le support de montage (A) de l'ensemble ventilateur-moteur (B) en desserrant les deux vis à canopée (JJ) situées dans les trous ronds. ¨ Retirez et conservez les deux vis d'auvent (II) situées dans les fentes en forme de "L". Cela vous permettra de retirer le support de montage (A). - Page 12 ¨ Soulevez avec précaution l'ensemble ventilateur-moteur (B) jusqu'au support de montage coulissant (A). ¨ Placez l'ensemble ventilateur-moteur (B) sur le crochet en J (MM) de la plaque de montage. ¨ fourni en utilisant l'un des trous ronds situés sur le bord extérieur de l'ensemble ventilateur-moteur (B).Accrochez le ventilateur au crochet en J (MM).
- Page 13 ¨ Décrocher avec précaution le ventilateur du support de montage (A) et aligner les fentes de verrouillage de l'ensemble ventilateur-moteur (B) avec les deux vis (II) du support de montage (A). Poussez vers le haut pour engager les fentes et tournez dans le sens des aiguilles d'une montre pour verrouiller en place.
- Page 14 ¨ Connectez le fil bleu du ventilateur au fil noir du kit de lumière LED, puis connectez le fil blanc du ventilateur au fil blanc du kit de lumière LED. (SS) ¨ Fixez le kit d'éclairage à DEL dans le plateau du kit d'éclairage (D).
-
Page 15: Dépannage
Entretien et Nettoyage AVERTISSEMENT : Assurez-vous que le ventilateur est hors tension avant de le nettoyer. En raison du mouvement naturel du ventilateur, certaines connexions peuvent se desserrer. Vérifiez les connexions de support, le support et les fixations des pales deux fois par an. Assurez-vous qu'ils sont bien fixés. Il n'est pas nécessaire de retirer le ventilateur du plafond.
Need help?
Do you have a question about the B31-390V80 and is the answer not in the manual?
Questions and answers