Table of Contents
Advertisement
Available languages
Available languages
Quick Links
Advertisement
Table of Contents

Related Manuals for HOMCOM B31-394


Summary of Contents for HOMCOM B31-394
- Page 2 1-Protection class I: The fitting has an earthing connection: The earth wire (yellow /green ) has to be connected to the clip marked with 2-This fitting should only be installed in rooms where direct contact with water is impossible. 3-Consumption in w, according to the speed of the motor. 4-May be operated with a remote control.
-
Page 3: Important Safety Precautions
IMPORTANT SAFETY PRECAUTIONS To ensure the success of installation, be sure to read instructions and check parts for completeness before starting. NOTE: To reduce the risk of personal injury, only use the mounting kit provided with this ceiling fan. TOOLS REQUIRED Be sure to turn off the power before preparing for installation... -
Page 4: Preparing For Mounting
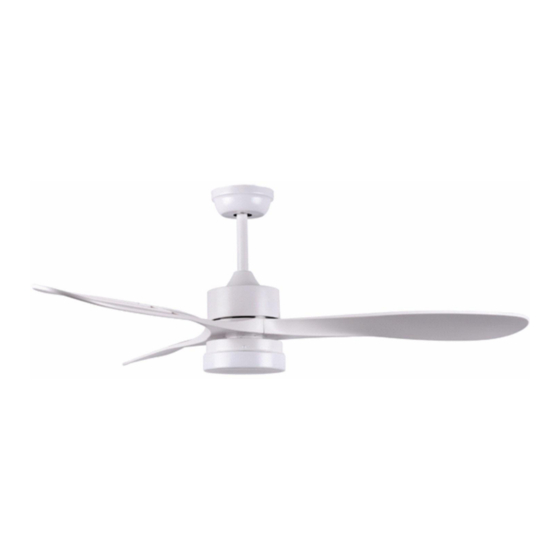
PREPARING FOR MOUNTING 1. Remove the canopy from the mounting bracket,install the mounting bracket to the ceiling. (please ensure the fixing is able to support minimum moving weight of the fan which is 15.8kg=35Lb) 2. Remove the nylon ball from the down rod and push the pin and clevis from the motor assembly, pass the wires through the down rod and reinsert the pin and clevis, tighten the screw holding the down rod in place. - Page 5 3. Put the yoke cover and canopy through the down rod, reinsert the nylon ball, pin and screw on the down rod. 4. Install the fan blades. Be sure to tighten the screws. 5. Remove the LED Disc from the light kit pan by loosening the screws.
- Page 6 6. Install the light kit pan to the motor assembly by tighten the screws. 7. Connect two plugs .Connect the wire from fan to LED disc. Attach the LED disc to the center of the light box. 8. Turn the glass bowl clockwise until it stops. 9.
- Page 7 The antenna don’t need be left outside the outlet 10. put the remote receiver into the middle of the bracket and connect the wires. (connect the wires according to the wiring instructions) power supply from ceiling (230V/50Hz) RECEIVER Subtitle: 1: Light wire L (Red) 2: Light wire N (Blue) 3: Motor phase wire U (Gray) 4: Motor phase wire V (Yellow)
-
Page 8: Remote Control
12. Assemble the canopy with the bracket again and using the fixing screws to tighten the canopy, make sure that the canopy is secured and that you have not trapped any wires. REMOTE CONTROL ① Timer function: fan and light can set timer 2 hours/4 hours / 8 hours to turn off . -
Page 9: Troubleshooting
Care and Cleaning WARNING: Make sure the power is off before cleaning your fan. Because of the fan’s natural movement, some connections may become loose. Check the support connections, brackets, and blade attachments twice a year. Make sure they are secure. It is not necessary to remove the fan from the ceiling. - Page 10 1-Classe di protezione I: L'apparecchio è dotato di un collegamento con messa a terra: il cavo di terra (giallo/verde) deve essere collegato alla clip contrassegnata dal simbolo 2- Collocare il prodotto solo in ambienti asciutti e tenerlo lontano da sostanze umide. 3- Il consumo per il funzionamento del motore è...
-
Page 11: Strumenti Necessari
IMPORTANTI PRECAUZIONI DI SICUREZZA Leggere le istruzioni e verificare che tutte le parti siano presenti prima di iniziare il montaggio. AVVISO: Per ridurre il rischio di lesioni personali, utilizzare il kit di installazione fornito. STRUMENTI NECESSARI Be sure to turn off the power before preparing for installation... - Page 12 PREPARING FOR MOUNTING 1. Rimuovere l’imballaggio dal montante e installare il montante al soffitto. Assicurarsi che il soffitto possa supportare il peso in caso di minimo in movimento della ventola, che è di 15,8 kg o 35 libbre. 2. Rimuovere la sfera di nylon il montante inferiore ed estrarre il perno e il bullone dal motore. Far passare i cavi attraverso il montante inferiore e reinserire il perno e il bullone.
- Page 13 Posizionare l’involucro del motore e deli cavi attraverso il montante inferiore. Reinserire la sfera di nylon, il perno e la vite nel montante inferiore. Installare le pale della ventola. Assicurarsi che le viti siano strette. 5. Rimuovere il disco LED dal pannello del kit luci allentando le viti.
- Page 14 6. Installare il pannello del kit luci sul gruppo motore stringendo le viti. 7. Collegare due spine. Collegare il filo dalla ventola al disco LED. Fissare il disco LED al centro della scatola luminosa. 8.Ruotare la lampada di vetro in senso orario finché non si blocca in posizione. 9.Sollevare il ventilatore e posizionare la sfera di nylon sul montante.
- Page 15 Non è necessario lasciare l'antenna fuori dalla presa 10.Collocare il ricevitore remoto al centro del montante e collegare i cavi secondo le istruzioni. Alimentazione dal soffitto (230V/50Hz) RICEVITORE Antenna Parti: 1: Cavo sottile L (Rosso) 2: Cavo sottile N (Blu) 3: Cavo fase motore U (Grigio) 4: Cavo fase motore V (Giallo) 5: Cavo fase motore W (Rosso)
- Page 16 12.Montare nuovamente il montante al soffitto. Utilizzare le viti di fissaggio per stringere al soffitto, assicurarsi che sia ben saldo e che non vi siano cavi intrappolati. TELECOMANDO ① Funzione timer: ventilatore e luci possono essere impostati 2, 4 e 8 ore prima dello spegnimento automatico. Quando ventilatore e luci sono spenti, si accendono automaticamente e sara’...
-
Page 17: Risoluzione Dei Problemi
Cura e Pulizia AVVERTENZA: assicurarsi spegnere l’alimentazione elettrica prima di pulire il ventilatore. ¨ A causa del movimento naturale del ventilatore, alcuni raccordi potrebbero allentarsi. Controllare le connessioni di supporto, del montante e gli attacchi delle pale due volte l'anno. Assicurati che siano sicuri. Non è necessario rimuovere il ventilatore dal soffitto.
Need help?
Do you have a question about the B31-394 and is the answer not in the manual?
Questions and answers