Intermec EasyCoder PF8 User Manual
Intermec easycoder pf8: user guide
Hide thumbs
Also See for EasyCoder PF8:
- Install manual (8 pages) ,
- User manual (2 pages) ,
- Quick start manual (2 pages)
Table of Contents
Advertisement
Advertisement
Table of Contents
Troubleshooting

Subscribe to Our Youtube Channel
Related Manuals for Intermec EasyCoder PF8


Summary of Contents for Intermec EasyCoder PF8
- Page 1 User’s Guide PF8d/PF8t Printers...
- Page 2 User’s Guide PF8d/PF8t Printers...
- Page 3 Intermec Technologies Corporation. Information and specifications contained in this document are subject to change without prior noticed and do not represent a commitment on the part of Intermec Technologies Corporation. © 2007-2008 by Intermec Technologies Corporation. All rights reserved.
- Page 4 Document Change This page records changes to this document. The document was originally released as version 001. Version PF8d/PF8t Printer User’s Guide Date Description of Change 08/2007 Removed listing of accessories. Revised information about installing and using a CompactFlash card. Minor format corrections.
- Page 5 PF8d/PF8t Printer User’s Guide...
-
Page 6: Table Of Contents
Connecting the Printer to Your Network ........ - Page 7 Loading Thermal Transfer Ribbon (PF8t Only)......19 Troubleshooting and Maintaining the Printer Troubleshooting........... . 24 Upgrading the Firmware .
- Page 8 Contents Labels ............45 Tags and Strip with Slots.
- Page 9 Contents viii PF8d/PF8t Printers User’s Guide...
-
Page 10: Before You Begin
Global Services and Support Warranty Information To understand the warranty for your Intermec product, visit the Intermec web site at Returns and Repairs > Warranty. Disclaimer of warranties: The sample code included in this document is presented for reference only. -
Page 11: Telephone Support
Technical Support Service Service contracts • Ask about an existing Outside the U.S.A. and Canada, contact your local Intermec representative. To search for your local representative, from the Intermec web site, click About Us > Contact Us. Service Location Support For the most current listing of service locations, click Support >... -
Page 12: Who Should Read This Manual
ESim for the PC4 and PF8 Printer Programmer’s Reference Manual The Intermec web site at documents (as PDF files) that you can download for free. To download documents 1 Visit the Intermec web site at www.intermec.com. 2 Click Support > Manuals. PF8d/PF8t Printers User’s Guide sbkang@awoo.co.kr jmyou@idif.co.kr korlim@gw.idif.co.kr... - Page 13 Before You Begin 3 In the Select a Product field, choose the product whose documentation you want to download. To order printed versions of the Intermec manuals, contact your local Intermec representative or distributor. PF8d/PF8t Printers User’s Guide...
-
Page 14: Using The Pf8 Printers
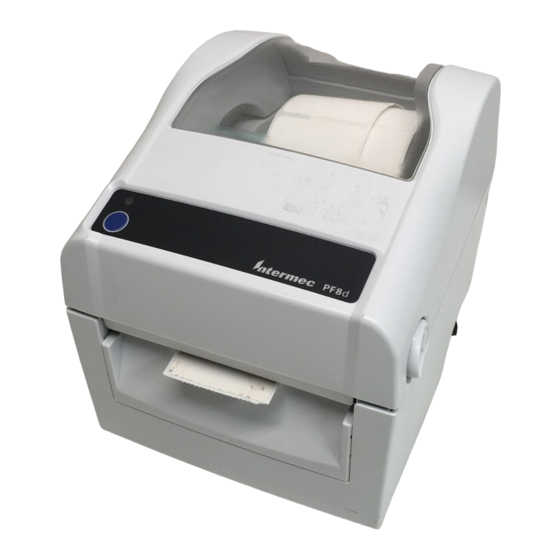
Using the PF8 Printers Use this chapter to familiarize yourself with the PF8 printers. In this chapter you will find these sections: • Introducing the PF8 Printers • Features of the PF8 Printers • Understanding the LED Indicators PF8d/PF8t Printers User’s Guide... -
Page 15: Introducing The Pf8 Printers
1000 labels, per day. There are two models of the PF8 printer: • The PF8d is a 203 dpi direct thermal printer. • The PF8t is a direct thermal or thermal transfer printer that is available in 203 and 300 dpi models. -
Page 16: Features Of The Pf8 Printers
• Hold it down Holding the button down when the power is turned on causes the printer to enter Media Sensing mode. The printer configuration page prints when you release the button. There are also cover open buttons located on each side of the printer which you press to access the media compartment. -
Page 17: Media Compartment
Chapter 1 — Using the PF8 Printers Media Compartment The PF8t is a thermal transfer or direct thermal capable printer. The media compartment accommodates the media supply and the transfer ribbon supply. In direct thermal printers like the PF8d, the top cover and the print mechanism are combined into a single unit. -
Page 18: Other Features And Connections
(RS-232) PF8d and PF8t Rear View Connections and Controls The bottom of the PF8d also has hanger holes that allow you to wall-mount the printer. Bottom case cover PF8d Wall-Mount Holes PF8d/PF8t Printers User’s Guide Chapter 1 — Using the PF8 Printers... -
Page 19: Understanding The Led Indicators
Chapter 1 — Using the PF8 Printers Understanding the LED Indicators When power to the printer is switched on, the status LED turns green, indicating that the printer is ready to accept print commands. If the printer runs out of media or ribbon during printing, the LED turns red. -
Page 20: Installing The Printer
Use this chapter to install your PF8d and PF8t printers. In this chapter you will find these sections: • Installing the Printer Driver • Connecting the Printer to Your Network • Turning on the Printer • Installing the CompactFlash card(PF8t Only) •... -
Page 21: Installing The Printer Driver
Chapter 2 — Installing the Printer Installing the Printer Driver You must install the Intermec InterDriver print driver in order to communicate with your PF8 printer. The InterDriver files are on the PrinterCompanion CD or available for download from the Intermec web site at click Downloads, and then search for “interdriver”. -
Page 22: Connecting The Printer To Your Network
Printer Driver” on page Connecting the Printer Through the Serial Port You can use the serial connection with either LabelShop or Intermec InterDriver. You can also use it to send commands directly through the terminal connection. Connecting the Printer Through the Parallel Port You can use the parallel connection with LabelShop or Intermec InterDriver. -
Page 23: Installing The Compactflash Card (Pf8T Only)
CompactFlash adapter to use a CompactFlash card. You can select which memory source you want to use. Use Windows HyperTerminal to send an ESim M command to the printer to select your memory source. You can only use one memory source. ESim memory allocation commands are: For more information on ESim commands, refer to the ESim for the PC4 and PF8 Bar Code Label Printer Programmer’s Reference... -
Page 24: Understanding Auto-Sensing Mode
Understanding Auto-Sensing Mode The Auto-Sensing mode can be used for the following: • Adjusting the label gap sensor • Printing a test label with a test pattern and list of the printer’s current settings • Entering Dump mode To use Auto-Sensing mode 1 Load media in the printer. -
Page 25: Creating And Printing Labels
If you are using peel-off media, remove the labels as they are fed out. After a short delay, a test label will print and the printer will enter Dump mode. See the ESim for the PC4 and PF8 Bar Code Label Printer Programmer’s Reference Manual... -
Page 26: Loading Media
1 Use the Windows Control Panel Add/Remove Programs feature to uninstall all previous versions of LabelShop and service packs for LabelShop from the computer. 2 Connect the printer to the computer using a USB connection. 3 Install Windows Interdrivers version 7.1.4 or later. These... -
Page 27: Loading Media For Tear-Off Operation
• Cut-off media requires an optional paper cutter fitted on the front of the printer. The cutter is not designed to cut through adhesive; adhesive sticks to the cutting shears and prevents the cutter from operating. - Page 28 Chapter 2 — Installing the Printer printer while the PF8t spindle lifts completely out of the spindle compartment. PF8d PF8t 3 Insert the spindle into the core of a fresh media roll. Rotate the spindle to fit the inside diameter of the core. See the core diameter markings on the spindle.
- Page 29 Chapter 2 — Installing the Printer 4 Put the label between the label guides and pull it forward. 5 Adjust the label guide to fit the media you are using and close the top cover. On the PF8t you will first need to close the print mechanism and ribbon container before closing the cover.
-
Page 30: Loading Media For Peel-Off Operation
1 Press the cover open buttons on both sides of the case to open the top cover. Lift the cover upwards and rearwards. 2 Open the peel-off mechanism on the front of the printer. 3 Pull or lift the spindle and remove the empty label roll core, if present. -
Page 31: Loading Media For Cut-Off Operation
Gap Sensor” on page Loading an Media from an External Supply Insert the media through the slot in the back of the printer. Follow the instructions for the type of media you are using. The spindle is not used when using an external media supply. -
Page 32: Loading Thermal Transfer Ribbon (Pf8T Only)
1 Press the cover open buttons on both sides of the case to open the top cover. Fold the cover upwards and rearwards. 2 Press the green release tabs at the bottom of the top cover on both sides of the printhead. PF8d/PF8t Printers User’s Guide Chapter 2 — Installing the Printer... - Page 33 Chapter 2 — Installing the Printer 3 Lift the print carriage halfway up while keeping the top cover fully opened. Insert a new ribbon roll onto the ribbon supply shaft. 4 Feed the transfer ribbon from the ribbon supply shaft under the printhead.
- Page 34 7 Firmly close the printer’s top cover. 8 Tap the Feed button until the status LED turns green. When you switch between direct thermal and thermal transfer printing, or when you switch between different types of transfer ribbon, you can remove a partially used transfer ribbon and save it for later use.
- Page 35 Chapter 2 — Installing the Printer PF8d/PF8t Printers User’s Guide...
-
Page 36: Troubleshooting And Maintaining The Printer
• Cleaning the Case • Cleaning the Printhead • Adjusting the Thermal Printhead Pressure • Adjusting the Print Alignment • Adjusting the Label Taken Sensor • Adjusting the Label Gap Sensor PF8d/PF8t Printers User’s Guide Troubleshooting and Maintaining the Printer... -
Page 37: Troubleshooting
See (PF8t only)” on page 26. Partial labels printed. • Print carriage is not fully locked. Open the printer and lower the • Label caught on printhead. Remove label and clean printhead. Printer continues to print • Stuck label is blocking the label gap sensor. Open the top cover, or feed when it should stop printing. -
Page 38: Upgrading The Firmware
RS-232 connection. Intermec recommends a parallel or USB connection. • The Intermec ESim Config Tool for the PF8 is on the PrinterCompanion CD or can be downloaded from www.intermec.com. Use the ESim Config Tool to install a firmware upgrade file on the printer, download new fonts, and manage printer memory. -
Page 39: Cleaning The Case
5 Close the print carriage. 6 Use one hand to hold the printer steady. Use the other hand to pull the cleaning card forward until it is out of the printer. -
Page 40: Adjusting The Printhead Alignment
• Turn the adjustment screw counterclockwise or clockwise to adjust the contact between the printhead and platen roller. PF8t printhead alignment adjustment screw PF8d/PF8t Printers User’s Guide Chapter 3 — Troubleshooting and Maintaining the Printer Adjustment screw... -
Page 41: Adjusting The Label Taken Sensor
• Peel-off with label taken sensor enabled • Peel-off with label taken sensor disabled The InterDriver files are on the PrinterCompanion CD or available for download from the Intermec web site at www.intermec.com. Adjusting the Label Gap Sensor The PF8 printers are fitted with a label gap sensor that detects the slots between tickets and tags or gaps between labels as media is fed past the sensor during printing. -
Page 42: Adjusting The Label Stop/Black Mark Sensor
Note: This sensor is only adjustable on the PF8t. The default position of the Label Stop Sensor/Black Mark sensor is all the way to the right of the slot, at the center of the printer. For an illustration, see the For most media, this is the correct position. - Page 43 Chapter 3 — Troubleshooting and Maintaining the Printer PF8d/PF8t Printers User’s Guide...
-
Page 44: Specifications
Specifications This appendix provides technical specifications for the PF8d and PF8t printers and their available features and options. PF8d/PF8t Printers User’s Guide... -
Page 45: Pf8D Specifications
Appendix A — Specifications PF8d Specifications General Specifications Resolution Print Mode Memory Print Speed Print Length Print Width Sensor Type Sensor Detection Label gap and black mark sensing, Label length Media Firmware Software Resident Fonts Fonts Download Image Handling Bar Codes 8 dot/mm (203 dpi) Direct Thermal 32 bit... - Page 46 Operation: 30% to 85%, non-condensing. Free air Storage: 10% to 90%, non-condensing. Free air Length: 218 mm (8.58 in) Height: 166 mm (6.53 in) Width: 168 mm (6.61 in) Weight: 2.0 Kg (4.4 lbs) Host - DB9 Socket Printer - DB9 Plug +5V, max 500ma...
- Page 47 Appendix A — Specifications USB Interface Connector Type: B Parallel Interface 19-30 34-35 Handshake: DSTB connects to the printer, BUSY connects to the host Interface cable: Parallel cable compatible with computer. Function VBUS Function Transmitter /Strobe host/printer Data 0-7 host...
-
Page 48: Pf8T Specifications
Internal Interface PF8t Specifications General Specifications Resolution Print Mode Memory Print Speed Print Length Print Width Sensor Type Sensor Detection Media PF8d/PF8t Printers User’s Guide Appendix A — Specifications UART1 Wafer Ethernet Module E_MD E_MD E_RST E_RST 8 dot/mm (203 dpi) or 12 dot/mm (300 dpi) Direct Thermal/Thermal Transfer 32 bit 4 MB CompactFlash, 8 MB SDRAM... - Page 49 Interfaces Control Panel Power Environment Certification Humidity Printer Dimensions ESim (v7.x or later) ActiveX Controls (v1.3 or later) InterDriver (v7.06 or later) ESim Config Tool (v2.1 or later) LabelShop Patch (v6.12 or later) 203 dpi: 6, 7, 10, 12, 24 points...
- Page 50 Note The total current output from the serial port cannot exceed 500 mA. USB Interface Connector Type: B Parallel Interface PF8d/PF8t Printers User’s Guide Appendix A — Specifications Host - DB9 Socket Printer - DB9 Plug +5V, max 500ma Function VBUS Function Transmitter /Strobe host/printer...
- Page 51 Appendix A — Specifications Parallel Interface (continued) 19-30 34-35 Handshake: DSTB connects to the printer, BUSY connects to the host. Interface cable: Parallel cable compatible with computer. Internal Interface UART1 Function Transmitter /Paper empty printer /Select printer /Auto line feed...
-
Page 52: Accessories
Accessories for the PF8 printers are sold and ordered separately. Serial and parallel cables, media, and transfer ribbons are also available. To order, contact your local Intermec sales representative. The Cutter Kit and Stripper Module must only be installed by an authorized service technician. - Page 53 Appendix A — Specifications PF8d/PF8t Printers User’s Guide...
-
Page 54: Media Specifications
Media Specifications This appendix explains the different types of media that the PF8 printers can use and indicates the allowed dimensions of that media. PF8d/PF8t Printer User’s Guide... -
Page 55: Direct Thermal Media
Appendix B — Media Specifications Direct Thermal Media Intermec offers a premium and an economy grade of direct thermal media for the PF8 printers. Premium Quality Top-coated media with high demands on printout quality and resistance against moisture, plasticizers and vegetable oils. - Page 56 The materials of choice in combination with HR/TMX3201/ TMX3202 ribbons. Gives high resistance to chemicals, heat, and mechanical abrasion. Examples of Polyesters Europe TTR High Gloss Polyester PF8d/PF8t Printer User’s Guide Chapter B — Media Specifications North America Duratran II Duratran II Tag North America...
-
Page 57: Transfer Ribbons
Appendix B — Media Specifications Transfer Ribbons Intermec offer three types of thermal transfer ribbons optimized for different purposes: General Purpose (GP/TMX1500) General purpose transfer ribbons allow high speed printing and give a good printout, but are somewhat sensitive to smearing. -
Page 58: Labels
Labels PF8d/PF8t Printer User’s Guide Chapter B — Media Specifications Media width includes liner (a) Maximum:116.0 mm (4.57 in) Minimum: 25.0 mm (1 in) Label length (b) Minimum: 6.35 mm (0.25 in) Label gap height (c) Maximum: 10 mm (0.39 in) Minimum: 2 mm (0.08 in) -
Page 59: Tags And Strip With Slots
Detection slot/Black mark width (c) Minimum: 14 mm (0.55 in) Black mark height (d) Maximum: 10 mm (0.39 in) Minimum: 3 mm (0.12 in) The black mark sensor is centered on the media path. Maximum reflectance 5% at 940 PF8d/PF8t Printer User’s Guide... -
Page 60: Plain Continuous Stock
Plain Continuous Stock The PF8 printers can use continuous stock without any detection slots or black marks. The printer must be set for continuous stock by using the ESim Q command. For more information, see the ESim for the PC4 and PF8 Printer Programmer’s Reference Manual (P/N 937-011-xxx). - Page 61 Appendix B — Media Specifications PF8d/PF8t Printer User’s Guide...
- Page 62 Worldwide Headquarters 6001 36th Avenue West Everett, Washington 98203 U.S.A. tel 425.348.2600 fax 425.355.9551 www.intermec.com PF8d/PF8t Printers User’s Guide *934-011-003* P/N 934-011-003...
Need help?
Do you have a question about the EasyCoder PF8 and is the answer not in the manual?
Questions and answers