Table of Contents
Advertisement
Available languages
Available languages
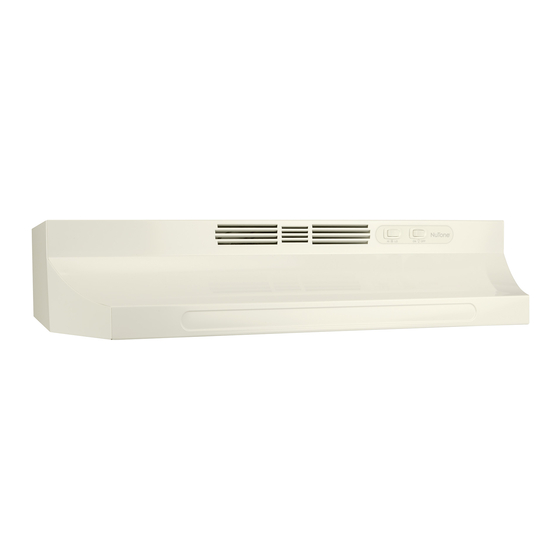
Installation INSTRUCTIONS
RL6100C, RL6100F, BP, CM & HFRM SERIES RANGE HOODS
IMPORTANT SAFETY INSTRUCTIONS
WARNING - TO REDUCE THE RISK OF FIRE, ELECTRIC
SHOCK, OR INJURY TO PERSONS, OBSERVE THE
FOLLOWING:
1. Use this unit only in the manner intended by the manufacturer. If you
have any questions, contact the manufacturer at the address or
telephone number listed in the warranty.
2. Before servicing or cleaning unit, switch power off at service panel and lock
service panel to prevent power from being switched on accidentally.
When the service disconnecting means cannot be locked, securely
fasten a prominent warning device, such as a tag, to the service panel.
3. Installation work and electrical wiring must be done by qualified person(s)
in accordance with all applicable codes and standards - including
fire-rated construction codes and standards.
4. Sufficient air is needed for proper combustion and exhausting of
gases through the flue (chimney) of fuel burning equipment to prevent
backdrafting. Follow the heating equipment manufacturer's guidelines
and safety standards such as those published by the National Fire
Protection Association (NFPA), and the American Society for Heating,
Refrigeration and Air Conditioning Engineers (ASHRAE), and local
code authorities.
5. When cutting or drilling into wall or ceiling, do not damage electrical
wiring and other hidden utilities.
6. This unit must be grounded.
7. Ducted fans must always be vented to the outdoors.
8. To reduce the risk of fire, use only metal ductwork.
9. When applicable local regulations comprise more restrictive installation
and/or certification requirements, the aforementioned requirements
prevail on those of this document and the installer agrees to conform
to these at his own expenses.
10. When performing installation, servicing or cleaning this unit, it is
recommended to wear safety glasses and gloves.
TO REDUCE THE RISK OF A RANGE TOP GREASE FIRE:
1. Never leave surface units unattended at high settings. Boilovers cause
smoking and greasy spillovers that may ignite. Heat oils slowly on low
or medium setting.
2. Always turn hood ON when cooking at high heat or when flambeing
food (i.e.: Crêpes Suzette, Cherries Jubilee, Peppercorn Beef Flambé).
3. Clean ventilating fans frequently. Grease should not be allowed to
accumulate on fan or filter.
4. Use proper pan size. Always use cookware appropriate for the size of
the surface element.
TO REDUCE THE RISK OF INJURY TO PERSONS IN THE EVENT OF
A RANGE TOP GREASE FIRE, OBSERVE THE FOLLOWING*:
1. SMOTHER FLAMES with a close-fitting lid, cookie sheet, or metal
tray, then turn off the burner. BE CAREFUL TO PREVENT BURNS.
If the flames do not go out immediately, EVACUATE AND CALL THE
FIRE DEPARTMENT.
2. NEVER PICK UP A FLAMING PAN - you may be burned.
3. DO NOT USE WATER, including wet dishcloths or towels - a violent
steam explosion will result.
4. Use an extinguisher ONLY if:
A. You know you have a Class ABC extinguisher, and you already know
how to operate it.
B. The fire is small and contained in the area where it started.
C. The fire department is being called.
D. You can fight the fire with your back to an exit.
*Based on "Kitchen Fire Safety Tips" published by NFPA.
REGISTER YOUR PRODUCT ON LINE AT
• For Aira HFRM Series: www.broan.ca
• For Broan BP & CM Series: www.broan.ca
• For Nutone RL6100C & RL6100F Series: www.nutone.ca
READ & SAVE THESE INTRUCTIONS
IMPORTANT SAFETY INSTRUCTIONS
1. For indoor use only.
2. For general ventilating only. Do not use to exhaust hazardous or explosive
materials and vapors.
3. To reduce the risk of fire or electrical shock, this range hood shoul not
be used with an additional solid-state speed control device.
4. To reduce the risk of shock, disconnect power before servicing.
5. To reduce the risk of fire and to properly exhaust air, be sure to duct
air outside. Do not vent exhaust air into spaces within walls or ceilings
or into attics, crawl spaces or garages.
HORIZONTAL DISCHARGE THROUGH WALL
CUTOUT DIMENSIONS
7"
WIRING
5
1
⁄
"
8
CUTOUT
10¼"
FIGURE 1
VERTICAL OR HORIZONTAL DISCHARGE
USING 3¼" x 10" DUCT
CUTOUT DIMENSIONS
TOP
C L
VIEW
18"
12"
3¼" x 10"
1
7
⁄
"
7"
16
ELEC. K.O.
3¼" x 10"
1
7
⁄
"
16
BACK
VIEW
FIGURE 2
VERTICAL DISCHARGE USING 7" ROUND DUCT
(TRANSITION NOT INCLUDED)
CUTOUT DIMENSIONS
TOP
C L
VIEW
18"
7"
DIA
12"
1
7
⁄
"
7"
1"
16
7
1
⁄
"
16
ELEC. K.O.
BACK
VIEW
FIGURE 3
1
KITCHEN
CABINET
SUPPLIED DUCT
TRANSITION
7
1
⁄
"
16
3¾"
RANGE HOOD
REMOVE DAMPER FLAP
FROM TRANSITION FOR
THIS INSTALLATION
7⁄8"
ELBOW
(
)
If required
9³⁄
"
8
3¼" x 10"
1"
1⁄2"
DUCT
1⁄2"
SUPPLIED DUCT
6"
TRANSITION
RANGE
HOOD
ROOF CAP
ADJUSTABLE
7⁄8"
ELBOW
7" ROUND
DUCT
9³⁄
"
8
4
7
/
"
8
1⁄2"
1⁄2"
6"
RANGE HOOD
WALL
WALL
CAP
ROOF CAP
EAVE
CAP
WALL
CAP
WALL
ROOF
REMOVE BOTH
3¼" x 10" AND
4½" x 8"
KNOCKOUTS
FOR 7" DUCT
30042421A
Advertisement
Table of Contents

Related Manuals for NuTone RL6100F Series


Summary of Contents for NuTone RL6100F Series
- Page 1 ELEC. K.O. FOR 7" DUCT REGISTER YOUR PRODUCT ON LINE AT 6" • For Aira HFRM Series: www.broan.ca RANGE HOOD • For Broan BP & CM Series: www.broan.ca BACK VIEW • For Nutone RL6100C & RL6100F Series: www.nutone.ca FIGURE 3 30042421A...
- Page 2 INSTALLATION INSTRUCTIONS RL6100C, RL6100F, BP, CM & HFRM SERIES RANGE HOODS PLANNING • These hoods can be connected to ductwork to discharge through the top or the back of the hood to outside. BP/RL61000F/HFRM Series can be installed without ducts to return filtered air back into the room. For a ductless installation, a separate filter is required.
- Page 3 INSTALLATION INSTRUCTIONS RL6100C, RL6100F, BP, CM & HFRM SERIES RANGE HOODS COMPLETING ASSEMBLY 1. Install a 75 W (maximum) light bulb in the receptacle. 2. Install filter and light lens assembly. 3. For ductless use with charcoal filter (FKM-65): Install 2 filter clips by sliding into the receivers on the sides of the hood fan housing.
- Page 4 INCLUDING, BUT NOT LIMITED TO, IMPLIED WARRANTIES OF MERCHANTABILITY OR FITNESS FOR A PARTICULAR PURPOSE. During this one-year period, Broan-NuTone Canada will, at its option, repair or replace, without charge, any product or part which is found to be defective under normal use and service.
- Page 5 ENREGISTREZ VOTRE PRODUIT EN LIGNE À : ⁄ • Pour la série HFRM de Aira : www.broan.ca HOTTE • Pour les séries BP et CM de Broan : www.broan.ca ARRIÈRE • Pour les séries RL6100C et RL6100F de NuTone : www.nutone.ca FIGURE 3 30042421A...
- Page 6 DIRECTIVES D’INSTALLATION HOTTES DE CUISINIÈRE SÉRIES RL6100C, RL6100F, BP, CM HFRM PLANIFICATION DE L’INSTALLATION • Ces hottes peuvent être branchées au conduit de façon à évacuer l’air à l’extérieur par le haut ou à l’arrière de la hotte. Les séries BP/RL61000F/HFRM peuvent être installées sans conduit pour rejeter l’air filtré...
- Page 7 DIRECTIVES D’INSTALLATION HOTTES DE CUISINIÈRE SÉRIES RL6100C, RL6100F, BP, CM HFRM COMPLÉTER L’ASSEMBLAGE 1. Installer une ampoule de 75 W (maximum) dans la douille. 2. Installer le filtre et le couvercle de l’ampoule. 3. Pour les hottes sans conduit, utiliser un filtre à charbon FKM-65. Fixer les deux attaches de filtre en les glissant dans les réceptacles de chaque côté...
- Page 8 Pour le service sous garantie, vous devez (a) aviser Broan-NuTone Canada à l’adresse ou au numéro de téléphone ci-dessous, (b) donner le numéro du modèle et l’identification de la pièce et (c) décrire la nature de tout défaut dans le produit ou la pièce. Au moment de demander le service sous garantie, vous devez présenter une preuve de la date d’achat originale.
Need help?
Do you have a question about the RL6100F Series and is the answer not in the manual?
Questions and answers