Advertisement
Available languages
Available languages
Quick Links
⚠
WARNING
TO REDUCE THE RISK OF FIRE, ELECTRIC SHOCK, OR INJURY TO PERSONS,
OBSERVE THE FOLLOWING:
• Use this unit only in the manner intended by the manufacturer. If you have questions,
contact the manufacturer at the address or telephone number listed in the warranty.
• Before servicing or cleaning unit, switch power off at service panel and lock the service
disconnecting means to prevent power from being switched on accidentally. When the
service disconnecting means cannot be locked, securely fasten a prominent warning
device, such as a tag, to the service panel.
• Installation work and electrical wiring must be done by a qualified person(s) in accordance
with all applicable codes and standards, including fire-rated construction.
• Sufficient air is needed for proper combustion and exhausting of gases through the flue
(chimney) of fuel burning equipment to prevent backdrafting. Follow the heating equipment
manufacturer's guidelines and safety standards such as those published by the National
Fire Protection Association (NFPA) and the American Society for Heating, Refrigeration
and Air Conditioning Engineers (ASHRAE) and the local code authorities.
• When cutting or drilling into wall or ceiling, do not damage electrical wiring and other
hidden utilities.
• Ducted fans must always be vented to the outdoors.
• Do not use this unit with any additional solid-state speed control device.
• To reduce the risk of fire, use only metal ductwork.
• This unit must be grounded.
• As an alternative, this product may be installed with the UL-approved cord kit designated
for the product, following instructions packed with the cord kit.
• When applicable local regulations comprise more restrictive installation and/or certification
requirements, the aforementioned requirements prevail on those of this document and the
installer agrees to conform to these at his own expense.
For complete warranty statement and service parts, or to learn more about
the instructions below, please type your model number in on our website.
To obtain a paper copy of the detailed instructions, please call us.
RECOMMENDED TOOLS AND ACCESSORIES
B
INSTALL DUCTWORK (DUCTED INSTALLATIONS)
R
OOF CAP
3¼"
10", 6"
X
7"
ROUND DUCT
(F
OR VERTICAL
DISCHARGE
S
OFFIT
H
OUSE WIRING
(T
C
ABINET
OP OR BACK OF HOOD
W
ALL CAP
H
OOD
3¼"
- 18"
18"
- 24"
(F
electrical range
min
MIN
MAX
OR HORIZONTAL DISCHARGE
- 26"
gas range
ABOVE COOKING SURFACE
min
HH0327A
above cooking surface
NOTE: Mounting distances over 30" are at the installer and user
discretion.
D
PREPARE THE HOOD
B
Remove electrical access panel.
E
PERFORM REQUIRED CUTOUTS
Use the proper diagram below for placement of ductwork and electrical cutout in cabinet or wall. For a non-ducted installation, DO NOT cut a duct access hole, only cut the hole for electrical wiring.
For 3¼" x 10" adapter/damper, A = 5¼"
CENTER LINE
WOOD SHIMS
(
-
)
CABINET
BOTTOM
A
DUCT ACCESS HOLE
5¹/ "
1¹/ "
HD1576A
INSTALLATION, USE, AND CARE QUICK START MANUAL
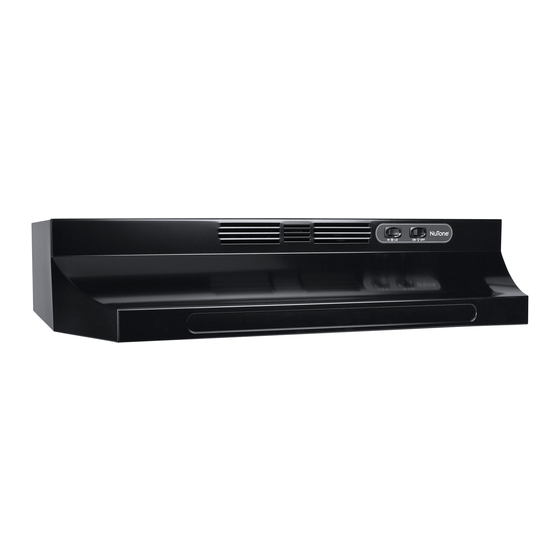
BROAN-NUTONE RANGE HOODS
READ AND SAVE THESE INSTRUCTIONS
1/8" & 7/64"
1-1/2"
ROUND OR
)
)
10"
X
DUCT
)
C
NON-DUCTED INSTALLATION ONLY
Remove louver cover from front of hood.
HD1089
CABINET FRONT
CABINET
BOTTOM
7¹/ "
A
2¹/ "
5¹/ or 5⁷/ "
ELECTRICAL ACCESS
WOOD SHIMS
(
)
(
-
⚠
WARNING
TO REDUCE THE RISK OF A RANGE TOP GREASE FIRE:
a) Never leave surface units unattended at high settings. Boilovers cause
smoking and greasy spillovers that may ignite. Heat oils slowly on low or
medium settings.
b) Always turn hood ON when cooking at high heat or when flambeing food
(i.e.: Crêpes Suzette, Cherries Jubilee, Peppercorn Beef Flambé).
c) Clean ventilating fan frequently. Grease should not be allowed to
accumulate on fan, filters or in exhaust ducts.
d) Use proper pan size. Always use cookware appropriate for the size of the
surface element.
TO REDUCE THE RISK OF INJURY TO PERSONS IN THE EVENT OF A
RANGE TOP GREASE FIRE, OBSERVE THE FOLLOWING*:
1. SMOTHER FLAMES with a close-fitting lid, cookie sheet or metal tray,
then turn off the burner. BE CAREFUL TO PREVENT BURNS. IF THE
FLAMES DO NOT GO OUT IMMEDIATELY, EVACUATE AND CALL THE
FIRE DEPARTMENT.
2. NEVER PICK UP A FLAMING PAN — You may be burned.
3. DO NOT USE WATER, including wet dishcloths or towels — This could
cause a violent steam explosion.
4. Use an extinguisher ONLY if:
A. You own a Class ABC extinguisher and you know how to operate it.
B. The fire is small and contained in the area where it started.
C. The fire department has been called.
D. You can fight the fire with your back to an exit.
* Based on "Kitchen Fire Safety Tips" published by NFPA.
In the United States
Broan-NuTone.com
800-558-1711
C
CHECK BOX CONTENT
7"
round duct plate
(f40000
)** (
series only
not shown
aluminum filter
ductfree filter
*s
ome models only
**s
ave screws
D
Remove either top or rear electrical knockout.
OR
TOP
install a strain relief
HO0434
VERTICAL DISCHARGE
CENTER LINE
CABINET FRONT
7¹/ "
7" DUCT
ACCESS HOLE
2¹/ "
8" Ø
ELECTRICAL ACCESS
(
)
• For indoor use only.
• For general ventilating use only. Do not use to exhaust
hazardous or explosive materials and vapors.
• Your hood motor has a thermal overload which
will automatically shut off the motor if it becomes
overheated. The motor will restart when it cools down.
If the motor continues to shut off and restart, have the
hood serviced.
• For best capture of cooking fumes, the bottom of the
hood MUST NOT BE LESS than 18" for electric range
or 26" for gas range and at a recommendedmaximum
of 30" above the cooking surface (at installer
discretion).
• Always follow the cooking equipment manufacturer's
requirements regarding the ventilation needs.
• To reduce the risk of fire and to properly exhaust air,
be sure to duct air outside — Do not exhaust air into
spaces within walls or ceiling or into attics, crawl space
or garage.
• When installing, servicing or cleaning the unit, it is
recommended to wear safety glasses and gloves.
• Please read specification label on product for further
information and requirements.
• Always use tools appropriate for the task being
performed.
• Wood shims (2) and wood screws (4)
• Strain relief, 1/2" diameter
• BP87Q Damper (7" round ducting)
)
parts bag
*
*
HM0023
E
Remove appropriate duct knockout.
REAR
Fit damper/duct connector over opening.
Hinge pins per figure above.
For 3¼" x 10" adapter/damper, A = 5¼"
CABINET FRONT
WOOD SHIMS
(
-
)
4"
DUCT ACCESS HOLE
CABINET
A
BOTTOM
)
CENTER LINE
HD1577A
EN
CAUTION
In Canada
Broan-NuTone.ca
800-567-3855
3¼"
10"
/
x
damper
*/**
duct connector
7"
round damper
(bueZ2
)
series only
DUCTED INSTALLATION ONLY
HINGE PINS
OR
HORIZONTAL DISCHARGE
³/ "
FLUSH
A
ELECTRICAL ACCESS
(
)
7¹/ "
1114025A
Advertisement

Related Manuals for NuTone RL6230BL


Summary of Contents for NuTone RL6230BL
- Page 1 INSTALLATION, USE, AND CARE QUICK START MANUAL BROAN-NUTONE RANGE HOODS READ AND SAVE THESE INSTRUCTIONS ⚠ ⚠ WARNING WARNING CAUTION TO REDUCE THE RISK OF FIRE, ELECTRIC SHOCK, OR INJURY TO PERSONS, TO REDUCE THE RISK OF A RANGE TOP GREASE FIRE: •...
-
Page 2: Operation
INSTALL OPTIONAL EZ1 TEMPORARY SUPPORT BRACKETS (SUPPLIED WITH BUEZ MODELS) The EZ1 installation system consists of 2 brackets (included in parts bag). Use these brackets to TEMPORARILY hang the hood to the cabinet during its installation. If not used, go to step 5. 7"... - Page 3 INSTRUCTIONS D’INSTALLATION, D’UTILISATION ET DE DÉMARRAGE RAPIDE HOTTES DE CUISINIÈRE BROAN-NUTONE LIRE ET CONSERVER CES INSTRUCTIONS ⚠ ⚠ AVERTISSEMENT AVERTISSEMENT ATTENTION AFIN DE RÉDUIRE LES RISQUES D’INCENDIE, D’ÉLECTROCUTION OU DE BLESSURES AFIN DE RÉDUIRE LES RISQUES DE FEU DE CUISINIÈRE : •...
- Page 4 INSTALLER LES SUPPORTS DE MONTAGE OPTIONNELS TEMPORAIRES EZ1 (FOURNIS AVEC LES MODÈLES BUEZ) Le système d’installation EZ1 comprend 2 supports (inclus dans le sac de pièces). Utiliser ces supports pour tenir TEMPORAIREMENT la hotte à l’armoire durant l’installation. Si non utilisé, aller à l’étape 5. 7"...
- Page 5 GUÍA RÁPIDA DE INSTALACIÓN, USO Y MANTENIMIENTO CAMPANAS EXTRACTORAS BROAN-NUTONE LEA ESTAS INSTRUCCIONNES Y GUÁRDELAS ⚠ ⚠ ADVERTENCIA ADVERTENCIA PRECAUCIÓN PARA REDUCIR EL RIESGO DE INCENDIO, DESCARGA ELÉCTRICA O LESIÓN PARA REDUCIR EL RIESGO DE QUE ARDA LA GRASA EN LA •...
- Page 6 INSTALAR LOS SOPORTES DE MONTAJE OPCIONALES TEMPORALES EZ1 El sistema de instalación EZ1 incluye 2 soportes (incluidos en la bolsa de piezas). Use estos soportes para mantener TEMPORALMENTE la campana al armorio durante la instalación. Si no usados, pasar al paso 5. 7"...
Need help?
Do you have a question about the RL6230BL and is the answer not in the manual?
Questions and answers