Table of Contents
Advertisement
Quick Links
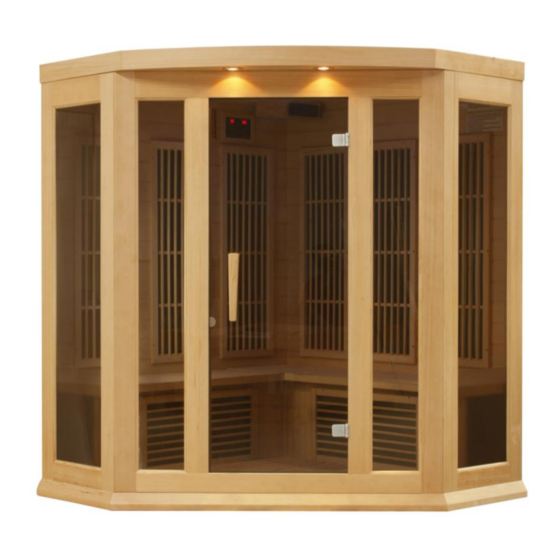
Maxxus Infrared Sauna Instruction Manual
MX-K356-01 / MX-M356-01
FOR CARBON MODEL SAUNAS
HEMLOCK AND RED CEDAR MODELS
FOR INDOOR USE ONLY
120V/20AMP DEDICATED CIRCUIT REQUIRED
Carefully and thoroughly read this Owner's Manual before
using/operating the sauna. We recommend keeping this Owner's
Manual for regular review and future reference.
1
Advertisement
Table of Contents

Subscribe to Our Youtube Channel
Related Manuals for Maxxus MX-M356-01


Summary of Contents for Maxxus MX-M356-01
- Page 1 Maxxus Infrared Sauna Instruction Manual MX-K356-01 / MX-M356-01 FOR CARBON MODEL SAUNAS HEMLOCK AND RED CEDAR MODELS FOR INDOOR USE ONLY 120V/20AMP DEDICATED CIRCUIT REQUIRED Carefully and thoroughly read this Owner’s Manual before using/operating the sauna. We recommend keeping this Owner’s...
-
Page 2: Table Of Contents
TABLE OF CONTENTS Packing List Visual Assembly Diagrams Parts Description Assembly Instructions Operating the Sauna Tips for Using Your Sauna Safety Instructions Safeguards for Your Sauna Troubleshooting Guide Warranty Warranty Card WARNING: Visually inspect all heaters before assembly to make sure they are not damaged. - Page 3 What Are Infrared Rays? Infrared is the band of light we perceive as heat. We cannot see this band of light with the naked eye, but we can feel this type of light in the form of heat. Our sun produces most of its energy output in the infrared segment of the spectrum.
- Page 4 EMF Levels from Common Homes Sources After many years and numerous studies on EMF exposure, no government body including the Occupational Safety and Health Administration (OSHA) have established permissible exposure limits (PEL). Currently, there is no consensus on the potential health hazard from any exposure to EMF.
- Page 5 HOW IT WORKS Infrared Saunas differ from traditional saunas in that they use infrared radiant energy to directly penetrate into the body's tissue to produce perspiration. Traditional saunas use steam to heat the air inside the sauna, which then heats your body until you begin to perspire.
-
Page 6: Visual Assembly Diagrams
*PLEASE READ INSTRUCTIONS BEFORE ASSEMBLY* Visual Assembly Diagram MX-K356-01 *The above assembly diagrams are for quick reference visual guides only. All sauna models are not shown. Parts and accessories may vary. Parts subject to change. -
Page 7: Parts Description
PARTS DESCRIPTION – MX-K356-01 *The above assembly diagrams are for quick reference visual guides only. All sauna models are not shown. Parts and accessories may vary. Parts subject to change. - Page 8 *PLEASE READ INSTRUCTIONS THOROUGHLY BEFORE ASSEMBLY* Highlights A. High quality craftsmanship B. Temperature control C. Timer D. Infrared carbon heat emitter panels E. Control Panel: F. Power supply: G. MP3 Jack: Buckles:...
- Page 9 Assembly Please note that your sauna has been completely assembled and tested at the factory prior to packaging. Please further note that the rear wall panels are intentional warped as part of the overall design. Two adults will be needed to assemble the sauna room.
- Page 10 FIG-2.1 Cartons FIG-2.2 C/No. 4. Place the Floor Panel on a smooth/flat surface and make sure which side is the front and which side is the back. See FIG-3. FIG-3 Placing Floor Panel 5. Align the Right Back Side Panel with the Floor Panel’s corresponding wood pattern; make sure the wood pattern is flowing in the same direction.
- Page 11 FIG-5 Assembling Left Side Panel FIG-5.1 Buckle 7. The Right Back Side Panel will align with the Right Side Panel. Once they are aligned and fit together snug and tight, use the latches to buckle together. Do the same for the Left Back Side Panel and the Left Side Panel.
- Page 12 FIG-7 Inserting Floor Heater on floor FIG-8 Installing short Bench Heater Panel 9. Insert the Benches onto the top of the Bench Heater Panels. Make sure to slide them all the way back and up against the Back Side Panels. Secure the Benches using the provided screws.
- Page 13 FIG-11 Assembling Front Panel 11. Place (flop) cords/wires coming up to through the top of the wall panels to the outside of the wall panels to avoid damaging the cords/wires during the roof installation. Open the door, lift the Roof Panel up and over the sauna room, and gently lower it into place resting it on the wall panels.
- Page 14 FIG-14 Slip cords/wires through roof 12. The Radio Player will already be mounted in its wood housing box. Connect the antenna to the Radio Player. Next, feed the wires up through the roof. Then mount the wood housing box to the ceiling of the sauna room. See FIG-15.1, 15.2, 15.3, 15.4. FIG-15.1 Radio Player in wood housing FIG-15.2 Connect antenna plug FIG-15.3 Feed the wires up through the roof...
- Page 15 13. Connect the Radio Player wire harness on the roof. See FIG-16 FIG-16 Connecting CD Player connection Note: CD player may not be available on all model sauna rooms 14. Locate the Control Panel harness on the roof and make the connection. See FIG- FIG-17 Connecting the Control Panel Plug 15.
- Page 16 FIG-18 Pull Power Cord through Roof Cover FIG-18.1 Screw down Roof Cover FIG-18.2 Sauna Room Assembled 16. Attach the door handle and screw into place. Screw cup-holder and magazine rack to the interior wall panel. (Cup-holder and/or magazine rack are not available on all models.) Installation Completed.
-
Page 17: Operating The Sauna
Operating the Sauna NOTE: Please check and confirm that the connections to the POWER SUPPLY, HEAT EMITTERS, and TEMPERATURE SENSOR are connected properly. The power supply voltage and frequency must match the requested voltage and frequency of the sauna (120VAC 15AMP Dedicated Circuit or 120VAC 20AMP Dedicated Circuit). - Page 18 temperature c. To set the temperature, press the buttons to increase or decrease the temperature to the desired temperature. If the “Heat" light is on, the temperature setting will increase one degree every time the button is pressed. If pressed for three seconds, the setting will increase quickly.
- Page 19 The MP3 Jack will allow you to connect your musical device using the AUX wire. Plug one end of the AUX wire into your musical device and the other end into the MP3 Jack at the ceiling. Do not leave the AUX wire connected at the ceiling when not using this function as it may cause static interference at the speakers.
-
Page 20: Tips For Using Your Sauna
Tips for using Your Sauna 1. If you take a hot/warm shower or bath before using your sauna, you may perspire more and experience more comfort. 2. Drink water prior to, during, and after your sauna session to replenish body fluids. 3. - Page 21 5. Pregnant or possibly pregnant women should contact their medical physician prior to using the sauna. Excessive temperatures have a high potential for causing fetal harm during pregnancy. 6. Hyperthermia Danger: The normal body temperature can’t rise above 103°F (39°C). Symptoms of excessive hyperthermia include dizziness, lethargy, drowsiness, and/or fainting.
-
Page 22: Safeguards For Your Sauna
its agent immediately to avoid safety risks. Unauthorized repair attempts will void the manufacturer’s warranty. 20. Please make sure the outlet power supply meets the specifications required. Failure to meet the requirements may cause safety risks. 21. Some sauna models are equipped with reading and/or roof lamps. Because the lamp temperature will become very hot once powered ON, do not attempt to touch the lamp to avoid being burned. - Page 23 Solution: If some of the heat emitters are working, then the ones which are not working may have been damaged. Do not continue to operate. Contact the manufacturer for replacement parts. Solution: If the heat emitters are not working but the control panel displays the time and temperature, then the temperature sensor may not be plugged in properly or it may be damaged.
- Page 24 panel, then the power supply may need to be reset. Go to the roof of the sauna and locate the power supply. Press the RESET button to reset the power supply. The RESET button is on the same side of the power supply as all the heater cord connections.
- Page 25 Limited Lifetime Warranty 5 Year Limited Warranty: Golden Designs, Inc. under the Dynamic brand name warranties the wood, structure, heating elements, and electronics against defects in material and workmanship for a period of 1 to 5 years from the original date of purchase. This sauna is for INDOOR use only.
-
Page 26: Warranty
Use of lacquer or paints Sauna and other Golden Designs, Inc. products accessories placed on non-approved surfaces Outdoor applications Normal wear and tear or weathering Use of product not in accordance with instructions Worn out receptacle Surface cracks are not considered defects in material or workmanship, as they are normal characteristics of all woods. -
Page 27: Warranty Card
WARRANTY CARD Congratulations on your purchase of an Infrared Sauna from Golden Designs, Inc. Please take the time to complete the following Warranty Card and mail it back to: Golden Designs, Inc. 3550 Jurupa Street, Unit B Ontario, CA 91761 Please include a copy of your sales receipt showing date of purchase as this will serve as proof of purchase.
Need help?
Do you have a question about the MX-M356-01 and is the answer not in the manual?
Questions and answers