Blodgett BX-14G Installation Operation & Maintenance
Hide thumbs
Also See for BX-14G:
- Installation, operation and maintenance manual (128 pages) ,
- Troubleshooting manual (117 pages) ,
- Installation operation & maintenance (60 pages)
Table of Contents
Advertisement
Quick Links
Advertisement
Table of Contents

Subscribe to Our Youtube Channel
Related Manuals for Blodgett BX-14G


Summary of Contents for Blodgett BX-14G
- Page 1 BCX-14G, BCX-14E, BX-14G, BX-14E, CNVX-14G AND CNVX-14E INSTALLATION - OPERATION - MAINTENANCE BLODGETT OVEN COMPANY www.blodgett.com 42 Allen Martin Drive, Essex Junction, VT 05452 USA Telephone: (802) 658-6600 Fax: (802) 864-0183 PN 39678 Rev AK (7/18) © 2018 - G.S. Blodgett Corporation...
- Page 2 Your Service Agency’s Address: Model Serial number Oven installed by Installation checked by...
-
Page 3: Table Of Contents
The Blodgett Combi-Oven/Steamer ........ -
Page 4: Installation
Today the improvement of food quality is more important than ever. Vegetables are cooked in the Blodgett Combi- Oven/Steamer without water at the optimal temperature of just under 100ºC (21ºF), maintaining valuable vita- mins, minerals, nutrients and trace elements. -
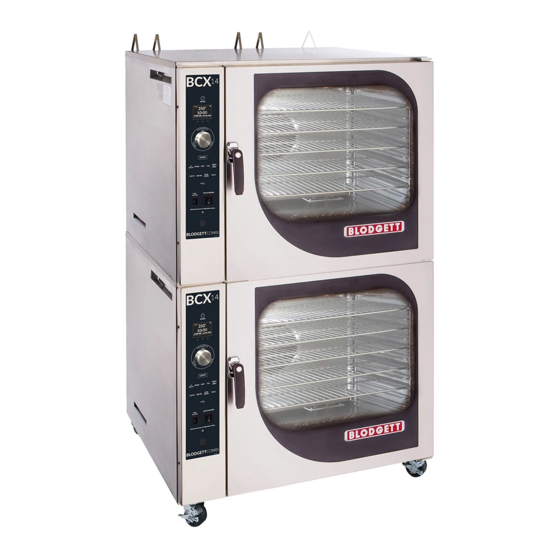
Page 5: Description Of The Combi-Oven/Steamer
Description of the Combi-Oven/Steamer ABOUT THE OVEN/STEAMER OVEN/STEAMER OPERATION Blodgett Combi-Oven/Steamers are quality produced us- The practical oven door, with a viewing window, has a ing high-grade stainless steel with first class workman- wide swing radius and handle which can be operated eas- ship. -
Page 6: Owner's Responsibilities
1. Oven(s) are uncrated, stacked (if applies) and put in place. PLUMBING SPECIFICATIONS BCX-14G/AA, BCX-14E/AA CNVX-14G/AA BX-14G/AA, and BX-14E/AA CNVX-14E/AA WATER Water pressure 40 PSI minimum 50 PSI maximum Water connection 3/4”... - Page 7 Installation Owner’s Responsibilities ELECTRICAL RATINGS - GAS OVENS BCX-14G/AA, BX-14G/AA AND CNVX-14G/AA TYPE OF GAS GAS INPUT VOLTAGE PHASE AMPS MOTOR BCX-14G/AA Natural Steam - 50,000 BTU/Hr 3/4 HP 208-240VAC, 3 phase, 50/60 Hz Hot Air - 65,000 BTU/Hr 208-240...
-
Page 8: Utility Connections - Standards And Codes
Local installation codes and/or require- ments may vary. If you have any questions regarding the proper installation and/or operation of your appliance, please contact your local distributor. If you do not have a local distributor, please call Blodgett Combi at 0011-802- 658-6600. -
Page 9: Oven Location And Ventilation
If you have any questions regarding the CNVX-14E proper installation and/or operation of your unit, please contact your local distributor. If you do not have a local distributor, please call Blodgett Combi at 0011-802-658- • Do not place strong sources of heat such as open 6600. -
Page 10: Leg Attachment
Installation Leg Attachment LEG OPTIONS ATTACHMENT Legs are available in 4” (101mm), 6” (152mm) or 25” 1. Align the threaded stud on one of the front legs to the (635mm) lengths or low profile casters. bolt hole located the bottom corner of the appliance. -
Page 11: Caster Attachment
Installation Caster Attachment 1. Place a level on the floor where the casters are to rest. 2. Place shims under the low side until it is level. 3. Mount the shims between the casters and the oven as follows: a. Align the shims and caster holes with the bolt Add shims as necessary holes. -
Page 12: Stacking
Installation Stacking 1. Attach the legs or casters to the bottom oven. WARNING!! 2. Place the top oven on the bottom oven. Be sure all Stacking should be performed by qualified four sides are flush. installation personnel only. The ovens are heavy. -
Page 13: Deliming System Connection And Priming (Bcx-14 Units Only)
Installation Deliming System Connection and Priming (BCX-14 units only) DELIMING SYSTEM CONNECTION 1. Push deliming tube onto barbed fitting on oven back. Insert the end of the deliming tube with the jug weight into the deliming solution reservoir. Figure 5 2. - Page 14 Installation Deliming System Connection and Priming (BCX-14 units only) PRIME THE DELIMING PUMP 4. In order to prime the delime pump, press the key be- low the word PUMP on the screen. When the word To prime the delime pump, use the following procedure PUMP is highlighted the delime pump is pumping for your oven control.
- Page 15 Installation Deliming System Connection and Priming (BCX-14 units only) SmartTouch 2™ Control 1. With the oven off, the control displays the POWER screen. Press the TOOLS key. 2. On the TOOLS MENU press the MANAGER key. 3. Press the PRIME DELIME PUMP key on the display. 4.
-
Page 16: Plumbing Connections
160°F, and be backflow preventer. of adequate diameter not to cause flow restric- tion. Improper materials may deform and cause restrictions, thus affecting performance. Gas connection Electrical connection BCX-14G and BX-14G BCX-14E and BX-14E Filtered/boiler connection Unfiltered/condensate and spray hose connection CNVX-14G... -
Page 17: Electrical Connections
NOTE: Disconnect the power supply to the appliance 125 VAC, 60 Hz, specification grade GFCI duplex recep- before servicing. tacle as being immune to the variable frequency inverter drive’s noise. Blodgett recommends using this specific WARNING!! GFCI for this model oven. Improper installation may invalidate your war- ranty. -
Page 18: Gas Connection
Installation Gas Connection GAS PIPING Maximum Capacity of Iron Pipe in Cubic Feet of Natural Gas Per Hour A properly sized gas supply system is essential for maxi- mum oven performance. Piping should be sized to pro- (Pressure drop of 0.5 Inch W.C.) vide a supply of gas sufficient to meet the maximum de- mand of all appliances on the line without loss of pressure NOMINAL SIZE, INCHES... - Page 19 If you do not have a cess of 1/2 psig (3.45kPa). local distributor, please call Blodgett Combi at 0011-802- 658-6600. The oven must be isolated from the gas supply piping...
-
Page 20: Gas Hose Restraint
If you do not have a returned to its original position. local distributor, please call Blodgett Combi at 0011-802- 658-6600. Quick Connect Attachment Plate... -
Page 21: Adjustments
Installation Adjustments Before applying power to the appliance for the first time, DOOR ADJUSTMENT check for the following conditions: The door catch may be adjusted in and out using the fol- • All electrical safety provisions have been adhered lowing procedure: to and the electrical connections are correct. -
Page 22: Final Check Lists
Installation Final Check Lists Combi Mode - BCX-14 and BX-14 only WARNING!! Change to COMBI mode, set thermostat to 350ºF (177ºC) Final check list must be performed by a quali- and verify: fied installer only. • The oven is preheating and shows the actual cavity temperature rising. -
Page 23: Operation
DO NOT use tools to turn off the gas control. If the erating instructions. They are the key to the successful gas cannot be turned off manually do not try to re- operation of your Blodgett oven. pair it. Call a qualified service technician. SAFETY TIPS •... -
Page 24: Power Switches
Operation Power Switches CONTROLS IDENTIFICATION 1. HEAT CONTROL SWITCH Gas Ovens - Used to turn gas on or off. Electric Ovens - Used to turn power to the elements on or off. 2. CIRCUIT BREAKER - Used to turn power to the unit on or off. This switch should always stay ON. Circuit Breaker See View A... -
Page 25: Standard Controls
Operation Standard Controls CONTROLS IDENTIFICATION 1. POWER KEY - used to place control in and out of standby mode 2. DISPLAY - displays time, temperature, humidity and other information related to oven function and/or pro- gramming 3. DISPLAY KEYS - context sensitive keys used to inter- act with the display 4. - Page 26 Operation Standard Controls OVEN STARTUP key to exit the cook cycle. 1. Be sure the circuit breaker and heat cutoff switches 7. Remove the product from the oven. are in the ON position. The display flashes PRESS POWER KEY TO TURN ON. MANUAL CORE PROBE COOKING 2.
- Page 27 Operation Standard Controls 2. Press the TEMP KEY (5). Rotate the CONTROL 5. Remove the product from the oven. KNOB (6) to enter the desired cavity cook tempera- ture. Press any key to accept the value. The oven COOK CYCLE ADJUSTMENTS preheats to the new cavity set temperature.
- Page 28 Operation Standard Controls OVEN SHUTDOWN 8. To save the recipe and exit the edit mode, select ESC using the center display key. 1. Press the COOL DOWN KEY (16). The display reads COOLING and gives the actual cavity temperature. 9. To delete a recipe, with the recipe name highlighted To speed up the cool down process, open the doors.
-
Page 29: Smarttouch 2 Touchscreen Control
Operation SmartTouch 2 Touchscreen Control CONTROL DESCRIPTION 1. TOUCHSCREEN - interactive display for oven func- tioning and/or programming 2. USB Port and COVER - Use to transfer recipes and data to/from the control 3. HEAT CUTOFF - used to turn heat source off 4. - Page 30 Operation SmartTouch 2 Touchscreen Control MANUAL MODE COOKING Fan Reversal Interval - To adjust the fan reversal time, press the FAN REVERSAL icon. Enter the de- 1. Press POWER to turn on the oven. sired reversal interval on the keypad provided. Press 2.
- Page 31 Operation SmartTouch 2 Touchscreen Control BCX shown Core Probe Screen - BCX shown Mode Selection Vent Humidity Closed Vent Temperature Open Actual Temp Core Probe Cooking Add a minute Time Steam on Demand Vent Position Fan Speed Fan Delay Fan Reversal Increment Lights BCX shown...
- Page 32 Operation SmartTouch 2 Touchscreen Control MENU MODE Create a New Recipe 3. The NEW RECIPE screen is displayed. Press the camera icon. 1. From the mode selection screen, select MENU. Figure 19 Figure 17 4. Select an icon to represent the recipe. 2.
- Page 33 Operation SmartTouch 2 Touchscreen Control 5. Press NEW RECIPE text. Use the keypad provided to 8. Enter parameters for the first cooking step. Press the enter a recipe name. Press the DISK ICON to save. icon above each parameter to adjust settings. Press the + to add a step.
- Page 34 Operation SmartTouch 2 Touchscreen Control Create a New Category 4. Press the NEW CATEGORY text. Use the keypad provided to enter a category name. Press the DISK 1. From the mode selection screen, select MENU. ICON to save. Figure 25 Figure 27 2.
- Page 35 Operation SmartTouch 2 Touchscreen Control Edit Existing Category 1. From the mode selection screen, select MENU. 2. Press and hold the icon for the category you wish to edit. 3. Choose edit, copy or delete from the pop up menu. Menu Mode Cooking 1.
- Page 36 Operation SmartTouch 2 Touchscreen Control RACK TIMING Creating a Rack Timing Group 1. From the mode selection screen, select RACK TIM- ING. The SELECT GROUP screen is displayed. 2. Select ADD GROUP. Figure 32 3. Press the pencil icons to edit the group name and cooking parameters.
- Page 37 Operation SmartTouch 2 Touchscreen Control Using Rack Timing 5. To add time, select +1 MIN key for individual racks or +1 MIN ALL key to add time to all racks. Each time the 1. From the mode selection screen, select RACK TIM- key is pressed, 1 minute of cook time is added.
- Page 38 Operation SmartTouch 2 Touchscreen Control USB INTERFACE 3. The following menu is displayed. To Access the USB Drive 1. From the mode selection screen, select USB Figure 41 4. Insert USB drive into USB port on the control panel. Figure 39 2.
- Page 39 Operation SmartTouch 2 Touchscreen Control To Store Menu Data to a USB To Retrieve Menu Data from a USB NOTE: The following procedure may be used to store NOTE: The following procedure may be used to upload any type of data to a USB including HACCP, set- menu recipes and/or icons from a USB.
- Page 40 Operation SmartTouch 2 Touchscreen Control COOL DOWN 1. From the mode selection screen, select COOL 2. The display toggles between cooling and open door DOWN. in yellow until the oven is cool. NOTE: If the oven is shut down with the circuit breaker switch at the bottom of the front panel, the display will return to the power screen.
-
Page 41: Maintenance
Maintenance Spray Bottle Operating Procedure 3. To spray, depress the trigger with your thumb. NOTE: Only use a commercial oven cleaner/degreaser with the spray bottle. DO NOT use chemicals that are not intended as oven cleaners. See chemical manufacturer’s information for intended use. -
Page 42: Cleaning And Preventive Maintenance
The Oven/Steamer requires no lubrication. Contact the factory, the factory representative or a local Blodgett Combi service com- pany to perform maintenance and repairs should they be required. -
Page 43: Bx-14 Boilerless Oven Weekly Cleaning
Maintenance Cleaning and Preventive Maintenance BX-14 BOILERLESS OVEN WEEKLY CLEANING In addition to the daily cleaning, it is necessary to clean 5. Fill the spray bottle as described in the Daily Clean- behind the fan guard of this oven on a weekly basis. This ing procedure. -
Page 44: Flushing The Boiler - Bcx Models Only
Maintenance Flushing the Boiler - BCX Models Only STANDARD CONTROL A flush of the boiler is required every 24 hours and hap- pens either automatically or can be initiated at any time. NOTE: In order to flush the oven, the water and gas supply must be left on. -
Page 45: Deliming
Maintenance Deliming BCX COMBI OVENS BCX WITH STANDARD CONTROL Deliming of the steam generator is the single most im- 1. When it is time to delime your BCX, the display reads: portant preventative maintenance task. Lime will build up inside the steam generator, reducing efficiency and caus- ing damage to the boiler. - Page 46 Maintenance Deliming BCX WITH SMARTTOUCH 2 CONTROL After 30 hours of boiler operation the control reminds you delime your boiler. Press OK to acknowledge the remind- Figure 60 2. The control displays the current flush stage. To stop the deliming process, press ABORT. Figure 59 NOTE: Once the deliming process has been start- ed, the oven cannot be used until deliming...
-
Page 47: Bx-14 Boilerless Oven
Maintenance Deliming BX-14 BOILERLESS OVEN It may be necessary to delime the oven interior and be- 6. Thoroughly spray deliming agent onto the fan, heat hind the fan guard. This is necessary for proper function- source and back of fan guard. Wait 10 minutes. ing of the oven. -
Page 48: Deliming Interval Setting - Bcx Only
Maintenance Deliming DELIMING INTERVAL SETTING - BCX ONLY Refer to figure below to determine the correct deliming interval for your appliance. Find your location and the corresponding potentiometer setting. These values are general and are guidelines only. Your specific water quality may be harder or softer. Adjust the deliming interval to your specific water quality.
Need help?
Do you have a question about the BX-14G and is the answer not in the manual?
Questions and answers