Advertisement
Quick Links
Installation Guide
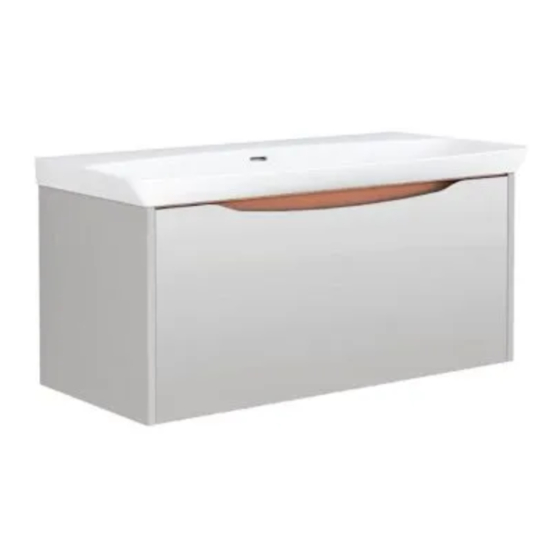
Lustre Wall Mounted Washbasin Unit
Important Information
•
Read the instructions carefully.
•
Check the product for any signs of damage and remove any protective film.
•
It is recommended that this product is fitted by a suitably qualified Part P registered
electrician in accordance with current IEE & Building Regulations.
•
It is the installer's responsibility to carry out a thorough assessment of wall type and the
weight of the cabinet and use appropriate fixings.
•
Care should be taken when drilling walls to avoid any hidden wires or pipes.
•
To prevent the cabinet falling down this product must be fixed using the wall attachment
device provided.
•
The light source in this luminaire is not replaceable. When the light source reaches its
end of life, the whole luminaire must be replaced.
•
The terminal block used to connect the leads to the electrical supply can be of either the
screw- or screw-less type and should be rated at 240V 6A with 4 terminals. The cable
tails do not need to be crimped when connected to the terminal block.
•
The driver can be screwed to the internal top rail of the cabinet or left to hang in the void
between the cabinet and the wall.
•
This product should be used only with a mains supply that is protected by a 30mA
Residual Current Device.
•
This product is IP20 Rated and is only suitable for installation in Outside Zones in a
bathroom. It is not suitable to be fitted in zones 0, 1 or 2.
Connection to Mains Electrics
1. Turn off the electrical supply.
2. Connect the driver cable for the internal cabinet light to the electrical supply in the
bathroom (A). it is recommended that this light is connected to a constant electrical feed.
3. Connect the driver cable for the under-cabinet light to the electrical supply in the
bathroom (B). It is recommended that this light is connected to a separate switched feed
or to a room motion sensor.
4. Turn the electrical supply back on and check that the lights function as required.
WARNING
RISK OF ELECTRIC SHOCK
Turn off Mains Electric prior to commencing
work.
Advertisement

Subscribe to Our Youtube Channel
Related Manuals for Utopia Lustre


Summary of Contents for Utopia Lustre
- Page 1 Installation Guide Lustre Wall Mounted Washbasin Unit Important Information • Read the instructions carefully. • Check the product for any signs of damage and remove any protective film. • It is recommended that this product is fitted by a suitably qualified Part P registered electrician in accordance with current IEE &...
- Page 2 Installation Mark a horizontal line on the wall at the required height X---X. Ensure that the wall brackets will fit inside the width of the cabinet and are equally spaced to ensure even distribution of weight. Secure the wall brackets to the wall using suitable fixings. Hook the unit onto the wall brackets so that the spring locks the arm into place.
-
Page 3: Installation
Installation Guide Lustre Toilet Unit Without Cistern Important Information • Read the instructions carefully. • Check the product for any signs of damage and remove any protective film. • It is recommended that a technically competent installer undertakes installation. •... - Page 4 Installation Guide Lustre Toilet Unit With Cistern Important Information • Read the instructions carefully. • Check the product for any signs of damage and remove any protective film. • It is recommended that a technically competent installer undertakes installation. •...
- Page 5 Installation Guide Lustre Tall Mirror Cabinet Important Information • Read the instructions carefully. • Check the product for any signs of damage and remove any protective film. • It is recommended that this product is fitted by a suitably qualified Part P registered electrician in accordance with current IET &...
-
Page 6: Door Hinge Adjustment
Fitting Cabinet to Wall It may be necessary to snap the wall plate in half at the marked line to create two wall brackets. Mark a horizontal line on the wall at the required height X---X. Ensure that the wall brackets will fit inside the width of the cabinet and are equally spaced to ensure even distribution of weight. - Page 7 Installation Guide Lustre Mirror Cabinet Without Bluetooth Important Information • Read the instructions carefully. • Check the product for any signs of damage and remove any protective film. • It is recommended that this product is fitted by a suitably qualified Part P registered electrician in accordance with current IEE &...
- Page 8 Fitting Cabinet to Wall It may be necessary to snap the wall plate in half at the marked line to create two wall brackets. Mark a horizontal line on the wall at the required height X---X. Ensure that the wall brackets will fit inside the width of the cabinet and are equally spaced to ensure even distribution of weight.
- Page 9 Installation Guide Lustre Mirror Cabinet With Bluetooth Important Information • Read the instructions carefully. • Check the product for any signs of damage and remove any protective film. • It is recommended that this product is fitted by a suitably qualified Part P registered electrician in accordance with current IEE &...
- Page 10 Fitting Cabinet to Wall It may be necessary to snap the wall plate in half at the marked line to create two wall brackets. Mark a horizontal line on the wall at the required height X---X. Ensure that the wall brackets will fit inside the width of the cabinet and are equally spaced to ensure even distribution of weight.
- Page 11 Installation Guide Lustre Bath Side Panel Important Information • Read the instructions carefully. • Ensure product contents are complete. • Check the product for any signs of damage and remove all protective film. • It is recommended that a technically competent installer undertakes installation.
- Page 12 Installation Guide Lustre Bath End Panel Important Information • Read the instructions carefully. • Ensure product contents are complete. • Check the product for any signs of damage and remove all protective film. • It is recommended that a technically competent installer undertakes installation.
Need help?
Do you have a question about the Lustre and is the answer not in the manual?
Questions and answers