
Subscribe to Our Youtube Channel
Related Manuals for Fisher & Paykel OR36S Gas Gas


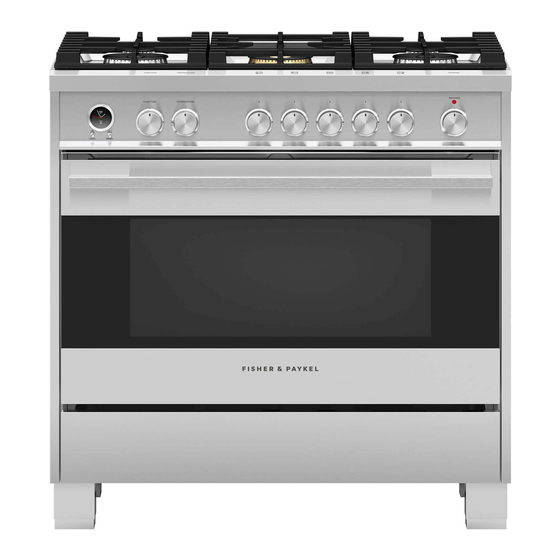
Summary of Contents for Fisher & Paykel OR36S Gas Gas
- Page 1 FREESTANDING RANGE OR36S Gas Gas & OR36S Dual Fuel models INSTALLATION GUIDE US CA...
-
Page 2: What To Do If You Smell Gas
WARNING! If the information in this manual is not followed exactly, a fire or explosion may result causing property damage, personal injury or death. Do not store or use gasoline or other flammable vapors and liquids in the vicinity of this or any other appliance. -
Page 3: Safety And Warnings
SAFETY AND WARNINGS The product data plate is attached below the bottom drawer. WARNING! To check the label, it is necessary to remove the drawer (see ‘Setting the pressure regulator’ for instructions on drawer removal). Electrical shock hazard Before carrying out any work on the electrical section of the appliance, it must be disconnected from the mains DATA PLATE electricity supply. -
Page 4: Important Safety Instructions
SAFETY AND WARNINGS IMPORTANT SAFETY INSTRUCTIONS! GENERAL INSTALLATION INFORMATION Installation in manufactured (mobile) home Installation must conform with the Manufactured Home Construction and Save these instructions for the local inspectors use. Safety Standard, Title 24 CFR, Part 3280 [formerly the Federal Standard To avoid hazard, follow these instructions carefully before installing or using this appliance. - Page 5 PARTS SUPPLIED FOR INSTALLATION Anti-tip Small Bolt (1) Threaded Wood Screws Pressure 1/2" (12.7mm) Gas extension Gas extension Ground lead* Cupped washer* bracket (1) screws & nuts (2) screws (8) and plastic regulator (1) NPT connector pipe support pipe and (3 wire permanent (4 wire permanent washers...
-
Page 6: Model Identification
MODEL IDENTIFICATION Model features may vary 36" GAS GAS MODELS 36" DUAL FUEL MODELS OR36SCG4 OR36SCG6 OR36SDG4 OR36SDG6 PRIOR TO INSTALLATION Unpacking and handling Inspect the range to verify that there is no shipping damage. If any damage is detected, call the shipper and initiate a damage claim. Fisher & Paykel is not responsible for shipping damage. DO NOT discard any packing material until the range has been inspected. -
Page 7: Product Dimensions
PRODUCT DIMENSIONS Note: Model features may vary Optional kickstrip is available (purchased separately) FRONT PROFILE OR36S GAS GAS OR36S DUAL FUEL PRODUCT DIMENSIONS INCHES INCHES A Overall height of product (from floor to top of cooktop, min 35 3/8 min 898... - Page 8 The same FRONT clearances apply to island installations. The range can be placed in various positions OR36S GAS GAS OR36S DUAL FUEL with respect to the cabinet front, with the CLEARANCE DIMENSIONS control panel either flush or projecting,...
- Page 9 FITTING THE OPTIONAL BACKGUARD LOCATION OF ELECTRICAL & GAS SUPPLY Island trim and backguard Grounded outlet (Gas Gas) It is mandatory to install and use the appliance with either the island trim or the optional backguard The electric cord with correctly in place.
-
Page 10: Ventilation Requirements
VENTILATION REQUIREMENTS A suitable ventilation hood may be installed above the range. Fisher & Paykel has a choice of ventilation hoods designed to match the rest of our kitchen appliance family. See fisherpaykel.com or your local dealer for more details. IMPORTANT Consult local building codes and/or local agencies, before starting, to ensure that hood and duct installation will meet local requirements. -
Page 11: Fitting The Adjustable Feet
FITTING THE ADJUSTABLE FEET Fitting the adjustable feet Fitting the adjustable (front) feet covers (optional) The adjustable feet must be fitted to the base of the range before use. If using the adjustable feet covers fit these while the range is tipped over. Rest the rear of the range on a piece of the polystyrene packaging exposing the base for the fitting of the feet. -
Page 12: Moving The Range
FITTING THE ADJUSTABLE FEET Fitting the adjustable (rear) feet covers (optional) If installing rear feet covers use the following instructions to attach the mounting brackets to the base of the range. Washers 1 Remove screws A, B and C from 2 Replace screw C with one of the 3 Attach the mounting bracket to 4 Secure covers to brackets using the... - Page 13 INSTALLING THE COOKTOP FRONT GUARD INSTALLING THE ANTI-TIP BRACKET The anti-tip bracket has two components: Models without hob rail only To increase the clearance between the front edge of the cooktop and the adjustable bracket the burners it is possible to install the cooktop front guard supplied with the appliance. the stability bracket IMPORTANT! IMPORTANT...
- Page 14 INSTALLING THE ANTI-TIP BRACKET 3 Fix the stability bracket in place. It can be fixed as follows: To the floor OR on the rear wall by #4 screws (supplied). To the floor AND on the rear wall by #8 screws (supplied). There are 8 x wood screws and 8 x screws with plastic sleeve anchors supplied with the range in two separate kits.
-
Page 15: Electrical Connection
ELECTRICAL CONNECTION OR36 Dual Fuel models ONLY OR36 Gas Gas models ONLY WARNING! If codes permit and a separate ground wire is used, it is recommended that a qualified electrician determine that the ground path is adequate. If codes permit and a separate ground wire is used, it is recommended that a qualified electrician determine that Be sure that the electrical connection and wire size are adequate the ground path is adequate. - Page 16 ELECTRICAL CONNECTION 4-Wire Connection 3-Wire Connection (using supplied Ground lead) PERMANENT CONNECTION (HARD WIRING) 1 Loosen the L1 (black), L2 (red) and neutral (white) screws. 1 Loosen the L1 (black), L2 (red) and neutral US only, for Canada it is mandatory to connect the range (white) screws.
-
Page 17: Gas Connection
GAS CONNECTION Gas requirements Manual shut-off valve All gas connections must be made according to national and local codes. A manual shut-off valve must be installed Shut-off valve ‘open’ position The gas supply (service) line must be the same size or greater than the inlet in an accessible location in the gas line line of the appliance. - Page 18 GAS CONNECTION Gas connection specification IMPORTANT! Check the correct positioning of the gas regulator. The arrow on the back of the gas regulator must be oriented toward the connector. To range Range manifold 1/2" G cylindrical Manifold male (ISO 228-1) male pipe fitting Gasket 1/2"...
- Page 19 GAS CONNECTION Pressure regulator installation All heavy duty, commercial type cooking equipment must have a pressure regulator on the incoming service line for safe and efficient operation, since service pressure may fluctuate with local demand. The regulator supplied with this range must be installed before any gas connections are made.
- Page 20 GAS CONNECTION 4 Connect the extension pipe and pressure regulator group to the range gas manifold 5 Fix the extension pipe support bracket onto the back of the range using the two ensuring the supplied gasket is positioned between. The regulator cover must be supplied screws.
-
Page 21: Pressure Testing
PRESSURE TESTING Manifold pressure should be checked with a manometer using the following instructions: 1 Remove the injector from the rear left (or rear right) burner and mount the test point adapter (available from the After-Sales service). 2 Turn the burner control knob to the maximum position. TEST POINT ADAPTER 3 Press the knob and keeping it pressed check the manifold pressure with a manometer. -
Page 22: Gas Conversion
GAS CONVERSION Conversion to LP/Propane Gas Pressure regulator This range can be used with NATURAL or LP/PROPANE gas. It is shipped from the factory adjusted for use with NATURAL gas. Any conversion required must be performed by your dealer, a qualified licensed technician or gas service company. - Page 23 GAS CONVERSION Replacing the cooktop burner injectors Injectors table Remove the pan supports, the burner caps and the flame spreaders. LP/PROPANE NATURAL GAS Using a wrench substitute the nozzle injectors with those most suitable for the kind of NOMINAL REDUCED 11"...
- Page 24 GAS CONVERSION Adjusting the cooktop burner minimums When switching from one type of gas to another, the minimum flow rate must also be correct: Regulation The flame should not go out even when passing suddenly from screws maximum to minimum flame. To regulate the flame follow these instructions: Semi-rapid burner ( Light the burner...
- Page 25 GAS CONVERSION (GAS GAS MODELS ONLY) Replacing the lower oven burner injector Ignition electrode Anchorage clip Anchorage clip Safety valve probe 1 Lift and remove the lower panel inside the oven. Injector 2 Gently unlock, the safety valve probe (V) and the ignition electrode (E) from the burner.
- Page 26 GAS CONVERSION (GAS GAS MODELS ONLY) Replacing the oven broil burner injector Anchorage clip Safety valve probe Ignition electrode Anchorage clip 1 Gently unlock, the safety valve probe (V) and the ignition electrode (E) from Injector the burner. Take care not to damage the probe and the ignition electrode. 2 Unscrew and remove the burner securing screw (A).
- Page 27 GAS CONVERSION (GAS GAS MODELS ONLY) Adjusting the lower oven burner minimum 1 Turn on the burner by setting the oven dial the highest temperature setting. 2 Remove the dial and unscrew the by-pass screw A about three times by passing a small flat screwdriver (Ø1/8"...
-
Page 28: Final Checklist
FINAL CHECKLIST TO BE COMPLETED BY THE INSTALLER GENERAL OPERATION Placement of unit. All internal packing materials removed. Check below the cooktop grates and inside the oven. Specified clearance maintained to cabinet surfaces. If used on LP gas, verify that the pressure regulator, cooktop burner injectors and Unit Level –... -
Page 29: Guide D'installation
CUISINIÈRE NON ENCASTRÉE Modèles au gaz et mixtes OR36 GUIDE D’INSTALLATION 591508D 06.19... - Page 30 MISE EN GARDE! Le fait de ne pas suivre toutes les instructions de ce manuel peut provoquer un incendie ou une explosion causant des dommages matériels, des blessures ou la mort. Ne rangez et n’utilisez pas de l’essence ou d’autres liquides et vapeurs inflammables à proximité de cet appareil ou de tout autre appareil.
-
Page 31: Consignes De Sécurité Et Mises En Garde
CONSIGNES DE SÉCURITÉ ET MISES EN GARDE La plaque signalétique du produit est apposée sous le tiroir inférieur. MISE EN GARDE! Pour vérifier l’étiquette, il est nécessaire de retirer le tiroir (consultez ‘Réglage du régulateur de pression’ pour les instructions de retrait du tiroir). Risque de choc électrique Avant de procéder à... -
Page 32: Consignes De Sécurité Importantes
CONSIGNES DE SÉCURITÉ ET MISES EN GARDE CONSIGNES DE SÉCURITÉ IMPORTANTES! INFORMATIONS D’INSTALLATION GÉNÉRALES Installation in manufactured (mobile) home L’installation doit être effectuée conformément à la norme Conservez ces instructions pour permettre aux inspecteurs locaux de les consulter. Manufactured Home Construction and Safety Standard, Titre 24 Pour réduire les risques de danger, suivez attentivement ces instructions avant d’installer ou utiliser cet appareil. - Page 33 PIÈCES FOURNIES POUR L’INSTALLATION Support Petites Boulon Écrous Vis à bois Vis et Régulateur Connecteur NPT Support de tuyau Tuyau Fil de masse* Rondelle creuse* antibasculement vis et filetés chevilles à de pression 1/2" (12,7 mm) d’extension de d’extension de (Connexion (Connexion rondelles douille en...
-
Page 34: Identification Du Modèle
IDENTIFICATION DU MODÈLE Remarque : Les caractéristiques du modèle peuvent varier MODÈLES AU GAZ 36" MODÈLES MIXTES 36" OR36SCG4 OR36SCG6 OR36SDG4 OR36SDG6 AVANT L’INSTALLATION Déballage et manutention Inspectez la cuisinière pour vous assurer qu’aucun dommage n’a été causé lors de l’expédition. En cas de dommage, communiquez avec l’expéditeur pour effectuer une demande d’indemnisation. -
Page 35: Dimensions Du Produit
DIMENSIONS DU PRODUIT Remarque : Les caractéristiques du modèle peuvent varier Kickstrip en option est disponible (acheté séparément) AVANT CÔTÉ GAZ OR36S MIXTE OR36S PRODUCT DIMENSIONS POUCES POUCES A Hauteur hors tout de la cuisinière (du plancher au dessus min 35 3/8 min 898 min 35 3/8 min 898... - Page 36 DIMENSIONS DE DÉGAGEMENT Remarque #1 Pour éviter les risques de brûlures ou d’incendie en atteignant les surfaces chauffées, l’espace de rangement des armoires situé au-dessus des unités de surface doit être évité. Si un rangement doit être fourni, le risque peut être réduit en installant une hotte qui fait saillie horizontalement à...
- Page 37 INSTALLATION DU DOSSERET EN OPTION EMPLACEMENT DES ALIMENTATIONS EN ÉLECTRICITÉ ET GAZ Garniture d’îlot et dosseret Prise mise à la terre (Gaz) Il est obligatoire d’installer et utiliser l’appareil avec la garniture d’îlot ou le dosseret en option correctement installé. Le cordon électrique La garniture d’îlot est déjà...
- Page 38 EXIGENCES RELATIVES À LA VENTILATION Une hotte de ventilation appropriée peut être installée au-dessus de la cuisinière. Fisher & Paykel a un choix de hottes de ventilation conçues pour correspondre le reste de notre famille d’appareils de cuisine. Voir fisherpaykel.com ou votre revendeur local pour plus de détails. IMPORTANT Consultez les codes du bâtiment et/ou organismes locaux avant de commencer, pour vous assurer que l’installation de la hotte et des conduits sera conforme aux exigences locales.
- Page 39 INSTALLATION DES PATTES AJUSTABLES Installation des pattes ajustables Installation des revêtements de pattes ajustables (en option) Les pattes ajustables doivent être installées sur la base de la cuisinière avant Si vous souhaitez utiliser les revêtements de pattes ajustables, installez-les pendant que l’utilisation.
-
Page 40: Déplacement De La Cuisinière
INSTALLATION DES PATTES AJUSTABLES Installation des revêtements de pattes ajustables (en option) Si vous souhaitez utiliser les revêtements de pattes ajustables, installez-les pendant que la cuisinière est basculée vers l’arrière. Rondelles 1 Retirer les vis A, B et C de la 2 Remplacez la vis C par l’une des vis 3 Attach the mounting bracket to 4 Fixez les couvercles aux supports à... - Page 41 INSTALLATION DU PROTECTEUR AVANT DE LA SURFACE DE CUISSON INSTALLATION DU SUPPORT ANTIBASCULEMENT Le support antibasculement est constitué de deux composants : Modèles sans rail uniquement Pour augmenter le dégagement entre le rebord avant de la surface de cuisson et les brûleurs, le support ajustable il est possible d’installer le protecteur avant de surface de cuisson fourni avec l’appareil.
- Page 42 INSTALLATION DU SUPPORT ANTIBASCULEMENT 3 Fixez le support de stabilité en place. Vous pouvez le fixer comme suit : Au sol OU au mur arrière à l’aide de 4 vis (fournies). Au sol ET sur la paroi arrière par 8 vis (fournies). Il y a 8 vis à...
-
Page 43: Raccordement Électrique
RACCORDEMENT ÉLECTRIQUE Modèles mixtes OR30 UNIQUEMENT Modèles au gaz OR30 UNIQUEMENT MISE EN GARDE! Si les codes le permettent et qu’un fil de mise à la terre distinct Si les codes le permettent et qu’un fil de mise à la terre distinct est utilisé, nous vous recommandons de faire appel à... - Page 44 RACCORDEMENT ÉLECTRIQUE Connexion à 4 fils Connexion à 3 fils (en utilisant le fil de masse fourni) CONNEXION PERMANENTE (CÂBLAGE DUR) 1 Desserrez les vis L1 (noire), L2 (rouge) et neutre (blanche). 1 Desserrez les vis L1 (noire), L2 (rouge) et US seulement, pour le Canada, il est obligatoire de connecter neutre (blanche).
-
Page 45: Raccordement Du Gaz
RACCORDEMENT DU GAZ Gas requirements Robinet d’arrêt manuel Tous les raccordements de gaz doivent être effectués en conformité avec Vous devez installer un robinet d’arrêt Robinet d’arrêt en position ‘ouverte’ les codes locaux et nationaux. manuel dans un endroit accessible de La conduite d’alimentation en gaz (service) doit être d’une taille identique ou supérieure la conduite de gaz, à... - Page 46 RACCORDEMENT DU GAZ Spécifications de raccordement du gaz IMPORTANT! Vérifiez le positionnement adéquat du régulateur de gaz. La flèche à l’arrière du régulateur de gaz doit être orientée vers le connecteur. Vers la cuisinière Collecteur de la cuisinière Raccord de Mâle cylindrique tuyau mâle G 1/2"...
- Page 47 RACCORDEMENT DU GAZ Installation du régulateur de pression Tous les équipements de cuisson de type commercial à haut rendement doivent être munis d’un régulateur de pression sur la conduite d’alimentation pour assurer un fonctionnement sécuritaire et efficace, car la pression d’alimentation peut fluctuer selon la demande locale. Vous devez installer le régulateur fourni avec cette cuisinière avant de procéder à...
- Page 48 RACCORDEMENT DU GAZ 4 Raccordez l’ensemble de tuyau prolongateur et de régulateur de pression au collecteur 5 Fixez le support de tuyau prolongateur à l’arrière de la cuisinière à l’aide des de gaz de la cuisinière en vous assurant de positionner le joint d’étanchéité fourni entre deux vis fournies.
- Page 49 VÉRIFICATION DE PRESSION La pression du collecteur doit être vérifiée avec un manomètre en suivant les instructions ci-dessous : 1 Retirez l’injecteur du brûleur arrière gauche (ou arrière droit) et installez l’adaptateur de point de vérification (disponible auprès du service après-vente). 2 Tournez le bouton de commande du brûleur à...
-
Page 50: Conversion Du Gaz
CONVERSION DU GAZ Conversion au gaz de pétrole liquéfié/propane Régulateur de pression Cette cuisinière peut être utilisée avec du gaz NATUREL ou de PÉTROLE LIQUÉFIÉ/ PROPANE. À sa sortie de l’usine, elle est réglée pour l’utilisation avec du gaz NATUREL. Toute conversion requise doit être effectuée par votre détaillant, un technicien autorisé... - Page 51 CONVERSION DU GAZ Remplacement des injecteurs de brûleur de la surface de cuisson Injectors table Retirez les pièces d’appui, les capuchons de brûleur et les diffuseurs de flamme. GAZ DE Utilisez une clé pour remplacer les injecteurs de buse par ceux adaptés au type PÉTROLE de gaz utilisé.
- Page 52 CONVERSION DU GAZ Réglage de débit minimum du brûleur de la surface de cuisson Lorsque vous passez d’un type de gaz à un autre, le débit minimum doit également être adapté : Vis de La flamme ne doit pas s’éteindre, même lors du passage soudain du niveau de flamme régulation maximum à...
- Page 53 CONVERSION DU GAZ (MODÈLES AU GAZ UNIQUEMENT) Remplacement de l’injecteur de brûleur de four inférieur Électrode d’allumage Clip d’ancrage Clip d’ancrage Sonde de la soupape de sûreté 1 Soulevez et retirez le panneau inférieur à l’intérieur du four. Injecteur 2 Déverrouillez délicatement la sonde de la soupape de sûreté (V) et l’électrode d’allumage (E) du brûleur.
- Page 54 CONVERSION DU GAZ (MODÈLES AU GAZ UNIQUEMENT) Remplacement de l’injecteur de brûleur de grillage du four Clip d’ancrage Sonde de la soupape de sûreté Électrode d’allumage Clip d’ancrage 1 Déverrouillez délicatement la sonde de la soupape de sûreté (V) et l’électrode Injecteur d’allumage (E) du brûleur.
- Page 55 CONVERSION DU GAZ (MODÈLES AU GAZ UNIQUEMENT) Réglage de débit minimum du brûleur de four inférieur 1 Allumez le brûleur en réglant le bouton du four au réglage de la température la plus élevée. 2 Retirez le bouton et dévissez la vis de dérivation ( ) d’environ trois tours en passant un petit tournevis à...
-
Page 56: Liste De Vérification Finale
LISTE DE VÉRIFICATION FINALE À ÊTRE REMPLIE PAR L’INSTALLATEUR GÉNÉRALITÉS FONCTIONNEMENT Emplacement de l’appareil. Tous les matériaux d’emballage internes ont été retirés. Vérifiez en dessous des grilles de la surface de cuisson et à l’intérieur du four. Mesures de dégagement spécifiées respectées par rapport aux surfaces d’armoires. Si l’appareil est utilisé...
Need help?
Do you have a question about the OR36S Gas Gas and is the answer not in the manual?
Questions and answers