Table of Contents
Advertisement
Quick Links
Advertisement
Table of Contents

Related Manuals for SPORTS AFIELD SA-HD1-BIO


Summary of Contents for SPORTS AFIELD SA-HD1-BIO
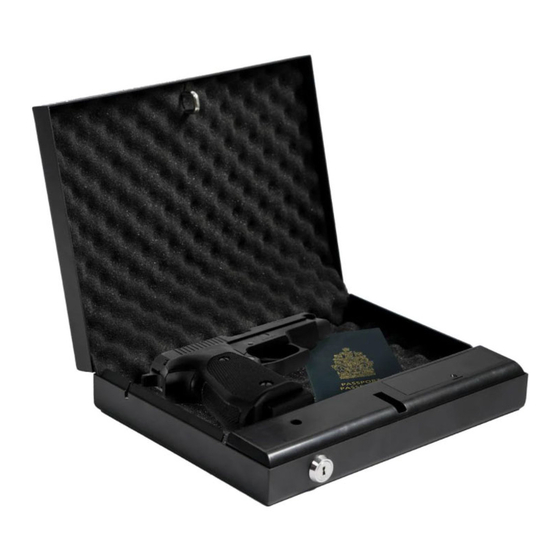
- Page 1 QUICK ACCESS BIOMETRIC SECURITY VAULT INSTRUCTION MANUAL FOR SA-HD1-BIO 072921...
-
Page 2: Table Of Contents
TABLE OF CONTENTS IMPORTANT INFORMATION ....................2 1. REGISTRATION ........................ 3 2. UNDERSTANDING YOUR VAULT ..................4 3. INITAL ENTRY........................5 4. BATTERY INSTALLATION ....................5 5. PROGRAMMING YOUR FINGERPRINT................. 6 6. OPENING VAULT WITH PROGRAMMED FINGERPRINT ..........7 7. PROGRAMMING ADDITIONAL FINGERPRINTS ............. 8 8. -
Page 3: Important Information
DISCLAIMER - READ BEFORE VAULT SETUP PLEASE READ THIS INFORMATION CAREFULLY BEFORE OPERATING YOUR SPORTS AFIELD VAULT. DO NOT LOCK THIS MANUAL OR THE ACCESS KEYS IN YOUR VAULT. Thank you for choosing a Sports Afield vault to protect your valuables. We are committed to securing, organizing and protecting your most important documents, valuables and keepsakes. -
Page 4: Registration
1. REGISTRATION Register your vault at www.saproducts.com By registering your Sports Afield vault we will be able to expedite and address any problems or challenges you may have which would otherwise require a notary letter and proof of payment. REGISTRATION INFORMATION The information you record onto this page will be required in the event you cannot access the contents of your Sports Afield vault. -
Page 5: Understanding Your Vault
2. UNDERSTANDING YOUR VAULT Biometric Scanner Key Entry RESET BUTTON (INSIDE BATTERY COMPARTMENT BATTERY COMPARTMENT SECURITY CABLE... -
Page 6: Inital Entry
3. INITIAL ENTRY Locate the back up key on the front surface of the vault. Insert the back up key and turn it counter-clockwise to open your vault. The spring loaded lid will open upwards automatically, but does not open to a fully MANUAL OPEN accessible position. -
Page 7: Programming Your Fingerprint
5. PROGRAMMING YOUR FINGERPRINT Battery Compartment Remove Screw Remove the battery compartment cover For Entry and locate the reset button inside. 2. Press and release the reset button. The biometric scanner will beep and the indicator ring will illuminate, indicating you are now in programming mode. -
Page 8: Opening Vault With Programmed Fingerprint
6. OPENING VAULT WITH RECORDED FINGERPRINT With keys in hand, close the door. Place and hold the programmed finger on the scanner, if your fingerprint was successfully programmed the indicator ring will illuminate green and vault door will open automatically. SCANNER LIGHT If your fingerprint is not accepted:... -
Page 9: Programming Additional Fingerprints
7. PROGRAMMING ADDITIONAL FINGERPRINTS (CONTINUED) When accessing your vault quickly, there is a chance you might press the scanner with a part of your finger that you have not registered before. For this reason, we recommend programming additional areas of your fingerprint to ensure fast and reliable entry to your vault. -
Page 10: Trouble Shooting
8. TROUBLE SHOOTING In the event that you run into issues with programming and accessing your vault, please read through this section for answers to your questions. Low Battery Warning BATTERIES ARE LOW IF THE BIO SENSOR TURNS PURPLE. If you notice your indicator ring is not remaining on for a few seconds upon entering, replace batteries immediately to avoid being locked out of your vault. -
Page 11: Lockout Mode And Tamper Protection
9. LOCKOUT MODE/ TAMPER PROTECTION 1. Three consecutive incorrect code entries will put the vault in “Basic Lockout” mode. Scanner is deactivated for 30 seconds. 2. After “Basic Lockout” mode has ended, another three consecutive incorrect code entries will result in “Severe Lockout” mode. Scanner is deactivated for 5-minutes. -
Page 12: Securing Your Vault
12. SECURING YOUR VAULT TOOLS AND HARDWARE NEEDED TO SECURE VAULT TO A WOOD OR CONCRETE SURFACE: • DRILL • 2 STEEL LAG BOLTS (NOT INCLUDED) - SIZE 1/4" X 1.50" TO 2.0" LONG • 2 STEEL WASHERS (NOT INCLUDED) •... -
Page 13: Loading Your Vault
12. SECURING YOUR VAULT CONTINUED SECURING YOUR VAULT WITH PROVIDED CABLE A security cable is included with your vault. To secure the cable around a fixed object, first loop the cable around the object. Next, thread one looped end through the second loop as shown in the figure to the right. -
Page 14: Warranty
SA Consumer Products will repair or replace, at their sole discretion, any Sports Afield vault damaged by fire, forced entry, forced attack or natural flood for the lifetime of the original owner. SA Consumer Products will repair or replace, at their sole discretion, any Sports Afield vault with defective parts, paint or lock for three years of the original owner purchase date.
Need help?
Do you have a question about the SA-HD1-BIO and is the answer not in the manual?
Questions and answers