Table of Contents
Advertisement
Quick Links
Advertisement
Table of Contents

Subscribe to Our Youtube Channel
Related Manuals for Trace2O ARSENOMETER HMAS100


Summary of Contents for Trace2O ARSENOMETER HMAS100
- Page 1 ARSENOMETER HMAS100 Portable Arsenic Analyser...
-
Page 2: Table Of Contents
Arsenometer HMAS100 Instruction Manual v2.0 CONTENTS INTRODUCTION GETTING TO KNOW YOUR ARSENOMETER GETTING STARTED OPERATING PROCEDURE 2.3.1 METHODS 2.3.2 PLATING 2.3.3 ANALYSIS STANDARD ADDITION ANALYSES – OVERVIEW 2.3.4 2.3.5 ADDING A STANDARD ADDITION TROUBLE SHOOTING INTERFERENCES SPECIFICATIONS 2 www.trace2o.com... -
Page 3: Introduction
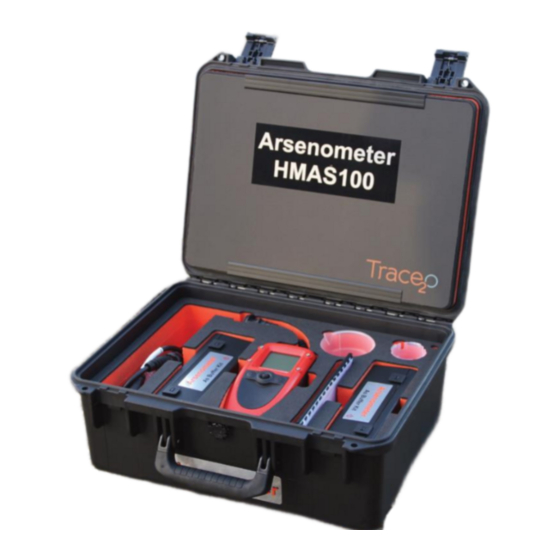
Arsenometer HMAS100 Instruction Manual v2.0 1. INTRODUCTION The Arsenometer HMAS100 kit is ideal for testing arsenic in natural water courses, for example lakes and rivers. The Arsenometer HMAS100 is a rugged field kit using a well established technique for the detection of heavy metals, Anodic Stripping Voltammetry. -
Page 4: Getting To Know Your Arsenometer
Arsenometer HMAS100 Instruction Manual v2.0 2.1 GETTING TO KNOW YOUR ARSENOMETER Sonde Connector Cable USB Connector LCD Screen USB Connection Indicator Stirrer Icon Battery Status Indicator 4-Way Navigation Joystick (Push for OK) CANCEL Button ON/OFF Button 4 www.trace2o.com... - Page 5 Arsenometer HMAS100 Instruction Manual v2.0 USB Connector The USB connector can be used to charge the battery using the supplied car or mains charger, and also for download/upload and charging via a PC or laptop. LCD Screen The LCD screen tells you what is happening as you go along. It will continually display the current date and time as well as other useful indicators such as battery and connection status.
- Page 6 Arsenometer HMAS100 Instruction Manual v2.0 On Screen Indicators At the bottom of the screen these symbols will appear periodically to provide information about the instrument’s status. Battery fast charge indicator Battery trickle charge indicator i Battery fault/overheat indicator ...
- Page 7 Arsenometer HMAS100 Instruction Manual v2.0 Components and care of components Electrodes – your kit consists of 3 different types of electrodes: Counter electrode – this electrode needs the least maintenance of all. A quick visual inspection to ensure the electrode has no physical damage.
- Page 8 Arsenometer HMAS100 Instruction Manual v2.0 The instrument also consists of: Stirrer – the stirrer will not operate all the time during the different stages of a run. The stirrer is crucial to the operation of the instrument and needs to be checked to ensure it is working properly. During a run, look through the translucent beaker or lightly touch the bottom of the SAB to determine that the stirrer is rotating when indicated on the handset.
- Page 9 Arsenometer HMAS100 Instruction Manual v2.0 Menu System The Arsenometer is controlled via a system of on-screen menus. The structure of these menus is illustrated below to assist you in navigating them. Main Menu Used to condition the working electrode with a →...
- Page 10 Arsenometer HMAS100 Instruction Manual v2.0 The Sonde Assembly The sonde (electrodes x 3) SAB (Sample Analysis Beaker) In-line waterproof cable connector Warning: Sonde head is designed for submersion up to 1 metre in water. Lowering the head deeper than this may result in water ingress which will require sonde head replacement.
-
Page 11: Getting Started
Arsenometer HMAS100 Instruction Manual v2.0 2.2. GETTING STARTED Charging the battery When you first receive your Arsenometer it would be advisable to fully charge the battery. This can be done several ways using the USB lead and chargers provided with the kit. If a computer is used the software drivers will need to be installed to perform a fast charge. - Page 12 Arsenometer HMAS100 Instruction Manual v2.0 To Select the charge rate follow these steps: • From the main menu select System • From the system menu select Charge • Highlight required charge rate and press <OK> • Press <cancel> to return to main menu Note: The fast charge option is only available when the instrument is switched on.
- Page 13 Arsenometer HMAS100 Instruction Manual v2.0 Software Installation Your Arsenometer is compatible with most computers with a USB socket, but first the USB drivers must be installed. The drivers are located on the Software CD ROM provided for all versions of Windows post Windows 95.
- Page 14 Arsenometer HMAS100 Instruction Manual v2.0 Backlight Your Arsenometer is equipped with a backlight to aid viewing in poor lighting conditions. Selecting backlight from the system menu will present the following options. ON The backlight will be on at all times...
- Page 15 Arsenometer HMAS100 Instruction Manual v2.0 Electrodes The Arsenometer is designed to be used out of the box. The electrodes are all pre-fitted. Setting up the Arsenometer The Arsenometer comes with three electrodes. The electrodes are WE2 (Working Electrode 2), R (Reference) and C (Counter). The...
- Page 16 Arsenometer HMAS100 Instruction Manual v2.0 Reference Electrode The Reference Electrode cap needs to be removed prior to analysis and replaced when the electrode is going to be stored. It is best practice not to let the tip of the Reference Electrode dry out.
-
Page 17: Operating Procedure
Arsenometer HMAS100 Instruction Manual v2.0 2.3. OPERATING PROCEDURE 2.3.1. METHODS The Arsenometer operating procedure consists of two main steps – plating (conditioning) and analysis. The plating step forms a plate on the surface of the working electrode which can be seen as a yellow/gold layer on the tip of the Working Electrode. -
Page 18: Plating
Arsenometer HMAS100 Instruction Manual v2.0 2.3.2. PLATING The plating step takes a few minutes. There are two preliminary steps required for any analysis with the Arsenometer. The plating step uses the AU500 Au Plating Solution and forms a plate on the working electrode, covering the black tip with a yellow/ gold colour. - Page 19 Arsenometer HMAS100 Instruction Manual v2.0 It is necessary to perfom the plating and then condition before a session or if the sensitivity of the analysis decreases. If a lot of samples are to be analysed then a plate in the morning and one in the afternoon at the beginning of the session is recommended.
-
Page 20: Analysis
Arsenometer HMAS100 Instruction Manual v2.0 2.3.3. ANALYSIS Before using the Arsenometer to perform a test ensure that the working electrode has been successfully plated and conditioned first. There are now two ways to analyse a sample, either via the Standard Addition method or by an in-field calibration of the instrument. - Page 21 Arsenometer HMAS100 Instruction Manual v2.0 The Blank Subtraction method is used for creating a new baseline for the instrument for the analysis. It is to be used only when a suspected contaminant is present in the buffers being used. Performing this will replace the previous blank.
-
Page 22: Standard Addition Analyses - Overview
Arsenometer HMAS100 Instruction Manual v2.0 2.3.4. STANDARD ADDITION ANALYSES - OVERVIEW Perfoming a Standard Addition method analysis consists of Plating, running Analysis and obtaining a result. The following main steps will assist you in understanding how to perform a Standard Addition based test. -
Page 23: Adding A Standard Addition
Arsenometer HMAS100 Instruction Manual v2.0 2.3.5. ADDING A STANDARD ADDITION When prompted a 20ppb Standard Addition needs to be added to the SAB. This is achieved by using the pipette (which is set to 280µl). The 20ppb default setting can be changed by pushing the joystick left and right. - Page 24 Arsenometer HMAS100 Instruction Manual v2.0 Altering deposition times The standard default deposition time of 60 seconds is suitable for all analysis down to 5ppb for most elements, 10ppb for arsenic. To increase accuracy for the lower levels an increased deposition time is recommended. If the user expects the analysis to be higher then a shorter deposition time should be used.
-
Page 25: Troubleshooting
Arsenometer HMAS100 Instruction Manual v2.0 2.4. TROUBLESHOOTING Whilst your Arsenometer is designed to be very reliable, problems may occur throughout its working life. The following tables are intended to help you diagnose and resolve these problems simply and quickly. Should you not be able to resolve the problem please contact your supplier and they will be able to assist you. -
Page 26: Interferences
Arsenometer HMAS100 Instruction Manual v2.0 2.5. INTERFERENCE EFFECTS The Arsenometer has been designed to test very low levels of metals in water and as such is very sensitive. Due to the interaction of other metals and organics in the water source, interferences can occur as with any system of this type. - Page 27 Arsenometer HMAS100 Instruction Manual v2.0 NOTES www.trace2o.com 27...
- Page 28 Arsenometer HMAS100 Instruction Manual v2.0 The Technology Centre Wagtech Court Station Road Thatcham Berkshire RG19 4HZ United Kingdom T : +44(0) 1635 866772 Fax : +44(0) 1635 873509 E : sales@trace2o.com W: www.trace2o.com 28 www.trace2o.com...
Need help?
Do you have a question about the ARSENOMETER HMAS100 and is the answer not in the manual?
Questions and answers