Table of Contents
Advertisement
Quick Links
Advertisement
Table of Contents

Related Manuals for Trace2O METALYSER HM4000


Summary of Contents for Trace2O METALYSER HM4000
- Page 1 METALYSER SOILS HM4000 ® Portable Heavy Metals Analyser for Soils...
-
Page 2: Table Of Contents
3.5 Interference Effects 3.6 Specifications Soil Extraction Kit 4.1 Getting to Know Your Soils Kit 4.2 Safety First 4.3 Digestion Procedure for Dry Soils 4.4 Digestion Procedure for Wet Soils (Quick) 4.5 Digestion Procedure for Wet Soils (Precise) 2 www.trace2o.com... -
Page 3: Introduction
It is recommended to familiarize yourself with the instrument first using drinking water samples before advancing to the soil extraction procedures. Note The results shown will be in units of mg/kg but for water samples this can be directly correlated to ppb. www.trace2o.com 3... -
Page 4: Kit Content
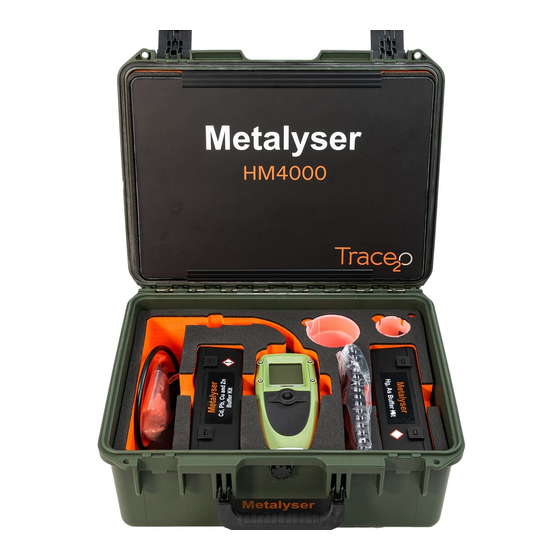
USB/AC adapters Sonde Waste Beakers Buffer Kit Sample Analysis Beaker Instrument Buffer Kit Pipette Tips & USB Lead Instructions (Beneath instrument) Gloves Accessories Digestants Cleaning Kit Clamp Filtration kit Sample Deionised water Collection Balance Bottles Digestion beaker Mixer 4 www.trace2o.com... -
Page 5: Metalyser
® Metalyser Soils HM4000 Instruction Manual v3.0 ® 3. METALYSER ® 3.1 GETTING TO KNOW YOUR METALYSER www.trace2o.com 5... - Page 6 Right and OK. To navigate up, down, left and right simply push the joystick in the required direction. To select an option or ‘OK’ a choice press the joystick in the centre. Cancel Button Pressing the cancel button will return you to the previous menu or screen. 6 www.trace2o.com...
- Page 7 Battery fast charge indicator Battery trickle charge indicator i Battery fault/overheat indicator Battery Full Battery Full Battery Full Battery Full Battery empty Stirrer on indicator www.trace2o.com 7...
- Page 8 The second option is to fit the extension cable between the sonde and the instrument. This allows the instrument to be used to collect samples as well as analyse them. The sonde (electrodes x 4) SAB (Sample Analysis Beaker) 8 www.trace2o.com...
- Page 9 Alternatively, a clamp and stand are provided. The stand slots into the hole in the right hand rear corner of the box. This can be used to clamp the sonde as show above, which improves stability during the analysis. www.trace2o.com 9...
- Page 10 The different working electrodes can be identified by the number of connecting pins and are not interchangeable. Electrode WE1 (6 pins) is to be fitted in position WE1. Electrode WE2 (3 pins) is to be fitted in position WE2. Do not mix up the electrodes. 10 www.trace2o.com...
- Page 11 Slide the band down from the hole. Use the pipette to drop enough solution into the reference electrode to fill it up. Once topped up, replace the band to prevent the electrode fill solution escaping. Note: Only use supplied Reference Electrode Fill Solution. www.trace2o.com 11...
- Page 12 Hold the electrode perpendicular to the platen and use a smooth figure of eight motion as indicated. Polish until the surface has a mirror finish and no scratches or imperfections are seen. 12 www.trace2o.com...
- Page 13 Plating Solutions – the plating solutions should be stored in a cool, dark place and have a shelf life of one year. Refer to solutions for expiry dates. Should the efficacy of the plating solution deteriorate before this during use, they should be discarded and replaced. www.trace2o.com 13...
- Page 14 Used to set the instrument date and time → Language Used to select the display language → Charge Battery charging options → Auto switch off Auto off select → Program Program internal hardware (Not used in normal P/STAT operation) 14 www.trace2o.com...
-
Page 15: Getting Started
Press <cancel> to return to main menu Note: The fast charge option is only available when the instrument is switched on. The instrument will also charge at a trickle rate if the instrument is connected for charging but not switched on www.trace2o.com 15... - Page 16 • From the main menu select System • From the system menu select Set date/time and press <OK> • Use the navigation key to alter the date and time • Press <OK> when finished to save settings 16 www.trace2o.com...
- Page 17 Switch Off’ from the System menu and then select On or Off. • From the main menu select System • From the system menu select Auto switch off • Highlight required setting and press <OK> • Press <cancel> to return to main menu www.trace2o.com 17...
-
Page 18: Operating Procedure
Likewise for WE1 during analyses using WE2. When switching between different analyses, the unused electrode needs to be removed, otherwise results may be affected. Procedures for each parameter are detailed in the relevant application notes 18 www.trace2o.com... - Page 19 Test Methods menu and then choosing condition electrode, which is at the top of the list for the selected electrode. The conditioning step should be carried out in sample water, and undertakes a run which sensitises the Working Electrode. www.trace2o.com 19...
- Page 20 Place buffer in SAB and fill SAB with (within the metal sample menus) prepare the Working Electrode for analysis. From the Test Methods Menu, choose As(III), and then Condition Electrode Refer to Application notes for Operating Procedures particular to each parameter. 20 www.trace2o.com...
- Page 21 This is in order to minimise carry-over and to clean off all traces of the previous analysis. This can be achieved by using the deionised water or by washing the sonde head (without the SAB) in the sample water. This is particularly important following an arsenic analysis. www.trace2o.com 21...
- Page 22 Continue Standard Addition run on Metalyser Save / discard / download results Remove SAB. Rinse electrodes & sonde head Where ‘WEx’, use WE1 or WE2 for your required analysis Where ‘Mx’ use M1, 2, 3, 4 or 5 for your required analysis 22 www.trace2o.com...
- Page 23 To release the pipette tip after use, push the white button at the side of the pipette Before carrying out testing, become familiar using the pipette and the two different stops on the plunger to ensure the correct volume of standard is added. www.trace2o.com 23...
- Page 24 Always dilute with water that will not contribute to the heavy metals being tested. Deionised water is ideal. Blank subtraction Blank subtraction is recommended to be used for all of the analyses and is the default setting. It is particularly important for the analysis of Hg and As. 24 www.trace2o.com...
-
Page 25: Troubleshooting
The metal concentration is below the minimum limit of < L.O.D detection for the method being used. The increase in metal response was not sufficient Addition error enough to determine the addition. The addition was not added or the metals have not Calibration error been detected. www.trace2o.com 25... - Page 26 To see the graph, navigate to the main menu, choose Data Log, then Last Result. The result will appear first; pressing <OK> will display the graph. Press <OK> again to exit the graph. 26 www.trace2o.com...
-
Page 27: Interference Effects
Lower limits achievable using the Handset at 60 seconds deposition. Increased accuracy can be achieved by setting the deposition time to 120 seconds Variability at 20mg/kg ± 5% with Metaware software, ± 7.5% with handheld Accuracy dependent on element measured, sample matrix and type www.trace2o.com 27... -
Page 28: Soil Extraction Kit
The balance can be used at angles up to 15º allowing it to be used in the Peli case on uneven ground but the box should be stable and the balance zeroed once in position and kept in that position during use. 28 www.trace2o.com... -
Page 29: Safety First
Safety glasses and gloves are provided as part of the soils extraction kit. These should be worn at all times whilst carrying out the digestion procedure. Protective clothing should also be worn (Not provided). All containers and equipment should be disposed of in accordance with local legislation. www.trace2o.com 29... -
Page 30: Digestion Procedure For Dry Soils
3.5ml of the digested sample. Add the 3.5 mL sample to the sample analysis beaker and fill to the mark just below the overflow with de-ionised water. The soil extract sample is now ready to be analysed using the ® Metalyser 30 www.trace2o.com... -
Page 31: Digestion Procedure For Wet Soils (Quick)
50ml mark. Pour the full contents of the graduated beaker into the digestion beaker and swirl to mix. Decant from beaker to beaker to ensure full transfer of soil Connect the digestion beaker to the mixer. www.trace2o.com 31... - Page 32 Add the 3.5 mL sample to the sample analysis beaker and fill to the mark just below the overflow with de-ionised water. The soil extract sample is now ready to be analysed using the ® Metalyser 32 www.trace2o.com...
-
Page 33: Digestion Procedure For Wet Soils (Precise)
Choose the “Digest” method from the list of methods in the , select ‘Condition’ and let it stir for 10 minutes. ® Metalyser After 10 mins, remove the beaker from the stirrer head and let it settle for 5 minutes. www.trace2o.com 33... - Page 34 Add the 3.5 mL sample to the sample analysis beaker and fill to the mark just below the overflow with de-ionised water. The soil extract sample is now ready to be analysed using the ® Metalyser 34 www.trace2o.com...
- Page 35 ® Metalyser Soils HM4000 Instruction Manual v3.0 NOTES www.trace2o.com 35...
- Page 36 ® Metalyser Soils HM4000 Instruction Manual v3.0 The Technology Centre Wagtech Court Station Road Thatcham Berkshire RG19 4HZ United Kingdom T : +44(0) 1635 866772 Fax : +44(0) 1635 873509 sales@trace2o.com W: www.trace2o.com 36 www.trace2o.com...
- Page 37 ® Metalyser Soils HM4000 Instruction Manual v3.0 www.trace2o.com 37...
Need help?
Do you have a question about the METALYSER HM4000 and is the answer not in the manual?
Questions and answers