Table of Contents
Advertisement
Advertisement
Table of Contents

Related Manuals for Trace2O HT1000


Summary of Contents for Trace2O HT1000
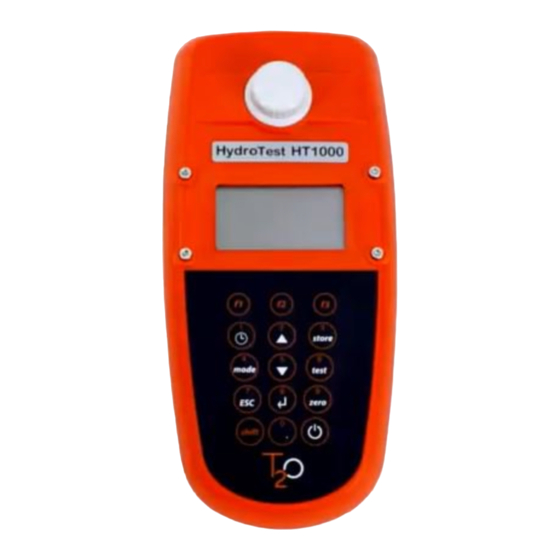
- Page 1 HydroTest Photometer HT1000...
-
Page 2: Table Of Contents
Contents Introduction .................. 5 Operation ..................6 2.1.1 Set up ................... 6 2.1.2 Saving data – Important Information .......... 6 2.1.3 Replacement of batteries ............. 6 2.1.4 Instrument (exploded drawing): ..........7 Overview of function keys ............8 2.1.1 Overview..................8 2.1.2 Displaying time and date: ............ - Page 3 2.3.11 Selecting a new method ............14 2.3.12 Measure absorbance ............... 14 Photometer settings: Table of Mode Functions ......15 2.4.1 Instrument basic settings 1 ............16 2.4.2 Printing of stored results ............20 2.4.3 Recall / delete stored results ............25 2.4.4 Lab function ................
- Page 4 Troubleshooting ................ 45 3.5.1 Operating messages in the display / error display ....45 3.5.2 General ..................47 HT1000_0.5 09/2015...
-
Page 5: Introduction
1.0 Introduction The HT1000 is part of the HydroTest range of instruments based on optical measurement technology for the analysis of a range of chemical parameters in aqueous samples. The HT1000 is a photometric analyser using 6 indivdual selective wavelengths to measure the colour change produced by a reagent when reacted with the analyte of interest. -
Page 6: Operation
2.1.2 Saving data – Important Information During replacement of the battery the data in the HT1000 is saved for 2 minutes. If the change time exceeds 2 minutes all stored data and settings are lost. It is recommended to have the replacement batteries to hand to expediate fitment. -
Page 7: Instrument (Exploded Drawing)
2.1.4 Instrument (exploded drawing): (A) screws (B) battery compartment cover (C) notch (D) batteries: 4 batteries (AA/LR6) (E) seal ring (F) instrument back (B) battery compartment cover (E) seal ring (F) instrument back (A) screws (C) notch (D) batteries CAUTION: To ensure that the instrument is water proof: •... -
Page 8: Overview Of Function Keys
2.1 Overview of function keys 2.1.1 Overview Switching the photometer on or off Press shift key to achieve figures key 0-9. Keep the shift key depressed and press desired figures key. e.g.: [Shift] + [1][1] Returning to selection of methods or previous menu Function key: description in the text if key available Function key: description in the text if key available Function key: description in the text if key available... -
Page 9: Displaying Time And Date
2.1.2 Displaying time and date: Press [“clock”] key. 19:30:22 2012-06-15 The display shows: After 15 seconds the photometer reverts to the previous display automatically or press [ ] key or [ESC]. 2.1.3 User countdown With this function the operator is able to define his own countdown. Press [“clock”] key. -
Page 10: Operation Mode
2.3 Operation mode Switch the photometer on by pressing the [ON/OFF] key. The photometer performs an electronic self-test. selftest ... 2.3.1 Automatic switch off The instrument switches off automatically after 20 minutes. This is indicated 30 seconds before by a beeper. Press any key to avoid the instrument switching off. As long as the instrument is working (for example countdown or printing) the automatic switch off is inactive. -
Page 11: Differentiation
2.3.2.2 Chemical Species Information Pressing the [F2] key the display shows a list with available chemical species and corresponding ranges. Changing chemical species see chapter 2.3.5 page 12. 320 Phosphate LR T 0.05- Line 1: Method number, Method name 4 mg/l PO Line 2: Range with chemical species 1 0.02-1.3 mg/l P Line 3: Range with chemical species 2... -
Page 12: Changing Chemical Species
2.3.5 Changing chemical species For some methods there is a possibility to change the chemical species of the test result. If the test result is displayed press arrow key [ ] or [ ]. Example: 320 Phosphate LR T -----[ ]----> 320 Phosphate LR T <---- [ ] ----- 320 Phosphate LR T... -
Page 13: Printing Results (Infra-Red Interface Module) (Optional)
Note: The display shows the number of free data sets. Storage: 900 free records left If there are less than 30 data sets free the display shows: Storage: only 29 free records left Clear the memory as soon as possible (see “Deleting stored results”). -
Page 14: Selecting A New Method
2.3.11 Selecting a new method Press [ESC] key to return to method selection. Or enter the required method number directly, e.g. [Shift] + [1][6][0] for CyA-TEST (Cyanuric acid). Confirm with [ ] key. 2.3.12 Measure absorbance Range: –2600 mAbs to +2600 mAbs Method-No. -
Page 15: Photometer Settings: Table Of Mode Functions
2.4 Photometer settings: Table of Mode Functions MODE-Function No. Description Page Calibration Special method calibration Clear calibration Deleting user calibration Clock Setting date and time Countdown Switching the countdown on/off to ensure reaction times Delete data Deleting all stored results Key beep Switching the acoustic signal on/off to indicate key- pressing... -
Page 16: Instrument Basic Settings 1
MODE-Function No. Description Page User calibration Storage of user calibration The selected settings are kept by the photometer even when switched off. To change photometer settings a new setting is required. 2.4.1 Instrument basic settings 1 Selecting a language Press [MODE], [Shift] + [1][0] keys. Mode Confirm with [ ] key. - Page 17 Key beep Press [MODE], [Shift] + [1][1] keys. Mode Confirm with [ ] key. The display shows: <Key-Beep> ON: 1 OFF: 0 • Press [Shift] + [0] keys to switch the key beep off. • Press [Shift] + [1] keys to switch the key beep on. Confirm with [ ] key.
- Page 18 Countdown (Ensuring reaction periods) Some methods require a reaction period. This reaction period is incorporated in the method as standard with the countdown function. It is possible to switch the countdown off for all methods: Press [MODE], [Shift] + [1][3] keys. Mode Confirm with [ ] key.
- Page 19 Signal beep Performing a zero or a measurement takes 8 seconds. The photometer indicates the end of zeroing or measuring by a short beep. Press [MODE], [Shift] + [1][4] keys. Mode Confirm with [ ] key. <Signal-Beep> The display shows: ON: 1 OFF: 0 •...
-
Page 20: Printing Of Stored Results
2.4.2 Printing of stored results Printing all results Press [MODE], [Shift] + [2][0] keys. Mode Confirm with [ ] key. <Print> The display shows: Print all Data Start: cancel: Press [ ] key for printing out all stored test results. The display shows e.g.: Test No.: After printing the photometer goes back to <Mode-Menu>... - Page 21 Printing results of a selected time period Press [MODE], [Shift] + [2][1] keys. Mode Confirm with [ ] key. The display shows: <Print> sorted: date from yy-mm-dd Enter year, month and day for the first day of the required period, e.g.: 14 May 2009 = [Shift] + [0][9][0][5][1][4] Confirm with [ ] key.
- Page 22 Printing results of a selected Code No. range Press [MODE], [Shift] + [2][2] keys. Mode Confirm with [ ] key. <Print> The display shows: sorted: Code-No. Enter numeric code number (up to 6 places) for the first from _ _ _ _ _ _ required Code No., e.g.: [Shift] + [1].
- Page 23 Printing results of one selected method Press [MODE], [Shift] + [2][3] keys. Mode Confirm with [ ] key. The display shows: <Print> >>20 Acid demand 30 Alkalinity-tot Select the required method from the displayed list or enter 40 Aluminium T the method-number directly.
- Page 24 Printing Parameter Press [MODE], [Shift] + [2][9] keys. Mode Confirm with [ ] key. <printing parameter> The display shows: 2: Baud rate cancel: Press [Shift] + [2] keys to select ”Baud rate”. The display shows: <Baud rate> is: 19200 select: [ ] [ ] save: cancel:...
-
Page 25: Recall / Delete Stored Results
2.4.3 Recall / delete stored results Recall all stored results Press [MODE], [Shift] + [3][0] keys. Mode Confirm with [ ] key. The display shows: <Storage> display all data Start: cancel: ESC The stored data sets are displayed in chronological order, print: starting with the latest stored test result. - Page 26 Recall results of a selected time period Press [MODE], [Shift] + [3][1] keys. Mode Confirm with [ ] key. The display shows: <Storage> sorted: date from yy-mm-dd Enter year, month and day for the first day of the required period, e.g.: 14 May 2009 = [Shift] + [0][9][0][5][1][4] Confirm with [ ] key.
- Page 27 Recall results of a selected Code No. range Press [MODE], [Shift] + [3][2] keys. Mode Confirm with [ ] key. <Storage> The display shows: sorted: Code-No. from _ _ _ _ _ _ Enter numeric code number (up to 6 places) for the first required Code No., e.g.: [Shift] + [1].
- Page 28 Recall results of one selected method Press [MODE], [Shift] + [3][3] keys. Mode Confirm with [ ] key. <Storage> The display shows: >>20 Acid demand 30 Alkalinity-tot Select the required method from the displayed list or enter 40 Aluminium T the method number directly.
- Page 29 Delete stored results Press [MODE], [Shift] + [3][4] keys. Mode Confirm with [ ] key. <Delete data> The display shows: Delete all data? YES : 1 NO : 0 • Press [Shift] + [0] keys to retain the data sets in memory. •...
- Page 30 User Calibration If a test method is user calibrated the method name is displayed inverse. Procedure: • Prepare a standard of known concentration and use this standard instead of the sample according to the test procedure. • It is recommend to use well known standards which are formulated according to DIN EN, ASTM or other international norms or to use certified standards which are commercially available.
- Page 31 Iron T 0.3 – 0.7 mg/l Fe Iron PP 0.1 – 2 mg/l Fe Manganese T 1 – 2 mg/l Mn Molybdate T 5 – 15 mg/l Mo Molybdate LR PP 1.5–2.5 mg/l Mo Nickel T 6 – 8 mg/l Ni Nitrate LR T 0.5–0.7 mg/l N Nitrate TT...
- Page 32 The display shows: <user calibration> 100 Chlorine T 0.02-6 mg/l Cl2 Pressing the arrow key [ ] once increases the displayed result. 0.90 mg/l free Cl2 up: , down: save: Pressing the arrow key [ ] once decreases the displayed result.
-
Page 33: Lab Function
2.4.4 Lab function Reduced operator guidance => “Profi-Mode“ This function may be used for routine analyses with many samples of one method. The following information is always stored in the methods: a) Method b) Range Date and time d) Differentiation of results e) Detailed operator instruction ) Compliance with reaction periods If the Profi-Mode is active, the photometer provides only a minimum of operator instructions. - Page 34 One Time Zero (OTZ) OneTimeZero is available for all methods where Zero is performed in a 24 mm Ø round vial with sample water (see chapter 1.1 Table of Methods). OneTimeZero can be used for different tests providing the tests are performed with the same sample water and under the same test conditions.
-
Page 35: User Operations
2.4.5 User operations User method list After switching on the instrument a scroll list of all available methods is automatically shown in the display. To shorten this list according to the requirements of the user it is possible to create a user defined scroll list. The program structure requires that this list must have at least one active (switched on) method. - Page 36 User method list, switch all methods on This mode function activates all methods. After switching on the instrument a scroll list of all available methods is automatically shown in the display. Press [MODE], [Shift] + [6][1] keys. Mode Confirm with [ ] key. <Mlist all on>...
-
Page 37: Special Functions
2.4.6 Special functions Langelier Saturation Index (Water Balance) For calculation the following tests are required: • pH-value • Temperature • Calcium hardness • Total Alkalinity • TDS (Total Dissolved Solids) Run each test separately and note the results. Calculate the Langelier Saturation Index as described: Calculation of Langelier Saturation Index With Mode 71 (see below) it is possible to select between degree Celsius or degree Fahrenheit. - Page 38 pH value The display shows: 0<=pH<=12 +_ _ _ _ Enter the pH-value in the range between 0 and 12 and confirm with [ ] key. <Langelier> Langelier The display shows the Langelier Saturation Index. saturation index 0.00 Press [ ] key to start new calculation. Return to mode menu by pressing [ESC] key.
-
Page 39: Instrument Basic Settings 2
2.4.7 Instrument basic settings 2 Adjusting display contrast Press [MODE], [Shift] + [8][0] keys. Mode Confirm with [ ] key. <LCD contrast> The display shows: • Press arrow key [ ] to increase contrast of the LCD display about one unit. •... -
Page 40: Instrument Special Functions /Service
Press [Store] key to increase brightness of the display about Store ten units. Press [Test] key to decrease brightness of the display about Test ten units. 0...254 : 200 The display shows: The brightness can be selected between 0 and 254 units, e.g.: 200. -
Page 41: Data Transfer
2.5 Data transfer To print data or to transmit to a PC the optional T2o PC-Link infra-red module is required. 2.5.1 Data Printing Besides the PC-Link module the following printer is required to print data directly using the USB Interface of the module: HP Deskjet 6940. 2.5.2 Data transfer to a personal computer Besides the PC-LINK a transfer program, is required to transmit test results. -
Page 42: Part 3
Carefully inspect all items to ensure that every part of the list below is present and no visible damage has occurred during shipment. If there is any damage or something is missing, please contact your local distributor immediately. 3.2 Delivery contents Standard contents for HT1000: 1 Photometer 4 batteries (Type AA/LR 6) 1 Instruction manual... -
Page 43: Technical Data
3.3 Technical data Display Graphic Display with backlight Serial Interface IR interface for data transfer RJ45 connector for internet updates (see chapter 2.5.3) Light source light-emitting diode – photosensor – pair arrangement in a transparent measurement chamber Wavelength ranges: 1 = 530 nm IF = 5 nm 2 = 560 nm IF = 5 nm... -
Page 44: Abbreviations
3.4 Abbreviations Abbreviation Definition °C degree Celsius (Centigrade) °F degree Fahrenheit °F = (°C x 1.8) + 32 °dH degree German Hardness °fH degree French hardness °eH degree English Hardness °aH degree American Hardness Absorption unit ( = Extinction E) 1000 mAbs = 1 Abs = 1 A = μg/l... - Page 45 3.5 Troubleshooting 3.5.1 Operating messages in the display / error display Display Possible Causes Elimination Overrange reading is exceeding the range if possible dilute sample or use other measuring range water sample is too cloudy filtrate water sample seal on the cap? too much light on the photo cell Repeat measurement with seal on the cap of the vial.
- Page 46 Display Possible Causes Elimination The calculation of a value (e.g. Test procedure correct? combined Chlorine) is not If not – repeat test possible Example 1: Example 1 The readings for free and total 0,60 mg/l free Cl Chlorine are different, but comb Cl considering the tolerances of 0,59 mg/l total Cl...
- Page 47 3.5.2 General Finding Possible Causes Elimination Test result deviates from Chemical species not as Press arrow keys to select the the expected. required. required chemical species. Profi-Mode is switched on. Switch Profi-Mode off with No differentiation: e.g. for the Chlorine test Mode 50.
- Page 48 Trace2o Limited Technology Centre W a g t e c h C o u r t , S t a t i o n R o a d Thatcham, Berkshire, RG19 4HZ Tel.: +44 (0)1635 566772 Fax: +44 (0)1635 873509 sales@trace2o.com...
Need help?
Do you have a question about the HT1000 and is the answer not in the manual?
Questions and answers