Table of Contents
Advertisement
Quick Links
Advertisement
Table of Contents

Subscribe to Our Youtube Channel
Related Manuals for Hyundai E200


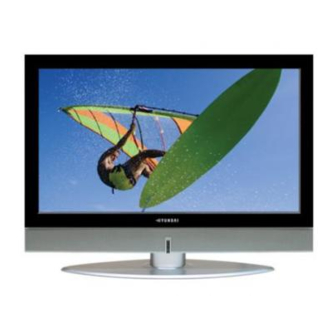
Summary of Contents for Hyundai E200
-
Page 2: Table Of Contents
Sound Setup How to Adjust the Desired Audio Mode ...21 Channel Setup Choosing the your Language ...22 How to Select Auto Scan(Analog TV) ...22 How to Select Manual Scan ...23 How to Set the Program Edit(Skip, Swap) ...24 Function Setup How to Set Clock, Sleep Time, ON/OFF Time ...25... -
Page 3: Safety Precaution
Please read the instructions carefully before using. Outdoor Antenna Grounding If an outside antenna or cable system is connected to the TV, be sure the antenna or cable system is grounded so as to provide some protection against voltage surges and built-up static charges. - Page 4 - Direct contact with the hot surface may cause physical burns. Do not allow children to climb or play on the - This may cause the TV to fall resulting in serious injury. Unplug when you do not use your TV for a long time.
- Page 5 - It may cause electric shock or fire. Do not install on an unstable place or small support. - This may cause the TV to fall, resulting in serious injury especially to children. When the TV produces abnormal noise, burning smell, or smoke, unplug the TV immediately and call a service center.
- Page 6 - Contact your local service center. Consult a service center or customer service for inside cleaning about once a year. - When dust is piled inside the TV for a long time, fire or malfunction may be caused.
-
Page 7: Contents Of The Package
General Information Contents of the Package When opening the package, please ensure to check the following accessories. Antenna Cable Power Cord Remote Control & User's Guide (coaxial cable) 2 batteries (1.5V AAA) Products Sold Separately If you want to purchase the following accessories, consult a service center, electronics shops, or parts seller. PC signal cable Scart cable Composite(Video &... -
Page 8: Parts Names And Functions
Use this button to switch among inputs connected to the TV. Power button Use this button to turn on or off the TV. Remote sensor and power LED. - Point the remote control toward LED. - It displays standby or operation status. - Page 9 General Information Rear View - E200D/E230D MODEL * This product image may be a bit different from the actual product. Power switch Composite Audio input terminal Power (AC) input terminal Antenna input terminal HDMI input terminal ✓ - it's for technical service do not use at home. D-SUB input terminal D-SUB Audio input terminal Extend an RS-232 input for ATV communication...
-
Page 10: Remote Control
Use this button to switch among inputs connected to the TV. Power button Use this button to turn on or off the TV. Remote sensor and power LED. - Point the remote control toward LED. - It displays standby or operation status. - Page 11 Rear View - E201D/E231D MODEL * This product image may be a bit different from the actual product. Power switch Power (AC) input terminal HDMI input terminal D-SUB input terminal D-SUB Audio input terminal Extend an RS-232 input for ATV communication Extend an RS-232 input for DTV communication Full Scart input terminal Video(CVBS) input terminal...
-
Page 12: Remote Control
Use this button to call the OSD on the screen. 11. PICTURE MODE 12.INFO 13. EXIT Use this button to select end the osd. 14. SLEEP 15. A/D TV Use this button to switch the input source from analog to digital. 16. NUMERIC KEYS... - Page 13 DTV : To delete a channel from the channel List menu. To show extended program information in the EPG menu. 9. TTX/MIX - To see Teletext Service Data for Analog TV and Digital TV. - use buttons for TTX page up/down Insert batteries with proper polarities of + and -.
-
Page 14: Connections
Connections Connecting Indoor/Outdoor TV Antenna(UHF/VHF) - Antenna or Cable service without cable box connections - For on optimum picture quality, adjust the direction of antenna if needed. ✓ When inserting a 75 ohm coaxial cable into the input connection, ensure the wire tip not to bend. -
Page 15: Before Connecting The Video/Audio Connections To External Devices
The superior picture quality starts from the far left side. How to Connect a VCR, Cable Receiver, Camcoder, Game Player 1. Connect the Video cable between Video output terminals of VCR or Cable receiver and Video input terminal of TV. (Connect the jacks to terminals in the same color.) 2. -
Page 16: How To Connect To A Pc
1. Connect the PC signal cable (15-pin D-sub) between the output terminal of PC and the D-sub input terminal of TV. 2. Connect the Audio cable between Audio output terminal of PC and Audio input terminal for PC on the rear of TV. -
Page 17: Scart Connection To The External Input/Output
VIDEO(CVBS) + Audio(L/R) TV OUT TV IN ✓ When switching voltage comes into the Scart-Pin 8 during viewing a TV program, the current mode will be switched to Scart mode. F SCART - F Scart Input : RGB, CVBS Connections... -
Page 18: Hdmi Connection (For Hdmi Model Only)
• If you connect an equipment without a digital output terminal, connect to the COMPONENT VIDEO, S VIDEO or VIDEO input terminal on the TV so you can enjoy an analog signal. • The DIGITAL IN terminal can only be used with 1080i, 720p or 576p picture signals. Set the Digital Set -Top -Box DIGITAL OUT terminal Output setting to 1080i, 720p or 576p. -
Page 19: How To Set The Osd Screen
How to Select input source Different OSD Menu You can confirm OSD menu of two different types. ✓ ANALOG TV - Terrestrial broadcasting for supporting analog PAL/SECAM system. F-SCART - For supporting composite video and RGB video signals. SCART connectors is used with many European video equipments. -
Page 20: Picture Setup
Press buttons to select, then “V” mark to selected item. Press EXIT button to TV viewing or press MENU button to return to the previous menu. ♦ CUSTOM : When the user wants to set the values directly. -
Page 21: How To Set Image Adjust In Pc Mode
Press button to select “Auto Adjust”,”Phase”. “Position”,”Clock”,”Auto color” Press EXIT button to TV viewing or press NEW button to return to the previous menu ♦ Auto ADJUST : Horizontal/vertical positions are automatically adjusted. ♦ PHASE : To eliminate the shake of the picture. -
Page 22: How To Set The Display Size
Press button to select, then “V” mark appears Press EXIT button to TV viewing or press MENU button to return to the previous menu. ♦ WIDE - General broadcast picture is adjusted to 16:9. -
Page 23: Channel Setup
Choosing the Your Languages Using the TV for the first time, users must select their preferred language preference in order to display main menus and sub menus, etc. How to Select Auto Scan(Analog TV) Auto scan enables to search/store channels of countries where the user is located automatically. -
Page 24: How To Select Manual Scan
Channel Setup How to Select Manual Scan Manual store enables to searching channels which the user want manually. Press MENU button. Menu items appear on the screen. Press Buttons to move to “SETUP” icon. Press button to select “CHANNEL” Icon. “COUNTRY”... -
Page 25: How To Set The Program Edit(Skip, Swap)
How to Set the Program Edit(Skip, Swap) Program edit enables users to edit the searched programs. Press MENU button. Menu items appear on the screen. Press Buttons to move to “SETUP” icon. Press buttons to select “CHANNEL” Icon. “COUNTRY” is highlighted. Press Buttons to move to “Prog Edit”. -
Page 26: Function Setup
Function Setup How to Set Clock, Sleep Time, ON/OFF Time Press Menu button. Menu items appear on the screen. Press buttons to move to “TIMER”. Press buttons to select “SET TIME”. Press buttons to move between Hour, Minute and Press buttons to set Hour, Minute. -
Page 27: How To Set Teletext In Atv
How to Set Teletext in ATV You can use Teletext service in analog TV mode. If it is included in you receiving channels. Selecting Teletext Display Options in ATV Mode When users have displayed a teletext page, they can have various options to suit their requirements. -
Page 28: Dtv Setup
When scanning is finished, you can see the following information on the screen. After the scanning process, the first program of the last scanned channel will be displayed on the back screen Press EXIT button to TV viewing or press MENU button to return to the previous menu. ✓... -
Page 29: How To Check Channel State
After scanning process, the first channel of scanned channel will be displayed. Press EXIT button to TV viewing or press MENU button to return to the previous menu. ✓ If the scan fails, please check whether your entered values are correct or not and the signal reception sensitivity is good or bad. -
Page 30: How To Use The Guide (Epg : Electronic Program Guide)
➥ Press “BLUE” button. You will see extended information of the selected program. Press EXIT button to TV viewing or press MENU button to return to the previous menu. ✓ supported by 7 language : English, French, German, Italian, Spanish,... -
Page 31: How To Select Channel List
(page up/down) or select the channel you want Press buttons, The selected channel appears on the screen. Press EXIT button to TV viewing or press MENU button to return to the previous menu. Press MENU button. Menu items appear on the screen. -
Page 32: How To Use Channel List Mode
- ETC : If you want to see channels without numeric or alphabetic initials. ♦ Network Mode : You can see the channel list in network style. Press EXIT button to TV viewing or press MENU button to return to the previous menu. -
Page 33: How To Set The Channel Order
How to Set the Channel Order Users can organize the number or sequence of the channels. How to Delete Channel Users can delete channels from the channel list. Press CH. LIST button. Channel list menu appears on the screen. Press buttons to select the channel you want to move. -
Page 34: How To Add Channel
How to Add Channel Users add channels they want. How to Factory Set The status of the Digital-TV will return to factory default parameters by using this function. Press CH. LIST button. Channel list menu appears on the screen. Press WHITE buttons. -
Page 35: How To Day Light Saving Time(Summer Time)
Setting Time offset Saving Time(Summer time) Users can use this menu when they want to change a TV channel to a Radio channel or vice versa. How to TV/RADIO switching Users can use this menu when they want to change a TV channel to a Radio channel or vice versa. -
Page 36: How To Subtitle / Audio
DTV Channel Setup How to Subtitle / Audio Users can adjust the subtitle and audio condition/status of the current channel. How to Select Channel / Information Brief information is displayed, such as current channel type, name, local start/end time, guide information, current time, fav/normal mode, Audio mode and Audio ID. -
Page 37: How To Set Teletext In Dtv
How to Set Teletext in DTV You can use Teletext service in iDTV mode. icon on the screen means your TV is receiving Teletext service. Press “TTX/MIX” button and wait. If the “ * ” sign pops up left upside of the screen as the following picture, wait until the teletext service menu is displayed “... -
Page 38: Appendix
Auto On does not work. Ensure to use the remote control or power button on the product to turn off your TV. If you unplug the power cord, the stand-by consumption power becomes 0 (zero), which causes the programmed time to be erased. - Page 39 After setting the time, Ensure to use the remote control or power button on the product to turn off your TV. If I turned TV off and turn it on. you unplug the power cord, the stand-by consumption power becomes 0 (zero), which The programmed information causes the programmed time to be erased.
-
Page 40: Product Specifications
Control type - The above specifications may be subject to change without prior notice. E200D 1 (A/V) Full-Scart 1 (Audio included) Video (RCA) 1 (Analog TV/IDTV) Antenna D-SUB PC Connection jack 1280 X 1024 @ 60Hz Max. resolution Audio HDMI... - Page 41 Control type - The above specifications may be subject to change without prior notice. E201D 1 (A/V) Full-Scart 1 (Audio included) Video (RCA) 1 (Analog TV/IDTV) Antenna D-SUB PC Connection jack 1280 X 1024 @ 60Hz Max. resolution Audio HDMI...
- Page 42 HYUNDAI IT SERVICE CENTER Germany/Austria/Benelux Hyundai IT Germany SVC Hessenring 13B D-65546 Mörfelden-Walldorf Germany Tel - Total : 0049 (0) 6105 4088 211 IT : 0049 (0) 180 50 70113 TV : 0049 (0) 180 59 13 134 e-mail : oezer.oeguen@ hyundai-service.eu...
Need help?
Do you have a question about the E200 and is the answer not in the manual?
Questions and answers