Table of Contents
Advertisement
Quick Links
Advertisement
Table of Contents

Related Manuals for Hyundai E260D


Summary of Contents for Hyundai E260D
-
Page 2: Declaration Of Conformity
DECLARATION OF CONFORMITY Hyundai IT COPR. Ami-ri Bubal-Eub Ichon-Si Gyeonggi-Do 467-860 KOREA declare under our sole responsibility that the product: Type-Designation : LT26AW001/LT32DW002/LT37DW000/LT42DW000/LT46DW000 to which this declaration relates is in conformity with the following standard(s) or other normative document(s) Safety : EN60065:2001 / IEC60065 : 2001... -
Page 3: Table Of Contents
Table of Contents General Information Important Tip/Image Sticking Precaution ...1 Safety Precaution ...2 Contents of the Package ...6 Products Sold Separately ...6 Parts Names and Functions ...7 Remote Control ...11 Connections Connecting Indoor/Outdoor TV Antenna(UHF/VHF) ...13 Connecting Antenna input Connection to External Equipments ...13 Before Connecting the Video/Audio Connections to External Devices... -
Page 4: Important Tip/Image Sticking Precaution
General Information Image Sticking Precaution When watching a still Image within motion pictures and Wide/Panorama/Zoom/ /4:3 screen/14:9 1. Note : - When the central area of the screen and the screen edges are fixed, the different brightness level of the edges may cause image retentions on the edges when watching for a long time - This phenomenon happens also to products from other manufacturers. -
Page 5: General Information
Safety Precaution The contents of this section are provided for the safety of users and their property. Please read the instructions carefully before using. Outdoor Antenna Grounding If an outside antenna or cable system is connected to the TV, be sure the antenna or cable system is grounded so as to provide some protection against voltage surges and built-up static charges. - Page 6 General Information Safety Precaution ...Continued from previous page The contents of this section are provided for the safety of users and their property. Please read the instructions carefully before using. If there is a persistent accumulation of dusts or water on the plug, please make sure to wipe it off using a dry cloth.
- Page 7 Please avoid touching the panel at the rear of TV as it is producing high temperature. - Direct contact with the hot surface may cause physical burns. Do not allow children to climb or play on the - This may cause the TV to fall resulting in serious injury.
- Page 8 General Information Safety Precaution ...Continued from previous page The contents of this section are provided for the safety of users and their property. Please read the instructions carefully before using. Do not install the product on the floor. - This may cause the TV to fall resulting in serious injury.
-
Page 9: Contents Of The Package
General Information Contents of the Package When opening the package, please ensure to check the following accessories. Antenna Cable Power Cord Remote Control & User's Guide (coaxial cable) 2 batteries (1.5V AAA) Products Sold Separately If you want to purchase the following accessories, consult a service center, electronics shops, or parts seller. Component(Y, Pb, Pr) cable Composite(Video &... -
Page 10: Parts Names And Functions
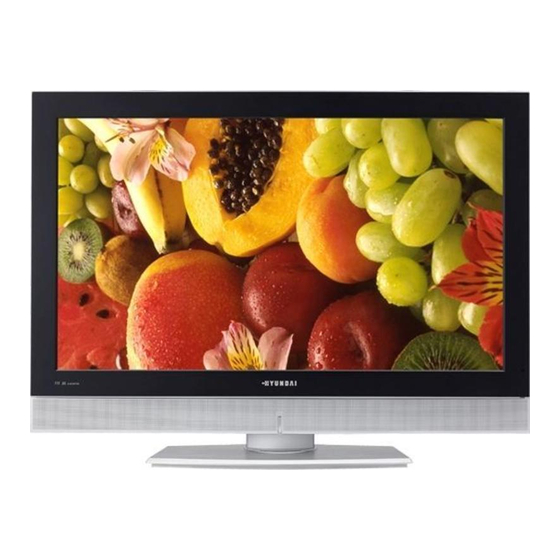
General Information Parts Names and Functions Front View - E260D/E320D/E370D/E420D/E460D MODEL * This product image may be a bit different from the actual product. Volume buttons Use these buttons to adjust sound levels. These buttons also serve as the cursors of Select/Adjust in Menu mode. - Page 11 Rear View - E260D/E320D/E370D/E420D/E460D MODEL * This product image may be a bit different from the actual product. Power switch (For 26”/32” model only) Power (AC) input terminal HDMI input terminal D-SUB input terminal D-SUB Audio input terminal Video(CVBS) output terminal...
- Page 12 General Information Front View - E261D/E321D/E371D/E421D/E461D MODEL * This product image may be a bit different from the actual product. Volume buttons Use these buttons to adjust sound levels. These buttons also serve as the cursors of Select/Adjust in Menu mode. Channel buttons Use these buttons to change channels.
- Page 13 Rear View - E261D/E321D/E371D/E421D/E461D MODEL * This product image may be a bit different from the actual product. Power switch (For 26”/32” model only) Power (AC) input terminal HDMI input terminal D-SUB input terminal D-SUB Audio input terminal Video(CVBS) output terminal Audio(CVBS) output terminal Audio(CVBS/S-Video) input terminal S-Video input terminal...
-
Page 14: Remote Control
General Information Remote Control SLEEP CH-LIST GUIDE TV/RADIO PICTURE MUTE TTX/MIX INDEX LIST/FLOF STORE 1. POWER/STANDBY 2. POWER LED 3. SOURCE Use this button to select External Input. 4. STILL SOURCE 5. INFOMATION Use this button to display resolution or various programs. INFO 6. - Page 15 Teletext & Fastext Function (See pages 36 for more details.) CH-LIST GUIDE TV/RADIO S.MODE P-SOURCE SUB-PR PICTURE SOUND MUTE TTX/MIX INDEX LIST/FLOF STORE 1. CH. LIST To watch the channel list for Digital TV. Press confirm or press EXIT to return to previous channels. 2.
-
Page 16: Connections
Connections Connecting Indoor/Outdoor TV Antenna(UHF/VHF) - Antenna or Cable service without cable box connections - For on optimum picture quality, adjust the direction of antenna if needed. ✓ When inserting a 75 ohm coaxial cable into the input connection, ensure the wire tip not to bend. ✓... -
Page 17: Before Connecting The Video/Audio Connections To External Devices
Before Connecting the Video/Audio Connections to External Devices... Please make sure to read the following instruction to enjoy the best picture quality. Best picture quality is displayed in the following order. HDMI HDMI, COMPONENT DVI-I, D-Sub The superior picture quality starts from the far left side. How to Connect a DTV Receiver or DVD Player 1. -
Page 18: How To Connect A Vcr, Cable Receiver, Camcoder, Game Player
Connections How to Connect a VCR, Cable Receiver, Camcoder, Game Player 1. Connect the Video cable or S-Video cable between Video/S-Video output terminals of VCR or Cable receiver and Video/S-Video input terminal of TV. (Connect the jacks to terminals in the same color.) 2. -
Page 19: Scart Connection To The External Input/Output
Resolutions Supported in PC Model Resolution 640 x 350 640 x 480 720 x 400 800 x 600 832 x 624 1024 x 768 1280 x 1024 1366 x 768 Scart Connection to the External Input/Output If you have a second VCR and wish to copy cassettes tape. Connect the source VCR to “F Scart” and the target VCR to “H Scart”... -
Page 20: Hdmi Connection (For Hdmi Model Only)
Connections HDMI Connection (For HDMI model only) HDMI* (High Definition Multi media Interface) is the first all digital consumer electronics A/V interface that supports uncompressed standard. The HDMI terminal supports both video and audio information. To the HDMI™ input terminal, you can connect an EIA/CEA-861/861* as a Set Top Box or DVD player with HDMI or DVI output terminal. -
Page 21: How To Set The Osd Screen
How to Set the OSD Screen SOURCE SLEEP INFO CH-LIST GUIDE TV/RADIO S.MODE P-SOURCE SUB-PR ANALOG TV - Terrestrial broadcasting for supporting analog PAL/SECAM system. H-SCART - Basically the same as Full SCART in function but not supporting RGB Video signals. Different OSD Menu You can confirm OSD menu of three different types. -
Page 22: Picture Setup
Picture Setup How to Select the Picture Mode Users can automatically adjust the picture mode according to the input mode. How to Set the Desired Picture Users can manually adjust their desired picture Press MENU button. Menu items appear on the screen. Press button to select “Picture”... -
Page 23: Hdmi Input Modes
How to Set the Desired Picture in PC, HDMI Input Modes Users can adjust Color as users want. How to Set Image Adjust in PC Mode Press MENU button. Menu items appear on the screen. Press button to select “Picture” Icon. picture mode is highlighted. -
Page 24: How To Select A Color Tone
Picture Setup How to Select a Color Tone Users can adjust Color as users want. How to Set the Display Size Users can adjust the display scale as they want Press MENU button. Menu items appear on the screen. Press button to select “Picture”... -
Page 25: How To Set Noise Reduction(Nr)
How to Set Noise Reduction(NR) User can eliminate noises on the screen in Video mode How to Set Film Mode Set Film Mode to receive a crisp, clear picture without flickering. Press MENU button. Menu items appear on the screen. Press button to select “Picture”... -
Page 26: Sound Setup
Sound Setup How to Select the Audio Mode Users can adjust sound mode automatically as they want. How to Adjust the Desired Audio Mode Users can adjust sound mode automatically as they want. Press MENU button. Menu items appear on the screen. Press buttons to move to “SOUND”... -
Page 27: How To Select Auto Volume
How to Select Auto Volume This function will automatically give a similar volume size to each channel. How to Select Sound Mode Depending on the particular program being broadcast, you can select stereo or mono. Press MENU button. Menu items appear on the screen. Press buttons to move to “SOUND”... -
Page 28: How To Select Surround
Sound Setup How to Select Surround This function processes multi-channel surround sound through two speakers. Press MENU button. Menu items appear on the screen. Press button to select “SOUND” Icon. “MODE” is highlighted. Press buttons to move to “SURROUND”. Press buttons to select to SURROUND . -
Page 29: Channel Setup
How to Select Auto Store Auto store enables to search/store channels of countries where the user is located automatically. How to Select Manual Store Manual store enables to searching channels which the user want manually. Press MENU button. Menu items appear on the screen. Press buttons to move to “CHANNEL”... -
Page 30: How To Set The Program Edit(Add/Delete,Sort,Name)
Channel Setup How to Set the Program Edit(Add/Delete, Sort, Name) Program edit enables users to edit the searched programs. P r o g . A d d / D e l e t e C h a n n e l N a m e E r a s e d –... -
Page 31: How To Fine Tune
How to fine tune if the reception is clear, you do not have to fine tune, as this is done automatically during the search and store operation. If the signal is weak or distorted, you may have to fine tune the channel manually. How to Set PIP This is to set PIP(Picture In Picture). -
Page 32: Supported Pip Table
PIP Setup In case of PIP mode, go to step 10 if you need to set the “Position” of Sub picture. Press buttons to move to “Positon” and Press Press button, then the mode will changes the following order. ➛ RIGHT BOTTOM ➛ RIGHT TOP ➛ LEFT TOP ➛ LEFT BOTTOM ➛ In case of PIP mode, go to step 12 if you need to set the “SWAP”... -
Page 33: Function Setup
How to Reset How to Set Clock, Sleep Time, ON/OFF Time Press MENU button. Menu items appear on the screen. Press button to select “Set up” Icon. “Reset” is highlighted. Press or buttons to select to “RESET”. Press buttons to choose to RESET . Press EXIT button to TV viewing or press MENU button to return to the previous menu. -
Page 34: Choosing The Your Language
Function Setup Choosing the Your Languages Using the TV for the first time, users must select their preferred language preference in order to display main menus and sub menus, etc. Go to step 6 if you need to set the “ON or OFF TIME”. Press buttons to move to “ON or OFF TIME”. -
Page 35: How To Set Osd Tone
How to set osd tone How to Set Teletext in ATV You can use Teletext service in analog TV mode. If it is included in you receiving channels. Press MENU button. Menu items appear on the screen. Press button to select "set up"icon “RESET”... -
Page 36: Selecting Teletext Display Options In Atv Mode
Function Setup Selecting Teletext Display Options in ATV Mode When users have displayed a teletext page, they can have various options to suit their requirements. DISPLAY(ACTION) • Hidden Text (Answers to Quiz Games, for Example) • The Normal Screen • A Second Page •... -
Page 37: Dtv Setup
How to Search Automatically This function can be used to get the latest program data while the receiver is still in use. Through this function, the receiver searches for all the available program and saves them in the memory. How to Search Manually You can edit parameters of certain channels and scan them. -
Page 38: How To Check Channel State
DTV Channel Setup How to Check Channel State Users can check parameters of certain channels and scan them. Press buttons to select “Bandwidth”, and set the proper value for the selected Channel. Press Up and Down buttons to move to “Scan”. Press buttons to store all the entered channel data. -
Page 39: How To Use The Guide (Epg : Electronic Program Guide)
How to Use the Guide (EPG : Electronic Program Guide) Users can check the channel information on the channels of the transponder they are watching. Press MENU button. Menu items appear on the screen. Press Buttons to move to “DTV CHANNEL” icon. Press button to select “DTV CHANNEL”... -
Page 40: How To Select Channel List
DTV Channel Setup How to Select Channel List Users can change the current channel to any other channel they want. How to Set Favorite Channel Users can store frequently watched channels to quickly access a preferred channel. Press MENU button. Menu items appear on the screen. -
Page 41: How To Use Channel List Mode
How to Use Channel List Mode Users can see variant channel lists which may enable them to edit and select channels more conveniently. How to Lock Channel This menu enables users to prevent children from viewing programs unsuitable for their age. Press CH. -
Page 42: How To Set The Channel Order
DTV Channel Setup How to Set the Channel Order Users can organize the number or sequence of the channels. How to Delete Channel Users can delete channels from the channel list. Press CH. LIST button. Channel list menu appears on the screen. Press buttons to select the channel you want to move. -
Page 43: How To Add Channel
How to Add Channel Users add channels they want. How to Factory Set The status of the Digital-TV will return to factory default parameters by using this function. Press CH. LIST button. Channel list menu appears on the screen. Press WHITE buttons. The Add Digital Channel window will appear. -
Page 44: How To Day Light Saving Time(Summer Time)
DTV Channel Setup Setting DayLight Saving Time(Summer Time) Users can use this menu when they want to change a TV channel to a Radio channel or vice versa. How to TV/RADIO switching Users can use this menu when they want to change a TV channel to a Radio channel or vice versa. Press buttons to select “DL Saving”... -
Page 45: How To Subtitle / Audio
How to Subtitle / Audio Users can adjust the subtitle and audio condition/status of the current channel. How to Select Channel / Information Brief information is displayed, such as current channel type, name, local start/end time, guide information, current time, fav/normal mode, Audio mode and Audio ID. -
Page 46: How To Set Teletext In Dtv
DTV Channel Setup How to Set Teletext in DTV You can use Teletext service in iDTV mode. icon on the screen means your TV is receiving Teletext service. Press “TTX/MIX” button and wait. If the “ * ” sign pops up left upside of the screen as the following picture, wait until the teletext service menu is displayed “... -
Page 47: Appendix
Troubleshooting Symptom Possible solution How can I install an Refer to page 13. antenna? TV screen is not clear after Indoors antenna may experience poor reception due to surrounding buildings. Please installing an indoors install an outdoors antenna or wireless antenna. antenna. - Page 48 Appendix Troubleshooting After setting the time, Ensure to use the remote control or power button on the product to turn off your TV. If I turned TV off and turn it on. you unplug the power cord, the stand-by consumption power becomes 0 (zero), which The programmed information causes the programmed time to be erased.
-
Page 49: Product Specifications
Product Specifications E260D Model 1 (A/V) Full-Scart Input 1 (A/V) Half-Scart 1 (A/V audio common) S-Video 1 (Audio included) Video (RCA) 1 (Audio included) Component(Y/Cb/Cr) Antenna D-SUB PC Connection jack 1366 X 768 @ 75 Hz Max. resolution Audio DVI-HDCP / HDMI... - Page 50 Appendix Product Specifications Model Input Full-Scart Half-Scart S-Video Video (RCA) Component(Y/Cb/Cr) Antenna PC Connection jack Max. resolution Audio DVI-HDCP / HDMI Video Output Audio Output Digital SPDIF Optical Digital SPDIF Coaxial Subwoofer TV/Video Color system Sound system Video system Power Supply Consumption power Stand-by power...
Need help?
Do you have a question about the E260D and is the answer not in the manual?
Questions and answers