Fisher & Paykel WH1060P Installation Manual/User Manual
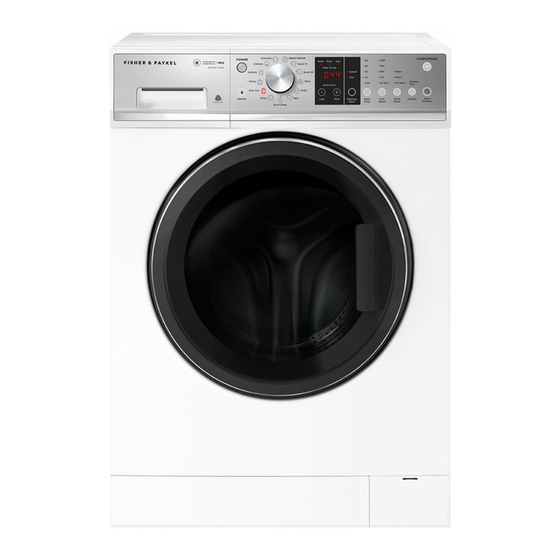
Front loader washing machine
Hide thumbs
Also See for WH1060P:
- Installation manual (3 pages) ,
- Installation manual and user manual (44 pages)

Subscribe to Our Youtube Channel
Related Manuals for Fisher & Paykel WH1060P


Summary of Contents for Fisher & Paykel WH1060P
- Page 1 FRONT LOADER WASHING MACHINE WH1060P, WH1060J, WH9060P, WH9060J, WH8560F, WH8560P, WH8560J, WH8060F, WH8060P, WH8060J, WH7560P & WH7560J INSTALLATION GUIDE / USER GUIDE NZ AU SG...
-
Page 3: Table Of Contents
CONTENTS Safety and warnings Installation guide Before your first wash Safety features Control panel Wash cycles Detergent and softener Where to put the detergent Wash preparation Getting started quickly Wash cycle options Customising a wash cycle Changing pre-set options Caring for your washer Before you call for service Fault codes Troubleshooting... -
Page 5: Safety And Warnings
SAFETY AND WARNINGS WARNING! Electric Shock Hazard Failure to follow this advice may result in electric shock or death. • If you are using an extension cord or a portable electrical outlet device (eg multi-socket outlet box), ensure that it is positioned so that it does not come into contact with water or moisture. - Page 6 WH7560P, WH7560J WH8060F, WH8060P, WH8060J WH8560F, WH8560P, WH8560J WH9060J, WH9060P WH1060P, WH1060J 10.0 *Capacity refers to the maximum dry weight of items the washer can wash at any one time Installation For guidance on how to install your product, please refer to ‘Installation guide’...
-
Page 7: Installation Guide
INSTALLATION GUIDE Accessories Check if you received the following accessories with your Fisher & Paykel washer. You will find them inside the drum or attached to the packaging. 1 x hot inlet hose (grey with red connectors) for WH8560F, WH8560P2, WH8060F, WH8060P2 and WH7560P 1 x cold inlet hose (grey with white connectors) for all models. - Page 8 INSTALLATION GUIDE Removing transit safety bolts The clothes washer is fitted with transit safety bolts at the rear to avoid possible damage to the internal components during transportation. The four transit bolts must be removed prior to operation of the washer. Failure to remove these will result in damage to the washer and compromise your manufacturer’s warranty.
- Page 9 INSTALLATION GUIDE Product dimensions FRONT PLAN WH1060P/J WH9060P/J WH8560F/P/J WH8060F/P WH7560P/J WH8060J PRODUCT DIMENSIONS Overall height* Overall width Overall depth** Depth of open door 1075 1075 1075 1075 1010 1010 Standpipe height min * Exact height is dependent on foot adjustment...
- Page 10 INSTALLATION GUIDE Levelling the washer It is IMPORTANT to level the washer. Having a level washer set up in its cavity will ensure best performance for spinning, minimising noise, vibrations and wear and tear on the washer. Before positioning your washer in its final position, check that the machine is level, front to back and side to side.
- Page 11 INSTALLATION GUIDE Water supply Water supply requirements If you have an uncontrolled water heating source (eg a wet back or solar heating system) you should fit a tempering valve. This will ensure the hot water temperature remains within safe limits. Contact your registered plumber to select and install the tempering valve. Your cold water should not exceed 35°C and your hot water should not exceed 65°C.
- Page 12 INSTALLATION GUIDE Draining In multi-storey apartments or any upper floor, the washer should be installed on a floor equipped with a drain. Draining must comply with local by-laws. Place the drain hose in a tub or standpipe The hose guide is used to hold the drain hose over the tub or standpipe. 1 Flex the guide apart and pull the hose through the guide.
- Page 13 INSTALLATION GUIDE Electrical connection This appliance must be connected to a 220V – 240V, 50Hz, sinusoidal, minimum 10A electrical supply. Check the power cord for damage and make sure it is not squashed or twisted when installing the washer. Always remove the power cord from a socket by the plug, not by the cord. Spare Parts SPARE PART* PART NO.
- Page 14 INSTALLATION GUIDE Press to start. The washer will start to fill. Wait until you see water in the bottom of the drum. Press to stop the cycle, then press to turn the washer off. Press again, select the cycle and SPIN press Check the drain hose is firmly secured to the...
-
Page 15: Before Your First Wash
BEFORE YOUR FIRST WASH Check you have done everything you need to before you start your first wash: … Have the packaging and transit bolts been removed? … Is the washer correctly levelled, feet are extended and cabinet corners are clear of the floor? …... -
Page 16: Safety Features
60°C). If necessary the water in the washer will be drained to a level where the door can be opened. Refer to ‘Wash cycle options’ for more information. Drum light (WH1060P, WH9060P, WH8560F, WH8060F, WH8560P3 and WH8060P3 models only) Your washer has a drum light to help assist you when loading and unloading your washer. - Page 17 SAFETY FEATURES Opening the door during a power failure Do not attempt to do this if the water level in the washer is above the bottom of the door. If there is a power failure during a wash cycle your washer will stop and the door will remain locked.
-
Page 18: Control Panel
CONTROL PANEL WH8560F and WH8060F models 1 Power Press to turn the washer ON/OFF. 2 Keylock Press to disable all buttons on the control panel, except the POWER button. This prevents accidental button presses. 3 SmartTouch™ Rotate to select your desired wash cycle. Control Dial Red LED illuminates to indicate the selected wash cycle. - Page 19 CONTROL PANEL WH1060P, WH9060P, WH8560P3 and WH8060P3 models 1 Power Press to turn the washer ON/OFF. 2 Keylock Press to disable all buttons on the control panel, except the POWER button. This prevents accidental button presses. 3 SmartTouch™ Rotate to select your desired wash cycle.
- Page 20 CONTROL PANEL WH8560P2, WH8060P2 and WH7560P models Power Press to turn the washer ON/OFF. Keylock Press to disable all buttons on the control panel, except the button. This prevents accidental button presses. POWER SmartTouch™ Rotate to select your desired wash cycle. Control Dial Red LED illuminates to indicate the selected wash cycle.
- Page 21 CONTROL PANEL WH1060J, WH9060J, WH8560J, WH8060J and WH7560J models Power Press to turn the washer ON/OFF. Keylock Press to disable all buttons on the control panel, except the button. This prevents accidental button presses. POWER SmartTouch™ Rotate to select your desired wash cycle. Control Dial Red LED illuminates to indicate the selected wash cycle.
-
Page 22: Wash Cycles
Company for the washing of machine washable wool products provided that the products are washed according to the instructions on the garment label and those issued by the manufacturer of these washing machines M1528. Only the WH1060P, WH9060P, WH8560F and WH8060F models comply with Woolmark Apparel Care requirements. - Page 23 Company for the washing of machine washable wool products provided that the products are washed according to the instructions on the garment label and those issued by the manufacturer of these washing machines M1528. Only the WH1060P, WH9060P, WH8560F, WH8060F, WH8560P3 and WH8060P3 models comply with Woolmark Apparel Care requirements.
- Page 24 WASH CYCLES WH8560P2, WH8060P2 and WH7560P models Your washer has a number of wash cycles to suit your laundering needs. Selecting the most appropriate cycle for each particular wash load will help ensure you get the best wash result. SPIN MAX.
- Page 25 WASH CYCLES WH9060J, WH8560J, WH8060J and WH7560J models Your washer has a number of wash cycles to suit your laundering needs. Selecting the most appropriate cycle for each particular wash load will help ensure you get the best wash result. SPIN MAX.
- Page 26 WASH CYCLES WH1060J Your washer has a number of wash cycles to suit your laundering needs. Selecting the most appropriate cycle for each particular wash load will help ensure you get the best wash result. MAX. WASH SPIN CYCLE DESIGNED FOR LOAD SIZE TEMP.
-
Page 27: Detergent And Softener
DETERGENT AND SOFTENER Detergent type Your washer requires low-sudsing detergent to prevent oversudsing problems. Low sudsing detergent comes in powder, liquid or pod form and is labelled front loading, low suds, high efficiency or HE. Using top loader detergent in your front loader washer may lead to excessive suds formation, which will lengthen the cycle time as the washer waits for the suds to dissolve. -
Page 28: Where To Put The Detergent
WHERE TO PUT THE DETERGENT Pods Detergent pods are a no mess alternative to powdered or liquid detergent. They must be placed at the back of the drum prior to loading your clothes. This will ensure they are activated quickly in the wash. - Page 29 WHERE TO PUT THE DETERGENT Powdered detergent If you wish to use powdered detergent, the liquid detergent compartment MUST be removed from the dispenser drawer. To remove the liquid detergent compartment, firmly grasp and twist the left hand side of the internal compartment and pull upwards.
- Page 30 WHERE TO PUT THE DETERGENT J Model Washers Powdered or liquid detergent Detergent is added to the main wash detergent compartment on the left side of the dispensing drawer marked with a . As the washer fills, water is flushed through this compartment to deliver a detergent solution into the drum.
-
Page 31: Wash Preparation
WASH PREPARATION Sorting Sort items according to colour, fabric type, and soil type. Wash fine, delicate fabrics separately from thick, heavy fabrics. Always separate coloured items from whites, especially when they are new. Colour run could be an issue if you wash items at higher temperatures. Some soils, like mud and blood are best washed in cold water. -
Page 32: Getting Started Quickly
GETTING STARTED QUICKLY Open the detergent drawer. Pour liquid or powder detergent in the draw or place the pod in the drum. Pre-dissolving detergent in warm water when washing can improve the performance of the liquid and powder detergent. Press to activate your washer. - Page 33 GETTING STARTED QUICKLY Press to start the cycle. The washer will start to fill with water and select the correct wash action for your load. to lock the buttons on the control panel, preventing them from being activated accidently by a washing basket or little fingers, refer to the ‘Wash cycle options’...
-
Page 34: Wash Cycle Options
WASH CYCLE OPTIONS Once you have selected your wash cycle you may wish to change the default wash options. Wash cycle options All wash cycles default to the recommended options for that cycle based on the average expected load to be washed. You can vary the options (eg ) to WASH TEMP, SPIN SPEED create your desired cycle. - Page 35 A number of factors can influence the amount of time saved on a cycle, including the load size, cycle chosen, water flow rate and load distribution during spin. Optimise Wash (WH1060P, WH9060P, WH8560P3 and WH8060P3 models) Your washer offers you two optimise wash options –...
- Page 36 RINSE+ ECO/ECO RINSE Wash+ (WH1060P, WH9060P, WH8560P3 and WH8060P3 models) allows you to increase the wash time for heavy soiled items. The increase in wash WASH+ time gives the load the right amount of tumbling to remove the soil from items that might...
- Page 37 WASH CYCLE OPTIONS Options Soak (WH8560F and WH8060F models only) option provides a two-hour soak during the middle of the wash phase of the SOAK cycle. The washer will then complete the rest of the cycle. During , the washer will SOAK agitate for a few seconds every minute.
- Page 38 WASH CYCLE OPTIONS Eco/Eco Rinse Use the option to save water and energy. Selecting will ECO/ECO RINSE ECO/ECO RINSE reduce the wash temperature slightly and alter the wash and rinse programming. This option will not be available if has been selected. PRE WASH RINSE+ If you wish to, you can select both the...
- Page 39 WASH CYCLE OPTIONS Keylock can be used to lock the buttons on your washer. This will avoid accidental button KEYLOCK pushes during the wash cycle. To turn on or off when the washer is powered on: KEYLOCK Press for three seconds. When activated, the light above the button is illuminated.
- Page 40 WASH CYCLE OPTIONS Delay Start option can delay the start of the wash cycle between five minutes and DELAY START 12 hours. This can be useful to time your washing to finish when you arrive home from work, or to start once you have finished in the shower. Press the button to increase the MORE...
-
Page 41: Customising A Wash Cycle
CUSTOMISING A WASH CYCLE To customise a cycle You can program your washer to remember the wash options you prefer for each wash cycle. For instance, you may want to set the cycle to default to a wash or EVERYDAY COLD cycle to include a HEAVY... - Page 42 CUSTOMISING A WASH CYCLE Press to store your customised cycle. A long beep will sound to confirm that your changes have been saved. To change your customised wash cycle simply repeat these steps.
-
Page 43: Changing Pre-Set Options
CHANGING PRE-SET OPTIONS Option adjustment mode (Models WH1060P, WH9060P, WH8560P3 and WH8060P3) This allows you to change the default setting wash temperature to CONTROLLED COLD . If your incoming cold water temperature is very low and you choose to do COLD TAP wash, the wash may be less effective. - Page 44 CHANGING PRE-SET OPTIONS Factory reset You can reset your washer to factory default settings by following the steps below. To reset your washer to factory default settings: Select the cycle. SPIN Press buttons MORE LESS OPTIONS together for three seconds, will appear on the screen and the washer will beep.
-
Page 45: Caring For Your Washer
CARING FOR YOUR WASHER When you have finished using your washer Turn off the taps to prevent the chance of flooding should a hose burst. Unplug the washer from the power socket. Cleaning your washer Before you start cleaning your washer, ensure that it is disconnected from the power (ie unplug the washer from the power socket). - Page 46 CARING FOR YOUR WASHER Cleaning the inside of your washer It is important that you regularly clean the inside of your washer using the DRUM CLEAN cycle. After 100 cycles icon will flash every time you turn your washer on to remind you to do this.
- Page 47 CARING FOR YOUR WASHER Aside from the detergent dispenser, water hose(s), and the pump filter, no other parts are designed to be removed from the washer for cleaning. Do not attempt to remove any other part of the washer. Cleaning the drum and the door Use a soft damp cloth to wipe the door, cleaning any water marks or residue off it.
- Page 48 CARING FOR YOUR WASHER Cleaning the pump filter Turn the power off and unplug the washer. Use a coin to open the filter cover. Place the edge of the coin into the slot and tilt upwards whilst levering the cover open. Unhook the pump outlet hose and pull it out (about 150mm).
- Page 49 CARING FOR YOUR WASHER Products that might damage your washer Concentrated bleaches, laundry pre-soakers/sanitisers, stain removers and hydrocarbon solvents (eg petrol and paint thinners) can cause damage to the surfaces eg control panel, and components of your washer. Be careful when washing garments stained with solvents as they are flammable. DO NOT put them in your dryer.
-
Page 50: Before You Call For Service
BEFORE YOU CALL FOR SERVICE User warnings Your washer is capable of self diagnosis and may sound a series of beeps and display a notification or warning to inform you when there is a problem. In most cases you will be able to address the problem the washer is alerting you to. Check this chart before you call for service. - Page 51 Use the button if you wish to add or remove items ADD A GARMENT (WH1060P, WH9060P, WH8060P2, WH8060F, WH8560P2, WH8560F, WH8560P3, WH8060P3 and WH7560P models). If the drum is still moving, wait for it to stop before attempting to open the door.
-
Page 52: Fault Codes
FAULT CODES When a continuous series of beeps is sounded, all the lights turn off on the control panel and a number appears on the display, a fault has occurred. The washer will automatically enter this mode if a fault occurs. The fault code will be displayed as followed by a number on the digital display. -
Page 53: Troubleshooting
TROUBLESHOOTING The following is a list of problems you may encounter when using this appliance and some suggestions that may help to correct the problem. If you still have problems, contact your Fisher & Paykel trained and supported service technician. PROBLEM POSSIBLE CAUSES WHAT TO DO... - Page 54 TROUBLESHOOTING PROBLEM POSSIBLE CAUSES WHAT TO DO Washer is Drain hose blocked. Clear the drain hose. not draining Pump filter blocked. Clear the pump filter, refer to ‘Cleaning the pump filter’. Drain hose guide higher than Lower the level of the drain hose guide. 1200mm above floor level.
- Page 55 TROUBLESHOOTING PROBLEM POSSIBLE CAUSES WHAT TO DO Cycle time Cycle time is approximate. Cycle time is influenced by a number of longer than usual factors. Refer to ‘Wash cycles’. / inaccurate Low water pressure or flow rate. Ensure that inlet hose filters are not blocked. adjustment of time remaining Out of balance or oversudsing.
- Page 56 TROUBLESHOOTING PROBLEM POSSIBLE CAUSES WHAT TO DO Vibrating Transit bolts left in place. Ensure transit bolts are removed prior to use of the washer. Refer to ‘Removing the transit bolts’. Washer may not be level. Ensure washer is installed on an appropriate surface and levelled correctly.
- Page 57 TROUBLESHOOTING PROBLEM POSSIBLE CAUSES WHAT TO DO Poor soil removal Incorrect wash cycle selected. Select a wash cycle that is appropriate for the amount of dirt. Refer to ‘Wash cycles’. Insufficient detergent. Ensure the correct dose of detergent is used for the load size and soil level. Refer to ‘Detergent and softener’.
- Page 58 TROUBLESHOOTING PROBLEM POSSIBLE CAUSES WHAT TO DO Black or grey Correct amount of detergent. Ensure the correct dose of detergent is marks on clothes used for the load size and soil level. Refer to ‘Detergent and softener’. Washer needs to be cleaned. Empty the machine and complete a cycle.
-
Page 59: Manufacturer's Warranty
MANUFACTURER’S WARRANTY For New Zealand and Australia only. You automatically receive a two-year Manufacturer’s Warranty with the purchase of this clothes washer covering parts and labour for servicing within the country of purchase. Fisher & Paykel undertakes to: Repair or, at its option, replace without cost to the owner either for material or labour any part of the product, the serial number of which appears on the product, which is found to be defective within two years of the date of purchase. - Page 60 MANUFACTURER’S WARRANTY Nothing in this Manufacturer’s Warranty is intended to, nor limits, any rights you may have under law to recover the costs of inspecting or returning the goods to us. This product has been designed for use in a normal domestic (residential) environment. This product is not designed for any commercial use (whatsoever).
-
Page 61: Customer Care
CUSTOMER CARE Before you call for service or assistance: Check our website, fisherpaykel.com, for ‘Product Help’ to see the latest updates, hints and tips, and information about your product. We recommend that you also refer to your user guide to ensure: 1 Your product is correctly installed. - Page 62 CUSTOMER CARE Registration Register your product with us so we can provide you with the best service possible. To register your product visit our website: fisherpaykel.com Complete and keep for safe reference: Model Serial No. Purchase Date Purchaser Dealer Suburb Town Country...
- Page 64 FISHERPAYKEL.COM © Fisher & Paykel Appliances 2020. All rights reserved. The models shown in this guide may not be available in all markets and are subject to change at any time. The product specifications in this guide apply to the specific products and models described at the date of issue.
Need help?
Do you have a question about the WH1060P and is the answer not in the manual?
Questions and answers