Table of Contents
Advertisement
Advertisement
Table of Contents

Related Manuals for Cissell L28FD30


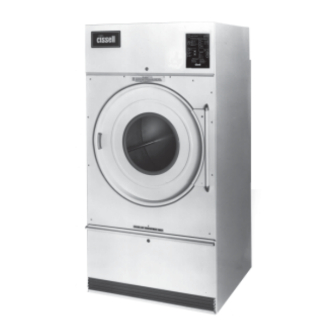
Summary of Contents for Cissell L28FD30
-
Page 1: Model Numbers & Company Address
2/07... -
Page 2: What To Do If You Smell Gas
Do not store or use gasoline or other flammable vapors and liquids in the vicinity of this or any other appliance. WARNING: A clothes dryer produces combustible lint and should be exhausted outside the building. The dryer and the area around the dryer should be kept free of lint. - Page 3 WARNING: Alterations to equipment may not be carried out without consulting with the factory and only by a qualified engineer or technician. Only Cissell parts may be used. WARNING: Remove clothes from dryer as soon as it stops. This keeps wrinkles from setting in and reduces the possibility of spontaneous combustion.
-
Page 4: Cissell Dryer Warranty
Cissell’s factory, transportation prepaid, within the applicable warranty period and found by Cissell to have been defective, and in no event shall Cissell be liable for damages of any kind, whether for any injury to persons or property or for any special or consequential damages. -
Page 5: Table Of Contents
TABLE OF CONTENTS 110 LB. LAUNDRY DRYER INSTALLATION/OPERATION MANUAL PAGE Model Numbers & Company Address ... 1 Important Notices ... 2-3 Dryer Warranty ... 4 Table of Contents ... 5 Warnings, Cautionary Notes and Symbols... 6-7 Unpacking and General Insulation ... 8 Disassembling Top of Dryer ... -
Page 6: Warnings, Cautionary Notes And Symbols
The following symbols are used in this manual and/or on the machine. The numbers between () refer to the numbers on the machine surveys. Symbol NOTE! Hot! Do Not Touch Heiß! Nicht Beruhren Haute temperature! Ne pas toucher Caliente! no tocar dangerous voltage tension dangereuse Gefährliche elektrische... - Page 7 SYMBOLS Symbol Description Part/Measurement rotation in two directions rotation dans les deux sens Drehbewigung in zwei Richtungen movimiento rotativo en los dos sentidos direction of rotation sens de mouvement continu de rotation Drehbewegung in Pfeilrichtung movimiento giratorio o rotatorio en el sentido de la flecha End of Cycle caution attention...
-
Page 8: Unpacking And General Insulation
GENERAL INSTALLATION (ALL DRYERS) All Cissell dryers are packed in a protective (heavy-duty) plastic bag. Upon arrival of the equipment, any damage in shipment should be reported to the carrier immediately. Upon locating permanent location of a unit, care should be taken in movement and placement of equipment. -
Page 9: Disassembling Top Of Dryer
PROCEDURE FOR DISASSEMBLING TOP OF 110 LB. GAS LAUNDRY DRYERS Disassembling Top of Dryer 1. Shut off main gas supply and electrical power. Disconnect bonnet gas supply line at union fitting. 2. Unscrew two (2) top front cover panel hold down screws and open front cover panel. -
Page 10: Gas Heated Dryer Illustration
110 lb. Gas Fired Dryer—Models L44CD42G and L44KD42G (Illustration) Page 10... -
Page 11: Steam Heated Dryer Illustration
110 lb. Steam Heated Dryer—Models L44CD42S and L44KD42S (Illustration) Page 11... -
Page 12: Electric Dryer Illustration
110 lb. Electric Dryer—Model L44CD42E (Illustration) Page 12... -
Page 13: Gas Fired Dryer Illustration
110 lb. Gas Fired Dryer—Models L44FD42G and L44RD42G (Illustration) ENERGY-SAVER MODEL Page 13... -
Page 14: Specifications
GENERAL SPECIFICATIONS FOR 110 lb. GAS FIRED, STEAM HEATED AND ELECTRIC LAUNDRY DRYERS GAS FIRED DRYERS ONLY CONSULT GAS SUPPLIER FOR SPECIFIC GAS REQUIREMENTS Specifications Floor Space ...67” Deep x 47” W x 89-1/8” H (Gas, Electric, 4-Coil Steam, ...(163 cm x 119 cm x 6-Coil Steam) ...227 cm) Door ...31-1/4”... - Page 15 STEAM HEATED DRYERS ONLY ELECTRIC LAUNDRY DRYER (see Electric Bonnet Sheet) Specifications Operating Steam Pressure 4-Coil ... 100 PSIG Max. 6-Coil ... 100 PSIG Max. Boiler HP (with normal load) 4-Coil ... 7.87 6-Coil ... 9.50 Heat Capacity 4-Coil 6-Coil Steam Coils 4-Coil ...
-
Page 16: Specifications
ENERGY SAVER GAS DRYERS MOTORS USED - ALL 110 lb. DRYERS Motor No. Voltage MTR212 208-230/460 MTR101 MTR104 240/415 MTR192 220/380 MTR192 220/380 MTR192 200/346 MTR215 200-230/460 MTR100 MTR192 240/415 MTR61 220/380 MTR61 220/380 MTR61 200/346 Total controls on dryer, other than motors and electric heating elements are 1 to 3 Amperes. Specifications Floor Space ... -
Page 17: Electrical Connections
National Electrical Code as ANSI/NFPA No. 70—Latest Edition. See wiring diagram furnished with dryer. Your Cissell dryer is completely wired at the factory and it is only necessary for the electrician to connect the power leads to the wire connectors within the service connection box on the rear of the dryer. -
Page 18: Gas Piping
WARNING (LIQUIFIED PETROLEUM GASES ONLY) A Gas Pressure Regulator for Liquified Petroleum Gases is not furnished on Cissell Gas Heated Clothes Dryers. This regulator is normally furnished by the installer. In accordance with American Gas Association (AGA) standards, a gas... -
Page 19: Gas Piping And Gas Loop Piping Installation
Gas Loop Piping and Gas Supply Piping System (Illustrations) Page 19... -
Page 20: Gas Pipe Size Chart
TOTAL BTU/HR (for LP Gas correct TOTAL total BTU/HR below by KCAL multiplying by .6) HOUR 15000 60,000 80,000 20000 25200 100,000 30200 120,000 35200 140,000 40300 160,000 45300 180,000 50400 200,000 75600 300,000 100800 400,000 126000 500,000 151200 600,000 176400 700,000 202000... -
Page 21: Gas Piping Installation
GAS PIPING INSTALLATION Gas Piping Installation 1. The installation must conform to local codes or in absence of local codes, with the National Fuel Gas Code as ANSI Z223.1—Latest Edition. 2. Check with utilities for proper gas pressure and gas supply line. -
Page 22: Steam Piping Installation
INSTALLATION INSTRUCTIONS PIPING R E C O M M E N D A T I O N S Steam Piping Installation 1. Set and anchor dryer in position. Machine should be level to assure proper steam circulation. 2. To prevent condensate draining from headers to dryer, piping should have a minimum 12”... -
Page 23: Steam Piping Installation
Steam Piping Installation (Illustration) Page 23... -
Page 24: Exhaust Installation - Multiple Manifold Duct
0.3 inches static pressure. Area of section “A-A” must be equal to the sum of dryer exhaust pipes entering multiple exhaust pipe. (See chart below.) MODELS: L28FD30, L28US30, L36FD30, L36US30, L36US36, L44FD42 No. of Dryers Duct Diameter... - Page 25 Dryer Installation with Multiple Exhaust (Illustration) 10.16cm) Page 25...
-
Page 26: Dryer Installation With Multiple Exhaust
Dryer Installation with Multiple Exhaust EXHAUST INSTALLATION— MULTIPLE MANIFOLD DUCT For Exhaust Duct more than 14 feet and 2 elbows equivalent and more than 0.3 inches static pressure. 1. Make-up air from outside building may enter enclosure from top or side walls. Area of opening should be equal to 4-6 times the sum of dryer duct areas. -
Page 27: Dryer Installation With Separate Exhaust (Preferred)
Dryer Installation with Separate Exhaust (Preferred) (Illustration) DRYER INSTALLATION WITH SEPARATE EXHAUST (PREFERRED) DRYER INSTALLATION WITH SEPARATE EXHAUST (PREFERRED) For Exhaust Duct less than 14 feet and 2 elbows equivalent and less than 0.3 inches static pressure. NEVER exhaust the dryer into a chimney. NEVER install wire mesh screen over the exhaust or make- up air area. -
Page 28: Dryer Air Flow Installation
TROUBLESHOOTING Dryer Air Flow Installation Nothing is more important than air flow for the proper operation of a clothes dryer. A dryer is a pump which draws make-up air from the out-of-doors, through the heater, through the clothes and then forces the air through the exhaust duct back to the out-of-doors. Just as in a fluid water pump, there must be a fluid air flow to the inlet of the dryer, if there is to be the proper fluid air flow out of the exhaust duct. -
Page 29: Rules For Safe Operation
RULES FOR SAFE OPERATION OF DRYER ENERGY-SAVING TIPS Rules for Safe Operation of Dryer 1. Be sure your dryer is installed properly in accordance with the recommended instructions. 2. CAUTION Be safe—shut main electrical power supply and gas supply off externally before attempting service. - Page 30 ABOVE 2,000 FEET Energy Saving Tips CAUTION Synthetic solvent fumes from dry cleaning machines create acids when drawn through the dryer. These acid fumes cause rusting of painted parts, pitting of bright plated parts and completely removes the zinc from galvanized metal parts, such as the tumbler basket.
-
Page 31: Two Timer Model Operation Instructions
Two Timer Models—Figures 1, 2, and 3 (Illustrations) Page 31... - Page 32 Operating Instructions—Two Timer Models OPERATING INSTRUCTIONS—TWO TIMER MODELS OPERATING INSTRUCTIONS—TWO TIMER MODELS 1. After loading the dryer tumbler with the water washed clothes load, proceed to close the loading door. For better drying, do not load dryer with combination of garments that twist.
- Page 33 Operating Instructions—Two Timer Models OPERATING INSTRUCTIONS—TWO TIMER MODELS OPERATING INSTRUCTIONS—TWO TIMER MODELS (continued) What is happening to the drying operation: a. The fan motor will operate. b. The basket will rotate. c. The heat source will be energized. d. The heated air will mix with the water washed clothes to evaporate the moisture from the garments.
-
Page 34: Service Savers
TROUBLESHOOTING DRYER WON’T START DRYER WON’T HEAT CLOTHES ARE NOT SATISFACTORILY DRY GAS DRYER IGNITION Service Savers To help you troubleshoot the dryer, we list below the most common reasons for service calls and some answers to the problems. Before you call service, please review the following items: DRYER WON’T START 1. - Page 35 Troubleshooting Chart—Gas, Steam, and Electric Dryers TROUBLE Motor will not start. No power. Incorrect power. Time off. Loose wiring connections. Defective starting relay. Motor tripping on thermal Low voltage. overload. Inadequate wiring. Loose connections. Inadequate air. Poor housekeeping. Basket motor will not run. Loading door OPEN.
- Page 36 Troubleshooting Chart—Gas, Steam, and Electric Dryers TROUBLE CAUSE Dryer noisy or vibrating. Not leveled. Fan out of balance. Basket rubbing. V-Belt sheaves. Belt. Foreign objects. Dryer runs, but no heat. Incorrect voltage. No voltage. Silicon Carbide Igniter will not glow- red.
- Page 37 Troubleshooting Chart—Gas, Steam, and Electric Dryers TROUBLE Dryer runs, but no heat. Air Switch out of (continued) adjustment. Air Switch defective. Gas pressure too low. Improper orifice. Electric power to heating unit turned OFF. Defective relay. Defective thermostat. Defective Safety Overload Thermostat.
- Page 38 Troubleshooting Chart—Gas, Steam, and Electric Dryers TROUBLE Dryer too hot. Incorrect Main Burner orifice. Inadequate make-up air. Lint accumulated. Exhaust duct dampers. High gas pressure. Partially restricted or inadequately sized exhaust system. Defective thermostat. Dryer does not stop at end Defective timer.
Need help?
Do you have a question about the L28FD30 and is the answer not in the manual?
Questions and answers