Advertisement
Quick Links
Philips Consumer Lifestyle
Service Manual
Product information
• This product meets the requirements regarding
interference suppression on radio and TV.
• After the product has been repaired, it should function
properly and has to meet the safety standards as
officially laid down at this moment.
Performance
• Battery type
• Battery voltage
• Charging time
• Runtime
• Sound power level
Usability
• Dust full indicator
• 24-hour scheduling
• Dust sensor
• Floor types
• Smart detection system : 19 sensors
• Threshold climbing
• Cleaning modes
Design
• Design features
: Stairs detector
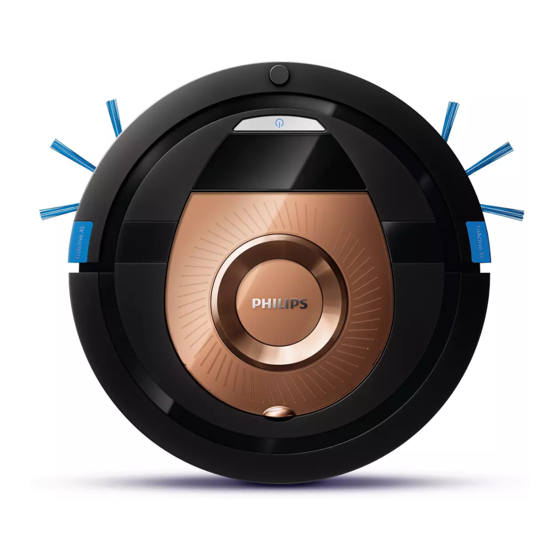
• Color
: Bright copper
Filtration
• Dust capacity
: 0.30 l
• Filter
: Filter inside the Dustbin
(not washable)
Published by Philips Consumer Lifestyle
17/12 Version 1.8
SmartPro Compact Robot vacuum cleaner
: Li-Ion
: 12.8 V
: 4 hour(s)
: 120 minute(s)
: 58 dB
: Hard floors
: 17 mm
: 4
Printed in the Netherlands
Nozzles and accessories
• Accessories included : AC power adaptor, Side brushes
• Standard nozzle
: TriActive XL
• Other accessories
: 2 x Filter, Remote control,
Docking station
Sustainability
• Stand-by power consumption : 0.62 W
Weight and dimensions
• Dimensions of product
(L x W x H)
• Weight of product
Production date
© Copyright reserved
FC8776/01
FC8776/31
: 60.1 x 330 mm
: 1.73 kg
Subject to modification
Advertisement

Related Manuals for Philips SmartPro Compact FC8776/01


Summary of Contents for Philips SmartPro Compact FC8776/01
- Page 1 : Stairs detector • Color : Bright copper Filtration • Dust capacity : 0.30 l • Filter : Filter inside the Dustbin (not washable) Published by Philips Consumer Lifestyle Printed in the Netherlands © Copyright reserved Subject to modification 17/12 Version 1.8...
- Page 2 Consumer Replaceable Parts FC8776/01 / FC8776/31 Description Remark Service code Switching adaptor 24 V 1000 mA Euro plug 4322 006 09961 Switching adaptor 24 V 1000 mA Taiwan plug 4322 006 10341 Docking station A 4322 006 23111 Remote control A 4322 006 21321 2-25...
-
Page 3: Exploded View
Exploded view FC8776/01 / FC8776/31 Description Remark Service code Front bumper assy B 4322 005 37371 Top cover Bright Copper 9965 100 77077 3-25... - Page 4 Exploded view FC8776/01 / FC8776/31 Description Service code Dustbin assy 4322 005 37321 Filter Libra Extra layer 4322 004 94401 Filter Libra 4322 004 94381 4-25...
- Page 5 Exploded view FC8776/01 / FC8776/31 5-25...
- Page 6 Exploded view FC8776/01 / FC8776/31 Description Remark Service code Left double wheel assy 4322 005 37341 Right double wheel assy 4322 005 37351 Power PCBA switch 4322 006 26171 Main PCBA HE EU 4322 006 25911 6-25...
- Page 7 Exploded view FC8776/01 / FC8776/31 Description Service code Side brush motor assy Left 4322 006 67941 Side brush motor assy Right 4322 006 67951 Cliff Sensor Front 4322 005 38001 Cliff sensor Left / Right 4322 005 30031 Back IR Receiver for Hawk 9965 100 78435 7-25...
- Page 8 Exploded view FC8776/01 / FC8776/31 Description Remark Service code Suction motor assy 12.8 V - 10200 rpm 4322 006 95161 ICR18650 assy 14.8V - 2800 mAh 4322 005 37981 Side brushes Set of 2 4322 004 25961 Nozzle assy 4322 005 37331 8-25...
- Page 9 Disassembly- and Reassembly advice FC8776/01 / FC8776/31 • To empty and/ or replace the Dustbin assy the Top Cover has to be removed: • The brushes can easily be pulled out and replaced after hearing the <click> the brush is placed in a correct way. •...
- Page 10 Disassembly- and Reassembly advice FC8776/01 / FC8776/31 • To open the appliance: First remove the screws from the blue Decoration parts (2 screws). • The battery can now be removed by pushing the connector, remove the connector. Now the battery can be replaced.
- Page 11 Disassembly- and Reassembly advice FC8776/01 / FC8776/31 • Remove the bumper upwards. • Remove the Upperhousing by removing the 8 screws D, 2 screws are positioned in the Battery compartment and near the Wheels. 11-25...
- Page 12 Disassembly- and Reassembly advice FC8776/01 / FC8776/31 • Replacing the wheels: Remove the 2 screws of the small plate, the cover must be removed and the wheels can be pulled out after removal of the two springs with a tweezer or pliers. Now the wheels can be replaced if necessary.
- Page 13 Disassembly- and Reassembly advice FC8776/01 / FC8776/31 • Remove the plastic cover of the wheel assy • Turn the appliance again and remove the wires from the wire guiding. Remark: Be aware that the tape is still on the wires. •...
- Page 14 Disassembly- and Reassembly advice FC8776/01 / FC8776/31 • Now the connector can be removed from the PCB. • The new Suction motor assy can be connected and placed. Make sure all the wiring are fi xed via the wire guidance. •...
- Page 15 Disassembly- and Reassembly advice FC8776/01 / FC8776/31 • While replacing the cliff Sensor be aware that it is positioned in the correct way, check if the wiring is correct and check by turning the bottom. For Re-assembly all points: Opposite working-direction of above.
-
Page 16: Repair Instruction
Repair instruction FC8776/01 / FC8776/31 Important note: Deep sleep mode Picture: Dustbin Full indicator • How to reset the robot when it is in deep sleep mode (robot does not respond): - Set the power switch to ‘On’ position. - Charge the robot. After a few seconds the robot will respond again. - Page 17 Repair instruction FC8776/01 / FC8776/31 Cliff Sensors calibration for replacing PCBA Purpose: IR Sensors have to be calibrated if replacing Step 4: After calibration, put the robot on an over 7 cm PCBA. In order to avoid to move backward and height table to check IR sensors and function.
- Page 18 Repair instruction FC8776/01 / FC8776/31 Wiring diagram Battery socket, Left brush, Left wheel, Red, black Green Orange and brown and blue and black Rear IR, Right brush, Purple Blue and and black black Bumper PCB, Black, brown, red, orange and green Front IR Right IR Left IR...
-
Page 19: Troubleshooting
Repair instruction FC8776/01 / FC8776/31 Troubleshooting: Problem Cause Solution 1. The robot does not charge. a. Power Switch is off . • When charging the robot the Power switch should be "on", otherwise the robot will not be charged. 2. The robot does not charge, a. - Page 20 Repair instruction FC8776/01 / FC8776/31 Problem Cause Solution 8. The robot does not clean and a. The dust container is not • Place the dust container in the dust container warning indicator lights up present. compartment properly. Make sure you close continuously.
- Page 21 Repair instruction FC8776/01 / FC8776/31 Error code Cause Solution a. Wheels stuck. • Remove the robot from the obstacle and press the on/off button to resume cleaning. a. Top cover or dust container not • Place the dust container in and the top cover on the robot placed properly.
- Page 22 Whole range without partlist FC8776/01 / FC8776/31 Model Number FC8772/82 FC8774/01 FC8774/82 Colour Deep Turquoise Denim blue Denim blue Battery type Li-Ion Li-Ion Li-Ion Battery voltage 12.8 V 12.8 V 12.8 V Charging time 2 hour(s) 4 hour(s) 4 hour(s) Runtime 120 minute(s) 120 minute(s)
- Page 23 TriActive XL nozzle TriActive XL nozzle TriActive XL nozzle Additional nozzle Stand-by power consumption 0.62 W 0.62 W 0.62 W Philips FREE SmartPro WiFi connected Active App AC power adaptor, AC power adaptor, AC power adaptor, Accessories included Side brushes...
- Page 24 Whole range without partlist FC8776/01 / FC8776/31 Model Number FC8972/81 Colour Bright silver Battery type Li-Ion Battery voltage 12.8 V Charging time 4 hour(s) Runtime 120 minute(s) Sound power level 58 dB Dust full indicator 24-hour scheduling Dust sensor Floor types Hard fl oors Smart detection system 19 sensors...
- Page 25 FC8776/01 / FC8776/31 Version history 16/08 Version 1.1 : FC8776/01 initial release. 16/10 Version 1.2 : Added new version: FC8776/31. In Parts List at Pos. 3, added 4322 006 10341 Switching adaptor 24 V 1000 mA Taiwan plug. In Parts List at Pos. 9, added 4322 004 94381 Filter Libra. 16/11 Version 1.3 : Chapter troubleshooting extended with item 11.
Need help?
Do you have a question about the SmartPro Compact FC8776/01 and is the answer not in the manual?
Questions and answers