MELAG Vacuklav 24 B+ Technical Description
Autoclave
Hide thumbs
Also See for Vacuklav 24 B+:
- User manual (61 pages) ,
- Operating manual (36 pages) ,
- Technical manual (26 pages)
Table of Contents
Advertisement
Quick Links
Technical Description
Autoclave
Vacuklav
Vacuklav
Dear doctor,
We thank you for your confidence demonstrated by the purchase of this autoclave.
More than 55 years ago, MELAG began as a medium-sized family-run enterprise to specialise in the
manufacture of sterilization equipment for medical practices. In the meantime our company has grown
into one of the world's leading producers of sterilization equipment. Verification of it success has been
the sale of more than 400,000 MELAG units worldwide, attesting to the high quality of our sterilizers,
which are exclusively made in Germany.
This autoclave has also been manufactured and tested according to the most stringent quality criteria.
Nevertheless, please read the Technical Description carefully before the initial start-up of the device.
The long-term serviceability and the retention of value of your autoclave depend primarily on the
careful preparation of the instruments and the regular maintenance of the device.
MELAG - General Management and employees
®
24 B+
®
30 B+
Advertisement
Table of Contents

Related Manuals for MELAG Vacuklav 24 B+


Summary of Contents for MELAG Vacuklav 24 B+
- Page 1 In the meantime our company has grown into one of the world's leading producers of sterilization equipment. Verification of it success has been the sale of more than 400,000 MELAG units worldwide, attesting to the high quality of our sterilizers, which are exclusively made in Germany.
- Page 2 Technical Description near to the autoclave. The instructions are a part of the product. ® ® Technical Description of Vacuklav 24 B+, Vacuklav 30 B+ MELAG Medical Technology Berlin ® ® Valid for Vacuklav 24 B+, Vacuklav 30 B+ as of software version 3.34...
- Page 3 Foreword Thank you for deciding to buy this Pro Class MELAG autoclave. ® This Technical Description describes both the autoclaves Vacuklav 24 B+ ® and Vacuklav 30 B+. They are identical except for their chamber depth and device depth. The device name "autoclave" is used in this Technical Description to Device name ®...
- Page 4 Never pull on the mains cable to take it out of the socket. Always take hold of the power plug itself. ■ Only have the autoclave set up, installed, and commissioned by Setting up, installation, people authorised by MELAG. commissioning ■ Only operate the autoclave in areas which are not subject to explosion hazards.
-
Page 5: Table Of Contents
Contents Computer as output medium ........ 32 Chapter 1 – Performance Specification....6 Automatic immediate log output ......32 Proper use .............. 6 Output the logs subsequently ....... 33 User benefit ............6 Display printer memory......... 34 Overview of sterilization programs......8 Read log files correctly ......... -
Page 6: Chapter 1 - Performance Specification
■ Use the autoclave only for the intended purposes outlined in the related technical documents and only in connection with the devices and components approved by MELAG. Warning! ■ The sterilization of instruments and textiles with this autoclave, like the foregoing instrument sterilization, is only to be done by competent personnel. - Page 7 Chapter 1 – Performance Specification shortens the program time periods and reduces the formation of condensate to give improved drying results. The autoclave functions according to the feed water one-way system. This Clean feed water according means that it uses fresh purified →feed water for every sterilization run. to VDE0510 The quality of the feed water is monitored via integrated →conductivity measurement.
-
Page 8: Overview Of Sterilization Programs
Chapter 1 – Performance Specification Overview of sterilization programs Type tests Universal program Quick program Gentle Prion Program program Program type as per Type B Type S Type B Type B →DIN EN 13060 →Dynamic pressure test of the sterilization chamber →Air leak →Empty chamber test →Solid load... -
Page 9: Chapter 2 - Device Description
Chapter 2 – Device Description In this chapter you learn Which components are included in the standard scope of delivery Which components the autoclave contains What safety devices the autoclave has How the operating elements are designed and how you should use them How the menus of the user interface are structured What kind of water supply the autoclave needs Scope of delivery... -
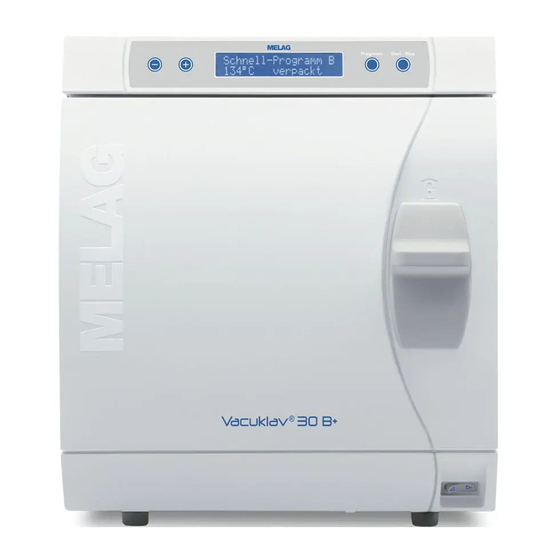
Page 10: Device Views
Chapter 2 – Device Description Device views Front side Operating and display field Door (pivots opens to the left) sliding closure grip Mains switch Front foot of the unit (adjustable) Front side below with opened door Serial data and printer connection (RS232)* Cap for emergency switch-on of the vacuum pump Device fuses –... -
Page 11: Effective Capacity
Chapter 2 – Device Description Interior view Chamber Mounting to hold trays/ cassettes Door locking pin Chamber sealing surface Blue door seal Door plate Fig. 2: Interior view Effective capacity Device type Diameter Depth Volume ® ∅25 cm 45 cm 22 litres Vacuklav 24 B+... -
Page 12: Control Panel
Only use water according to →VDE 0510 as →feed water. The water storage tank from MELAG has a capacity of maximum 11.5 Water storage tank from litres. This quantity of →feed water suffices for up to 25 sterilizations. -
Page 13: Supply With Cooling Water
Both MELAG autoclaves can be supplemented with a water treatment unit. NOTICE! Please first consult with MELAG if you would like to employ water treatment units of other manufacturers. Supply with cooling water The pump for the vacuum creation is cooled with water. -
Page 14: Chapter 3 - Initial Start-Up
Conditions for setting up, installing and starting up ■ Only have the autoclave set up, installed, and started up by people →authorized by MELAG. ■ According to the currently valid VDE standards, this device is not suitable for use in areas subject to explosion hazards. -
Page 15: Connections Required
Space requirements for position above or below the autoclave is also possible. external water storage The space requirements for the MELAG water storage tank is 19 tank centimetres in width, 32 centimetres in height and 23 centimetres in depth. NOTICE: In no case may you subject the water storage tank to sunlight. - Page 16 Cooling water inlet customer-side faucet. NOTICE: In order to prevent water damage, MELAG recommends the use of a leak monitor, e.g. water stop valve from MELAG (Art. No. 01056) The waste-water hose can be connected as follows: Cooling water discharge On an existing rinsing drain when using the dual-chamber siphon (Art.
-
Page 17: Prerequisites For Initial Start-Up
As documentation of proper setting up, installation and setting up as well as for your warranty claim, the record of installation must be filled out by the person responsible and a copy sent to MELAG. Switch on autoclave Turn the mains switch on to power the autoclave (page 10, Switch on mains Fig. -
Page 18: Chapter 4 - Sterilization
NOTICE: In order to prevent water damage, MELAG recommends the use of a leak monitor, e.g. water stop valve from MELAG (Art. No. 01056) If you are employing a water storage tank for the →feed water and the... - Page 19 Chapter 4 – Sterilization NOTICE: If possible, sterilize textiles and instruments separately from each other in separate sterilization containers or sterilization packages. This way you achieve improved drying results. Observe the following instructions for treating textiles and putting Textiles the textiles into sterilization containers: ■...
-
Page 20: Load The Autoclave
NOTICE: Use perforated trays, such as the trays from MELAG. Only this way can →condensate run off. If you use closed materials or shell halves to bear the items to be sterilized, you risk bad drying results. Please note that the use of tray insertions made of paper can perhaps likewise lead to worse drying results. - Page 21 Chapter 4 – Sterilization ■ When stacking the sterilization containers, take care that the perforations are not covered. Danger! in case of non-observance, the condensate cannot drip off to the vessel bottom. It would soak sterilizing materials lying underneath. The consequence would be bad drying results. This can ultimately lead to unsterile instruments and thereby to endangering the health of the patient and the practice team.
-
Page 22: Close The Door
2.5 kg 5 kg 2 kg Maximum total weight *Mountings, trays, sterilization containers, norm-tray cassettes from MELAG, see Appendix A – Accessories Close the door When closing the door of the autoclave, observe the following instructions: Close the door with light pressure against the chamber flange and simultaneously press down the sliding closure grip. -
Page 23: Select Automatic Pre-Heating
(P) once again, switch the display to Pre-heating No. The pre-heating is deactivated. In order to end the menu Function: autom. Pre-heating and return to the initial state, press the K (S) twice. NOTICE: MELAG recommends the activation of automatic pre-heating. -
Page 24: Select Additional Drying
Chapter 4 – Sterilization Select additional drying For difficult drying tasks you can extend the drying time of a program by 50% with the function Additional Drying. For this proceed as follows: When starting the program, simultaneously press the K (+). -
Page 25: Manually Terminate Program
Chapter 4 – Sterilization Manually terminate program You manually terminate a running program in any of the phases. IMPORTANT! Do not interrupt a running program by disconnecting the power plug! In case of non-observance, an error message of power loss is displayed when the autoclave is switched back on. -
Page 26: Sterilization Phase Is Finished
Chapter 4 – Sterilization Press the K (S). Confirm the following prompt Stop program? Repeatedly press "Stop" with the K (S). The termination is confirmed with Drying stopped on the display. NOTICE: The confirmation prompt is shown for about 5 seconds on the display. If the key is not repeatedly pressed, the program continues with the normal process. -
Page 27: Display Sum Batch Number
Chapter 4 – Sterilization Display sum batch number You can allow the display of the number of total →batches. Select the SETUP Menu Function by short simultaneous pressing of the (+) and (-). The display shows Function: Print. KEYS Navigate with the K (+) or (-), up to the display where the submenu Sum batch number is shown. - Page 28 Chapter 4 – Sterilization ■ Protected from moisture (e.g. alcohol, disinfectant) Storage duration in accordance with the type of package wrapping The maximum storage life depends on the packaging and the storage Storage time conditions. For →sterilized items which have been wrapped in compliance with the standards (dust-protected storage is assumed) –...
-
Page 29: Chapter 5 - Logging
Chapter 5 – Logging In this chapter you learn Why and how you document batches Which output media you can employ for the batch documentation in which way How to read the logs correctly How to set the date and time at the autoclave Batch documentation The batch documentation is indispensable as documentation for the successfully completed sterilization process and as an obligatory measure... -
Page 30: Set Date And Time
Chapter 5 – Logging Set date and time Date and time of the autoclave must be correctly set for proper batch Observe time re-settings documentation. Observe the time re-settings in autumn and spring ("daylight saving time"), since this is not reset automatically. Set date and time as described below: Select the SETUP Menu Function by short simultaneous pressing of the... - Page 31 Chapter 5 – Logging In order to be able to print out logs on the connected log printer, you must Initialisation of the log ® initialise MELAprint 42 once by making the following setting at the printer ® autoclave: MELAprint If the autoclave is still not switched on, switch it on.
-
Page 32: Employing Melaflash As Output Medium
You can download a current version of the software on the internet page of MELAG www.MELAG.de in the download area. Connect the MELAflash CF Card Writer with the serial interface like the log ®... -
Page 33: Output The Logs Subsequently
If it is not possible to output a log report for the immediate output because for example the activated output medium is not connected, a warning message appears. MELAG recommends that you employ the immediate output of logs. Output the logs subsequently You also have the option of outputting the logs subsequently and independently from the time of the end of the program. -
Page 34: Display Printer Memory
Chapter 5 – Logging program. The display shows Printout. After finishing the printout the display again shows Print stored cycles. in case you would like to leave the submenu without printing, press the K (S). NOTICE: A termination during the printing is only possible by disconnecting the instrument at the mains switch or interrupting the power supply of the printer. -
Page 35: Read Log Files Correctly
Chapter 5 – Logging Read log files correctly The head of the program listing includes the general fundamental Header information for the completed program such as for example current date, the selected program, the daily batch number and the autoclave type. During the program the program sequence phases are recorded with the Values of the program steps accompanying values for steam pressure, temperature and time (relative... - Page 36 Chapter 5 – Logging ------------------------------------------ Header MELAG Vacuklav 24-B ------------------------------------------ Started program Program : Universal program 134°C Packaged Current date Date 28.03.2007 time at program start Time 10:16:39 (Start) Charge No.: 10 daily batch number Preheating temperature Preheating 120.5 °C Conductivity 7 µS/ cm...
-
Page 37: Chapter 6 - Maintenance
Chapter 6 – Maintenance In this chapter you learn How to clean the autoclave and which cleaning agents are suitable How to avoid the formation of spots How to exchange the door seal What to observe in autoclave maintenance Cleaning Examine the chamber including door seal and chamber sealing surface Weekly inspection of and the mounting for loading (page 20,... -
Page 38: Avoid Formation Of Spots
Chapter 6 – Maintenance Avoid formation of spots Only if you correctly clean the instruments before sterilization can you Formation of spots due to avoid the detachment of residues resulting from loading or instrument improperly cleaned preparation under steam pressure during the sterilization. Detached dirt instruments residues (e.g. -
Page 39: Exchange The Door Seal
Maintenance ■ Have maintenance carried out only by trained field service technicians or technicians of the specialist trade. Turn to your specialist dealers or MELAG customer service in your vicinity. Warning! ■ Comply with the predetermined maintenance intervals. Malfunctions at the autoclave can occur on continuation of operation despite the servicing message. -
Page 40: Chapter 7 - Operating Pauses
Chapter 7 – Operating pauses In this chapter you learn How quickly you can start sterilization programs in sequence What you must observe for longer operating pauses How to put the autoclave out of operation, transport it and re-start it Sterilization frequency Pause times between individual programs are not required, since the No pause times... -
Page 41: Shut-Down
Chapter 7 – Operating pauses Shut-down If you would like to shut down the autoclave (put it out of operation) for a longer period of time, for instance because of holidays or a planned transport, proceed as follows: Switch the autoclave off at the mains switch. Pull the power plug from the wall socket. -
Page 42: Chapter 8 - Function Test
Chapter 8 – Function test In this chapter you learn How the autoclave automatically carries out the function test Which possibilities you have for the manual function test Which function tests should be conducted in daily operation Why and how you should conduct a vacuum test Why and how you should conduct a Bowie &... -
Page 43: Testing In Daily Operation
Chapter 8 – Function test Testing in daily operation Vacuum test Conduct a vacuum test in the following situations: Weekly in routine operation, at initial start-up, after Once weekly in routine operations pauses longer than two At initial start-up weeks and in case of error After longer operating pauses In case of a respective error (e.g. -
Page 44: Helix Test Body System Melacontrol
→Conductivity. Validation The guidelines for the validation of small steam sterilizers are still not conclusively specified. Please inform yourself about the current state of this matter in the download area of the MELAG internet site at www.MELAG.de. -
Page 45: Chapter 9 - Errors
Chapter 9 – Errors In this chapter you learn Which type of messages exist What you should do in case of errors What you can do before calling the Hotline What you can do if no display appears What you can do when the feed water consumption is too high What you can do if there are bad drying results A warning is not an error Not all messages which appear on the →display are error messages. -
Page 46: Before You Call
If you do not find the event in the table below or your efforts do not lead to success, turn to your specialist dealer or the →authorised MELAG customer service centre in your vicinity. In order to help you, keep the serial number of your autoclave and a detailed fault description of the fault report ready. - Page 47 ® MELAdem 47 and examine the unit On repeated occurrence, have maintenance carried out by MELAG customer service or service of the specialist trade. Possibly the pre- and activated carbon filter must be exchanged in addition. Mixed-bed resin pellets in reverse...
- Page 48 Check door seal for correct seating Repeat vacuum test with completely cold device Warning! Battery dead The monitoring of the device's The battery must be exchanged by MELAG internal battery voltage has customer service or service of the specialist trade determined a too low voltage...
- Page 49 Chapter 9 – Errors Error message Possible causes What you can do Error 1: Vacuum system Door seal, sealing surface at the Check door seal and sealing surface at the chamber is polluted or defective chamber for contamination and possibly clean Check door seal for defects, possibly switch, see page 11 Door seal wrongly inserted...
- Page 50 Chapter 9 – Errors Error message Possible causes What you can do Error 21: Preheating The monitoring time from On repeated occurrence select option switching on the pre-heating until Automatic pre-heating No ( see page the achievement of the 23) and notify specialist dealers respective pre-heating temperature was exceeded Error 22: Overheat...
-
Page 51: No Display On The Screen
Chapter 9 – Errors Error message Possible causes What you can do temperature Check door seal for wear On repeated occurrence notify your specialist dealer Error 36: Sterilization PU Shortfall of the minimum Carry out vacuum test sterilization pressure Operate device with smaller load On repeated occurrence notify your specialist dealer Error 37: Sterilization PO... -
Page 52: Bad Drying Results
Chapter 9 – Errors Bad drying results Apart from a proper device function, the drying process depends decisively on the correct setting up and loading of the autoclave. Check the correct set-up of the autoclave. If necessary increase the What you can do tilt by further screwing out the front feet of the unit. -
Page 53: Glossary
It is employed here as →feed water Authorized persons Medical specialist dealers, technician from depots or with DIN EN 867-5 customer service designated by MELAG, who were trained European standard: non-biological systems for use in by MELAG sterilizers – Part 5: Stipulations of indicator systems and... - Page 54 Glossary pressures with respect to the intended settings Serves to verify that for the values set on the control, the [→DIN EN 13060] steam quickly and uniformly penetrates into the defined test packet Evacuation [→DIN EN 13060] Creation of a →vacuum in a vessel Porous small parts Feed water Made of materials which can absorb fluids (e.g.
- Page 55 Glossary underpressure which reduces the boiling point and thereby also at low temperatures leads to a vaporizing of the water Verband der Elektrotechnik, Elektronik und Informationstechnik e.V. (Association of German Electricians) VDE 0510 Standard of the →VDE – Provisions for accumulators and battery units Water ring pump Pump which creates the vacuum for the sterilization,...
-
Page 56: Appendix A - Accessories
Appendix A – Accessories Article Order number* ® ® Vacuklav 24 B+ Vacuklav 30 B+ Tray mounts A for 5 trays or 3 standard-tray cassette 40244 40233 B for 4 standard-tray cassettes 40224 40234 D for 2 high cassettes or 4 trays 46840 Sterilization containers 15K depth/ width/ height in cm: 18/ 12/ 4,5... -
Page 57: Appendix B - Symbols On The Autoclave
Appendix B – Symbols on the autoclave The manufacturer of the apparatus declares with the accompanying sticker that the medical device corresponds to the basic requirements of the European Standard EN1717 – "Protection of drinking water from contaminants…." The symbol of the struck out trashcan identifies a device that may not be disposed with domestic waste.
Need help?
Do you have a question about the Vacuklav 24 B+ and is the answer not in the manual?
Questions and answers