Advertisement
Quick Links
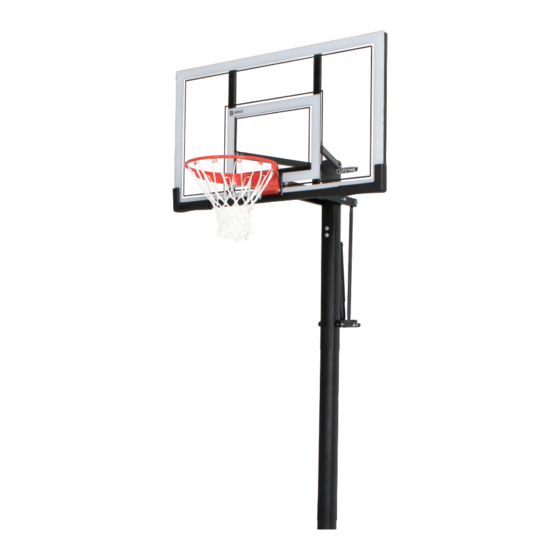
POWER LIFT
BASKETBALL SYSTEM
MODEL 90878
BEFORE ASSEMBLY:
• Requires at least 640 lb (≈291 kg) of concrete mix to fi ll a
volume of 5.1 ft
(≈0.14 m
).
3
3
• Requires, at least, 3 days for concrete to cure, plus 3-4
hours to complete assembly steps.
• At least 3 people recommended for setup.
WATCH
3D ANIMATION
OF THE FULL ASSEMBLY
SCAN THE
CODE
YouTube
IMPORTANT, RETAIN FOR FUTURE REFERENCE: READ CAREFULLY
Save this instruction in the event that the manufacturer has to be contacted for replacement parts.
TOOLS REQUIRED
1/2"
(≈13 mm)
9/16"
(≈14 mm)
3/4"
(≈19 mm)
(x2)
(x1)
(x1)
QUESTIONS?
CONTACT LIFETIME CUSTOMER SERVICE:
Dial 1-800-225-3865
7:00 am-5:00 pm (M-F) MST
and 9:00 am-1:00 pm (Sat) MST
(English, French, Spanish)
™
OR WATCH THE HOW-TO ON YOUTUBE
OR SEARCH
1215658
Scan the code, or visit go.lifetime.com/90878playlist
®
and the YouTube logo are trademarks of Google, LLC.
1/2"
11/16"
(≈18 mm)
(x1)
(x1)
(x1)
(x1)
Concrete Mix
640 lb (≈291 kg)
(x1)
Live Chat:
www.lifetime.com/customerservice
(click on "Live Chat" tab)
ASSEMBLY INSTRUCTIONS
Pour le français, voir la page 2. Para el español, ver la página 3.
(≈13 mm)
(x1)
(x1)
(x1)
(≈4-6)
For Customer Service in Mainland
Europe and the United Kingdom,
E-mail: cs@lifetimeproducts.eu
TABLE OF CONTENTS
Icon Legend................................4
Warnings & Notices.....................5
Initial Setup ..............................6
Pole Assembly............................8
(x1)
Backboard-to-Rim Assembly......13
Backboard-to-Pole Assembly......19
Parts Identifi er.........................i - iv
Handle Assembly......................25
(x1)
Final Assembly..........................32
Maintenance...........................38
Warning Sticker........................39
Registration........................40
Warranty................................41
(x3)
Model Number: 90878
Product ID:
Advertisement

Related Manuals for Lifetime POWER LIFT 90878


Summary of Contents for Lifetime POWER LIFT 90878
-
Page 1: Table Of Contents
OR WATCH THE HOW-TO ON YOUTUBE SCAN THE OR SEARCH CODE 1215658 Scan the code, or visit go.lifetime.com/90878playlist YouTube ® and the YouTube logo are trademarks of Google, LLC. IMPORTANT, RETAIN FOR FUTURE REFERENCE: READ CAREFULLY Save this instruction in the event that the manufacturer has to be contacted for replacement parts. - Page 2 (≈4-6) (x1) (x3) N° de modèle : 90878 ® QUESTIONS ? CONTACTER AUX SERVICES À LA CLIENTÈLE LIFETIME Référence du produit : Composer le 1-800-225-3865 Entretien en direct: Pour nos services à la clientèle du www.lifetime.com/customerservice continent européen et au Royaume-Uni, Du lundi au vendredi 7 h –...
- Page 3 (x1) (≈4-6) (x3) Número de modelo: 90878 ¿PREGUNTAS? ® PONERSE EN CONTACTO CON LOS SERVICIOS DE CLIENTES LIFETIME ID del producto: Marcar al 1-800-225-3865 Chat en vivo: Para nuestros servicios a clientes en www.lifetime.com/customerservice De lunes hasta viernes 7:00 h–17:00 h (MST) el continente europeo y el Reino Unido, (cliquear en la lengüeta «Live Chat»)
-
Page 4: Icon Legend
ICON LEGEND / LÉGENDE DES ICÔNES / LEYENDA DE ÍCONOS • Indicates special heed should be taken when reading. • Ceci indique que vous devez faire attention à ce que vous lisez. • Indica que uno debe prestar atención al leer. •... -
Page 5: Warnings & Notices
WARNINGS & NOTICES WARNINGS & NOTICES / AVERTISSEMENTS ET AVIS / ADVERTENCIAS Y AVISOS SAFETY INSTRUCTIONS FAILURE TO FOLLOW THESE WARNINGS MAY RESULT IN SERIOUS INJURY OR PROPERTY DAMAGE AND WILL VOID WARRANTY. Owner must ensure that all players know and follow these rules for safe operation of the system. To ensure safety, do not attempt to assemble this product without following the instructions carefully. -
Page 6: Initial Setup
INITIAL SET UP / PRÉPARATION INITIALE / PREPARACIÓN INICIAL HARDWARE REQUIRED / QUINCAILLERIE REQUISE / HERRAJE REQUERIDO PARTS REQUIRED / PIÈCES REQUISES / PIEZAS REQUERIDAS • Consult the instructions for the ground sleeve included with this basketball system for parts and assembly. •... - Page 7 SECTION 1 (CONTINUED) / SECTION 1 (SUITE) / SECCIÓN 1 (CONTINUACIÓN) TOOLS AND HARDWARE REQUIRED / OUTILS ET QUINCAILLERIE REQUIS HERRAMIENTAS Y HERRAJE REQUERIDOS (x1) (x1) 640 lb (291 kg) (x1) (x1) (x1) (x6) • Install the ground sleeve included with this system. Please refer to the ground sleeve instruction manual to complete the ground sleeve installation before continuing with this assembly.
-
Page 8: Pole Assembly
POLE ASSEMBLY / ASSEMBLAGE DU POTEAU / ENSAMBLAJE DEL POSTE HARDWARE REQUIRED / QUINCAILLERIE REQUISE / HERRAJE REQUERIDO Hardware bag / Sac de quincaillerie / Bolsa de herraje 5” ANF (x2) AAA (x2) AAF (x2) CMV (x2)* ANE (x2) • Only one self-drilling screw (CMV) will be used in Section 1. Save the second screw for use in Section 5. - Page 9 • Si vous avez des problèmes avec cette section, scannez le code QR en dessous pour voir un vidéo de l’assemblage. • Si tiene problemas con esta sección, escanee el código QR debajo para ver un video del ensamble. • http://go.lifetime.com/powerliftsquarepole • Secure the pole bracket (ALL) to top pole (ALH) with the hardware shown.
- Page 10 Son mécanisme a été conçu uniquement pour soutenir le poids du panneau et de l’anneau. N’accrochez rien au manche, à l’anneau, au panneau ni aux leviers sous peine d’endommager l’équipement et d’annuler la garantie. Lifetime Products, Inc., Clearfield, UT 84016 www.lifetime.com 7/12/2016 # 1176611...
- Page 11 SECTION 2 (CONTINUED) / SECTION 2 (SUITE) / SECCIÓN 2 (CONTINUACIÓN) TOOLS AND HARDWARE REQUIRED / OUTILS ET QUINCAILLERIE REQUIS HERRAMIENTAS Y HERRAJE REQUERIDOS (x1) • THIS STEP CANNOT BE REVERSED! Strike the end of the pole assembly on a piece of scrap wood or cardboard fi...
- Page 12 SECTION 2 (CONTINUED) / SECTION 2 (SUITE) / SECCIÓN 2 (CONTINUACIÓN) TOOLS AND HARDWARE REQUIRED / OUTILS ET QUINCAILLERIE REQUIS HERRAMIENTAS Y HERRAJE REQUERIDOS CMV (x1) (x1) • After the poles have been seated, measure up 1" (2.54 cm) from the bottom-center of the top pole (ALH) and insert one self-tapping screw (CMV) into the pole as shown.
-
Page 13: Backboard-To-Rim Assembly
BACKBOARD TO RIM ASSEMBLY / ASSEMBLAGE DU PANNEAU À L’ANNEAU / ENSAMBLAJE DEL TABLERO AL ARO HARDWARE REQUIRED / QUINCAILLERIE REQUISE / HERRAJE REQUERIDO Hardware bag / Sac de quincaillerie / Bolsa de herraje APZ (x1) (x2) AAQ (x2) ABK (x4) ADR (x4) AAV (x2) AOW (x1) - Page 14 • Si vous avez des problèmes avec cette section, scannez le code QR en dessous pour voir un vidéo de l’assemblage. • Si tiene problemas con esta sección, escanee el código QR debajo para ver un video del ensamble. • http://go.lifetime.com/rigidwideboardtoprorim • Insert two carriage bolts (EAP) through the rim pivot •...
- Page 15 SECTION 3 (CONTINUED) / SECTION 3 (SUITE) SECCIÓN 3 (CONTINUACIÓN) TOOLS AND HARDWARE REQUIRED / OUTILS ET QUINCAILLERIE REQUIS HERRAMIENTAS Y HERRAJE REQUERIDOS 1/2" (≈13 mm) (x1) AAQ (x1) • Slide the end of the axle (ABQ) through the rim (ALX) and the rim pivot bracket (APY). Press the push nut (AAQ) onto the end of the axle.
- Page 16 SECTION 3 (CONTINUED) / SECTION 3 (SUITE) SECCIÓN 3 (CONTINUACIÓN) TOOLS AND HARDWARE REQUIRED / OUTILS ET QUINCAILLERIE REQUIS HERRAMIENTAS Y HERRAJE REQUERIDOS 1/2" (≈13 mm) (x2) APZ (x1) BGR (x1) ABK (x2) • Insert the U-bolt (APZ) through the upper part of the opening on the backside of the backboard (AJI). Connect the rim (ALX) and plastic guard (ALD) to the backboard (AJI) with the hardware as shown.
- Page 17 SECTION 3 (CONTINUED) / SECTION 3 (SUITE) SECCIÓN 3 (CONTINUACIÓN) TOOLS AND HARDWARE REQUIRED / OUTILS ET QUINCAILLERIE REQUIS HERRAMIENTAS Y HERRAJE REQUERIDOS 1/2" (≈13 mm) (x2) AOW (x1) AJW (x2) AAV (x2) ABK (x2) • Thread two jam nuts (AAV) all the way on to the U-bolt (APZ). Then slide the compression springs (AJW) onto the U-bolt and place the spring retainer plate (AOW) over the compression springs.
- Page 18 SECTION 3 (CONTINUED) / SECTION 3 (SUITE) SECCIÓN 3 (CONTINUACIÓN) TOOLS AND HARDWARE REQUIRED / OUTILS ET QUINCAILLERIE REQUIS HERRAMIENTAS Y HERRAJE REQUERIDOS (x1) ADR (x4) • Attach the rim cover plate (AMA) to the rim (ALX) with the hardware shown. •...
- Page 19 BACKBOARD TO POLE ASSEMBLY / ASSEMBLAGE DU PANNEAU AU POTEAU / ENSAMBLAJE DEL TABLERO AL POSTE HARDWARE REQUIRED / QUINCAILLERIE REQUISE / HERRAJE REQUERIDO Hardware bag / Sac de quincaillerie / Bolsa de herraje 7 1/16" (≈18 cm) AAD (x1) ANU (x2) AQB (x2) 5”...
- Page 20 • http://go.lifetime.com/rigidwidebackboardtopole • Secure the lower extension arms (BGP) together with the hardware shown. Use a 1/2" (≈13 mm) socket wrench to screw the thread-cutting bolts (AQB) through the lower extension arms and the tie plate (BLC).
- Page 21 SECTION 4 (CONTINUED) / SECTION 4 (SUITE) SECCIÓN 4 (CONTINUACIÓN) TOOLS AND HARDWARE REQUIRED / OUTILS ET QUINCAILLERIE REQUIS HERRAMIENTAS Y HERRAJE REQUERIDOS 3/4” (≈19 mm) 7 1/16" (≈18 cm) AAD (x1) ANZ (x2) AAX (x1) AOR (x2) • Insert the extension arm caps (AQC) into the ends of the lower extension arms (BGP) as shown. •...
- Page 22 SECTION 4 (CONTINUED) / SECTION 4 (SUITE) SECCIÓN 4 (CONTINUACIÓN) TOOLS AND HARDWARE REQUIRED / OUTILS ET QUINCAILLERIE REQUIS HERRAMIENTAS Y HERRAJE REQUERIDOS 3/4” (≈19 mm) 5” AQD (x1) ANK (x2) ABN (x2) AAX (x1) • Insert the pole cap (ALM) into the top pole. Then attach the upper extension arms (BGO) to the top pole (ALH) with the hardware as shown.
- Page 23 PARTS IDENTIFIER / IDENTIFICATEUR DE PIÈCES / IDENTIFICADOR DE PIEZAS This page intentionally left blank Cette page est intentionnellement laissée en blanc Esta página ha sido dejada en blanco intencionalmente...
- Page 24 PARTS IDENTIFIER / IDENTIFICATEUR DE PIÈCES / IDENTIFICADOR DE PIEZAS Metal parts / Pièces en métal Piezas de metal APY (x1) ALE (x1) ABQ (x1) ALF (x1) APZ (x1) ALH (x1) BGR (x1) ALL (x1) AMA (x1) AOW (x1) 31” (78.7 cm) ALS (x2) AJW (x2)
- Page 25 PARTS IDENTIFIER / IDENTIFICATEUR DE PIÈCES / IDENTIFICADOR DE PIEZAS Plastic parts / Pièces en plastique Piezas de plástico AKI (x1) ALM (x1) ALD (x1) AQC (x2) AJI (x1) AMN (x1) AJQ (x1) AKF (x1) AKG (x1) BAA (x1) BAB (x1) BGW (x1) AKP (x1) AKZ (x1)
- Page 26 PARTS IDENTIFIER / IDENTIFICATEUR DE PIÈCES / IDENTIFICADOR DE PIEZAS This page intentionally left blank Cette page est intentionnellement laissée en blanc Esta página ha sido dejada en blanco intencionalmente...
- Page 27 SECTION 4 (CONTINUED) / SECTION 4 (SUITE) SECCIÓN 4 (CONTINUACIÓN) TOOLS AND HARDWARE REQUIRED / OUTILS ET QUINCAILLERIE REQUIS HERRAMIENTAS Y HERRAJE REQUERIDOS 3/4” (≈19 mm) ANQ (x2) 11/16" (≈18 mm) ABP (x2) AOR (x2) ANP (x1) • Rest the rim on cardboard to prevent scratching, then secure the lower extension arms (BGP) to the backboard (AJI) with the hardware shown.
- Page 28 SECTION 4 (CONTINUED) / SECTION 4 (SUITE) SECCIÓN 4 (CONTINUACIÓN) TOOLS AND HARDWARE REQUIRED / OUTILS ET QUINCAILLERIE REQUIS HERRAMIENTAS Y HERRAJE REQUERIDOS 3/4” (≈19 mm) ANU (x2) ANK (x2) AAX (x2) AOR (x2) ANS (x8) ABN (x2) • Attach the upper extension arms (BGO) to the backboard (AJI) with the hardware as shown.
- Page 29 HANDLE ASSEMBLY / ASSEMBLAGE DE LA POIGNÉE / ENSAMBLAJE DE LA MANIVELA HARDWARE REQUIRED / QUINCAILLERIE REQUISE / HERRAJE REQUERIDO Hardware bag / Sac de quincaillerie / Bolsa de herraje AQE (x1) AQF (x2) BSG (x1) ABB (x2) AAX (x2) 6 1/2"...
- Page 30 • Si vous avez des problèmes avec cette section, scannez le code QR en dessous pour voir un vidéo de l’assemblage. • Si tiene problemas con esta sección, escanee el código QR debajo para ver un video del ensamble. • http://go.lifetime.com/rigidwidepowerlifthandle • Slide the gas spring cover (AKG) •...
- Page 31 SECTION 5 (CONTINUED) / SECTION 5 (SUITE) / SECCIÓN 5 (CONTINUACIÓN) TOOLS AND HARDWARE REQUIRED / OUTILS ET QUINCAILLERIE REQUIS HERRAMIENTAS Y HERRAJE REQUERIDOS 6 1/2" (≈16.5 cm) (x1) AQF (x2) ABA (x2) ABB (x2) • Position the trigger (AMN) inside of the handle (AKI) as shown, and secure the trigger to the handle with the hardware shown.
- Page 32 SECTION 5 (CONTINUED) / SECTION 5 (SUITE) / SECCIÓN 5 (CONTINUACIÓN) TOOLS AND HARDWARE REQUIRED / OUTILS ET QUINCAILLERIE REQUIS HERRAMIENTAS Y HERRAJE REQUERIDOS AQE (x1) • Insert the release pin (AQE) through the gas spring (AKF). Slide the handle (AKI) under the gas spring (AKF) so that the release pin rests in the channels of the trigger (AMN).
- Page 33 SECTION 5 (CONTINUED) / SECTION 5 (SUITE) / SECCIÓN 5 (CONTINUACIÓN) TOOLS AND HARDWARE REQUIRED / OUTILS ET QUINCAILLERIE REQUIS HERRAMIENTAS Y HERRAJE REQUERIDOS 6 1/2" (≈16.5 cm) AAW (x1) (x1) AAX (x1) • Position the rear lifter arms (ALS) between the handle and trigger, and secure with the hardware shown. Only fi nger tighten the hardware for now.
- Page 34 SECTION 5 (CONTINUED) / SECTION 5 (SUITE) / SECCIÓN 5 (CONTINUACIÓN) TOOLS AND HARDWARE REQUIRED / OUTILS ET QUINCAILLERIE REQUIS HERRAMIENTAS Y HERRAJE REQUERIDOS 3/4" 7 1/16" (≈18 cm) (≈19 mm) (x2) AAD (x1) (x1) AAX (x1) APR (x1) AOR (x2) •...
- Page 35 SECTION 5 (CONTINUED) / SECTION 5 (SUITE) / SECCIÓN 5 (CONTINUACIÓN) TOOLS AND HARDWARE REQUIRED / OUTILS ET QUINCAILLERIE REQUIS HERRAMIENTAS Y HERRAJE REQUERIDOS 9/16" (≈15 mm) (x2) (x1) 1/2" (≈13 mm) (x2) AKH (x1) • Apply grease from the grease packet (AKH) on to the release pin (AQE). •...
- Page 36 FINAL ASSEMBLY / ASSEMBLAGE FINAL / ENSAMBLAJE FINAL HARDWARE REQUIRED / QUINCAILLERIE REQUISE / HERRAJE REQUERIDO Hardware bag / Sac de quincaillerie / Bolsa de herraje ADP (x10) CMV (x1) *This hardware taken from the hardware bag used in Section 2. *Cette quincaillerie vient du sac de quincaillerie utilisé...
- Page 37 • Si tiene problemas con esta sección, escanee el código QR debajo para ver un video del ensamble. • http://go.lifetime.com/framepadassembly • Remove the plastic fi lm from the backboard (AJI), and attach the center frame pad (AJQ) and corner frame pads (BAA &...
- Page 38 SECTION 6 (CONTINUED) / SECTION 6 (SUITE) SECCIÓN 6 (CONTINUACIÓN) TOOLS AND HARDWARE REQUIRED / OUTILS ET QUINCAILLERIE REQUIS HERRAMIENTAS Y HERRAJE REQUERIDOS (x1) (x3) • AT LEAST THREE ADULTS ARE REQUIRED. DO NOT ATTEMPT ASSEMBLY WITH FEWER THAN THREE ADULTS AND THREE LADDERS. •...
- Page 39 SECTION 6 (CONTINUED) / SECTION 6 (SUITE) SECCIÓN 6 (CONTINUACIÓN) TOOLS AND HARDWARE REQUIRED / OUTILS ET QUINCAILLERIE REQUIS HERRAMIENTAS Y HERRAJE REQUERIDOS (x1) (x1) (x3) CAUTION: THIS STEP CANNOT BE REVERSED! ATTENTION : CETTE ÉTAPE NE PEUT PAS ÊTRE INVERSÉE ! PRECAUCIÓN: ¡ESTE PASO NO PUEDE REVERTIRSE! To prevent serious injuries, three adults are required to complete assembly.
- Page 40 SECTION 6 (CONTINUED) / SECTION 6 (SUITE) SECCIÓN 6 (CONTINUACIÓN) TOOLS AND HARDWARE REQUIRED / OUTILS ET QUINCAILLERIE REQUIS HERRAMIENTAS Y HERRAJE REQUERIDOS (x1) (x3) CMV (x1) • After the poles have been seated, measure up 1” from the bottom center of the middle pole (ALF) and insert one self-tapping screw (CMV) into the pole as indicated.
- Page 41 SECTION 6 (CONTINUED) / SECTION 6 (SUITE) SECCIÓN 6 (CONTINUACIÓN) TOOLS AND HARDWARE REQUIRED / OUTILS ET QUINCAILLERIE REQUIS HERRAMIENTAS Y HERRAJE REQUERIDOS (x1) (x1) • Attach the net (AKZ) to the rim (ALX). • Attachez la fi let (AKZ) à l’anneau (ALX). •...
- Page 42 MAINTENANCE / ENTRETIEN / MANTENIMIENTO The life of your basketball system depends on many variables. The climate, exposure to corrosives such as salt, pesticides, or herbicides, and excessive use or misuse can all contribute to pole failure, which may cause property damage or personal injury. Check your basketball system frequently for loose hardware, excessive wear, and signs of corrosion.
- Page 43 Son mécanisme a été conçu uniquement pour soutenir le poids du panneau et de l’anneau. N’accrochez rien au manche, à l’anneau, au panneau ni aux leviers sous peine d’endommager l’équipement et d’annuler la garantie. Lifetime Products, Inc., Clearfield, UT 84016 www.lifetime.com 7/12/2016 # 1176611...
- Page 44 ® À Lifetime , l’entretien de ta confi dentialité est notre politique de longue date. Et tu peux être sûr que Lifetime ne vendra pas ni fournira pas tes données personnelles à d’autres tiers, ou les permettra d’utiliser tes données personnelles à leur propres fi ns.
- Page 45 2. This warranty is nontransferable and is expressly limited to the repair or replacement of defective product. If the product is defective within the terms of this warranty, Lifetime Products, Inc. will repair or replace defective parts at no cost to the purchaser.
- Page 46 6. Cette garantie remplace expressément toutes autres garanties, expresses ou tacites, y compris les garanties de commercialisation ou d’adaptation à un but particulier dans la mesure permise par les lois fédéraux et des états. Ni Lifetime Products, Inc. ni aucun de ses représentants n’assure aucune autre responsabilité concernant ce produit. Cette garantie vous accorde des droits particuliers, et vous aurez peut-être des autres droits qui varient d’un état à...
- Page 47 NO ESTÁN DISPONIBLES O SON OBSOLETAS. 1. El comprador original recibe la garantía de que los sistemas de basquetbol Lifetime estarán libres de defectos de material o de mano de obra por un período de cinco años a contar desde la fecha de la compra original. La palabra “defectos” se defi ne como imperfecciones que perjudican el uso del producto.
- Page 48 Or call: 1-800-424-3865 7:00 am–5:00 pm (M–F) MST and 9:00 am–1:00 pm Saturday MST ® AMÉLIORER L’ACHAT LIFETIME EN AJOUTANT DES ACCESSOIRES OU D’AUTRES PRODUITS Pour acheter des accessoires ou des autres produits Lifetime , visiter le : ® www.lifetime.com (Anglais seulement) Ou composer le 1-800-424-3865 Du lundi au vendredi de 7 h à...
Need help?
Do you have a question about the POWER LIFT 90878 and is the answer not in the manual?
Questions and answers