Table of Contents
Advertisement
Quick Links
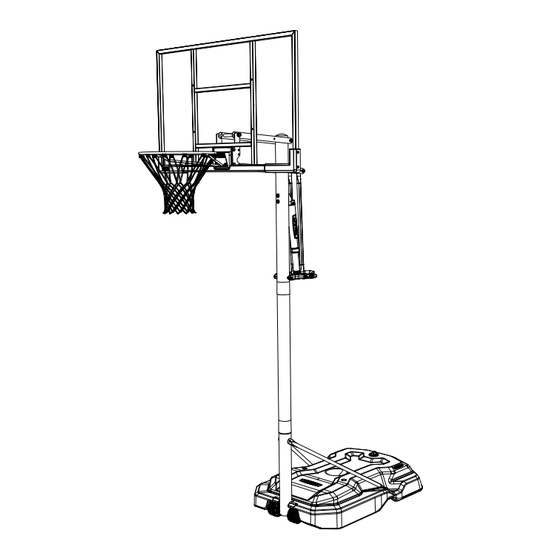
POWER LIFT
BASKETBALL SYSTEM
MODEL 90757
BEFORE ASSEMBLY:
• Decide with what to fi ll the base
(sand is recommended)
• At least 2 adults recommended for setup
IMPORTANT, RETAIN FOR FUTURE REFERENCE: READ CAREFULLY
Save this instruction in the event that the manufacturer has to be contacted for replacement parts.
TOOLS REQUIRED
(x2)
(x1)
QUESTIONS?
™
1/2" (≈13 mm)
(included)
(x1)
Web Site: cn.lifetime.com
ASSEMBLY INSTRUCTIONS
(x1)
(x1)
中文版,详见第2页。
TABLE OF CONTENTS
Icon legend..................................................3
Warnings & notices......................................4
Pole assembly..............................................5
Pole-to-base assembly...............................10
Backboard-to-rim assembly......................15
Backboard-to-pole assembly.....................19
Handle assembly.......................................23
Final assembly...........................................29
Moving the system.....................................34
Maintenance.............................................35
Warning sticker...........................................36
Model Number: 90757
Product ID:
Advertisement
Table of Contents

Related Manuals for Lifetime POWER LIFT 90757


Summary of Contents for Lifetime POWER LIFT 90757
-
Page 1: Table Of Contents
(x2) (x1) (x2) Backboard-to-rim assembly......15 Backboard-to-pole assembly.....19 Parts identifi er..........i–iv Handle assembly........23 325 lb (≈147 kg) (x1) (x1) Final assembly...........29 (x1) Moving the system........34 Maintenance..........35 Warning sticker...........36 (x1) (x1) (x1) (x1) Model Number: 90757 QUESTIONS? Product ID: Web Site: cn.lifetime.com... -
Page 2: 1/2" (≈13 Mm), 7/16" (≈11 Mm), 3/16" (≈5 Mm)
维护说明......35 警 告 贴 纸 ....3 6 (x1) (x1) (x1) (x1) 联系我们 微信公众号: 产品型号#与产品生产编码 (联系我们时需用到这两个号码) Web Site: cn.lifetime.com 产品型号:90757 产品生产编码:... -
Page 3: Icon Legend
图标图例 ICON LEGEND / • Indicates special heed should be taken when reading. 表示在阅读时需特别留意。 • • Indicates the parts to be used for a section. 表示组装该部份时所需的部件。 • • Indicates no parts required for a specifi c section. 表示组装该特定部份时不需要任何部件。 • • Indicates the hardware to be used for a section. 表示组装该部份时所需的五金器具。... -
Page 4: Warnings & Notices
警告与注意事项 WARNINGS & NOTICES / SAFETY INSTRUCTIONS FAILURE TO FOLLOW THESE WARNINGS MAY RESULT IN SERIOUS INJURY OR PROPERTY DAMAGE AND WILL VOID WARRANTY. Owner must ensure that all players know and follow these rules for safe operation of the system. To ensure safety, do not attempt to assemble this product without following the instructions carefully. -
Page 5: Pole Assembly
POLE ASSEMBLY / 立柱安装步骤 HARDWARE REQUIRED / 所需五金配件 Hardware Bag / 五金配件包 ABE (x2) AAF (x2) ABZ (x2) ABR (x2) CIH (x2) ADS (x2) ABB (x2) PARTS REQUIRED / 所需部件 Metal Part 金属部件 ALH (x1) ALL (x1) ALF (x1) • Warning Sticker applied to side not shown •... - Page 6 SECTION 1 (CONTINUED) 步骤1(续) TOOLS AND HARDWARE REQUIRED 所需工具及五金配件 9/16" (≈14 mm) (x2) ABE (x2) ABB (x2) AAF (x2) ABR (x2) • Secure the pole bracket (ALL) to the top pole (ALH) with the hardware as shown. • 使用如图所示的五金零件,将立柱托架( )固定至上立柱( )。...
- Page 7 SECTION 1 (CONTINUED) 步骤1(续) TOOLS AND HARDWARE REQUIRED 所需工具及五金配件 (x1) ADS (x2) CIH (x2) • Align the hole in the bottom of the top pole (ALH) • Secure the middle pole to the bottom pole (ALE) using with the slot in the top of the middle pole (ALF). the same method as step 1.2.
- Page 8 SECTION 1 (CONTINUED) 步骤1(续) TOOLS AND HARDWARE REQUIRED 所需工具及五金配件 (x1) • Strike the end of the pole assembly on a piece of scrap wood or cardboard 5–6 times. • 为了确保上中下三根立柱牢固的连接在一起,我们分别用立柱的两端用力撞击木块 5到 6 次。即使前面组装 时立柱已经很好的连接在一起亦不能跳过这个步骤。 • Do not strike your feet with the pole sections, as serious injury may occur.
- Page 9 SECTION 1 (CONTINUED) 步骤1(续) TOOLS AND HARDWARE REQUIRED 所需工具及五金配件 (x1) ABZ (x2) • Secure the poles together with self-drilling screws (ABZ). • 使用自攻螺丝( )将立柱固定在一起。 • THE SCREWS (ABZ) ARE DESIGNED TO DRILL INTO THE METAL OF THE UNDERLYING POLE. For ease of installation, chuck the self-drilling screws directly into the drill, or use a 3/8-inch (≈10 mm) hex driver.
-
Page 10: Pole-To-Base Assembly
POLE-TO-BASE ASSEMBLY / 立柱固定到底座的安装步骤 HARDWARE REQUIRED / 所需五金配件 DRZ (x1) BTS (x1) EEO (x2) AAE (x2) ABD (x4) AAO (x2) ABL (x4) PARTS REQUIRED / 所需部件 Metal Part 金属部件 HJX (x1) AJC (x1) ALI (x2) Long Axle / 长轴 Short axle / 短轴 Plastic Parts 塑胶部件... - Page 11 SECTION 2 (CONTINUED) / 步骤2(续) TOOLS AND HARDWARE REQUIRED / 所需工具及五金配件 ABL (x4) • Lay the pole assembly down and slide the long axle (AJC) through a spacer (ABL), a wheel (AMU), a second spacer (ABL) and the hole at the end of the bottom pole. Continue sliding the axle through a third spacer (ABL), the second wheel (AMU) and a fourth spacer (ABL) as indicated.
- Page 12 SECTION 2 (CONTINUED) / 步骤2(续) TOOLS AND HARDWARE REQUIRED / 所需工具及五金配件 • Set the front of the base (AJM) over the long axle as indicated. The ends of the long axle should be up inside the recesses in the bottom of the base. Please note that the two self-tapping screws from step 1.6 are on top. These should be on top in order to have all the other holes in the pole sections oriented correctly.
- Page 13 SECTION 2 (CONTINUED) / 步骤2(续) TOOLS AND HARDWARE REQUIRED / 所需工具及五金配件 EEO (x2) AAO (x2) AAE (x2) ABD (x4) BTS (x1) DRZ (x1) • While a second adult holds the pole upright, attach a pole brace (ALI) to the base as indicated.
- Page 14 SECTION 2 (CONTINUED) / 步骤2(续) TOOLS AND HARDWARE REQUIRED / 所需工具及五金配件 1/2" (≈13 mm) (x2) EEO (x2) • Lay the system down and keep it down until instructed otherwise. Securely tighten the hardware indicated. DO NOT overtighten. • 如图示方向放倒篮球架, 拧紧圆圈标记的螺丝, 但不要过紧。 •...
-
Page 15: Backboard-To-Rim Assembly
BACKBOARD-TO-RIM ASSEMBLY / 背板与球框的组装 HARDWARE REQUIRED / 需要的零件 AAM (x2) DFE (x4) AAV (x2) AAA (x4) APZ (x1) AAJ (x2) ABD (x2) ABK (x4) ABF (x2) AOW (x1) AJW (x2) PARTS REQUIRED / 所需部件 Metal Parts 金属部件 Plastic Parts 塑胶部件 ALD (x1) ALX (x1) Metal Parts... - Page 16 SECTION 3 (CONTINUED) 步骤3(续) TOOLS AND HARDWARE REQUIRED 所需工具及五金配件 1/2" (≈13 mm) (x2) AAM (x2) (x1) AAJ (x2) ABF (x2) ABD (x2) • Insert two bolts (AAM) with washers (ABD) and rubber washers (ABF) through the holes indicated in the back of the rim (ALX) as shown.
- Page 17 SECTION 3 (CONTINUED) 步骤3(续) TOOLS AND HARDWARE REQUIRED 所需工具及五金配件 1/2" (≈13 mm) (x2) ABK (x2) APZ (x1) • Place the backboard face down onto a table, box or similar. Secure the rim (ALX) and plastic guard (ALD) to the backboard (AJI) with the hardware shown.
- Page 18 SECTION 3 (CONTINUED) 步骤3(续) TOOLS AND HARDWARE REQUIRED 所需工具及五金配件 7/16" (≈11mm) AJW (x2) 1/2" (≈13mm) AOW (x1) 9/16" (≈14mm) AAV (x2) (x2) ABK (x2) DFE (x4) AAA (x4) • Attach the backboard brackets (AMY) to the backboard using the hardware indicated. •...
-
Page 19: Backboard-To-Pole Assembly
BACKBOARD TO POLE ASSEMBLY / 背板与立柱的组装 HARDWARE REQUIRED / 所需五金配件 7 1/16 in/po (≈18cm) 7 5/8 in/po (≈19cm) GBU (x2) AAD (x2) AAX (x4) HMP (x2) ABN (x8) PARTS REQUIRED / 所需部件 Metal Part 金属部件 AKC (x2) AKB (x2) TOOLS REQUIRED / 所需工具... - Page 20 SECTION 4 (CONTINUED) 步骤4(续) TOOLS AND HARDWARE REQUIRED 所需工具及五金配件 3/4” 7 5/8 in/po (≈19cm) (≈19 mm) (x2) GBU (x1) ABN (x2) AAX (x1) HMP (x2) • Attach the short extension arms (AKC) to the backboard brackets in the location shown with the hardware indicated. •...
- Page 21 SECTION 4 (CONTINUED) 步骤4(续) TOOLS AND HARDWARE REQUIRED 所需工具及五金配件 7 5/8 in/po (≈19cm) 3/4” (≈19 mm) (x2) GBU (x1) (x1) ABN (x2) AAX (x1) HMP (x2) • Attach the ends of the long extension arms (AKB) (that only have one hole) to the backboard brackets in the location shown with the hardware indicated.
-
Page 22: Parts Identifier
PARTS IDENTIFIER / 部件识别 This page intentionally left blank 本页面有意留白... - Page 23 PARTS IDENTIFIER / 部件识别 Metal Part / 金属部件 ALH (x1) ALL (x1) ALF (x1) • Warning Sticker applied to side not shown 警告贴纸粘在没有显示的那一侧。 • ALE (x1) AKC (x2) DFD (x1) AKB (x2) AJI (x1) ALX (x1) HJX (x1) AJC (x1) ALI (x2) Long Axle / 长轴...
- Page 24 PARTS IDENTIFIER / 部件识别 Plastic Parts 塑胶部件 AJQ (x1) AJM (x1) BAA (x1) BAB (x1) ALD (x1) AKP (x1) ALM (x1) AKZ (x1) AKF (x1) AKG (x1) AMN (x1) AKI (x1) AMU (x2) FIR (x1) FIQ (x1) AEF (x2) HARDWARE REQUIRED / 所需五金配件...
- Page 25 PARTS IDENTIFIER / 部件识别 This page intentionally left blank 本页面有意留白...
- Page 26 SECTION 4 (CONTINUED) 步骤4(续) TOOLS AND HARDWARE REQUIRED 所需工具及五金配件 3/4” 7 1/16 in/po (≈18cm) (≈19 mm) (x2) (x1) AAD (x1) AAX (x1) ABN (x2) CAUTION: HAVE ONE ADULT HOLD THE BACKBOARD IN PLACE UNTIL ASSEMBLY HAS BEEN COMPLETED! 注意:拧紧六角螺栓(AAD)直到它的尾端与螺母(AAX)齐平。 •...
- Page 27 SECTION 4 (CONTINUED) 步骤4(续) TOOLS AND HARDWARE REQUIRED 所需工具及五金配件 3/4" 7 1/16 in/po (≈18cm) (≈19 mm) (x2) (x1) AAD (x1) AAX (x1) ABN (x2) • Secure the short extension arms (AKC) to the top pole (ALH) with the hardware shown. •...
-
Page 28: Handle Assembly
HANDLE ASSEMBLY / 把手的安装步骤 HARDWARE REQUIRED / 所需五金配件 AQE (x1) ACX (x1) 7 1/16 in/po (≈18cm) HNX (x1) AAD (x1) 6 1/2 in/po (≈17cm) BSG (x1) AAO* (x1) ABB (x2) ABA (x2) 6 1/2 in/po (≈17cm) AKH (x1) ABM (x2) * The nylock nut (AAO) will not be used in this assembly. - Page 29 SECTION 5 (CONTINUED) 步骤5(续) TOOLS AND HARDWARE REQUIRED 所需工具及五金配件 1/2" (≈13 mm) (x2) ACX (x1) BSG (x1) • Slide the gas spring cover (AKG) onto the gas spring (AKF) as indicated. • 将气气压弹簧( )滑入压弹簧盖( ),如图所示。 • Align the holes in the gas spring cover (AKG) and the gas spring (AKF) with the holes in the pole bracket (ALL), and attach the gas spring assembly to the pole bracket with the hardware indicated.
- Page 30 SECTION 5 (CONTINUED) 步骤5(续) TOOLS AND HARDWARE REQUIRED 所需工具及五金配件 6 1/2 in/po (≈17cm) 9/16" (≈15 mm) (x2) ABA (x1) ABB (x1) AQE (x1) • Position the trigger (AMN) inside of the handle (AKI), and secure the trigger to the handle with the hardware indicated. •...
- Page 31 SECTION 5 (CONTINUED) 步骤5(续) TOOLS AND HARDWARE REQUIRED 所需工具及五金配件 3/4" (≈19 mm) 6 1/2 in/po (≈17cm) (x2) AAW (x1) AAX (x1) • Slide the handle (AKI) under the gas spring (AKF) so that the release pin (AQE) rests in the channels of the trigger (AMN).
- Page 32 SECTION 5 (CONTINUED) 步骤5(续) TOOLS AND HARDWARE REQUIRED 所需工具及五金配件 6 1/2 in/po (≈17cm) 9/16" (≈15 mm) (x2) ABA (x1) ABM (x2) ABB (x1) • Secure the handle (AKI) to the top pole (ALH) with the hardware shown. Make sure to place the spacers (ABM) between the handle assembly and the top pole as indicated.
- Page 33 SECTION 5 (CONTINUED) 步骤5(续) TOOLS AND HARDWARE REQUIRED 所需工具及五金配件 3/4" 7 1/16 in/po (≈18cm) (≈19 mm) (x2) AAX (x1) AAD (x1) HNX (x1) • Connect the rear lifter arms (ALS) to the inside of the lower extension arms (AKB) with the hardware shown. Place a spacer (HNX) between the rear lifter arms as shown.
-
Page 34: Final Assembly
FINAL ASSEMBLY / 收尾 HARDWARE REQUIRED / 所需五金配件 ADP (x10) PARTS REQUIRED / 所需部件 Plastic Parts 塑胶部件 AKP (x1) AJQ (x1) BAA (x1) BAB (x1) ALM (x1) WARNING / AKZ (x1) 警告 For safety reasons, we recommend that sand be used instead of water to fill the Base. - Page 35 SECTION 6 (CONTINUED) 步骤6(续) TOOLS AND HARDWARE REQUIRED 所需工具及五金配件 (x1) ADP (x10) (x1) • Remove the plastic fi lm from the backboard (AJI). )上的薄膜 • 撕掉篮板( • Attach the center frame pad (AJQ) and corner frame pads (BAA and BAB) to the backboard in the location shown with the hardware indicated.
- Page 36 SECTION 6 (CONTINUED) 步骤6(续) TOOLS AND HARDWARE REQUIRED 所需工具及五金配件 325 lb (≈147kg) (x1) Two adults are required to complete assembly. To prevent serious injuries, the pole should be held down by one adult 6.3a at all times while the base is being fi lled. 此步骤需由两个成年人来完成。为防止严重受伤,在填充底座时,应由一人始终扶住立柱。...
- Page 37 SECTION 6 (CONTINUED) 步骤6(续) TOOLS AND HARDWARE REQUIRED 所需工具及五金配件 (x1) Two adults are required to complete assembly. To prevent serious injuries, the pole should be held down by one adult 6.3b at all times while the base is being fi lled. 此步骤需由两个成年人来完成。为防止严重受伤,在填充底座时,应由一人始终扶住立柱。...
- Page 38 SECTION 6 (CONTINUED) 步骤6(续) TOOLS AND HARDWARE REQUIRED 所需工具及五金配件 (x1) • Attach the net (AKZ) to the rim (ALX). • Place pole cap (ALM) to the top pole. • 请挂上篮网( )。 • 将立柱盖( )盖到顶部立柱上。 • Raise the backboard until the top of the rim measures 10 feet from the playing surface.
-
Page 39: Moving The System
MOVING THE SYSTEM / 移动篮球架 WARNING: The system must only be moved by people capable of handling its weight. Children should not be allowed to move the system. 1. Adjust the system to its lowest position, and use caution to prevent the height mechanism from adjusting. 2. -
Page 40: Maintenance
MAINTENANCE / 维护 The life of your basketball system depends on many variables. The climate, exposure to corrosives such as salt, pesticides, or herbicides, and excessive use or misuse can all contribute to Pole failure, which may cause property damage or personal injury. Check your basketball system frequently for loose hardware, excessive wear, and signs of corrosion. - Page 41 à l’anneau, au panneau ni aux leviers sous peine d’endommager elevación, ya que esto puede dañar el sistema y anular la garantía. l’équipement et d’annuler la garantie. Lifetime Products, Inc., Clearfield, UT 84016 www.lifetime.com # 1180194 1-800-225-3865...
- Page 42 INFORMATION / 导入信息 Costco Wholesale Korea, Ltd. Distributed by: Costco Wholesale Corporation 40, Iljik-ro Gwangmyeong-si P.O. Box 34535 Gyeonggi-do, 14347, Korea Seattle, WA 98124-1535 1899-9900 www.costco.co.kr 1-800-774-2678 www.costco.com Importado por: Importadora Primex S.A. de C.V. Costco Wholesale Canada Ltd.* Blvd. Magnocentro No. 4 415 W.
- Page 43 笔记 NOTES /...
- Page 44 笔记 NOTES /...
- Page 45 2/09/2024 1234803...
Need help?
Do you have a question about the POWER LIFT 90757 and is the answer not in the manual?
Questions and answers