
Subscribe to Our Youtube Channel
Related Manuals for Wartmann WM-2007 EL


Summary of Contents for Wartmann WM-2007 EL
- Page 1 USER MANUAL / GEBRUIKERSHANDLEIDING VACUUM DEVICE | VACUÜMAPPARAAT model WM-2007 EL WWW.WARTMANN.COOKING...
- Page 2 User manuals User manual English 1-31 Gebruikshandleiding Nederlands 32-63...
-
Page 3: Table Of Contents
CONTENTS WELCOME Vacuumising and sealing by use of a vacuum bag IMPORTANT Vacuumising and sealing using vacuum pulse-function 15 Only suitable for domestic purposes Tips for packaging Check electrical connections Vacuumising by use of vacuum boxes Prevent the vacuum device from coming Tips for using vacuum boxes into contact with water Vacuumising by use of a wine stopper... -
Page 4: Welcome
WELCOME Congratulations on your purchase! Wartmann hopes that you will enjoy your new vacuum device. Using the Wartmann® vacuum device, you can keep your food fresh for a lon- ger period of time in the fridge or freezer. As the Wartmann®... - Page 5 A good choice Thanks to ingenious design, the Wartmann® vacuum device is compact, light-weight and easy to operate. The broad vacuum chamber with transparent lid en- sures that vacuum bags can be positioned easily and are always well sealable. During manufacturing of the Wartmann® vacuum device, only tested, high-quality components are used.
-
Page 6: Important
Make sure that no water ever enters instructions in the manual, or self-performed repairs, the vacuum device to prevent electrical shock and/ the warranty expires and Wartmann® will decline or damage to the vacuum device. any responsibility for any damage caused by this. -
Page 7: Use Original Accessories
Use original accessories This manual applies to the optional use of Wartmann® accessories. For accessories from other suppliers, other instructions may apply. -
Page 8: Food Safety
FOOD SAFETY Vacuum-packaging • Fermentation. Fermentation can be noticed When vacuum-packaging food in vacuum-storage by the odour or taste of the food. Fermentation boxes, most of the surrounding air is extracted whilst requires water and sugar and will develop at room the inflow of fresh air is being prevented. -
Page 9: Deep-Freezing
PREPARATIONS Deep-freezing Before you can start vacuum-packaging vegetables, In order to safely preserve foods, it must be kept at they need blanching. This will inhibit low temperatures. The growth of micro-organisms is enzymatic activity which causes loss of flavour and strongly reduced at temperatures of 4°C and below. -
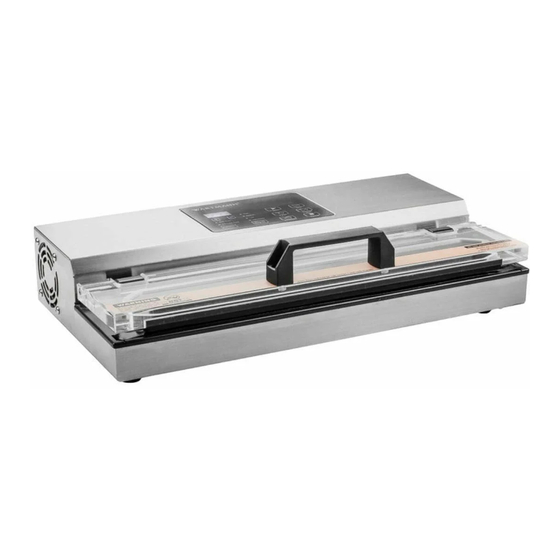
Page 10: List Of The Vacuum Device
LIST OF THE VACUUM DEVICE Outside Control panel Handle Power cord connection Vacuum hose connection... -
Page 11: Inside
Inside Sealing edge Gasket Vacuum chamber Sealing strip... -
Page 12: Control Panel
Control panel A. Start button [Start] Using the start button you can directly start your preferred programme. By pressing [Start] you start the “vacuumising & sealing” or the “vacuum-marina- ting”. Which programme is started, depends on the setting of the vacuum device. B. - Page 13 D. Impulse sealing-button [Impulse Seal] F. Cancel-button [Cancel] The impulse sealing-button helps to quickly seal Using the cancel-button you can stop any running multiple bags one after another. Open the lid and programme. Press [Cancel] to stop the running press [Impulse Seal] to select the programme for programme.
- Page 14 from High, Medium, Low or Adjustable. When you have chosen Adjustable, then, using the [+] and [-] buttons, you can set the vacuum as you desire. The set value is shown in inHg in the display. I. Display 1. You can read the (set) vacuum, the sealing time and marinating time from the display.
-
Page 15: Using The Vacuum Device
USING THE WARTMANN® VACUUM DEVICE Unpacking the vacuum device and vacuum roll over the sealing strip. Make sure that preparations for first use the open part of the vacuum roll reaches beyond the Take the vacuum device out of the box and remove sealing strip and ends up in the vacuum chamber. -
Page 16: Vacuumising And Sealing By Use Of A Vacuum Bag
open side. The open side of the vacuum bag is requi- Close the lid and press it lightly for a short time, red to have a free space of at least 4.5 centimetres. while briefly pressing the [Start] button to start the vacuumising and sealing. -
Page 17: Vacuumising And Sealing Using Vacuum Pulse-Function
led or kept in the freezer to reduce the risk of spoi- Close the lid and press it lightly for a short time, lage. If you want to interrupt the vacuumising, then while you keep pressing the [Pulse] button until the briefly press the [Cancel] button. -
Page 18: Tips For Packaging
Tips for packaging aging, marking and storage in the freezer. Pack the food as freshly as possible. By means of Cover sharp points and edges of products such as vacuum-packaging, the freshness of the food can be bones, pasta and rice first, using a paper towel. This retained up to five times longer, compared with food reduces the risk of the vacuum bag being punctured. - Page 19 vacuum box, after which you can take off the box Subsequently disconnect the vacuum hose from the lid. lid nipple. Check first if the gasket in the lid is dust-free and con- If you want to interrupt the vacuumising, then briefly tains no food residues.
-
Page 20: Tips For Using Vacuum Boxes
Tips for using vacuum boxes box (without a lid) is suitable for the dishwasher and Use only storage boxes that are suitable for microwave. The recommended maximum temperatu- vacuumising. Ordinary storage boxes may implode re for the vacuum box is 100C. when creating a vacuum in these boxes. - Page 21 of the wine stopper and the top of the liquid. If you want to interrupt the vacuumising, then brie- fly press the [Cancel] button. In order to undo the Connect one side of the vacuum hose to the nipple vacuum entirely, you can briefly remove the wine of the vacuum box, the other side to the nipple of the stopper from the bottle.
-
Page 22: Marinating Foods
Marinating foods box and set the button of the vacuum box to “open”. Your vacuum device has a marinating-function. Using Connect one side of the vacuum hose to the nipple this, a vacuum is created in a connected vacuum of the vacuum box, and the other side to the nipple box, and retained for about eight minutes. -
Page 23: Sealing Multiple Bags
the accompanying indication light will light up, after quickly seal multiple bags one after another. which the display will show the remaining time until Therefore press the [Impulse Seal] button. If the lid is the next marinating cycle. closed, the letters “CLO” will appear in the display. This process will be repeated until all set marinating As soon as you open the lid, the set sealing time will cycles have been completed. -
Page 24: After Use
AFTER USE RECYCLING THE WARTMANN® Cleaning Allow the sealing strip to cool off first before VACUUM DEVICE cleaning it and remove the plug from the socket. Clean the outside of the vacuum device with a damp microfiber cloth and soft soap. Remove all moistu-... -
Page 26: Appendix: Storing Advice For Foods
APPENDIX: STORING ADVICE FOR FOODS The vacuum device will change the way you Please note: Not all foods are suitable for vacuum purchase and store foods. As vacuum-packaging de- packaging. You can never vacuum pack garlic or celerates spoilage and prevents freezer burn, you fungi such as mushrooms. - Page 27 Foods Vacuum + Vacuum + Normally Deep-freeze Cooling Beef and veal 1½ years 2 weeks 2 days Minced meat 1 years 1 week 1 to 2 days Pork 1 years 1 to 2 weeks 2 days Fish 1½ years 1 week 2 days Poultry 1½...
-
Page 28: Appendix: Troubleshooting
APPENDIX: TROUBLESHOOTING In general the Wartmann vacuum device performs adequately. Should however a malfunction occur, then please first try the troubleshooting recommendations mentioned below. SYMPTOM POSSIBLE CAUSE SOLUTION The vacuum device does not switch on. The The power cord is damaged, the plug is not in First check if the power cord is undamaged indicator lights do not light up. - Page 29 SYMPTOM POSSIBLE CAUSE SOLUTION The vacuum boxes are not properly The vacuum hose is not properly connected. Make sure that the vacuum hose is properly vacuumised. inserted into the vacuum box and vacuum device connections. Then try again. The button on the vacuum box is not set to Make sure that the button on the vacuum box “vacuum”.
-
Page 30: Error Codes
ERROR CODES Meaning of the error codes in the display. ERROR CODE MEANING REMEDY The set vacuum cannot be reached. 1. Check if the lid is closed properly. 2. Check if the gasket is in place. 3. Check if the pump is functioning. 4. -
Page 31: Appendix: Other Vacuum-Packaging Applications
APPENDIX: OTHER VACUUM-PACKAGING APPLICATIONS You can also use the vacuum device for domestic Make your own dry packs by keeping essential applications other than food packaging. items, such as matches, socks and a map in a sealed bag. Vacuum-packaging is quite suitable for camping and outdoor activities Domestic applications Reusable cooling packs you can make yourself, by... -
Page 32: Appendix: Procedure For Replacing The Seal Ribbon
APPENDIX: PROCEDURE FOR REPLACING THE SEAL RIBBON The Wartmann ™ WM-2007 EL Elite vacuum device pull the seal ribbon straight up. This is to prevent comes with a sealing ribbon that you can replace accidentally breaking the underlying heating strip. - Page 33 Your vacuum device is now ready for use again. Tips When you use the transparent Wartmann ™ vacuum bags you can set the sealing time of the vacuum device to 2 seconds. With a longer sealing time, there is a possibility that the vacuum bags will melt through.
- Page 34 INHOUD Het maken van een vacuümzak uit een vacuümrol (verzegelen) Vacuümeren en verzegelen met een vacuümzak WELKOM Vacuümeren en verzegelen met behulp van de BELANGRIJK vacuümpuls-functie Alleen geschikt voor huishoudelijk gebruik. Tips voor het verpakken Controleer elektrische aansluitingen Vacuümeren met vacuümdozen Voorkom dat het vacuümapparaat in contact Tips voor het gebruik van vacuümdozen komt met water...
-
Page 35: Welkom
Gefeliciteerd met uw aankoop eenvoudig te bedienen. De brede vacuümkamer Wartmann wenst u veel plezier met uw nieuw met transparante deksel zorgt er voor dat vacuüm- vacuümapparaat. Met behulp van het Wartmann® zakken gemakkelijk te plaatsen zijn en steeds goed vacuümapparaat kunt u etenswaren, in de ijs-... -
Page 36: Belangrijk
Zorg dat er nooit uitgevoerde reparaties vervalt de garantie en water in het vacuümapparaat terecht kan komen om weigert Wartmann® iedere aansprakelijkheid voor een elektrische schok en/of beschadiging aan het hierdoor ontstane schade. vacuümapparaat te voorkomen. -
Page 37: Gebruik Originele Accessoires
Gebruik originele accessoires In deze handleiding wordt uitgegaan van het optionele gebruik van Wartmann® accessoires. Voor accessoires van andere leveranciers kunnen andere instructies gelden. -
Page 38: Voedselveiligheid
VOEDSELVEILIGHEID Vacuüm-verpakken suikers nodig en groeit bij kamertemperatuur. Ook Bij het vacuüm-verpakken van etenswaren in vacu- zonder lucht kan gist groeien. Om de gistgroei um-opbergdozen wordt een groot deel van de om- af te remmen moet u koelen, pas bij diepvriezen gevingslucht verwijderd en wordt de toestroom van wordt de gistgroei volledig afgeremd. -
Page 39: Controleren
VOORBEREIDINGEN van micro-organismen wordt sterk verminderd bij Voordat u groenten kunt vacuüm-verpakken moet temperaturen van 4ºC en lager. Bij een temperatuur u deze blancheren. Dit remt de enzymwerking die van -17ºC stopt de groei bijna volledig. Dit doodt de smaak- en kleurverlies veroorzaakt. Kook de groen- micro-organismen echter niet. -
Page 40: Overzicht Van Het Vacuümapparaat
OVERZICHT VAN HET VACUÜMAPPARAAT Bedieningspaneel Buitenkant Handvat Netsnoer- aansluiting vacuümslang- aansluiting Deksel... -
Page 41: Binnenkant
Binnenkant Afdichtingsrand Pakking Vacuümkamer Zegelstrip... -
Page 42: Bedieningspaneel
Bedieningspaneel A. Starttoets [Start] Met de starttoets kunt u direct uw voorkeursprogram- ma starten. Door op [Start] te drukken start u het “vacuümeren & verzegelen” of het “vacuüm-marine- ren”. Welk programma gestart wordt hangt af van de instelling van het vacuümapparaat. B. - Page 43 houdt. Zo kunt u bijvoorbeeld voorkomen dat [Accessory]. Het vacuümapparaat stopt automatisch producten worden samengedrukt. zodra het gewenste vacuüm is bereikt. D. Seriezegel-toets [Impulse Seal] F. Stop-toets [Cancel] De seriezegel-toets helpt u om snel meerdere zak- Met de stop-toets kunt u ieder lopend programma ken achter elkaar te verzegelen.
- Page 44 H. Vacuümdruk-toets [Vacuum Degree] K. Indicatorlampjes Met de vacuümdruk-toets kunt u het gewenste K1. Dit indicatorlampje geeft het geselecteerde vacuüm instellen. Druk steeds op [Vacuum Degree] voorkeurprogramma aan. totdat de gewenste instelling is geselecteerd. U kunt K2. Dit indicatorlampje geeft het ingestelde vacuüm kiezen uit High (hoog), Medium (gemiddeld), Low weer.
-
Page 45: Het Vacuümapparaat Gebruiken
HET VACUÜMAPPARAAT GEBRUIKEN Het vacuümapparaat uitpakken en gereed vacuümapparaat en leg het open einde van de va- maken voor het eerste gebruik cuümrol over de zegelstrip. Let er daarbij op dat het Haal het vacuümapparaat uit de doos en verwijder open gedeelte van de vacuümrol tot over de zegel- al het verpakkingsmateriaal. -
Page 46: Vacuümeren En Verzegelen Met Een Vacuümzak
u een vacuümzak overhoudt met één open zijde. De Degree] kunt u de gewenste onderdruk selecteren. open kant van de vacuümzak dient een vrije ruimte Sluit het deksel en houdt deze even lichtjes aange- van minimaal 4½ centimeter te hebben. drukt terwijl u kort op de toets [Start] drukt om het vacuümeren en verzegelen te starten. -
Page 47: Vacuümeren En Verzegelen Met Behulp Van De Vacuümpuls-Functie
moeten gekoeld of in de diepvries bewaard worden cuümkamer. Let er daarbij op dat het open gedeelte om bederf te beperken. van de vacuümzak en in de vacuümkamer uitkomt. Sluit het deksel en houdt deze even lichtjes aange- Wanneer u het vacuümeren voortijdig wilt onderbre- drukt terwijl u steeds op de toets [Pulse] drukt totdat ken dan drukt u kort op de [Cancel] knop. -
Page 48: Tips Voor Het Verpakken
Tips voor het verpakken Dek scherpe punten of randen van producten zoals Verpak voedsel zo vers mogelijk. Door vacuüm-ver- botten, pasta en rijst eerst met een papieren doekje pakken kunt u de versheid van voedsel tot maximaal af. Hiermee vermindert u de kans dat de vacuümzak vijf keer verlengen vergeleken met voedsel dat onder lek raakt. - Page 49 dicht te zetten sluit u de vrije luchttoevoer af waar- Het vacuümapparaat stopt automatisch zodra het door het vacuüm vergrendelt blijft. Door de knop op vacuüm bereikt is. Draai hierna de knop op het dek- open te zetten stroomt er lucht in de vacuümdoos sel van de vacuümdoos in de stand “lock”.
-
Page 50: Tips Voor Het Gebruik Van Vacuümdozen
Tips voor het gebruik van vacuümdozen Plaats het deksel van de vacuümdoos niet in de vaat- Gebruik alleen bewaardozen die geschikt zijn om te wasser of magnetron, was het met de hand. De va- vacuümeren. Gewone bewaardozen kunnen implo- cuümdoos (zonder deksel) is geschikt voor de vaat- deren wanneer u in deze bewaardozen een vacuüm wasser en magnetron. - Page 51 koolzuurvrije frisdrank, plantaardige olie, of vers Om de fles te openen verwijdert u eenvoudig de sap. wijnstop. Wanneer u het vacuümeren voortijdig wilt onderbre- Steek de onderkant van de wijnstop in de hals van ken dan drukt u kort op de [Cancel] toets. Om het de fles.
-
Page 52: Etenswaren Marineren
Etenswaren marineren de vacuümdoos. Houd een beetje ruimte vrij boven Uw vacuümapparaat beschikt over een mari- het product zodat de lucht gemakkelijk kan uitstro- neer-functie. Hierbij wordt in een aangesloten vacu- men. Plaats het deksel op de vacuümdoos en zet de um¬doos een vacuüm gemaakt en voor circa acht knop van de vacuümdoos in de stand “open”. -
Page 53: Meerdere Zakken Verzegelen
stroomt er lucht in de vacuümdoos. Hierna start de Meerdere zakken verzegelen volgende marineercyclus. Uw vacuümapparaat beschikt over een functie om meerdere zakken snel achter elkaar te verzegelen. Op het beeldscherm ziet u eerst de vacuümdruk Druk hiervoor op de [Impulse Seal] toets. Wanneer weergegeven. -
Page 54: Na Gebruik
NA GEBRUIK HET VACUÜM- APPARAAT Schoonmaken Laat de zegelstrip eerst afkoelen voordat u deze RECYCLEN schoon maakt en haal de stekker uit het stopcontact. Reinig de buitenkant van het vacuümapparaat even- tueel met een lichtvochtige microvezeldoek en een Wanneer het vacuümapparaat zijn levensduur heeft zachte zeep. -
Page 56: Bijlage: Bewaaradviezen Voor Etenswaren
BIJLAGE: BEWAARADVIEZEN VOOR ETENSWAREN Het vacuümapparaat verandert de manier waarop Let op: U kunt niet alle etenswaren vacuüm ver- u etenswaren inkoopt en bewaart. Omdat vacuüm- pakken. U mag nooit knoflook of schimmels, zoals verpakken bederf afremt en vriesbrand voorkomt paddenstoelen, vacuüm verpakken. - Page 57 Etenswaren Vacuum + Diepvries Vacuum + Koeling Normaal Rund- en kalfsvlees 1½ jaar 2 weken 2 dagen Gehakt 1 jaar 1 week 1 tot 2 dagen Varkensvlees 1 jaar 1 tot 2 weken 2 dagen 1½ jaar 1 week 2 dagen Gevogelte 1½...
-
Page 58: Bijlage: Storingen Verhelpen
BIJLAGE: STORINGEN VERHELPEN Normaliter levert het Wartmann vacuümapparaat een goede vacuümprestatie. Wanneer zich onverhoopt toch een storing voordoet probeert u dan eerst onderstaande adviezen. SYMPTOOM MOGELIJKE OORZAAK OPLOSSING Het vacuümapparaat gaat Het netsnoer is beschadigt, de stekker is niet in het Controleer eerst of het netsnoer onbeschadigd is en niet aan. - Page 59 SYMPTOOM MOGELIJKE OORZAAK OPLOSSING De vacuümdozen worden niet De vacuümslang is niet goed aangesloten. Verzeker u ervan dat de vacuüm-slang volledig in de goed vacuüm. aansluitingen op de vacuümdoos en het vacuüm- apparaat zijn gestoken. Probeer het daarna nog een keer. De knop op de vacuümdoos is niet in de positie Verzeker u ervan dat de knop op de vacuümdoos in “vacuüm”...
-
Page 60: Foutcodes
FOUTCODES Betekenis van de foutcodes op het beeldscherm. FOUTCODE BETEKENIS REMEDIE Het ingestelde vacuüm kan niet worden 1. Controleer of het deksel goed gesloten is. gehaald. 2. Controleer of de pakking op de juiste plaats zit. 3. Controleer of de pomp werkt. 4. -
Page 61: Bijlage: Andere Vacuüm- Verpakkingstoepassingen
BIJLAGE: ANDERE VACUÜM- VERPAKKINGSTOEPASSINGEN U kunt het vacuümapparaat ook gebruiken voor an- Door het vacuüm verpakken van vlees en andere rui- dere huishoudelijke toepassingen dan het verpakken kende producten voorkomt u ongewenste geurtjes. van etenswaren. Maak uw eigen droogpakketten door essentiële zaken, zoals lucifers, sokken en een kaart in een Vacuüm-verpakken is zeer geschikt voor verzegelde zak te bewaren. -
Page 62: Bijlage: Procedure Voor Het Vervangen Van Het Zegellint
Het kan handig zijn om een verwijderaar voor Zegellint plaatsen lijmresten bij de hand te hebben. Het Wartmann™ zegellint is voorgelijmd en aan de Zegellint verwijderen achterzijde voorzien van een gele, beschermende, De uiteinden van het zegellint zijn aan beide zijden... - Page 63 Wanneer u gebruik maakt van de transparante Wartmann™ vacuümzakken dan kunt u de zegeltijd Steek het losgemaakte einde van het zegellint van het vacuümapparaat instellen op 2 seconden. voorzichtig in één van de gleuven van het vacuümap- Bij een langere zegeltijd bestaat de mogelijkheid dat paraat.
- Page 64 Type number / Typenummer model: WM-2007 EL Pump pressure / Pompdruk: -28,3” Hg / -958mbar (±3%) Type pump / Type pomp: Dubbel Voltage / Spanning: 220-240 volt: 50/60 Hz Maximum width vacuum bag / Maximale breedte vacuümzak: 406 mm Power / Vermogen: 550 Watt...
Need help?
Do you have a question about the WM-2007 EL and is the answer not in the manual?
Questions and answers