Advertisement
Quick Links
Advertisement

Subscribe to Our Youtube Channel
Related Manuals for TEFAL Turbo Cuisine CY75


Summary of Contents for TEFAL Turbo Cuisine CY75
- Page 1 Turbo Cuisine CY75 www.tefal.com...
-
Page 2: Table Of Contents
주방에 초대해 주셔서 다시 한번 감사드립니다. 이제 함께 요리해 볼까요! CONTENTS Quick Start Guide in Images ----------------------------------------------------------------------------------4 Tefal Recommends Safety First ------------------------------------------------------------------------------40 THANKS FOR CHOOSING TEFAL All Parts of Your Product -----------------------------------------------------------------------------------------48 Getting Familiar with the Control Panel ------------------------------------------------------------------49 Welcome to the world of fast & delicious cooking! How To Use &... - Page 4 Bang!
- Page 5 테팔은 안전을 우선으로 합니다 안전은 우리의 최우선 순위입니다. 우리는 높은 안전 및 기술 표준에 따라 제품을 설계하고 제조합니다. 그러나 다른 전기 제품과 마찬가지로 몇 가지 잠재적 위험이 있으므로 주의를 기울여 다음 지침을 준수하시기 바랍니다. 안전 지침 사용 설명서의 안전 사항을 주의 깊게 읽고 나중에 스팀...
- Page 6 • 제품을 가열된 오븐 또는 뜨거운 바닥 위에 놓지 • 이 제품은 소독기로 사용해서는 안 됩니다. 용기 마십시오. 제품을 불꽃이나 가연성 물질 주변에 소독용으로 사용하지 마십시오. 두지 마십시오. • 본 제품은 외부 타이머나 별도의 리모컨을 통해 • 물이 튀지 않는 평평하고 안정적인 내열성 바닥 외부...
- Page 7 • 내솥을 넣지 않거나 내솥 안에 재료가 없는 상태로 4. 안전한 사용 방법 - 조리 전 제품을 사용하지 마십시오. 그럴 경우 제품이 • 제품을 사용하기 전에 내부 압력 장치 부분이 심각하게 손상될 수 있습니다. 깨끗한지 확인하십시오. • 내솥이 없는 상태에서 제품을 재료로 채우지 •...
- Page 8 오븐용 장갑을 착용하십시오. 제품을 들 때, 뚜껑 • 제품을 세척하려면 사용 설명서를 참조하십시오. 손잡이를 잡지 마십시오. 내솥과 뚜껑은 뜨거운 비눗물로 세척할 수 있지만, • 제품이 작동하는 동안 내솥을 분리하지 마십시오. 식기세척기에 넣지 마십시오. 젖은 천을 사용하여 • 볶음 모드에서는 내솥의 온도가 높게 올라가, 제품...
- Page 9 • 제공된 내솥 이외의 다른 내솥을 사용하지 제품의 모든 부품 마십시오. 이 제품에 사용하도록 설계된 정품 플로트 밸브 내솥으로만 교체 가능합니다. 압력 제한 밸브 압력 방출 • 현행 규정에 따라 더 이상 사용하지 않는 제품을 버튼 뚜껑 폐기하기 전에 플러그와 전원 코드를 뽑아서 뚜껑...
- Page 10 제품 조작부 안내 사용 방법 및 세척 가이드 빠른 시작 설명서 부분에서 (그림 x)로 표시된 그림을 조리 단계 표시등 참조하십시오. 예열 압력조리 중 처음 사용 전 조리 중 보온 1. 포장 제거 기능 기능 • 제품을 포장재에서 꺼내 처음 사용하기 전에 사용 예약...
- Page 11 • 제품을 물에 담그지 마십시오(그림 41). • 압력 제한 밸브 덮개를 세척하려면, 뚜껑 내부에서 제한 밸브 덮개를 푸십시오(그림 13). 부드러운 스펀지와 • 실수로 제품을 물속에 담그거나 가열판에 바로 물을 쏟은 뜨거운 비눗물로 세척하십시오(그림 14). 건조 후에 경우 공인 서비스 센터로 가져가 수리를 받으십시오. 파이프의...
- Page 12 2. 내솥 본체에 넣기 • 내솥의 바닥이 깨끗하고 건조한지 확인하고, 가열판에서 음식물 찌꺼기를 제거합니다(그림 20). • 내솥을 본체에 넣습니다(그림 21). • 내솥을 장착하지 않고, 제품을 사용하지 마십시오. 3. 뚜껑 닫고 잠그기 • 고무 패킹이 뚜껑에 단단히 고정되었는지 확인합니다 (그림 43). •...
- Page 13 • 선택 사항: 를 누르고 조작부 손잡이를 오른쪽(시간 증가) 국물요리 프로그램 또는 왼쪽(시간 감소)으로 돌려 원하는 시간을 설정합니다. • 내솥에 재료를 넣은 뒤, 뚜껑을 완전히 닫고 잠급니다. • 를 눌러 조리 프로그램을 시작합니다. • 조작부 손잡이를 오른쪽으로 돌려 국물요리 프로그램 으 •...
- Page 14 • 를 눌러 조리 프로그램을 시작합니다. • 예열 단계가 완료되면 제품이 자동으로 조리 단계로 전환 됩니다. 화면에 카운트다운이 표시되고 조리 중 표시등 이 • 제품이 예열 단계를 시작합니다. 화면에 및 이 번갈 켜집니다. 아 표시되고, 예열 표시등 이 켜집니다. • 조리 과정에서 압력이 제품에 축적되어 플로트 밸브를 위로 •...
- Page 15 • 예열 단계가 완료되면 제품이 자동으로 조리 단계로 전환 • 카운트다운이 끝나면 제품에서 신호음이 울리고 화면에 됩니다. 화면에 카운트다운이 표시되고 조리 중 표시등 이 이 표시됩니다. 켜집니다. • 몇 초 후 제품이 자동으로 대기 모드로 전환됩니다. 화면에 • 카운트다운이 끝나면 제품에서 신호음이 울리고 화면에 가...
- Page 16 데우기 프로그램 요거트 프로그램 요거트 프로그램은 요거트를 만들거나 빵/페이스트리 반죽 • 내솥에 재료를 넣고 레시피에 따라 뚜껑을 닫거나 을 부풀리는 데 사용할 수 있습니다. 열어둡니다. • 내솥에 준비한 재료를 넣고 뚜껑을 닫아줍니다. (잠그지 않 • 조작부 손잡이를 오른쪽으로 돌려 데우기 프로그램 으로 은...
- Page 17 • 선택 사항: 를 누르고 조작부 손잡이를 오른쪽(시간 증가) • 조작부 손잡이를 오른쪽(시간 증가) 또는 왼쪽(시간 감소)으 또는 왼쪽(시간 감소)으로 돌려 원하는 시간을 설정합니다. 로 돌려 원하는 시간을 설정합니다. • • 를 눌러 조리 프로그램을 시작합니다. 를 누릅니다. 화면에 예약 조리 카운트다운이 표시됩니 다.
- Page 18 9. 제품 플러그 뽑기 12. 스테인리스 찜틀 사용법 • 찜틀을 내솥에 넣기 전, 찜틀 지지대를 부착합니다. • 사용 후 제품의 플러그를 뽑고 최소 2시간 동안 식힌 후 세 • 찜틀을 뒤집어,지지대의 뾰족한 끝부분이 위로 가도록 잡아주세요. 척하십시오. (그림 48). • 지지대 양쪽의 움푹 들어간 부분을 홈에 끼워 맞춰주세요. 10.
- Page 19 기술 문제 해결 가이드 문제 가능한 원인 해결 방법 문제 가능한 원인 해결 방법 압력 방출 버튼을 계속 눌러 내솥 압력 제한 밸브를 내솥의 압력으로 인해 내부의 압력을 제거하십시오. 조심스럽게 회전시키거나 압력이 완전히 방출될 때까지 몇 뚜껑을 열 수 없습니다. 눌러서...
- Page 20 - 특히 제품 ID 또는 사양에 표시된 바와 다른 잘못된 전압이나 주파수로 인한 손상이나 불량한 결과 소비자의 법적 권리: TEFAL/T-FAL 해외 보증은 소비자가 보유하고 있을 수 있는 법적 권리 또는 제외 또는 한정될 수 없는 권리, 또는 해당 소비자가 해당 제품을 구입한 소매상에 대한 권리에 영향을 미치지 않습니다. 본 보증은 소비자에게 구체적인 법적...
-
Page 21: Tefal Recommends Safety First
− farm houses; TEFAL RECOMMENDS SAFETY FIRST − by clients in hotels, motels and other residential Safety is our number one priority. We design and manufacture type environments; our product with high safety and technology standards. However, − bed and breakfast type environments. - Page 22 3. How to use safely – general usage? • Do not use the appliance empty, without its cooking pot or without ingredients inside the cooking pot. This • Do not use appliance for other than the intended purpose. could cause serious damage to the appliance. •...
- Page 23 4. How to use safely – before cooking? • Do not remove the cooking pot while the appliance is working. • Before using your appliance, check that the float valve • In browning mode, be careful of risks of burns caused and the pressure limit valve are clean.
- Page 24 8. What to do in case of damage? Environment protection first! • Do not operate any appliance with a damaged power Your appliance contains valuable materials which can be recovered or recycled. cord or plug or after the appliance malfunctions or has Leave it at a local civic waste collection point.
-
Page 25: All Parts Of Your Product
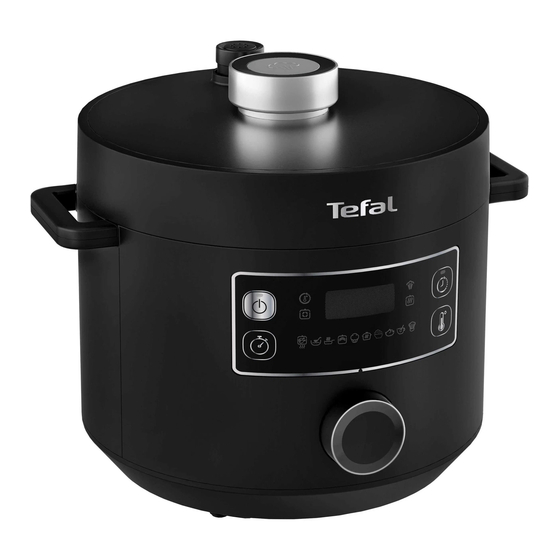
GETTING FAMILIAR WITH THE CONTROL PANEL ALL PARTS OF YOUR PRODUCT Pressure limit Float valve Cooking phase indicators valve Pressure Pre- Under release button heating pressure Sealing Cooking in Keeping Lid knob gasket progress warm Functions Functions Pressure limit Delayed start Start/Stop valve cover button... -
Page 26: How To Use & Clean Guide
• Do not use a scourer or abrasive sponge to clean the cooking HOW TO USE & CLEAN GUIDE pot as it could damage the non-stick coating in the cooking pot (Fig.40). Feel free to refer to the figures indicated as (Fig.x) from Quick Start Guide part. - Page 27 3c. Clean the valves INSTRUCTIONS FOR USE • To clean the pressure limit valve, remove the pressure limit 1. Place ingredients in the cooking pot valve from the pipe on top of the lid (Fig.10). Clean it with a • Remove the cooking pot from the housing. soft sponge and soapy hot water (Fig.11).
- Page 28 Please refer to the figures from Quick Start Guide (from Fig.25 to Fig.36) Stew program • Place the ingredients in the cooking pot and completely close and lock the lid. • Turn the control panel knob to the right to reach Stew program .
- Page 29 • Optional: Press and set the desired time by turning the Soup program control panel knob to the right (to increase time) or to the left • Place the ingredients in the cooking pot and completely close (to decrease time). and lock the lid.
- Page 30 • Press to start the cooking program. • Press to start the cooking program. • The appliance starts the pre-heating phase. The screen • The appliance starts the pre-heating phase. The screen displays alternatively & and the pre-heating displays alternatively &...
- Page 31 • Press to start the cooking program. • At the end of the count down, the appliance beeps and the screen displays • The appliance starts the pre-heating phase. The screen • After a few seconds, the appliance will automatically switch to displays alternatively &...
- Page 32 • At the end of the count down, the appliance beeps and the Adjustable Chef mode screen displays • Place the ingredients in the cooking pot and completely close • After a few seconds, the appliance will automatically switch to and lock the lid.
- Page 33 • First select a program following the steps described above 9. Unplug the appliance in part 6. • After usage, unplug the appliance and let it cool down for at least 2 hours before cleaning. • Before starting the selected program, press .
-
Page 34: Technical Troubleshooting Guide
TECHNICAL TROUBLESHOOTING GUIDE Problem Possible reasons Solutions Problem Possible reasons Solutions Carefully rotate/press the Press continuously the pressure pressure limit valve to make it release button to remove the The pressure limit valve is in Unable to open because of fall into place. - Page 35 Solutions Problem Possible reasons Remove the sealing gasket, The sealing gasket is not clean it and reinstall it in the properly installed. correct position. Remove the sealing gasket, The sealing gasket is dirty. clean it and reinstall it in the Steam leakage from lid.
- Page 36 3206000514...
Need help?
Do you have a question about the Turbo Cuisine CY75 and is the answer not in the manual?
Questions and answers