
Related Manuals for Meubilair 102077-05


Summary of Contents for Meubilair 102077-05
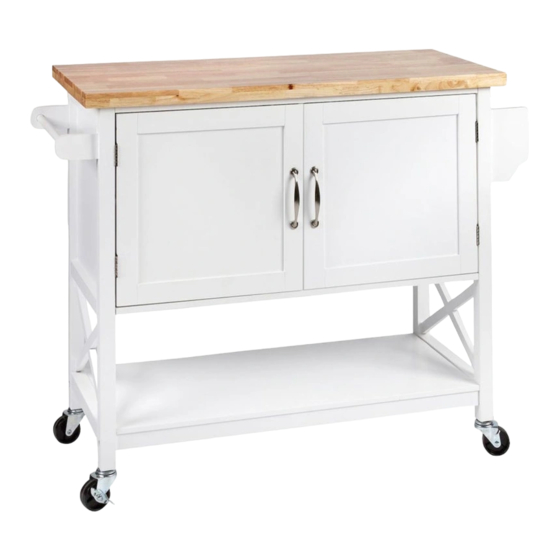
- Page 1 Kitchen 2 Door Island Solid Wood Counter Top-White FLOOR AREA 1.0hr 2M x 2M APPROXIMATE ASSEMBLY TIME 2 PERSON ASSEMBLY REQUIRED ASSEMBLY SPACE REQUIRED ASSEMBLY TOOLS PHILLIPS SCREWDRIVER Flat Head screwdriver DO NOT USE POWER DRILL 1 / 12...
- Page 2 Important Please read these instructions carefully before use and keep for future reference. • This product is intended for domestic use only and is not designed for commercial use. • Do not assemble/use this item if any components are missing or damaged. Please contact the retailer straight away.
- Page 3 Assembly Tips For larger items, please ensure that you have sufficient space and people (as indicated on page 1) to assemble your product safely. We recommend that, where possible, all items are assembled near to the area in which they will be placed in use, to avoid moving the product unnecessarily once assembled.
- Page 4 4 / 12...
-
Page 5: Hardware List
Kitchen 2 Door Island Solid Wood Counter Top-White HARDWARE LIST B x 1 C x 16 D x 16 E x 30 F x 9 G x 2 H x 4 A x 6 Allen key Bolt Screw Screw Cam bolt Cam lock Wood Dowel Magnet... - Page 6 6 / 12...
- Page 7 This is how a cam nut works ..The head of the cam bolt goes into the open mouth of the cam nut. You then turn the cam nut so it tightens over the bolt. Ensure the 2nd person is holding the panels 8 9 to support them until this step is completed, this will avoid damage to your item.
- Page 8 This is how a cam nut works ..The head of the cam bolt goes into the open mouth of the cam nut. You then turn the cam nut so it tightens over the bolt. Ensure the 2nd person is holding the panel 7 to support them until this step is completed, this will avoid damage to your item.
- Page 9 Ensure the 2nd person is holding the panel 14 to support them until this step is completed, this will avoid damage to your item. 1.Stand unit upright. lnsert the back panel (13) . 2.Assemble the top panel (14) with wood dowel (E), This is how a cam nut works ..
- Page 10 just lock the upper and lower screws NOTE: Do not overtighten screws in this step, the final hinge adjustments are part of step 12 where you can tighten the screws one at a time to ensure your door is hung int he right position. Only use the screws for the upper and lower holes in this step.
- Page 11 W x 8 NOTE: Only place the upper and lower screws and do not overtighten until your doors are hung correctly and in the right position. Refer to Step 12 for final adjustments and tightening of the screws once doors are correctly hung. 11 / 12...
- Page 12 STEP 12 Attention: If the doors may shift or sag after assembly, please adjust the hinges according to below instruction. Vertically adjustment Slightly adjust the screws position on side panels. When the doors are flush, lock the middle screws on hinges. Horizontally adjustment Slightly adjust the screws position on doors.
Need help?
Do you have a question about the 102077-05 and is the answer not in the manual?
Questions and answers