
Related Manuals for Meubilair BAYVILLE TVS 204


Summary of Contents for Meubilair BAYVILLE TVS 204
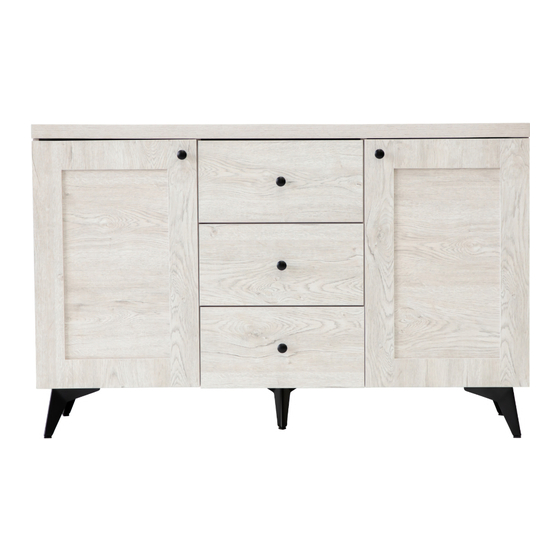
- Page 1 BAYVILLE 2 DOOR 3 DRAWER BUFFET ITEM CODE : TVS 204 FLOOR AREA 2.5M X 2.0M 1.5 HR 2 PERSON APPROXIMATE ASSEMBLY TIME REQUIRED ASSEMBLY SPACE ASSEMBLY REQUIRED ASSEMBLY TOOLS POZI SCREWDRIVER HAMMER MEASURING TAPE ASSEMBLED DIMENSIONS 1200MM 392MM 766MM 1/24...
- Page 2 BAYVILLE 2 DOOR 3 DRAWER BUFFET ITEM CODE : TVS 204 Important : Please read these instructions carefully before use and keep for future reference. ● This product is intended for domestic use only and is not designed for commercial use. ●...
- Page 3 BAYVILLE 2 DOOR 3 DRAWER BUFFET ITEM CODE : TVS 204 Tips before you start : 1. Please check that all parts are present before you start the assembly of your furniture. 2. For ease and speed of assembly, we recommend that before you commence each step of the assembly, that you Identify all the parts required for that step.
- Page 4 BAYVILLE 2 DOOR 3 DRAWER BUFFET ITEM CODE : TVS 204 Tips before you start : QUICKFIT Shoulder Tighten quickfit until shoulder is flush with panel . Do not overtighten or undertighten. CAM LOCK CORRECT WRONG When fitting cam lock , ensure starting position is correct before you insert connecting quickfit. Quickfit head should be in the center of the cam lock when the two panels are joined .
- Page 5 BAYVILLE 2 DOOR 3 DRAWER BUFFET ITEM CODE : TVS 204 DRAWER INSTALLATION GUIDE • Before you insert the drawers into the frame, please ensure that the ball bearing sliders (on the assembled unit) have been placed to the front of the main unit. If the bearings are in the middle of the slider it will be difficult to install the drawers correctly. •...
- Page 6 BAYVILLE 2 DOOR 3 DRAWER BUFFET ITEM CODE : TVS 204 NOTE: CAUTION When removing the drawer,be careful to tip up the safety release tab on the left side,and tip it down on the right side to remove the drawer from the body as shown. 6/24...
- Page 7 BAYVILLE 2 DOOR 3 DRAWER BUFFET ITEM CODE : TVS 204 PART LIST: (16) (17) (10) (10) (12) (15) (13) (15) (12) (11) (13) (14) (13) (11) (11) TOP PANEL PART NAME BOTTOM PANEL SHELF PANEL SIDE PANEL (LEFT) DRAWER (FRONT) MIDDLE BOARD (LEFT) DRAWER SIDE PANEL (LEFT) SLATS...
- Page 8 BAYVILLE 2 DOOR 3 DRAWER BUFFET ITEM CODE : TVS 204 HARDAWRE LIST C/B SCREW M3.5 x 12mm C/B SCREW M3.5 x 16mm C/B SCREW M3.5 x 20mm C/B SCREW M3.5 x 38mm x 32 C/B SCREW M4 x 45mm SCREW M10 x 12mm DOWEL Ø6 x 25mm CAM BOLT...
- Page 9 BAYVILLE 2 DOOR 3 DRAWER BUFFET ITEM CODE : TVS 204 STEP 1 Insert the Dowel (G) into the designated hole as shown. (12) = 3 PCS (13) = 3 PCS (4) = 2 PCS G x32 9/24...
- Page 10 BAYVILLE 2 DOOR 3 DRAWER BUFFET ITEM CODE : TVS 204 STEP 2 Pull out the (M) as in the illustration, then push the lever to reveal and remove the first component. Push the lever FRONT BACK FRONT BACK Pull Out Align the designated holes of the slide rail with the holes in the panel FRONT BACK...
- Page 11 BAYVILLE 2 DOOR 3 DRAWER BUFFET ITEM CODE : TVS 204 STEP 3 Lock the hardware (H) into the designated hole as shown. (11) = 3 PCS H x18 11/24...
- Page 12 BAYVILLE 2 DOOR 3 DRAWER BUFFET ITEM CODE : TVS 204 STEP 4 Fix hinge (J) to the designated hole of the door with screw (B) and tighten it. (17) (16) B x8 J x4 STEP 5 As shown in the picture, the bottom of No. 1 board faces upwards. Align the LEG (N) and screw (E) with the marked holes on the base plate and tighten.
- Page 13 BAYVILLE 2 DOOR 3 DRAWER BUFFET ITEM CODE : TVS 204 STEP 6 As shown in the picture12, 13, 15panels are fixed with screws (D) and tightened. (15) (12) (13) Tip: Keep the drawer frame on a flat surface to ensure the screws are installed straight and align the panels correctly. D x12 Note: Its important not to over-tighten screws on the drawer sides until all sides are aligned and the drawer base is inserted.
- Page 14 BAYVILLE 2 DOOR 3 DRAWER BUFFET ITEM CODE : TVS 204 STEP 8 As shown in the figure, align panels 12 and 13 with the designated holes on panels 11, insert and fix them,and then use the cam nut (I) to tighten them at 180° to the designated holes. (11) (14) (12)
- Page 15 BAYVILLE 2 DOOR 3 DRAWER BUFFET ITEM CODE : TVS 204 STEP 10 Secure the first part of the full extension rail (M2) to the panels 12 and 13 of the two drawers with screws (A) as shown. FRONT BACK (11) (13) (14)
- Page 16 BAYVILLE 2 DOOR 3 DRAWER BUFFET ITEM CODE : TVS 204 STEP 12 As shown in the figure, align the positioning pins at the bottom of No. 2, No. 3, No. 5, and No. 6 boards with the designated holes on the top of No. 1 board, and then fix the screws (E). 2 PERSON E x8 ASSEMBLY...
- Page 17 BAYVILLE 2 DOOR 3 DRAWER BUFFET ITEM CODE : TVS 204 STEP 14 As shown in the picture, align the holes at the bottom of No. 9 panel with the positioning pins of No. 2, 3, 5, and 6 panels, then put the CAM NUT (I) into the designated hole and tighten 180°.
- Page 18 BAYVILLE 2 DOOR 3 DRAWER BUFFET ITEM CODE : TVS 204 STEP 15 Place the shelf brackets (K) in the designated holes as shown. K x8 18/24...
- Page 19 BAYVILLE 2 DOOR 3 DRAWER BUFFET ITEM CODE : TVS 204 STEP 16 As shown in the picture, place the shelf (10) on the shelf support, then pull out the full pull-out slide rails to align with the first section on the drawer, and push in. (10) (10) (11)
- Page 20 BAYVILLE 2 DOOR 3 DRAWER BUFFET ITEM CODE : TVS 204 STEP 17 Align the hinge holes on the door with the holes marked on the panel as shown and tighten with screws (B). Next, screw the handle (L) into the designated hole in the door. Note: Ensure that there is a second person holding and supporting the door while the hinges are being installed to the side panel.
- Page 21 BAYVILLE 2 DOOR 3 DRAWER BUFFET ITEM CODE : TVS 204 HOW TO ADJUST YOUR HINGES AND ALIGN THE DOORS This adjustment is used if your doors are overlapping in the middle OR there is a large gap through the middle that you want to even out. Before you begin always ensure your cupboard is on a flat even surface, as rugs and carpet / uneven tiles can affect the position of the doors.
- Page 22 BAYVILLE 2 DOOR 3 DRAWER BUFFET ITEM CODE : TVS 204 This adjustment is used if your doors have a big gap at the top or the bottom, or if one door sits straight but is lower than the other door. This adjustment is used if your doors are TOO CLOSE to the main cavity.
- Page 23 BAYVILLE 2 DOOR 3 DRAWER BUFFET ITEM CODE : TVS 204 STEP 18 As shown in the picture, insert the Back Panel Connector (N) into the gap on the edge of the back panel and fix it with the screw (C). Note: It is important to correctly attach the back ply stoppers as this will help support and stabilise your item C x24 O x24...
- Page 24 BAYVILLE 2 DOOR 3 DRAWER BUFFET ITEM CODE : TVS 204 ASSEMBLY IS COMPLETE WARNING wall Serous or fatal crushing can occur from furnlture tip over, To help prevent tlp over : Use a tip over restralnts may only reduce, but will not elIminate, the risk of tip over.
-
Page 26: Warranty Certificate
You have made an excellent choice of this quality product. Our commitment to quality also includes our service. Should you, contrary to expectations, experience defects due to manufacturing faults, Meubilair Direct Imports will provide you with a warranty against defects as follows: Warranty The product is guaranteed to be free from defects in workmanship and parts for a period of 12 months from the date of purchase. -
Page 27: Brand Name
In the event of a product fault, please email the Customer Service team. Please ensure that you include the product details (as shown on the card) at hand so that we are able to respond as quickly and efficiently as possible. MEUBILAIR DIRECT IMPORTS PTY LTD Customer Service Email: cs@meubilair.com.au...
Need help?
Do you have a question about the BAYVILLE TVS 204 and is the answer not in the manual?
Questions and answers