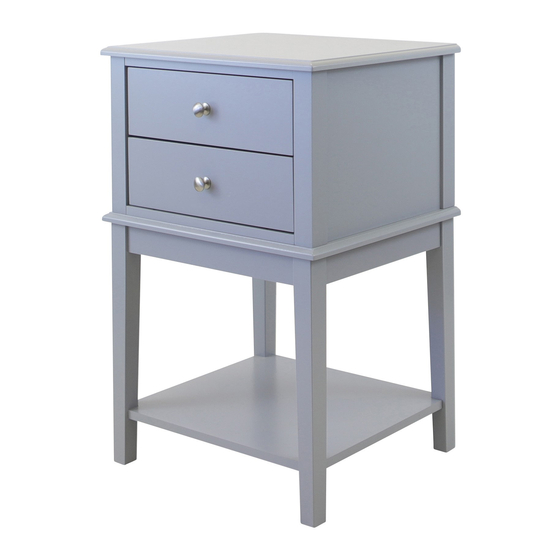
Summary of Contents for Meubilair Chloe 2 Drawer Side Table
- Page 1 Chloe 2 Drawer Side Table FLOOR AREA 45min 2M x 2M APPROXIMATE ASSEMBLY TIME 2 PERSON ASSEMBLY REQUIRED ASSEMBLY SPACE REQUIRED ASSEMBLY TOOLS PHILLIPS SCREWDRIVER Flat Head screwdriver 1 / 15...
- Page 2 Chloe 2 Drawer Side Table Tips before you start: Please check that all parts are present before you start the assembly of your furniture. For ease and speed of assembly, we recommend that before you commence each step of the assembly, that you identify all the parts required for that step.
- Page 3 Chloe 2 Drawer Side Table Tips before you start: QUICKFIT Tighten quickfit until shoulder is flush with panel. Do not overtighten or undertighten. CAM LOCK When fitting cam lock, ensure starting position is correct before you insert connecting quickfit. Quickfit head should be in the centre of the cam lock when the two panels are joined.
-
Page 4: Hardware List
Chloe 2 Drawer Side Table HARDWARE LIST (Ø8x30mm) (Ø4x25mm) (Ø3x12mm) (Ø4x35mm) (Ø6x50mm) A x 18 B x 18 C x 4 D x 20 x 24 J x 12 K x 4 (Ø4x18mm) (Ø3x16mm) (Ø6x30mm) L x 4 M x 2... - Page 5 Chloe 2 Drawer Side Table 4PCS 2PCS 2PCS 2PCS 2PCS 2PCS 2PCS 2PCS 5 / 15...
- Page 6 Chloe 2 Drawer Side Table 6 / 15...
- Page 7 Basic Kitchen Cart Chloe 2 Drawer Side Table STEP 1 Right Left 12 x E 4 x F STEP 2 STEP 2 4 x A 2 x D 7 / 15...
- Page 8 Basic Kitchen Cart Chloe 2 Drawer Side Table STEP 3 4 x B Attention! The arrow must be straight outward and face the hole! STEP 2 STEP 4 4 x C 8 / 15...
- Page 9 Basic Kitchen Cart Chloe 2 Drawer Side Table STEP 5 2 x D STEP 2 STEP 6 4 x J 9 / 15...
- Page 10 Basic Kitchen Cart Chloe 2 Drawer Side Table STEP 7 6 x A STEP 2 STEP 8 16 x D Please line up the all the slat of 7/8, make sure the frame on a flat surface before tighten the screws D.
- Page 11 Basic Kitchen Cart Chloe 2 Drawer Side Table STEP 9 4 x A STEP 2 STEP 10 2 x B Attention! The arrow must be straight outward and face the hole! 11 / 15...
- Page 12 Basic Kitchen Cart Chloe 2 Drawer Side Table STEP 11 2 x B STEP 2 STEP 12 4 x K 4 x L Attention! make sure the nut hole in position. Make sure slat 7 and 8 and legs be lined up before assemble the top.
- Page 13 Basic Kitchen Cart Chloe 2 Drawer Side Table STEP 13 6 x B STEP 2 STEP 14 8 x Q 4 x B 4 x A 13 / 15...
- Page 14 Basic Kitchen Cart Chloe 2 Drawer Side Table STEP 15 8 x J STEP 2 STEP 16 12 x E 4 x I 2 x M Left 2 x N 14 / 15...
- Page 15 Basic Kitchen Cart Chloe 2 Drawer Side Table STEP 17 4 x O 4 x P STEP 2 STEP 18 15 / 15...
-
Page 16: After Sales Support
Please provide your email address and advise the supplier, if you wish to obtain a repair and refurbished goods or parts no ce via email. AFTER SALES SUPPORT Product code: 203351V-GRY / 203351V-WHT / EMAIL : cs@meubilair.com.au 203351V-BLK... - Page 17 PRODUCT NAME: Chloe 2 Drawer Side Table BRAND NAME: PRODUCT CODE: 203351V-GRY / 203351V-WHT / 203351V-BLK NAME ADDRESS EMAIL DAYTIME TEL NO DATE OF PURCHASE SERIAL NUMBER We recommend that you a ach a photocopy of your receipt, showing the date of purchase, to this Warranty cate and kee In the event of a product fault, please email the Customer Service team.


Need help?
Do you have a question about the Chloe 2 Drawer Side Table and is the answer not in the manual?
Questions and answers