Juniper SRX5600 Quick Start Manual
Hide thumbs
Also See for SRX5600:
- Hardware manual (483 pages) ,
- Installation and initial configuration manual (205 pages) ,
- User manual (34 pages)
Advertisement
Quick Links
Removing Components from the SRX5600 Chassis Before Installing It Without a
Lift
Removing the Power Supplies Before Installing the SRX5600 Services Gateway Without
a Lift
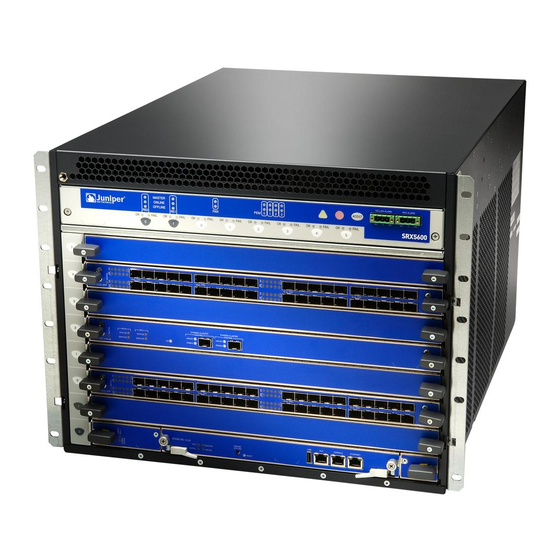
If you cannot use a mechanical lift to install the services gateway (the preferred
method), you can install it manually. Before installing the services gateway manually,
you must first remove components from the chassis, and reinstall the components
the chassis is installed in the rack. With components removed, the chassis weighs
approximately 65 lb (29 kg).
1. Removing the Power Supplies Before Installing the SRX5600 Services Gateway
Without a Lift on page 1
2. Removing the Fan Tray Before Installing an SRX5600 Services Gateway Without
a Lift on page 2
3. Removing SCBs Before Installing an SRX5600 Services Gateway Without a
Lift on page 3
4. Removing IOCs, Flex IOCs, and SPCs Before Installing an SRX5600 Services
Gateway Without a Lift on page 4
Remove the leftmost power supply first and then work your way to the right. To
remove the AC or DC power supplies for each power supply (see Figure 1):
Attach an electrostatic discharge (ESD) grounding strap to your bare wrist, and
1.
connect the strap to one of the ESD points on the chassis.
On an AC-powered services gateway, switch the AC input switch on each power
2.
supply to the off ( O ) position. On a DC-powered services gateway, Move the DC
circuit breaker on each DC power supply to the off ( O ) position.
We recommend this even though the power supplies are not connected to power
sources.
Loosen the captive screws on the bottom edge of the power supply faceplate.
3.
Pull the power supply straight out of the chassis.
4.
Removing Components from the SRX5600 Chassis Before Installing It Without a Lift
1
Advertisement

Related Manuals for Juniper SRX5600


Summary of Contents for Juniper SRX5600
- Page 1 1. Removing the Power Supplies Before Installing the SRX5600 Services Gateway Without a Lift on page 1 2. Removing the Fan Tray Before Installing an SRX5600 Services Gateway Without a Lift on page 2 3. Removing SCBs Before Installing an SRX5600 Services Gateway Without a Lift on page 3 4.
- Page 2 Figure 1: Removing a Power Supply Before Installing the Router Removing the Fan Tray Before Installing an SRX5600 Services Gateway Without a Lift To remove the fan tray (see Figure 2 ): Attach an electrostatic discharge (ESD) grounding strap to your bare wrist, and connect the strap to one of the ESD points on the chassis.
- Page 3 Figure 2: Removing the Fan Tray Removing SCBs Before Installing an SRX5600 Services Gateway Without a Lift To remove the SCBs (see Figure 3): Place an electrostatic bag or antistatic mat on a flat, stable surface. Attach an electrostatic discharge (ESD) grounding strap to your bare wrist, and connect the strap to one of the ESD points on the chassis.
- Page 4 CAUTION: Do not leave a fiber-optic transceiver uncovered except when inserting or removing cable. The safety cap keeps the port clean and prevents accidental exposure to laser light. Removing IOCs, Flex IOCs, and SPCs Before Installing an SRX5600 Services Gateway Without a Lift...
- Page 5 Preventing Electrostatic Discharge Damage to the SRX5600 Services Gateway Installing the SRX5600 Services Gateway Chassis in the Rack Manually Reinstalling Components in the SRX5600 Services Gateway Chassis After Installing It Without a Lift Removing IOCs, Flex IOCs, and SPCs Before Installing an SRX5600 Services Gateway Without a Lift...
- Page 6 Installing the SRX5600 Services Gateway Mounting Hardware for a Rack or Cabinet Moving the Mounting Brackets for Center-Mounting the SRX5600 Services Gateway Published: 2009-11-03 Removing IOCs, Flex IOCs, and SPCs Before Installing an SRX5600 Services Gateway Without a Lift...
Need help?
Do you have a question about the SRX5600 and is the answer not in the manual?
Questions and answers