
Related Manuals for Makita XRU13


Summary of Contents for Makita XRU13
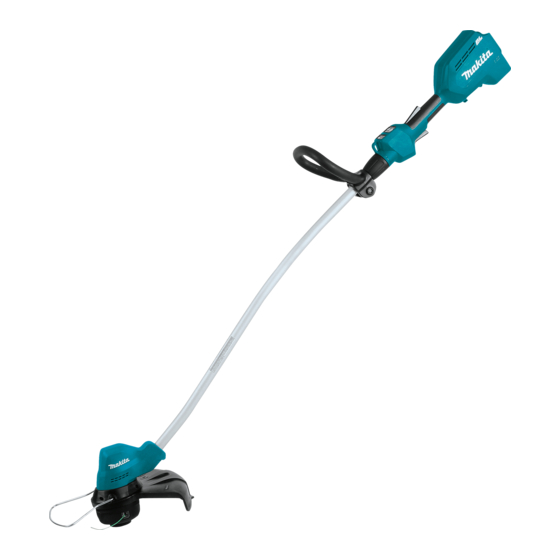
- Page 1 INSTRUCTION MANUAL MANUAL DE INSTRUCCIONES Cordless Grass Trimmer Cortador Inalámbrico de Pasto XRU13 IMPORTANT: Read Before Using. IMPORTANTE: Lea antes de usar.
-
Page 2: Specifications
ENGLISH (Original instructions) SPECIFICATIONS Model: XRU13 No load speed 4,000/5,000/6,000 /min (without cutting tool) Overall length 1,510 - 1,610 mm (without cutting tool) (59-1/2″ - 63-1/2″) Nylon cord diameter 2.0 - 2.3 mm (0.08″ - 0.09″) Applicable cutting tool and... - Page 3 10. Don't overreach. Keep proper footing and balance at all times. Stay Alert - Watch what you are doing. Use common sense. Do not operate appliance when you are tired. 12. Store idle appliances indoors. 13. Keep fingers away from switch trigger when not operating the tool and when moving from one operating position to another.
- Page 4 Starting up the tool Should the nylon cutting head hit stones or other hard objects, immediately switch off the motor and inspect the nylon cutting head. Before commencing cutting, the nylon cutting head must have reached full working speed. 10. During operation always hold the tool with both hands.
- Page 5 Use of non-genuine Makita batteries, or batteries that have been altered, may result in the battery bursting causing fires, personal injury and damage. It will also void the Makita warranty for the Makita tool and Important safety instructions for charger.
-
Page 6: Parts Description
PARTS DESCRIPTION Battery cartridge Lock-off lever Switch trigger Speed indicator Auto speed control Power lamp Main power button Reverse button indicator Hanger Lock sleeve Handle Protector (cutting tool guard) Shoulder harness FUNCTIONAL DESCRIPTION WARNING: Always be sure that the tool is switched off and the battery cartridge is removed before adjusting or checking function on the tool. -
Page 7: Overload Protection
Indicating the remaining battery CAUTION: Always install the battery cartridge capacity fully until the red indicator cannot be seen. If not, it may accidentally fall out of the tool, causing injury to you or someone around you. Only for battery cartridges with the indicator CAUTION: Do not install the battery cartridge forcibly. - Page 8 Indicator Mode Rotation speed Auto 4,000 - 6,000 min High 6,000 min Medium 5,000 min ► 1. Main power button 4,000 min To prevent the switch trigger from being accidentally pulled, a lock-off lever is provided. To start the tool, grasp the handle (the lock-off lever is released by the grasp) and then pull the switch trigger.
-
Page 9: Nylon Cutting Head
Nylon cutting head ASSEMBLY Optional accessory WARNING: Always be sure that the tool is NOTICE: The bump feed will not operate properly if switched off and battery cartridge is removed the head is not rotating. before carrying out any work on the tool. Failure to switch off and remove the battery cartridge may result in serious personal injury from accidental start-up. - Page 10 Be sure to remove the hex wrench after installation. NOTICE: Be sure to use genuine Makita nylon cutting head. To reduce the risk damaging the objects in front of the cutting head, insert the wire guard so that it controls the cutting range of the mowing line.
-
Page 11: Operation
OPERATION Correct handling of tool WARNING: Always position the tool on your right-hand side. Correct positioning of the tool allows for maximum control and will reduce the risk of seri- ous personal injury caused by kickback. WARNING: Be extremely careful to maintain control of the tool at all times. -
Page 12: Maintenance
Detachment Press on the housing latches inward to lift off the cover, then remove the spool. The buckle is provided with a means of quick release. Simply squeeze the sides of the buckle to release the tool. ► 1. Latch 2. Cover Prepare approximately 3 m (9 ft) of new nylon ►... -
Page 13: Troubleshooting
Before asking for repairs, conduct your own inspection first. If you find a problem that is not explained in the manual, do not attempt to dismantle the tool. Instead, ask Makita Authorized Service Centers, always using Makita replace- ment parts for repairs. -
Page 14: Optional Accessories
CAUTION: These accessories or attachments are recommended for use with your Makita tool specified in this manual. The use of any other accessories or attachments might present a risk of injury to persons. Only use accessory or attachment for its stated purpose. -
Page 15: Especificaciones
ESPAÑOL (Instrucciones originales) ESPECIFICACIONES Modelo: XRU13 Velocidad sin carga 4 000 r/min/5 000 r/min/6 000 r/min (sin la herramienta de corte) Longitud total 1 510 mm - 1 610 mm (sin la herramienta de corte) (59-1/2″″ - 63-1/2″) Diámetro del cordón de nailon 2,0 mm - 2,3 mm (0,08″″... - Page 16 Desconecte la batería de la desbrozadora antes Use gafas de seguridad. El visor del casco (o gafas de hacer cualquier ajuste, cambiar accesorios o protectoras como alternativa) protege la cara de los almacenar la herramienta. Tales medidas de segu- residuos y piedras que salgan proyectados. Use ridad preventivas reducirán el riesgo de que la des- siempre gafas protectoras o visor para evitar lesio- brozadora sea puesta en marcha accidentalmente.
- Page 17 No deseche la(s) batería(s) donde haya fuego. Asegúrese de que no haya cables eléctricos, La celda podría explotar. Consulte los códigos tubos de agua, tubos de gas, etc. que pudieran locales para ver si hay instrucciones especiales representar un peligro en caso de ser dañados relativas al desecho.
- Page 18 19. Tome un descanso para evitar la pérdida de ADVERTENCIA: El uso de este producto puede control a causa de la fatiga. Recomendamos producir polvo que contenga sustancias químicas tomar de 10 minutos a 20 minutos de descanso que podrían causar enfermedades respiratorias o cada hora.
-
Page 19: Descripción De Las Piezas
Asimismo, esto inva- nes peligrosos. lidará la garantía de Makita para la herramienta y el Para el trasporte comercial, por ej., mediante cargador Makita. terceros o agentes de transporte, se deben tomar en cuenta los requisitos especiales relativos al Consejos para alargar al máximo... -
Page 20: Descripción Del Funcionamiento
Sistema de protección para la DESCRIPCIÓN DEL herramienta/batería FUNCIONAMIENTO La herramienta está equipada con un sistema de pro- tección de la herramienta/batería. Este sistema corta ADVERTENCIA: Asegúrese siempre de que en forma automática el suministro de energía al motor la herramienta esté apagada y que el cartucho para prolongar la vida útil de la herramienta y la batería. - Page 21 Indicación de la capacidad restante PRECAUCIÓN: Nunca coloque su dedo en el de la batería interruptor cuando transporte la herramienta. La herramienta podría ponerse en marcha accidental- mente y ocasionar una lesión. Únicamente para cartuchos de batería con el indicador Para encender la herramienta, mantenga oprimido el botón de encendido principal durante algunos segundos.
- Page 22 Ajuste de velocidad Puede ajustar la velocidad de la herramienta pulsando el botón de encendido principal. Cada vez que toque el botón de encendido principal, el nivel de velocidad cambiará. ► 1. Botón de inversión NOTA: Durante la rotación inversa, la herramienta sólo funcionará...
-
Page 23: Instalación Del Mango
Ajuste de la longitud del eje Instalación del mango Coloque el mango en el eje y asegúrelo con el perno y ADVERTENCIA: Antes de ajustar la longitud la perilla. del eje, suelte el gatillo interruptor y retire el car- tucho de batería de la herramienta. El no soltar el gatillo y retirar el cartucho de batería puede ocasio- nar lesiones personales. - Page 24 El uso de una herra- mienta de corte dañada podría ocasionar lesiones personales graves. PRECAUCIÓN: Asegúrese de retirar la llave hexagonal después de la instalación. AVISO: Asegúrese de utilizar un cabezal de corte de nailon original de Makita. 24 ESPAÑOL...
-
Page 25: Operación
OPERACIÓN Manipulación correcta de la herramienta ADVERTENCIA: Siempre coloque la herramienta de su lado derecho. El correcto posicionamiento de la herra- mienta permite un máximo control y reducirá el riesgo de lesiones personales graves a causa de un retroceso brusco. ADVERTENCIA: Sea extremadamente cuida- doso en mantener el control de la herramienta en... -
Page 26: Mantenimiento
Desprendimiento Presione los pestillos de la carcasa hacia adentro para levantar la cubierta y luego retire el carrete. La hebilla se proporciona con un medio de liberación rápida. Simplemente apriete los lados de la hebilla y ésta se desprenderá de la herramienta. ►... -
Page 27: Resolución De Problemas
Antes de solicitar alguna reparación, primero realice una inspección por su cuenta. Si detecta algún problema que no esté explicado en el manual, no intente desensamblar la herramienta. En vez de esto, solicite la reparación a un centro de servicio autorizado de Makita, usando siempre piezas de repuesto Makita. Estado de la anomalía Causa probable (avería) -
Page 28: Accesorios Opcionales
PRECAUCIÓN: Estos accesorios o aditamen- tos están recomendados para utilizarse con su herramienta Makita especificada en este manual. El empleo de cualquier otro accesorio o aditamento puede conllevar el riesgo de lesiones personales. Utilice los accesorios o aditamentos solamente para su fin establecido. - Page 32 Makita Corporation 3-11-8, Sumiyoshi-cho, 885634A945 Anjo, Aichi 446-8502 Japan XRU13-1 EN, ESMX 20171106 www.makita.com...
Need help?
Do you have a question about the XRU13 and is the answer not in the manual?
Questions and answers