Table of Contents
Advertisement
Quick Links
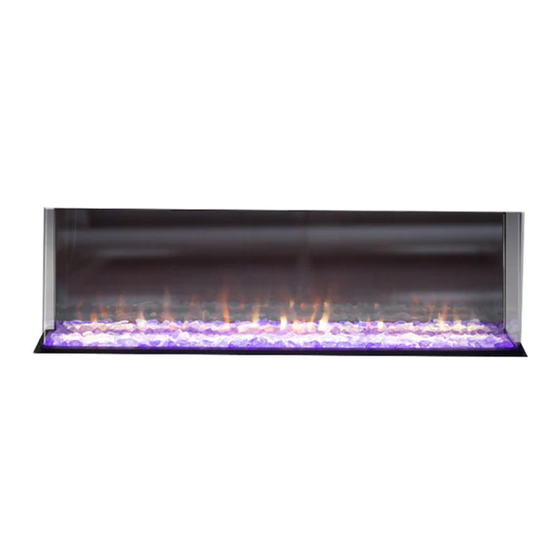
FULLY RECESSED ELECTRIC FIREPLACE
WARNING
READ AND UNDERSTAND THIS ENTIRE OWNER'S MANUAL, INCLUDING ALL SAFETY
INFORMATION, BEFORE PLUGGING IN OR USING THIS PRODUCT. FAILURE TO DO
SO COULD RESULT IN FIRE, ELECTRIC SHOCK, OR SERIOUS PERSONAL INJURY.
CAUTION
KEEP THIS OWNER'S MANUAL FOR FUTURE REFERENCE. IF YOU SELL OR GIVE
THIS PRODUCT AWAY, MAKE SURE THIS MANUAL ACCOMPANIES THIS PRODUCT.
30" Built-in Electric Fireplace
USER MANUAL
Multi 49
49" BUILT-IN ELECTRIC FIREPLACE
AC 120V 60Hz 1500W
Model#: Square 30
OWNER'S MANUAL
AC 120V 60Hz 1500W
ambefireplaces.com
Dimension
25"
24 1/4"
635mm
616mm
630612_
1
Advertisement
Table of Contents

Subscribe to Our Youtube Channel
Related Manuals for ambe Multi 49


Summary of Contents for ambe Multi 49
- Page 1 USER MANUAL Multi 49 49" BUILT-IN ELECTRIC FIREPLACE FULLY RECESSED ELECTRIC FIREPLACE AC 120V 60Hz 1500W Model#: Square 30 OWNER’S MANUAL Dimension WARNING READ AND UNDERSTAND THIS ENTIRE OWNER’S MANUAL, INCLUDING ALL SAFETY INFORMATION, BEFORE PLUGGING IN OR USING THIS PRODUCT. FAILURE TO DO SO COULD RESULT IN FIRE, ELECTRIC SHOCK, OR SERIOUS PERSONAL INJURY.
-
Page 2: Important Safety Information
DO NOT use on soft surfaces, like a bed, bathrooms. where openings may become blocked. ͳ Risk of electric shock- DO NOT OPEN! ͳ DO NOT place clothing or other No user-serviceable parts inside. AMBE USER MANUAL - MULTI 49... - Page 3 ͳ NEVER modify this fireplace. Doing ͳ This fireplace is tested and listed for so could result in personal injury or use only with the accessories listed in property damage. Modification of this this manual. Use of other accessories fireplace completely voids all warranties. not specifically tested for this appliance could void the warranty and/or result in ͳ...
- Page 4 For support, inquiries and contact information visit www.ambefireplaces.com Postal Address: Escea North America LLC, 522 W RIVERSIDE AVE, STE N SPOKANE, WA, 99201-0580 UNITED STATES...
-
Page 5: Table Of Contents
TABLE OF CONTENTS Important Safety Information Dimensions Preparation dware Installation an A d ssembly Installation for 3-Sided Viewing Installation for Front and Right-Sided Viewing Installation for Front and Left-Sided Viewing Decorative Crystal and Pebble Installation Operation Car an d Maintenance Troubleshooting 630612_... -
Page 6: Dimensions
Parts and Hardware E - Decorative Dark Crystals D - Decorative Dark Crystals and assembly steps are grouped for free-standing or wall-hanging use. Check the AMBE USER MANUAL - MULTI 49 A – Fireplace (big) (small) sure nothing is missing. -
Page 7: Preparation
This product includes a GLASS panel! Always use extreme glass. Failure to do so could result in personal injury or property damag materials properly. Front View glass. Failure to do so could result in personal injury or prope Side View Front View Please recycle whenever possible. -
Page 8: Installation An A D Ssembly
I - Logs are grouped for free-standing or wall-hanging use. Check the parts list to make Dispose of packaging AMBE USER MANUAL - MULTI 49 ever possible. following tools (not included): Phillips screwdriver; stud finder; level; tape l; 1/4” wood drill bit, hammer. -
Page 9: Installation For 3-Sided Viewing
relocating. the TWO screws as shown below and take off the black glass fascia with care. warnings about safe nt, safe installation, and e of this product. s Fascia Installation INSTALLATION FOR 3-SIDED VIEWING ass Fascia Installation e the TWO screws as shown below and take off the black glass fascia with care. The fireplace is fixed with fending bars and panels on the left and right side. - Page 10 wall opening. Fix the FOUR wall screws in each side of the Fix back the fending bars after the panels are removed. ace into the wall opening. Fix the FOUR wall screws in each side of the 3. Install the fireplace into the wall opening. Fix the FOUR wall screws in each side of the fireplace box.
- Page 11 6. Make an opening for the fireplace with the sizes shown. Insert the fireplace into the wall opening. Drive the mounting screws into the brackets and the wall studs. Plug in and check if the fireplace works properly. If so, move on to next step. 630612_ 1...
- Page 12 8. Cover the glass panel with protective plastic bag and install plywood or drywall. 9. Decorate the plywood or drywall with glazed tile, wallpaper, etc. AMBE USER MANUAL - MULTI 49...
-
Page 13: Installation For Front And Right-Sided Viewing
ameless Kit Installation Frameless Kit Installation 1. Remove the TWO screws as shown in the below picture and take off the INSTALLATION FOR FRONT AND RIGHT-SIDE VIEWING Frameless Kit Installation black glass fascia with care. To view the fireplace from front and right side, you need to take off the fending panel on 1. - Page 14 4. Place the left, right, top, and bottom trims on the appliance and fix the part using the 4. Place the left, right, top, and bottom trims on the appliance and fix the part using the screws provided in the kit. screws provided in the kit. AMBE USER MANUAL - MULTI 49...
- Page 15 5. Put the appliance into the wall opening and fix it with the screws provided. 5. Put the appliance into the wall opening and fix it with the screws provided. 5. Put the appliance into the wall opening and fix it with the screws provided. Fix the brackets with the screws in the previous step.
- Page 16 Plug in and check if the fireplace works properly. If so, move on to next step. Cover the glass panel with protective plastic bag and install plywood or drywall. AMBE USER MANUAL - MULTI 49...
- Page 17 9. Decorate the plywood or drywall with glazed tile, wallpaper, etc. 630612_ 1...
-
Page 18: Installation For Front And Left-Sided Viewing
To view the fireplace from front and left side, you need to take off the fending panel on the left side and keep the right side close to a wall. Remove the 7 screws on the left side. Take off the fending bar and panel. AMBE USER MANUAL - MULTI 49... - Page 19 Fix back the fending bar after the panel is removed. Remove the screws from the fireplace as shown in the picture below. 630612_ 1...
- Page 20 Fix the brackets with the screws in the previous step. Make an opening for the fireplace with the sizes shown. AMBE USER MANUAL - MULTI 49...
- Page 21 Insert the fireplace into the wall opening. Drive the mounting screws into the brackets and the wall studs. Plug in and check if the fireplace works properly. If so, move on to next step. Cover the glass panel with protective plastic bag and install plywood or drywall.
- Page 22 9. Decorate the plywood or drywall with glazed tile, wallpaper, etc. AMBE USER MANUAL - MULTI 49...
-
Page 23: Decorative Crystal And Pebble Installation
DECORATIVE CRYSTAL AND PEBBLE INSTALLATION 1. Use the screw driver to take off the 4 screws. Have two people take out the glass panel and move it to a clean area taking care to avoid scratching. 630612_... - Page 24 3. Place the decorative crystals or pebbles on the media tray. Apply an even layer from side to side. After placing the decorative crystals or pebble, fasten screws back on the glass panel. AMBE USER MANUAL - MULTI 49...
-
Page 25: Operation
” wood drill bit, hammer. ass. Failure to do so could result in personal injury or This product includes a GLA not included): Phillips screwdriver; stud finder; level; tape dware udes a GLASS panel! Always use extreme caution when handling glass. - Page 26 H2 - High heat LO - Heater button can be locked or unlocked by holding the Heater button for 5 seconds Controls the timer. Timer Settings: 00 30min 1h 2h 3h 4h 5h 6h 7h 8h AMBE USER MANUAL - MULTI 49...
- Page 27 BUTTON FUNCTION ACTION & INDICATION Controls the temperature. Temperature Settings: 640F [180C] 760F [240C] 660F [190C] 780F [250C] 680F [200C] 800F [260C] 700F [210C] 820F [270C] 720F [220C] and OFF 740F [230C] Note: To change temperature format from Fahrenheit to Celsius or vice versa, press and hold the temperature button for 5 seconds.
- Page 28 This remote control uses one CR2025 battery (included). ͳ NEVER DISPOSE OF BATTERIES IN FIRE. FAILURE TO OBSERVE THIS PRECAUTION MAY RESULT IN AN EXPLOSION. DISPOSE OF BATTERIES AT YOUR LOCAL HAZARDOUS MATERIAL PROCESSING CENTER. AMBE USER MANUAL - MULTI 49...
-
Page 29: Car An E D Maintenance
CARE AND MAINTENANCE Cleaning ALWAYS TURN THE FIREPLACE OFF AND UNPLUG THE POWER CORD FROM THE OUTLET BEFORE CLEANING, PERFORMING MAINTENANCE, OR MOVING THIS FIREPLACE. FAILURE TO DO SO COULD RESULT IN ELECTRIC SHOCK, FIRE, OR PERSONAL INJURY. NEVER IMMERSE IN WATER OR SPRAY WITH WATER. DOING SO COULD RESULT IN ELECTRIC SHOCK, FIRE, OR PERSONAL INJURY. - Page 30 When replacing old appliances with new ones, the retailer is legally obligated to take back your old appliance for disposals at least free of charge. AMBE USER MANUAL - MULTI 49...
-
Page 31: Troubleshooting
TROUBLESHOOTING WARNING DISCONNECT THE APPLIANCE COMPLETELY AND LET COOL PRIOR TO ANY SERVICE. ONLY A QUALIFIED SERVICE PERSON SHOULD SERVICE AND REPAIR THIS ELECTRIC APPLIANCE. PROBLEM POSSIBLE CAUSE SOLUTION 1. Fireplace turns 1. Fireplace has 1. Reset switch by turning main power off and will not overheated and safety switch off and waiting 10 minutes then... - Page 32 PLEASE REMEMBER TO ALWAYS HAVE THE UNIT DISCONNECTED PRIOR TO ANY WORK, ALWAYS LAY GLASS AS WELL AS THE UNIT ON A TOWEL OR OTHER MATERIAL NOT TO DAMAGE PARTS/FRAME. THIS ENTIRE PROCESS SHOULD NOT TAKE LONGER THAN 20-30 MINUTES AMBE USER MANUAL - MULTI 49...
- Page 36 ambefireplaces.com...
Need help?
Do you have a question about the Multi 49 and is the answer not in the manual?
Questions and answers