
Subscribe to Our Youtube Channel
Related Manuals for Hawking HWREG1


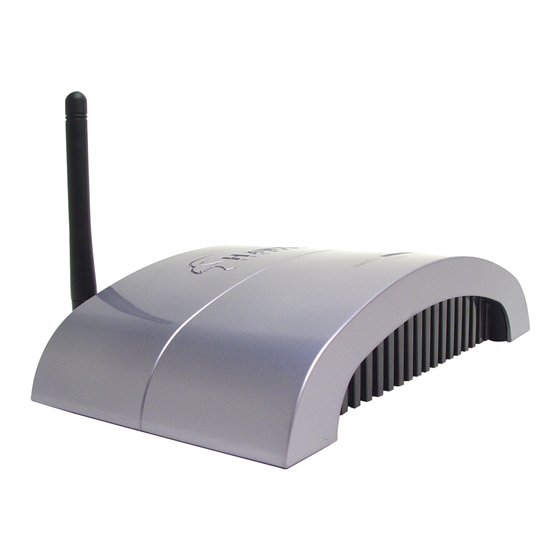
Summary of Contents for Hawking HWREG1
- Page 5 POWER UP After you have correctly connected your Range Extender to an available Ethernet port on your Network, please power on the Extender and a PC that is also on the netw ork.. INSERT THE SETUP CD (Mac Use rs skip this section and view the Mac setup page in the next section) Find the Setup-CD in your package and insert it into your CD-Rom drive of the PC you wish to configure the Extender from.
- Page 6 Once the Setup Wizard has loaded you will need to select your device from a list of HWREG1 devices in your network. If nothing appears in the box, double check all your connections and click on “ Refresh.” Once the Wizard has detected your device click “Next”...
- Page 7 Range Extender (for advanced settings). ASSIGN AN IP ADDRESS TO YOUR RANGE EXTENDER To successfully communicate to the HWREG1, an IP Address must be assigned to the unit. If you are on a network with a router that distributes IP Address automatically (DHCP) you have the option to automatically configure the IP Address.
- Page 8 SELECT A WIRELESS NETWORK TO EXTEND This section lets you scan for networks within the wireless vicinity of your Range Extender. Click the SCAN button to display the networks in your area. Highlight the network that you wish to extend. (Based on the SSID of your original network) Click NEXT when you are finished.
- Page 9 STATUS This screen displays the results of your settings. Please save this information somewhere secure for future use. You will need to enter the IP address in your web-browser for future configurations. Click SET to confirm these settings and continue. You may now skip the next section (Mac Users Setup) of this Installation Guide and continue to Step 4: Position the Range Extender.
- Page 10 Open your Web-Browser and type Hit Enter. A login page should appear: User Name: admin Password: Select the Basic Settings Tab and fill in the information within the page according to the diagram. Click Apply to confirm the settings. http://192.168.1.235 into your web address bar.
- Page 11 - Select either your Airport or Built-in Ethernet to configure the IP - Select Using DHCP Configuration and enter the information below and click apply. For more advanced settings of the HWREG1 refer the Users Manual. (Most Common) (IP Address of your network router)
- Page 12 1) After you have completely configured your Range Extender you can disconnect the Ethernet cable that connects the Extender to your network or PC for configuration. 2) Take the Range Extender and Power Adapter and place the Extender in a location half way between your original Access Point and the area that you are extending your wireless coverage to.
- Page 13 Gateway: 192.168.0.1 Once these values match you should be able to pull up the Web Menu. 2) I Can’t Connect to the Wireless Repeater or the Internet Make sure that all your settings are correct on the Range Extender. Remember that the Original SSID must match the SSID of your original network.
- Page 14 Ethernet: A networking standard using cables (Category 5) to create a network. Network Adapter: Also known as a NIC (Network Interface Card). Used to provide PC’s or laptops with an Ethernet port or wireless access to the network. Broadband Modem: A device that allows broadband connection to the internet. Broadband connections include speeds faster than 56k (dial up modem speed).
Need help?
Do you have a question about the HWREG1 and is the answer not in the manual?
Questions and answers