Hawking HWUR54G User Manual
Wireless-g range extender
Hide thumbs
Also See for HWUR54G:
- Specification sheet (2 pages) ,
- Product tutorial (1 page) ,
- Quick installation manual (13 pages)
Table of Contents
Advertisement
Quick Links
Advertisement
Table of Contents

Related Manuals for Hawking HWUR54G


Summary of Contents for Hawking HWUR54G
-
Page 2: Limited Warranty
If the product proves defective during this two-year warranty period, call Hawking Customer Service in order to obtain a Return Authorization number. Warranty is for repair or replacement only. Hawking Technology does not issue any refunds. BE SURE TO HAVE YOUR PROOF OF PURCHASE. RETURN REQUESTS CAN NOT BE PROCESSED WITHOUT PROOF OF PURCHASE. -
Page 3: Table Of Contents
Contents Chapter 1: Introduction ……………………………………. 3 1.1 Package Contents……………………………… 5 1.2 Features………………………………………... 5 1.3 Specifications…………………………………... 5 1.4 Physical Description…………………………… 7 Chapter 2: Plan Your Wireless Network…………………… 9 Chapter 3: Connecting the Range Extender……………….. 11 Chapter 4: Configuring the Range Extender ……………… 12 4.1 Setup Wizard……………………….……... -
Page 4: Chapter 1: Introduction
The HWUR54G solves the compatibility issues that exist in other brands of wireless repeaters. With the Universal Support feature, setup of the HWUR54G is simple. All that is required is the name of your wireless network. -
Page 5: Package Contents
1.1 Package Contents The HWUR54G includes the following items: One HWUR54G Range Extender One Power Adapter One Quick Installation Guide One Setup CD (Hawking WiFi Locator Software Included) One Dipole Antenna 1.2 Features Complies with the IEEE 802.11g/b wireless standards. - Page 6 Band) Antenna: External detachable dipole antenna (with RP-SMA connector) Connectors: 10/100Mbps RJ-45 x 1 Power: 12VDC, 0.5A Transmit Power: 16dBm (Typical) LEDs: Power, LAN Link/Activity, Wireless Activity Dimension: 30(H) x 127(W) x 87(D) mm Temperature: Operating: 32~131°F (0~55°C) Storage: -4~158°F(-20~70°C) Humidity: 10-90% (Noncondensing)
-
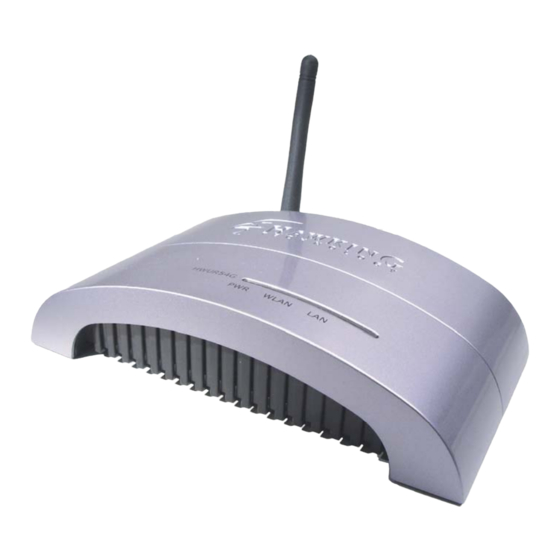
Page 7: Physical Description
1.4 Physical Description Front Panel Located on the HWUR54G’s front panel are LED status lights that inform you of the unit’s current status. Below is an explanation of each LED. - Page 8 Front LED Panel Color Status Power Green Wireless Green Flash Activity Green Link/Activity Flash Back Panel Connectors 1 Antenna Connector This round connection has a standard Reverse SMA connector where any Reverse SMA-compatible antenna can be connected to the Access Point. 2 DC Adapter Port Insert the power jack of the power adapter into this port.
- Page 9 keeping your original configurations intact. 2) If problems continue to persist or you have forgotten your password, pressing the reset button for more than 5 seconds will reset the device back to its factory default settings. (Warning: your original configurations will be replaced with the factory default settings).
-
Page 10: Chapter 2: Plan Your Wireless Network
Chapter 2: Plan Your Wireless Network Before you begin configuring your HWUR54G Wireless Range Extender, it is important that you determine where it fits within your wireless network. A wireless network consists of computers (Desktops or Laptops) with wireless network adapters installed. Computers within a wireless network are connected with a local wireless access point that handles all wireless communications between the computers and the internet. -
Page 11: Chapter 3: Connecting The Range Extender
Chapter 3: Connecting the Range Extender... - Page 12 You may also connect the HWUR54G to an open LAN port on your network. After you have finished configuring your Range Extender (the following steps will help you configure your Range Extender) you must disconnect it from your network or...
-
Page 13: Setup Wizard
Chapter 4: Configuring the Range Extender 4-1 Ensure that your Range Extender is powered on and correctly connected to your PC. (Note: If you are a more advanced user or you are using a Macintosh computer and wish to skip the Setup Wizard you may do so and use the default IP of the Range Extender to access the Web Based User Interface. -
Page 14: Selecting The Device
-In the Setup Menu select SETUP WIZARD using your mouse. 4-2 Selecting the Device -In the empty field you should see the name of the Hawking Range Extender. If you do not, click the REFRESH button to rescan for the Extender. -
Page 15: Assign An Ip Address
4-3 Assign an IP Address to the Range Extender This section allows you to define the specific IP address of your Wireless Range Extender. Please be sure to save the IP address you choose for your Range Extender for future use. You can assign an IP to your Wireless Range Extender using two options: 1: If your network uses DHCP and automatically assigns an IP address to new devices, please select this option (recommended) -
Page 16: Details And Status
4-4 Details and Status This page will display the IP address information of your Wireless Range Extender. Write this information down and save it in a safe place. You will need it to make any adjustments to the configuration settings in the future. -
Page 17: Setup Menu
4-5 SETUP MENU Before you use the Web Based Configuration Panel you must enter the default login information. User Name: admin Password: You can change the login information in the ADMIN menu of the Configuration Panel. 1234... -
Page 18: Parameter Description
Parameter Original SSID SSID of Extender Mode Broadcast SSID Channel Security Advanced setting Access Filter Click Apply button at the bottom of the screen to save the above configurations. You can now configure other advance sections or start using the Access Point. Description You must enter the SSID of the wireless access point that you wish to repeater. -
Page 19: Security Settings
4-6 SECURITY SETTINGS Parameter WEP Length Mode Passphrase Key 1 - Key 4 Default TX Key Click Apply button at the bottom of the screen to save the above configurations. You can now configure other advance sections or start using the Access Point. Description WEP-64: input 10-digit Hex values (in the “A-F”, “a-f”... -
Page 20: Advanced Setings
4-7 ADVANCED SETINGS Parameter Beacon Interval (20-1000) RTS Threshold (256-2432) DTIM Period (1-255) Protection Mode Transmit Rate Preamble Type Description The period of time that this access point broadcast a beacon. Beacon is used to synchronize the wireless network. When the packet size is smaller the RTS threshold, the access point will not use the RTS/CTS mechanism to send this packet. -
Page 21: Access Filtering
Access Point. ACCESS FILTERING The HWUR54G allows you to provide a Filter List of MAC addresses that are allowed/denied access associated with this Extender. Auto select: It will auto switch to the more suitable method. - Page 22 Parameter MAC Filtering Filter Mode Filter List Click Apply button at the bottom of the screen to save the above configurations. You can now configure other advance sections or start using the Access Point. Description You can enable or disable the MAC Filtering function. If you select “Only deny PCs with MAC listed below to access this device”, then all the PCs in the list will be denied to access and all other PCs will be allowed to access.
-
Page 23: Chapter 5: Status Screen
Chapter 5: STATUS SCREEN The Status Screen displays the current Ethernet and Wireless settings of the Wireless Range Extender. Parameter Ethernet Wireless Description It shows the default IP address, Subnet Mask, Gateway and Link status information. It shows the current Wireless information. -
Page 24: Chapter 6: Admin Screen
Chapter 6: ADMIN SCREEN Parameter FW Version FW Upgrade New Password Reconfirm Password Click Apply button at the bottom of the screen to save the above configurations. You can now configure other advance sections or start using the Access Point. Description It shows current FW version. -
Page 25: Chapter 7: Lan Screen
Chapter 7: LAN SCREEN Parameter Device Name Automatic IP Fixed IP Click Apply button at the bottom of the screen to save the above configurations. You can now configure other advance sections or start using the Access Point. Description It shows current name of the device. Selecting this option is not advised unless you have direct access to the device that provides the IP address. -
Page 26: Chapter 8: Finding The Right Location
Chapter 8: FINDING THE RIGHT LOCATION – PLACING THE WIRELESS RANGE EXTENDER WITHIN YOUR NETWORK 1) After you have completely configured your Range Extender you can disconnect the Ethernet cable that connects the Extender to your network or PC for configuration. 2) Take the Range Extender and Power Adapter and place the Extender in a location half way between your original Access Point and the area that you are extending your wireless coverage to. -
Page 27: What Is Essid
Chapter 9: TROUBLESHOOTING This chapter provides solutions to problems usually encountered during the installation and operation of the Access Point. 1. How do I manually find the PC’s IP and MAC Address? 1) In Windows, open the Command Prompt program 2) Type Ipconfig /all and Enter Your PC’s IP address is the one entitled IP address Your PC’s MAC Address is the one entitled Physical Address... - Page 28 5. What is WEP? WEP stands for Wired Equivalent Privacy, a data privacy mechanism based on a 64(40)-bit shared key algorithm. 6. What is a MAC Address? The Media Access Control (MAC) address is a unique number assigned by the manufacturer to any Ethernet networking device, such network adapter, that allows the network level.
- Page 29 Channel: 6 SSID of Range Extender: (any SSID other than HawkingAP) LAN IP: 192.168.1.x (any number other than 2) SUBNET: 255.255.255.0 GATEWAY: 192.168.1.2 After you have matched the settings check if you can connect to th internet through the Wireless Range Extender. If you still cannot acces the internet please contact our technical support department using th number below.
Need help?
Do you have a question about the HWUR54G and is the answer not in the manual?
Questions and answers