
Related Manuals for Hawking HW7ACW


Summary of Contents for Hawking HW7ACW
- Page 1 Wireless-AC Multifunction Extender HW7ACW website www.hawkingtech.com USER’S MANUAL e-mail techsupport@hawkingtech.com © COPYRIGHT 2015 HAWKING TECHNOLOGIES,INC. ALL RIGHTS RESERVED.
- Page 2 COPYRIGHT Copyright ©2015 by Hawking Technologies. All rights reserved. No part of this publication may be reproduced, transmitted, transcribed, stored in a retrieval system, or translated into any language or computer language, in any form or by any means, electronic, mechanical, magnetic, optical,...
- Page 3 Federal Communication Commission Interference Statement FCC Part 15 This equipment has been tested and found to comply with the limits for a Class B digital device, pursuant to Part 15 of FCC Rules. These limits are designed to provide reasonable protection against harmful interference in a residential installation.
- Page 4 This device complies with Part 15 of the FCC Rules. Operation is subject to the following two conditions: (1) this device may not cause harmful interference, and (2) this device must accept any interference received, including interference that may cause undesired operation. Any changes or modifications not expressly approved by the party responsible for compliance could void the authority to operate equipment.
- Page 5 R&TTE Compliance Statement This equipment complies with all the requirements of DIRECTIVE 1999/5/EC OF THE EUROPEAN PARLIAMENT AND THE COUNCIL of March 9, 1999 on radio equipment and telecommunication terminal Equipment and the mutual recognition of their conformity (R&TTE). The R&TTE Directive repeals and replaces in the directive 98/13/EEC (Telecommunications Terminal Equipment and Satellite Earth Station Equipment) As of April 8, 2000.
-
Page 6: Table Of Contents
Table of Contents Chapter I: Product Information ..............1 1-1 Introduction and safety information ..............1 1-2 Definition of Supported Modes ................3 1-3 Safety Information ....................4 1-4 System Requirements .................... 5 1-5 Package Contents ....................6 1-6 Product Overview ....................7 CHAPTER II: Repeater Mode ............... - Page 7 3-2-4 Wireless Access Control ................74 3-2-5 Advanced Wireless Settings ..............77 3-2-6 Wi-Fi Protected Setup (WPS) ..............81 3-3 Status ........................84 3-4 Configuration Tools .................... 85 3-5 Firmware Upgrade ....................87 3-6 System Reset....................... 89 CHAPTER IV: Access Point Mode ............90 4-1 AP mode Quick Installation Guide ..............
-
Page 8: Chapter I: Product Information
Thank you for purchasing the HW7ACW Wireless-AC Multifunction Extender! The ultra-compact design and built-in power adapter allows you to install this HW7ACW everywhere, and still provide excellent network performance to extend the Wi-Fi signal and wireless coverage. Other features of this Multi-Function HW7ACW: ... - Page 9 WPS (Wi-Fi Protected Setup) hardware button for easy installation and secure wireless security.
-
Page 10: Definition Of Supported Modes
It will not broadcast any Wireless signal. It will only make a wireless connection between the Access Point and the HW7ACW and allow devices that are only wired to connect to the wireless network. -
Page 11: Safety Information
Also, do not leave this Wireless HW7ACW in the car in summer. 3. Do not allow children to put any parts of this wireless HW7ACW in their mouths. It could cause serious injury or could be fatal. If they throw this wireless HW7ACW, it will be damaged. -
Page 12: System Requirements
1-4 System Requirements Computer or network device(s) with wired or wireless network interface card. Web browser (Microsoft Internet Explorer 4.0 or above, Netscape Navigator 4.7 or above, Opera web browser, Mozilla Firefox web browser or Safari web browser). ... -
Page 13: Package Contents
1-5 Package Contents Before you start to use this Wireless HW7ACW, please check if there’s anything missing in the package. If so, please contact your place of purchase to claim missing items: 1x - Wireless-AC Multifunction Extender 1x - Quick Installation Guide... -
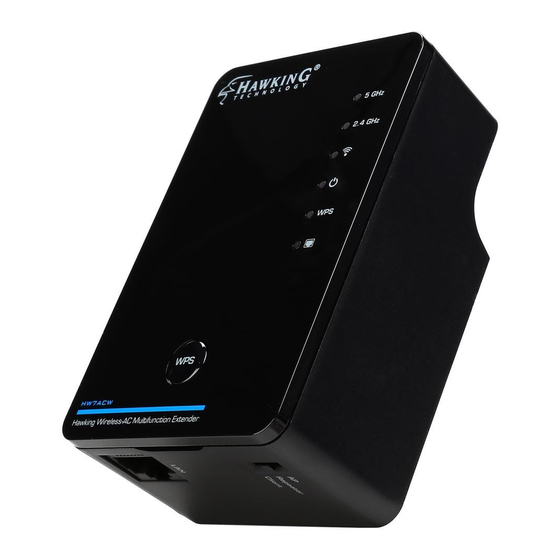
Page 14: Product Overview
1-6 Product Overview Interface Descriptions Item Item Name Description Mode switch You can switch the operation mode by this switch. The HW7ACW supports 3 modes: AP mode, Repeater mode and Bridge-Client mode. LAN port One 10/100Mbps Ethernet LAN Port with Auto-MDI/MDI-X. - Page 15 1. One click to start WPS function (Both button 2.4Ghz and 5Ghz) 2. Hold the button 10 seconds to reset all the values to the factory default. LED Definitions Color LED Status Description Steady ON 1. Good signal (RSSI 100%~50%) Signal 1.
- Page 16 3. Quick blinking (RSSI <25%) 1. No signal/ or LED off mode. Wireless function is active (transferring Blinking WLAN or receiving data) Status Green Wireless network is switched off/ or LED off mode. Steady ON 1. Power is turned on 1.
-
Page 18: Chapter Ii: Repeater Mode
After the installation is done and wireless connection is made, you can move this HW7ACW to the place you wish to use it at. Note that in repeater mode, this device acts like a wireless relay and should be placed at a midpoint so it can grab a signal from your router and then rebroadcast it to your extended location. - Page 19 Insert this device into a power outlet in the wall. You should see ‘Power’ LED light up in a few seconds. If not, please check if the power outlet you’re using is working. There are two ways to set this up: You can build wireless connection via ‘Hardware WPS button’...
-
Page 20: Hardware Wps Button Setup
2-1-1 Hardware WPS button setup (1) Press and hold WPS button on HW7ACW for 2 seconds, ‘WPS’ LED will start flashing. WPS button... - Page 21 WPS LED (2) Press WPS button on the wireless broadband router or access point you wish to connect within 2 minutes. NOTE: this WPS button position on access point is an example. Different devices may have different WPS button position.
- Page 22 TIP: If the access point you wish to connect does not have hardware WPS button, you can also use its web configuration menu’s WPS function to establish connection. You can also login to this HW7ACW’s web UI and do the setup there. (Refer to 2-1-2) (3) If WPS connection is successfully established, ‘WPS’...
- Page 23 Signal LED (4) Please move the Wireless HW7ACW to the place you wish to use it (the best place would be a midpoint between your router and your wireless devices so the HW7ACW can relay the signal). You can check the ‘Signal’ LED status to understand signal reception level.
-
Page 24: Repeater Web Based Setup
2-1-2 Repeater Web Based Setup Before you can connect to the HW7ACW and start configuration procedures, your computer must be able to get an IP address automatically (use dynamic IP address). If it’s set to use a static IP address, please refer to ‘Chapter V: Appendix, 5-1 Configuring TCP/IP on PC’... - Page 25 (3) Once you are logged in, the HW7ACW setup page will appear.
- Page 26 (4) By default, the first page will allow you to choose a 2.4GHz network you want to connect. If you do not want to repeat a 2.4GHz network, you can click skip on the bottom of the page. Select your network and click ‘Next’...
- Page 27 (6) The next page will allow you to choose a 5GHz network you want to connect. If you do not want to repeat a 5GHz network, you can click skip on the bottom of the page. Select your network and click ‘Next’ (7) If your network is a secure network, a password field will be prompted.
- Page 28 Click Next to continue if you wish to repeat a 5GHz signal. (8) By default, the HW7ACW will use the same SSID as your Home Wireless Network. If you wish to use a different name, you can uncheck the box and type in your own SSID.
- Page 29 Note2: After configuration, you can access the settings page at any time using ‘http://repeater.setup’ from any computer that is wirelessly or directly connected to the HW7ACW. From other devices on the network,you must use the IP address of the HW7ACW.
-
Page 30: General Setup
2-2-1 System Change password Default password of the HW7ACW is ‘1234’, and it’s displayed on the login prompt when accessed from the web browser. There’s a security risk if you don’t change the default password, since everyone can see it at the prompt. - Page 31 Current Please input current password here. Password (1): New Password (2): Please input new password here. Confirm Please input new password here again. Password (3): If the password you typed in ‘New Password’ (2) and ‘Confirm Password’ (3) field are not the same, you’ll see the following message: Please retype the new password again when you see above message.
- Page 32 If you see the following message: It means the content in ‘Current Password’ field is wrong, please click ‘OK’ to go back to previous menu, and try to input current password again. If the current and new passwords are correctly entered, after you click ‘Apply’, you’ll be prompted to input your new password: Please use new password to enter web management interface again, and you should be able to login with new password.
-
Page 33: Local Network
2-2-2 Local Network Before all computers using wired Ethernet connection can communicate with each other and access Internet, they must have a valid IP address. There are two ways to assign IP addresses to computers: static IP address (set the IP address for every computer manually), and dynamic IP address (IP address of computers will be assigned by access point automatically. - Page 34 Suggestions on IP Address numbering plan: If you have no idea on how to define an IP address plan for your network, here are some suggestions. 1. A valid IP address has 4 fields: a.b.c.d, for most of home and company users, it’s suggested to use 192.168.c.d, where c is an integer between 0 and 254, and d is an integer between 1 and 254.
- Page 35 Use the Following IP (2):Please input the IP address you wish to use Address Subnet Mask (3): Please input your subnet mask address for the network. Default Gateway (4): Please input your default gateway for the network Recommended Value if you don’t know what to fill: IP Address: 192.168.1.241 Subnet Mask: 255.255.255.0 Gateway Address: (leave it blank)
-
Page 36: Wireless Configuration
Domain Name (5): If you wish, you can also optionally input the domain name for your network. This is optional. Lease Time (6): Please choose a lease time (the duration that every computer can keep a specific IP address) of every IP address assigned by this access point from dropdown menu. -
Page 37: Security Settings
SSID (3): This is the name of wireless network that the HW7ACW will broadcast. Channel (4): This is the wireless channel that the HW7ACW will broadcast at. Please make sure it is the same channel of the existing network you hope to repeat. - Page 38 Disable wireless security When you select this mode, data encryption is disabled. Use this option only when there is no security set up on the original Wireless Signal. WEP - Wired Equivalent Privacy When you select this mode, the wireless access point will use WEP encryption, and the following setup menu will be shown on your web browser: Key Length (2):...
- Page 39 characters. Default Tx Key (4): This device only supports one WEP Key ‘Key 1’. Encryption Key (5) Input WEP key characters here, the number of characters must be the same as the number displayed at ‘Key Format’ field. You can use any alphanumerical characters (0-9, a-z, and A-Z) if you select ‘ASCII’...
- Page 40 Please click ‘Go Back’ to go back to previous setup menu, or click ‘Apply’ to reboot the access point so the settings will take effect. Please wait 30-60 seconds for the access point to reboot. Wi-Fi Protected Access (WPA): When you select this mode, the wireless access point will use WPA encryption, and the following setup menu will be shown on your web browser: WPA Unicast...
- Page 41 Please click ‘Go Back’ to go back to previous setup menu, or click ‘Apply’ to reboot the access point so the settings will take effect. Please wait 30-60 seconds for the access point to reboot. NOTE: Some wireless clients (especially those manufactured before year 2003) only support WEP or WPA (TKIP) cipher.
-
Page 42: Wireless Access Control
2-2-4 Wireless Access Control This function will help you prevent unauthorized users from connecting to your wireless access point; only those wireless devices who have a MAC address you assigned can gain access to your wireless access point. Use this function with other security measures described in previous section, to create a safer wireless environment. - Page 43 All allowed MAC addresses will be displayed in ‘MAC Address Filtering Table. Enable Wireless To enforce MAC address filtering, you have to check Access Control (1): ‘Enable Wireless Access Control’. When this item is unchecked, wireless access point will not enforce MAC address filtering of wireless clients.
- Page 44 here, please click ‘Delete All’ button. After you finish with all settings, please click ‘Apply’ (8) button and the following message will be displayed on your web browser: Please click ‘Go Back’ to go back to previous setup menu, or click ‘Apply’ to reboot the access point so the settings will take effect.
-
Page 45: Advanced Wireless Settings
2-2-5 Advanced Wireless Settings This bridge provides some advanced control of wireless parameters, if you want to configure these settings, please click ‘General Setup’ at the top of web management interface and click ‘Advanced Settings’ on the left hand column. Fragment Threshold(1): Set the Fragment threshold of wireless radio. - Page 46 RTS Threshold(2): Set the RTS threshold of wireless radio. Do not modify the default value if you do not understand the function, default value is ‘2347’. Beacon Interval(3): Set the beacon interval of wireless radio. Do not modify the default value if you do not understand the function, default value is ‘100’.
- Page 47 signal collisions between 802.11b and 802.11g/n wireless access points. It is recommended to set this option to ‘Auto’ or ‘Always’. However, if you set to ‘None’, your wireless access point should be able to function properly. Transmit Power(11): You can set the output power of wireless radio. Unless you are using this wireless access point in a large open space, you may not have to set output power to 100%.
- Page 48 Please click ‘Go Back’ to go back to previous setup menu; to continue on access point setup, or click ‘Apply’ to reboot the access point so the settings will take effect. Please wait 30-60 seconds for the access point to reboot.
-
Page 49: Wi-Fi Protected Setup (Wps)
2-2-6 Wi-Fi Protected Setup (WPS) Wi-Fi Protected Setup (WPS) is the simplest way to build connection between wireless network clients and this wireless access point. You don’t have to select an encryption mode and input a long encryption passphrase every time when you need to set up a wireless client, you only have to press a button on the wireless client and this wireless access point, and the WPS will automatically configure for you. - Page 50 Enable WPS (1) Check this box to enable WPS function, uncheck it to disable WPS. WPS Information (2) WPS Status: If the wireless security (encryption) function of this wireless access point is properly set, you’ll see ‘Configured’ message here. If wireless security function has not been set, you’ll see ‘Not configured’.
- Page 51 SSID: The SSID of this wireless access point will be displayed here. Authentication Mode: The wireless security authentication mode of this wireless access point will be displayed here. If you do not enable security function of the wireless access point before WPS is activated, the access point will auto set the security to WPA (AES) and generate a set passphrase key for WPS connection.
-
Page 52: Status
2-3 Status The status and information of the HW7ACW will be displayed here. Click on the status tab on the top of web page. You should see the screen looks like this (the contents will vary depending on your current firmware):... -
Page 53: Configuration Tools
2-4 Configuration Tools You can back up all configurations of this access point to a file, so you can make several cops of the HW7ACW’s configuration for security reason. To backup or restore the HW7ACW’s configuration, please follow the instructions: Please click ‘Tools’... - Page 54 ‘Upload’ to transfer the configuration file to access point. After the configuration is uploaded, the access point’s configuration will be replaced by the file you just uploaded. Restore to Click this button to remove all settings you made, and Factory Default (3): restore the configuration of this access point back to factory default settings.
-
Page 55: Firmware Upgrade
2-5 Firmware Upgrade The system software used by this access point is known as ‘firmware’, just like any applications on your computer, when you replace the old application with a new one; your computer will be equipped with new function. You can also use this firmware upgrade function to add new functions to your access point, even fix the bugs of this access point. - Page 56 Click ‘Browse’ button, and you’ll be prompted to provide the filename of the firmware upgrade file. Please download the latest firmware file from the Hawking Technologies website at www.hawkingtech.com, and use it to upgrade your access point. After a firmware upgrade file is selected, click ‘Apply’ button, and the access point will start firmware upgrade procedure automatically.
-
Page 57: System Reset
2-6 System Reset If you think you network performance is bad, or you find the behavior of the access point is strange, you can perform a access point reset. Sometimes it will solve the problem. Please click ‘Tools’ menu at the top of web management interface, and then click ‘Reset on the left hand column. -
Page 58: Chapter Iii: Bridge Mode
CHAPTER III: Bridge Mode Client mode can let your networking device have wireless capability; it will become your device’s wireless network card. You can connect this device to an Ethernet port on a TV or DVD player or game console device with Ethernet cable. - Page 59 NOTE: You must set your networking device as DHCP client (obtain IP automatically from DHCP server) You can build wireless connection via ‘Hardware WPS button’ or ‘Software web browser’. If your wireless router or access point supports ‘WPS’, we recommend you use the WPS button to establish connection.
-
Page 60: Hardware Wps Button Setup
3-1-1 Hardware WPS button setup (1) Press and hold WPS button on the HW7ACW for 2 seconds. The ‘WPS’ LED will start flashing. WPS button... - Page 61 WPS LED (2) Press the WPS button on the wireless broadband router or access point you wish to connect within 2 minutes.
- Page 62 TIP: If the access point you wish to connect does not have hardware WPS button, you can also use its web configuration menu’s WPS function to establish connection. You can also log into the HW7ACW’s web UI to do a quick setup. (refer. to section 3-1-2) (3) If WPS connection is successfully established, the ‘WPS’...
- Page 63 NOTE: If the Signal LED is off, it means the location is out of range of your wireless broadband router or access point. Please move this HW7ACW closer to the wireless signal until the HW7ACW can receive signal from broadband router and bridge the signal.
-
Page 64: Client Bridge Web Based Setup
IP address. (1) Use an Ethernet cable to connect your computer’s Ethernet port and HW7ACW’s Ethernet port. (2) Open a web browser and it should automatically redirect to the setup page. However, if it does not, you can type ‘http://repeater.setup’ in address bar. - Page 65 (3) Once you are logged in, the HW7ACW setup page will appear. (4) Click on “Select Site Survey” to choose the wireless network you wish to bridge to.
- Page 66 Note2: After configuration, you can access the settings page at any time using ‘http://repeater.setup’ from any computer that is wirelessly or directly connected to the HW7ACW. From other devices on the network, they must use the IP address of the HW7ACW.
- Page 67 (6) After you have selected your wireless network and clicked apply, if your wireless network you hope to bridge has wireless security, the next page will prompt you to enter in your security key. Please make sure you type in the exact key as the wireless network. If you are unsure what your key is, please contact the wireless router/access point’s manufacturer or your network adminsitrator.
- Page 68 (8) The last page wil be a summary of your settings. If everything is correct, click ‘Finish’ and the HW7ACW will then proceed to reboot and restart. (9) After reboot complete, you can close the web browser to finish this quick setup.
-
Page 69: General Setup
3-2-1 System Change password Default password of the HW7ACW is ‘1234’, and it’s displayed on the login prompt when accessed from the web browser. There’s a security risk if you don’t change the default password, since everyone can see it at the prompt. - Page 70 Current Please input current password here. Password (1): New Password (2): Please input new password here. Confirm Please input new password here again. Password (3): If the password you typed in ‘New Password’ (2) and ‘Confirm Password’ (3) field are not the same, you’ll see the following message: Please retype the new password again when you see above message.
- Page 71 If you see the following message: It means the content in ‘Current Password’ field is wrong, please click ‘OK’ to go back to previous menu, and try to input current password again. If the current and new passwords are correctly entered, after you click ‘Apply’, you’ll be prompted to input your new password: Please use new password to enter web management interface again, and you should be able to login with new password.
-
Page 72: Local Network
3-2-2 Local Network Before all computers using wired Ethernet connection can communicate with each other and access Internet, they must have a valid IP address. There are two ways to assign IP addresses to computers: static IP address (set the IP address for every computer manually), and dynamic IP address (IP address of computers will be assigned by access point automatically. - Page 73 Suggestions on IP Address numbering plan: If you have no idea on how to define an IP address plan for your network, here are some suggestions. 5. A valid IP address has 4 fields: a.b.c.d, for most of home and company users, it’s suggested to use 192.168.c.d, where c is an integer between 0 and 254, and d is an integer between 1 and 254.
- Page 74 Use the Following IP (2):Please input the IP address you wish to use Address Subnet Mask (3): Please input your subnet mask address for the network. Default Gateway (4): Please input your default gateway for the network Recommended Value if you don’t know what to fill: IP Address: 192.168.1.241 Subnet Mask: 255.255.255.0 Gateway Address: (leave it blank)
-
Page 75: Wireless Configuration
Domain Name (5): If you wish, you can also optionally input the domain name for your network. This is optional. Lease Time (6): Please choose a lease time (the duration that every computer can keep a specific IP address) of every IP address assigned by this access point from dropdown menu. -
Page 76: Security Settings
SSID (3): This is the name of wireless network that the HW7ACW will connect to. You can choose either the 2.4GHz signal OR the 5GHz signal when setting in client mode. Channel (4): This is the wireless channel of the network the HW7ACW is connecting to. - Page 77 Disable wireless security When you select this mode, data encryption is disabled. Use this option only when there is no security set up on the original Wireless Signal. WEP - Wired Equivalent Privacy When you select this mode, the wireless access point will use WEP encryption, and the following setup menu will be shown on your web browser: Key Length (2):...
- Page 78 characters. Default Tx Key (4): This device only supports one WEP Key ‘Key 1’. Encryption Key (5) Input WEP key characters here, the number of characters must be the same as the number displayed at ‘Key Format’ field. You can use any alphanumerical characters (0-9, a-z, and A-Z) if you select ‘ASCII’...
- Page 79 Please click ‘Go Back’ to go back to previous setup menu, or click ‘Apply’ to reboot the access point so the settings will take effect. Please wait 30-60 seconds for the access point to reboot. Wi-Fi Protected Access (WPA): When you select this mode, the wireless access point will use WPA encryption, and the following setup menu will be shown on your web browser: WPA Unicast...
- Page 80 Please click ‘Go Back’ to go back to previous setup menu, or click ‘Apply’ to reboot the access point so the settings will take effect. Please wait 30-60 seconds for the access point to reboot. NOTE: Some wireless clients (especially those manufactured before year 2003) only support WEP or WPA (TKIP) cipher.
-
Page 81: Wireless Access Control
3-2-4 Wireless Access Control This function will help you prevent unauthorized users from connecting to your wireless access point; only those wireless devices who have a MAC address you assigned can gain access to your wireless access point. Use this function with other security measures described in previous section, to create a safer wireless environment. - Page 82 All allowed MAC addresses will be displayed in ‘MAC Address Filtering Table. Enable Wireless To enforce MAC address filtering, you have to check Access Control (1): ‘Enable Wireless Access Control’. When this item is unchecked, wireless access point will not enforce MAC address filtering of wireless clients.
- Page 83 here, please click ‘Delete All’ button. After you finish with all settings, please click ‘Apply’ (8) button and the following message will be displayed on your web browser: Please click ‘Go Back’ to go back to previous setup menu, or click ‘Apply’ to reboot the access point so the settings will take effect.
-
Page 84: Advanced Wireless Settings
3-2-5 Advanced Wireless Settings This bridge provides some advanced control of wireless parameters, if you want to configure these settings, please click ‘General Setup’ at the top of web management interface and click ‘Advanced Settings’ on the left hand column. Fragment Threshold(1): Set the Fragment threshold of wireless radio. - Page 85 RTS Threshold(2): Set the RTS threshold of wireless radio. Do not modify the default value if you do not understand the function, default value is ‘2347’. Beacon Interval(3): Set the beacon interval of wireless radio. Do not modify the default value if you do not understand the function, default value is ‘100’.
- Page 86 signal collisions between 802.11b and 802.11g/n wireless access points. It is recommended to set this option to ‘Auto’ or ‘Always’. However, if you set to ‘None’, your wireless access point should be able to function properly. Transmit Power(11): You can set the output power of wireless radio. Unless you are using this wireless access point in a large open space, you may not have to set output power to 100%.
- Page 87 Please click ‘Go Back’ to go back to previous setup menu; to continue on access point setup, or click ‘Apply’ to reboot the access point so the settings will take effect. Please wait 30-60 seconds for the access point to reboot.
-
Page 88: Wi-Fi Protected Setup (Wps)
3-2-6 Wi-Fi Protected Setup (WPS) Wi-Fi Protected Setup (WPS) is the simplest way to build connection between wireless network clients and this wireless access point. You don’t have to select an encryption mode and input a long encryption passphrase every time when you need to set up a wireless client, you only have to press a button on the wireless client and this wireless access point, and the WPS will automatically configure for you. - Page 89 Enable WPS (1) Check this box to enable WPS function, uncheck it to disable WPS. WPS Information (2) WPS Status: If the wireless security (encryption) function of this wireless access point is properly set, you’ll see ‘Configured’ message here. If wireless security function has not been set, you’ll see ‘Not configured’.
- Page 90 SSID: The SSID of this wireless access point will be displayed here. Authentication Mode: The wireless security authentication mode of this wireless access point will be displayed here. If you do not enable security function of the wireless access point before WPS is activated, the access point will auto set the security to WPA (AES) and generate a set passphrase key for WPS connection.
-
Page 91: Status
3-3 Status The status and information of the HW7ACW will be displayed here. Click on the status tab on the top of web page. You should see the screen looks like this (the contents will vary depending on your current firmware):... -
Page 92: Configuration Tools
3-4 Configuration Tools You can back up all configurations of this access point to a file, so you can make several cops of the HW7ACW’s configuration for security reason. To backup or restore the HW7ACW’s configuration, please follow the instructions: Please click ‘Tools’... - Page 93 ‘Upload’ to transfer the configuration file to access point. After the configuration is uploaded, the access point’s configuration will be replaced by the file you just uploaded. Restore to Click this button to remove all settings you made, and Factory Default (3): restore the configuration of this access point back to factory default settings.
-
Page 94: Firmware Upgrade
3-5 Firmware Upgrade The system software used by this access point is known as ‘firmware’, just like any applications on your computer, when you replace the old application with a new one; your computer will be equipped with new function. You can also use this firmware upgrade function to add new functions to your access point, even fix the bugs of this access point. - Page 95 Click ‘Browse’ button, and you’ll be prompted to provide the filename of the firmware upgrade file. Please download the latest firmware file from the Hawking Technologies website at www.hawkingtech.com, and use it to upgrade your access point. After a firmware upgrade file is selected, click ‘Apply’ button, and the access point will start firmware upgrade procedure automatically.
-
Page 96: System Reset
3-6 System Reset If you think you network performance is bad, or you find the behavior of the access point is strange, you can perform a access point reset. Sometimes it will solve the problem. Please click ‘Tools’ menu at the top of web management interface, and then click ‘Reset on the left hand column. -
Page 97: Chapter Iv: Access Point Mode
CHAPTER IV: Access Point Mode You can build a wireless networking environment for home or small office, please switch this device to wireless access point mode and connect it to your wired router. Then your wireless client users can access internet by wirelessly connecting to this AP without wired cable burden. - Page 98 web browser’. If your wireless router or access point supports ‘WPS’, we recommend you use the WPS button to establish connection. It is the fast and secure way without computer. Using WPS button - please go to section 4-1-1 Using Web browser - please go to section 4-1-2...
-
Page 99: Hardware Wps Button Setup
4-1-1 Hardware WPS button setup (1) Press WPS button twice on the HW7ACW, ‘WPS’ LED will start flashing. WPS button... -
Page 100: Wps Button
WPS LED (2) Press WPS button on the wireless client you wish to connect within 2 minutes. WPS button NOTE: this WPS button position on wireless client is for example. Different device may have different WPS button position. TIP: If your wireless client card does not have hardware WPS button, you can also use its web configuration menu’s WPS function to establish connection. - Page 101 2 minutes until ‘WPS’ LED goes off, and try from step (1) again. WPS LED When quick installation is successfully done, the ‘Wireless LED will turn (4) Connect the HW7ACW to the ADSL modem, wired router, or switch/hub in your network through the LAN port by Ethernet cable.
-
Page 102: Access Point Web Based Setup
4-1-2 Access Point Web Based Setup Before you can connect to the HW7ACW and start configuration procedures, your computer must be able to get an IP address automatically (use dynamic IP address). If it’s set to use a static IP address, please refer to ‘Chapter V: Appendix, 5-1 Configuring TCP/IP on PC’... - Page 103 ‘1234’. Click ‘OK’ button to continue. (3) Once you are logged in, the HW7ACW setup page will appear.
- Page 104 (4) Under the Quick Setup, Basic Settings, please input a wireless name you wish to use for the HW7ACW. Default 2.4GHz Wireless Name is “Hawking_HW7ACW_2.4GHz” Default 5GHz Wireless Name is “Hawking_HW7ACW_5GHz” You can keep the channels by default unless you wish to change it.
- Page 105 Note2: After configuration, you can access the settings page at any time using ‘http://repeater.setup’ from any computer that is wirelessly or directly connected to the HW7ACW. From other devices on the network, they must use the IP address of the HW7ACW.
- Page 106 Hex (64 Hex Characters), and input key characters in ‘KEY’ field. (6) A summary page should appear. Check to make sure everything is in order and then click ‘Apply’ and the HW7ACW will then proceed to reboot and restart.
-
Page 108: General Setup
4-3 General Setup In this chapter, you’ll know how to change the major settings of the HW7ACW. Log onto the device and click on ‘General Setup’. -
Page 109: System
4-3-1 System Change password Default password of the HW7ACW is ‘1234’, and it’s displayed on the login prompt when accessed from the web browser. There’s a security risk if you don’t change the default password, since everyone can see it at the prompt. - Page 110 Confirm Please input new password here again. Password (3): If the password you typed in ‘New Password’ (2) and ‘Confirm Password’ (3) field are not the same, you’ll see the following message: Please retype the new password again when you see above message. If you see the following message: It means the content in ‘Current Password’...
-
Page 111: Local Network
Please use new password to enter web management interface again, and you should be able to login with new password. 4-3-2 Local Network Before all computers using wired Ethernet connection can communicate with each other and access Internet, they must have a valid IP address. There are two ways to assign IP addresses to computers: static IP address (set the IP address for every computer manually), and dynamic IP address (IP address of computers will be assigned by access point automatically. - Page 112 Suggestions on IP Address numbering plan: If you have no idea on how to define an IP address plan for your network, here are some suggestions. 9. A valid IP address has 4 fields: a.b.c.d, for most of home and company users, it’s suggested to use 192.168.c.d, where c is an integer between 0 and 254, and d is an integer between 1 and 254.
- Page 113 Use the Following IP (2):Please input the IP address you wish to use Address Subnet Mask (3): Please input your subnet mask address for the network. Default Gateway (4): Please input your default gateway for the network Recommended Value if you don’t know what to fill: IP Address: 192.168.1.242 (in AP and Bridge modes) Subnet Mask: 255.255.255.0 Gateway Address: (leave it blank)
-
Page 114: Wireless Configuration
Domain Name (5): If you wish, you can also optionally input the domain name for your network. This is optional. Lease Time (6): Please choose a lease time (the duration that every computer can keep a specific IP address) of every IP address assigned by this access point from dropdown menu. -
Page 115: Security Settings
SSID (3): This is the name of wireless network that the HW7ACW will connect to. You can choose either the 2.4GHz signal OR the 5GHz signal when setting in client mode. Channel (4): This is the wireless channel of the network the HW7ACW is connecting to. - Page 116 Disable wireless security When you select this mode, data encryption is disabled. Use this option only when there is no security set up on the original Wireless Signal. WEP - Wired Equivalent Privacy When you select this mode, the wireless access point will use WEP encryption, and the following setup menu will be shown on your web browser: Key Length (2):...
- Page 117 characters. Default Tx Key (4): This device only supports one WEP Key ‘Key 1’. Encryption Key (5) Input WEP key characters here, the number of characters must be the same as the number displayed at ‘Key Format’ field. You can use any alphanumerical characters (0-9, a-z, and A-Z) if you select ‘ASCII’...
- Page 118 Please click ‘Go Back’ to go back to previous setup menu, or click ‘Apply’ to reboot the access point so the settings will take effect. Please wait 30-60 seconds for the access point to reboot. Wi-Fi Protected Access (WPA): When you select this mode, the wireless access point will use WPA encryption, and the following setup menu will be shown on your web browser: WPA Unicast...
-
Page 119: Security Tips For Wireless Network
Please click ‘Go Back’ to go back to previous setup menu, or click ‘Apply’ to reboot the access point so the settings will take effect. Please wait 30-60 seconds for the access point to reboot. NOTE: Some wireless clients (especially those manufactured before year 2003) only support WEP or WPA (TKIP) cipher. - Page 120 MAC address.
-
Page 121: Status
4-3 Status The status and information of the HW7ACW will be displayed here. Click on the status tab on the top of web page. You should see the screen looks like this (the contents will vary depending on your current firmware):... -
Page 122: Configuration Tools
4-4 Configuration Tools You can back up all configurations of this access point to a file, so you can make several cops of the HW7ACW’s configuration for security reason. To backup or restore the HW7ACW’s configuration, please follow the instructions: Please click ‘Tools’... - Page 123 ‘Upload’ to transfer the configuration file to access point. After the configuration is uploaded, the access point’s configuration will be replaced by the file you just uploaded. Restore to Click this button to remove all settings you made, and Factory Default (3): restore the configuration of this access point back to factory default settings.
-
Page 124: Firmware Upgrade
4-5 Firmware Upgrade The system software used by this access point is known as ‘firmware’, just like any applications on your computer, when you replace the old application with a new one; your computer will be equipped with new function. You can also use this firmware upgrade function to add new functions to your access point, even fix the bugs of this access point. - Page 125 Click ‘Browse’ button, and you’ll be prompted to provide the filename of the firmware upgrade file. Please download the latest firmware file from the Hawking Technologies website at www.hawkingtech.com, and use it to upgrade your access point. After a firmware upgrade file is selected, click ‘Apply’ button, and the access point will start firmware upgrade procedure automatically.
-
Page 126: System Reset
4-6 System Reset If you think you network performance is bad, or you find the behavior of the access point is strange, you can perform a access point reset. Sometimes it will solve the problem. Please click ‘Tools’ menu at the top of web management interface, and then click ‘Reset on the left hand column. -
Page 127: Chapter V: Appendix
Chapter V: Appendix 5-1 Configuring TCP/IP on PC 5-1-1 Windows XP IP address setup 1. Click ‘Start’ button (it should be located at lower-left corner of your computer), then click control panel. Double-click Network and Internet Connections icon, click Network Connections, and then double-click Local Area Connection, Local Area Connection Status window will appear, and then click ‘Properties’... - Page 128 2. Select ‘Obtain an IP address automatically’ and ‘Obtain DNS server address automatically’, then click ‘OK’.
-
Page 129: Windows Vista/7/8 Ip Address Setup
5-1-2 Windows Vista/7/8 IP address setup 1. Click ‘Start’ button (it should be located at lower-left corner of your computer), then click control panel. Click View Network Status and Tasks, and then click Manage Network Connections. Right-click Local Area Network, then select ‘Properties’. Local Area Connection Properties window will appear, select ‘Internet Protocol Version 4 (TCP / IPv4), and then click ‘Properties’... - Page 130 2. Select ‘Obtain an IP address automatically’ and ‘Obtain DNS server address automatically’, then click ‘OK’.
-
Page 131: Mac Os X Ip Address Setup
5-1-3 Mac OS X IP Address Setup 1) Go to your system preferences, go to network. Make sure next to “Configure”, you have it set under “Using DHCP”... -
Page 132: Specification
5-2 Specification SoC + RF: MTK MT7620A + 7610E Flash: 4MB DDR2 RAM: 32MB LAN Port: 10/100M UTP Port x 1 Power: 5VDC, 1.2A Switching Power Module Inside Temperature: 32~104°F (0 ~ 40°C) Humidity: 10-90% (NonCondensing) -
Page 133: Glossary
5-3 Glossary 1. What is the IEEE 802.11g standard? 802.11g is the new IEEE standard for high-speed wireless LAN communications that provides for up to 54 Mbps data rate in the 2.4 GHz band. 802.11g is quickly becoming the next mainstream wireless LAN technology for the home, office and public networks. - Page 134 Wireless LAN card, Connected as an independent wireless LAN. Ad hoc wireless LAN is applicable at a departmental scale for a branch or SOHO operation. 5. What is Infrastructure? An integrated wireless and wireless and wired LAN is called an Infrastructure configuration.
- Page 135 WLAN features two-fold protection in security. On the hardware side, as with Direct Sequence Spread Spectrum technology, it has the inherent security feature of scrambling. On the software side, WLAN series offer the encryption function (WEP) to enhance security and Access Control.
- Page 136 Configuration) and PIN code.
Need help?
Do you have a question about the HW7ACW and is the answer not in the manual?
Questions and answers