Chapters
Table of Contents

Subscribe to Our Youtube Channel
Related Manuals for Rohde & Schwarz NRP-Z21


Summary of Contents for Rohde & Schwarz NRP-Z21
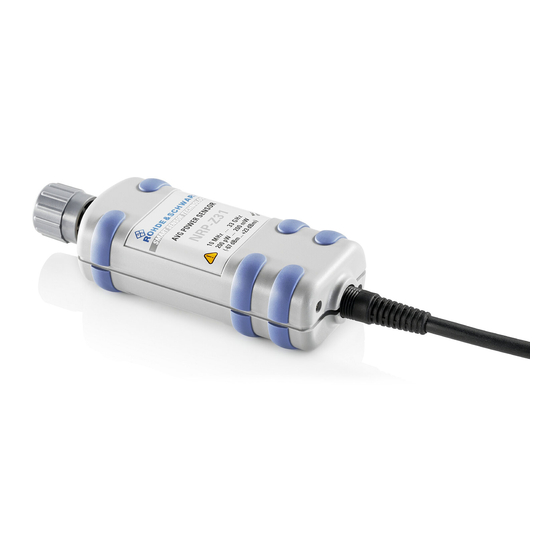
- Page 1 Operating Manual Average Power Sensor R&S NRP-Z11 R&S NRP-Z211 1138.3004.02/.04 1417.0409.02 R&S NRP-Z21 R&S NRP-Z221 1137.6000.02 1417.0309.02 R&S NRP-Z31 1169.2400.02 Printed in Germany Test and Measurement 1137.7470.12-06-...
- Page 2 Dear Customer, R&S® is a registered trademark of Rohde & Schwarz GmbH & Co. KG Trade names are trademarks of the owners. 1137.7470.12-06-...
- Page 3 Basic Safety Instructions Always read through and comply with the following safety instructions! All plants and locations of the Rohde & Schwarz group of companies make every effort to keep the safety standards of our products up to date and to offer our customers the highest possible degree of safety. Our products and the auxiliary equipment they require are designed, built and tested in accordance with the safety standards that apply in each case.
- Page 4 Basic Safety Instructions Tags and their meaning The following signal words are used in the product documentation in order to warn the reader about risks and dangers. indicates a hazardous situation which, if not avoided, will result in death or serious injury.
- Page 5 Basic Safety Instructions Electrical safety If the information on electrical safety is not observed either at all to the extent necessary, electric shock, fire and/or serious personal injury or death may occur. 1. Prior to switching on the product, always ensure that the nominal voltage setting on the product matches the nominal voltage of the AC supply network.
- Page 6 Basic Safety Instructions 14. Use suitable overvoltage protection to ensure that no overvoltage (such as that caused by a bolt of lightning) can reach the product. Otherwise, the person operating the product will be exposed to the danger of an electric shock. 15.
- Page 7 Basic Safety Instructions Repair and service 1. The product may be opened only by authorized, specially trained personnel. Before any work is performed on the product or before the product is opened, it must be disconnected from the AC supply network.
- Page 8 Informaciones elementales de seguridad 2. Handles on the products are designed exclusively to enable personnel to transport the product. It is therefore not permissible to use handles to fasten the product to or on transport equipment such as cranes, fork lifts, wagons, etc. The user is responsible for securely fastening the products to or on the means of transport or lifting.
- Page 9 Informaciones elementales de seguridad Se parte del uso correcto del producto para los fines definidos si el producto es utilizado conforme a las indicaciones de la correspondiente documentación del producto y dentro del margen de rendimiento definido (ver hoja de datos, documentación, informaciones de seguridad que siguen). El uso del producto hace necesarios conocimientos técnicos y ciertos conocimientos del idioma inglés.
- Page 10 Informaciones elementales de seguridad Palabras de señal y su significado En la documentación del producto se utilizan las siguientes palabras de señal con el fin de advertir contra riesgos y peligros. PELIGRO identifica un peligro inminente con riesgo elevado que provocará...
- Page 11 Informaciones elementales de seguridad Seguridad eléctrica Si no se siguen (o se siguen de modo insuficiente) las indicaciones del fabricante en cuanto a seguridad eléctrica, pueden producirse choques eléctricos, incendios y/o lesiones graves con posible consecuencia de muerte. 1. Antes de la puesta en marcha del producto se deberá comprobar siempre que la tensión preseleccionada en el producto coincida con la de la red de alimentación eléctrica.
- Page 12 Informaciones elementales de seguridad 12. Si un producto se instala en un lugar fijo, se deberá primero conectar el conductor de protección fijo con el conductor de protección del producto antes de hacer cualquier otra conexión. La instalación y la conexión deberán ser efectuadas por un electricista especializado. 13.
- Page 13 Informaciones elementales de seguridad 5. Ciertos productos, como p. ej. las instalaciones de radiocomunicación RF, pueden a causa de su función natural, emitir una radiación electromagnética aumentada. Deben tomarse todas las medidas necesarias para la protección de las mujeres embarazadas. También las personas con marcapasos pueden correr peligro a causa de la radiación electromagnética.
- Page 14 Informaciones elementales de seguridad 6. En caso de falta de estanqueidad de una celda, el líquido vertido no debe entrar en contacto con la piel ni los ojos. Si se produce contacto, lavar con agua abundante la zona afectada y avisar a un médico.
- Page 15 Qualitätszertifikat Certified Quality System ISO 9001 Certificate of quality Certified Environmental System Certificat de qualité ISO 14001 Sehr geehrter Kunde, Dear Customer, Cher client, Sie haben sich für den Kauf eines You have decided to buy a Vous avez choisi d’acheter un pro- Rohde &...
- Page 16 Customer Support Technical support – where and when you need it For quick, expert help with any Rohde & Schwarz equipment, contact one of our Customer Support Centers. A team of highly qualified engineers provides telephone support and will work with you to find a solution to your query on any aspect of the operation, programming or applications of Rohde &...
- Page 17 Equipment type Stock No. Designation NRP-Z3 1146.7005.02 USB Adapter NRP-Z4 1146.8001.02/.04 USB Adapter NRP-Z5 1146.7740.02 Sensor Hub NRP-Z11 1138.3004.02/.04 Leistungsmesskopf NRP-Z21 1137.6000.02 Leistungsmesskopf NRP-Z211 1417.0409.02 2-PATH USB POWER SENSOR NRP-Z22 1137.7506.02 Leistungsmesskopf NRP-Z221 1417.0309.02 2-PATH USB POWER SENSOR NRP-Z23 1137.8002.02 Leistungsmesskopf NRP-Z24 1137.8502.02...
- Page 19 R&S NRP-Z11/21/31/211/221 Table of Contents Chapter 1 Table of Contents Putting into Operation ......................1.1 Unpacking the power sensor ......................1.1 Connecting the power sensor......................1.1 Operation with the R&S NRP/NRP2 power meter .................1.1 Connecting the power sensor .....................1.1 PC control ............................1.2 Hardware and software requirements ..................1.2 Operation via the R&S NRP-Z4 passive USB adapter ...............1.3 Connecting the sensor to the DUT .....................1.4 Operation via the Active USB Adapter R&S NRP-Z3 ..............1.4...
-
Page 20: Table Of Contents
List of Figs. and Tables Chapter 1 R&S NRP-Z11/21/31/211/221 Figs. Fig. 1-1 Displaying the total available power of a USB port............1.3 Fig. 1-2 Configuration with Passive USB Adapter R&S NRP-Z4 ...........1.3 Fig. 1-3 Configuration with Active USB Adapter R&S NRP-Z3............1.4 Fig. - Page 21 R&S NRP-Z11/21/31/211/221 Unpacking the power sensor 1 Putting into Operation NOTICE Follow the instructions below precisely to prevent damage to the power sensor – particularly when you are putting it into operation for the first time. Unpacking the power sensor Remove the power sensor from its packing and check that nothing is missing.
- Page 22 PC control R&S NRP-Z11/21/31/211/221 PC control Hardware and software requirements The following requirements must be met if the power sensor is to be controlled by a PC via an interface adapter: • The PC must have a USB port. • Either Microsoft Windows XP (32 Bit), Microsoft Windows Vista (32 or 64 Bit), Microsoft Windows 7 (32 or 64 Bit), or x86 Linux (with kernel 2.6.8 oder more recent) must be installed as the operating system of the PC.
-
Page 23: Configuration With Passive Usb Adapter R&S Nrp-Z4
R&S NRP-Z11/21/31/211/221 PC control • In the Windows™ start menu, select Settings – Control Panel • Select the System icon • Select the Hardware tab • By clicking on the button with that name, start the Device Manager • Open USB Controller (all USB controllers, hubs and USB devices are listed here) •... -
Page 24: Configuration With Active Usb Adapter R&S Nrp-Z3
PC control R&S NRP-Z11/21/31/211/221 Connecting the sensor to the DUT The power sensor R&S NRP-Z11/21/211/221 has a male N connector and so can be connected to any standard female N connector. The power sensor R&S NRP-Z31 has a male 3.5 mm connector and so can be connected to any standard female 3.5 mm/2.92 mm/SMA connector. -
Page 25: Changing The Primary Adapter
R&S NRP-Z11/21/31/211/221 PC control Fig. 1-4 Changing the primary adapter The plug-in power supply is short-circuit-proof and has an internal fuse. It is not possible to replace this fuse or open the plug-in power supply. NOTICE The plug-in power supply is not intended for outdoor use. Keep within the temperature range of 0°C to 50°C. - Page 26 PC control R&S NRP-Z11/21/31/211/221 NOTICE The external power supply is not intended for outdoor use. Keep within the temperature range of 0°C to 50°C. If there is any condensation on the external power supply, dry it off before connecting it to the AC supply.
-
Page 27: Unlatching The R&S Instrument Connector
R&S NRP-Z11/21/31/211/221 PC control Unlatch the R&S Instrument connector on the rear panel by pressing down the unlatching ring of the built-in plug and pulling off the cable jack at the same time (Fig. 1-7). Fig. 1-7 Unlatching the R&S Instrument connector Test Setup Fig. - Page 28 PC control R&S NRP-Z11/21/31/211/221 Fig. 1-8 Typical test setup with R&S NRP-Z5 and PC 1137.7470.12...
-
Page 29: Identification Of Usb Root Hub On Which R&S Nrp-Z5 Is Operated
R&S NRP-Z11/21/31/211/221 PC control Troubleshooting A frequent problem, especially in the case of operation under Microsoft Windows XP, is that the R&S NRP-Z5 fails to respond after a power sensor connected to the R&S NRP-Z5 is disconnected and reconnected. It is then necessary to restart the PC. This problem is not specific to the R&S NRP-Z5, but occurs with all USB hubs. - Page 30 Operation with other Rohde & Schwarz test instrumentsR&S NRP-Z11/21/31/211/221 4. Double-clicking USB Root Hub opens the USB Root Hub Properties dialog box. Select the Power Management tab. Remove the check mark next to Allow the computer to turn off this device to save power and confirm this with OK.
-
Page 31: Table 1-1 Overview Of The Rohde & Schwarz Instruments That Support Power Measurements Using R&S Nrp Power Sensors
R&S NRP-Z11/21/31/211/221Operation with other Rohde & Schwarz test instruments Table 1-1 Overview of the Rohde & Schwarz instruments that support power measurements using R&S NRP power sensors Instrument class Type Measure- Options Connectors ment channels NRP- Standard specific SMA100A SMB100A SMU200A Signal generators SMJ200A... - Page 33 R&S NRP-Z11/21/31/211/221 Table of Contents Chapter 2 Table of Contents Virtual Power Meter ......................2.1 Overview............................2.1 Menus ............................2.3 1137.7470.12 I-2.1...
- Page 34 List of Figs. and Tables Chapter 2 R&S NRP-Z11/21/31/211/221 Figs. Fig. 2-1 Power Viewer virtual power meter ...................2.1 Tables Table 2-1 Virtual power meter keys ....................2.2 Table 2-2 Virtual power meter entry fields ..................2.2 1137.7470.12 I-2.2...
- Page 35 R&S NRP-Z11/21/31/211/221 Overview 2 Virtual Power Meter You will find the NrpFlashup program that enables you to operate the power sensor with a PC under Windows™ on the CD-ROM that accompanies the power sensor. The program comprises several modules which can be started centrally via the Windows™ start-menu entry NRP Toolkit. This section describes the Power Viewer program module.
- Page 36 Overview R&S NRP-Z11/21/31/211/221 Table 2-1 Virtual power meter keys Button Function Key combination Exit Terminates the program. The current settings are saved and recalled the Alt + E next time the program is started. Selects Watt as the display unit. Alt + W Selects dBm as the display unit.
- Page 37 R&S NRP-Z11/21/31/211/221 Overview Menus The menu bar can be used to call less frequently used functions. File Start Log ... Opens a file-selection dialog to specify the path and name of the log file. Clicking the Save button starts the recording.
- Page 38 Overview R&S NRP-Z11/21/31/211/221 Simulation … Allows you to try out the functions virtual power meter even without power sensor. display alternates between Measurement Value 1 & Measurement Value 2 with a period given by Interval. Simulation can be activated immediately with the Activate check box.
- Page 39 R&S NRP-Z11/21/31/211/221 Table of Contents Chapter 3 Table of Contents Manual Operation .......................3.1 Program module "Terminal" ......................3.1 Main control elements.........................3.1 Menus ............................3.3 Program module "Firmware Update" .....................3.6 Program module "Update S-Parameters" ..................3.6 Fundamentals ..........................3.6 Procedure ...........................3.9 1137.7470.12 I-3.1...
-
Page 40: Fig
List of Figs. and Tables Chapter 3 R&S NRP-Z11/21/31/211/221 Figs. Fig. 3-1 Sending commands using the Input field .................3.1 Fig. 3-2 Sending commands using command files ................3.2 Fig. 3-3 Dialog window for loading an s-parameter table...............3.9 Fig. 3-4 Dialog window for loading the backup file of a calibration data set ........3.10 Fig. -
Page 41: Manual Operation
R&S NRP-Z11/21/31/211/221 Program module "Terminal" 3 Manual Operation The previous section describes the Power Viewer program module supplied with the instrument. This module simplifies the most frequently used function of a power meter – measuring the average power of an RF signal of almost any modulation. Other program modules are also part of the supplied equipment and can be selected in the Start menu: •... - Page 42 Program module "Terminal" R&S NRP-Z11/21/31/211/221 Fig. 3-2 Sending commands using command files Table 3-1 Buttons assigned to the Input field Button Function Key combination Sends the content of the Input entry field to the sensor. Send Alt + S With Loop the command or command sequence is cyclically sent. Pressing Loop Alt + L the button again terminates the cyclic transmission.
-
Page 43: Menus
R&S NRP-Z11/21/31/211/221 Program module "Terminal" A command line starting with a tab, a blank or a special character is considered a comment and not forwarded to the sensor. Measurement results, parameters and status information returned by the sensor are displayed in the Output field. - Page 44 Program module "Terminal" R&S NRP-Z11/21/31/211/221 Filtering is started with Apply. The number of lines matching the filter criterion is displayed in the Linecounter field. If Open on startup is active, the Output Postfilter dialog is automatically opened when the terminal is started. The dialog window is closed with OK. Response Opens the Response time dialog window where the response time of Time …...
- Page 45 R&S NRP-Z11/21/31/211/221 Program module "Terminal" Options Protocol Mode In this mode, a time stamp is added to each response block. Hex Mode In this mode, the response blocks from the sensor are displayed in hexadecimal format. Auto Delete With this option active, the Output field is automatically cleared when the Send button is pressed.
-
Page 46: Program Module "Firmware Update
Program module "Firmware Update" R&S NRP-Z11/21/31/211/221 Program module "Firmware Update" A detailed description of the program module for firmware updates is provided in the Service Manual. Program module "Update S-Parameters" Fundamentals With the power sensor R&S NRP-Z11/21/31/211/221, the influence of any twoport – e. g. an adapter – between the signal source and the sensor input can be considered, allowing the power P actually delivered by the signal source to be calculated. - Page 47 R&S NRP-Z11/21/31/211/221 Program module "Update S-Parameters" The option line should therefore read: # [HZ | KHZ | MHZ | GHZ] [S] [MA | DB | RI] [R 50] 2. The measurement frequencies in ascending order are specified as follows: where is the display format as specified in the option line: (display format for linear magnitude and phase in degree) or (display format for magnitude in dB and phase in degree)
- Page 48 Program module "Update S-Parameters" R&S NRP-Z11/21/31/211/221 Structure of the uncertainty data file (square brackets indicate that the enclosed content is optional): 1. The option line has the following format: # [<frequency unit>] <parameter> [<format>] [<R n>] # identifies the option line. The <frequency unit>...
-
Page 49: Procedure
R&S NRP-Z11/21/31/211/221 Program module "Update S-Parameters" Procedure To load an s-parameter table into the calibration set of the sensor, proceed as follows: 1. Connect the sensor to the USB port of the PC and start the program module Update S- Parameters. - Page 50 Program module "Update S-Parameters" R&S NRP-Z11/21/31/211/221 During loading, the current calibration data set of the sensor is overwritten. To be on the safe side, a backup copy of the current calibration data set is therefore automatically stored before s-parameters are loaded.
- Page 51 R&S NRP-Z11/21/31/211/221 Program module "Update S-Parameters" Fig. 3-5 Subsequently changing the default behaviour of the s-parameter correction 1137.7470.12 3.11...
- Page 53 R&S NRP-Z11/21/31/211/221 Table of Contents Chapter 5 Table of Contents Remote Control – Fundamentals .................5.1 1137.7470.12 I-5.1...
- Page 55 R&S NRP-Z11/21/31/211/221 Remote Control – Fundamentals 5 Remote Control – Fundamentals Rohde & Schwarz recommends to utilize the VXI Plug & Play Driver for the remote control of R&S NRP power sensors. This driver can be found on the CD-ROM supplied with the sensor or downloaded in its most recent version via the internet (http://rohde-schwarz.com/).
- Page 57 R&S NRP-Z11/21/31/211/221 Table of Contents Chapter 6 Table of Contents Remote Control – Commands ..................6.1 Notation .............................6.1 Commands as per IEEE 488.2 ......................6.2 *IDN? – Identification Query .......................6.2 *RST – Reset ..........................6.2 *TRG – Trigger..........................6.2 *TST? – Self Test Query......................6.2 SCPI Commands..........................6.3 CALibration ..........................6.3 CALibration:DATA[?] <calibration data set as definite length block>...
- Page 58 Table of Contents Chapter 6 R&S NRP-Z11/21/31/211/221 SENSe:SGAMma:PHASe[?] –360.0 to 360.0.............6.17 SENSe:TIMing:EXCLude:STARt[?] 0.0 to 0.1 ............6.17 SENSe:TIMing:EXCLude:STOP[?] 0.0 to 0.003............6.17 SENSe:TRACe:AVERage:COUNt[?] 1 to 8192............6.18 SENSe:TRACe:AVERage:STATe[?] OFF | ON............6.19 SENSe:TRACe:AVERage:TCONtrol[?] MOVing | REPeat.........6.19 SENSe:TRACe:MPWidth?....................6.19 SENSe:TRACe:OFFSet:TIME[?] – (<TRIGger:DELay> + 0.005) to 100.0 ....6.20 SENSe:TRACe:POINts[?] 1 to 1024................6.20 SENSe:TRACe:REALtime[?] OFF | ON ..............6.20 SENSe:TRACe:TIME[?] 0.0001 to 0.3................6.20...
-
Page 59: Fig
Figures and List of Tables Chapter 6 R&S NRP-Z11/21/31/211/221 Figs. Fig. 6-1 Effect of SENSe:POWer:BURSt:DTOLerance ...............6.14 Fig. 6-2 Correction of interactions between the power sensor and the signal source ....6.16 Fig. 6-3 Correction of interactions between the power sensor, the signal source, and the s-parameter device...............6.16 Fig. -
Page 61: Remote Control - Commands
R&S NRP-Z11/21/31/211/221 Remote Control - Commands 6 Remote Control – Commands Notation In the following sections, all commands implemented in the sensor are first listed in a table according to command systems and are then described in detail. The notation is largely in line with the SCPI standard. -
Page 62: Commands As Per Ieee 488.2
*IDN? – Identification Query *IDN? returns a string with information on the sensor's identity (device identification code). In addition, the version number of the installed firmware is indicated. The string for a sensor of type R&S NRP-Z21 has the following structure: ROHDE&SCHWARZ,NRP-Z21,<serial number>,<firmware version>... -
Page 63: Scpi Commands
R&S NRP-Z11/21/31/211/221 Remote Control - Commands SCPI Commands The sensor R&S NRP-Z11/21/31/211/221 is controlled via the groups of commands • CALibration (zeroing) • SENSe (measurement configurations) • SYSTem • TRIGger • SERVice. CALibration Table 6-1 Commands of the CALibration system Command Parameter Unit... - Page 64 Remote Control - Commands R&S NRP-Z11/21/31/211/221 Repeat zeroing • during warm-up after switching on or connecting the instrument • after a substantial variation of the ambient temperature • after fastening the sensor to an RF connector at high temperature • after several hours of operation •...
-
Page 65: Sense (Sensor Configuration)
:OFFSet[?] –200.0 to 200.0 :STATe[?] OFF to ON :SPDevice:STATe[?] OFF to ON :FREQuency[?] 10.0e6 to 8.0e9 (NRP-Z11/211) or 10.0e6 to 18.0e9 (NRP-Z21/221) or 10.0e6 to 33.0e9 (NRP-Z31) :FUNCtion[?] “POWer:AVG“ | “POWer:TSLot:AVG“ | “POWer:BURSt:AVG“ | “XTIME:POWer“ :POWer :AVG :APERture[?] 10.0e-6 to 0.3 :BUFFer 1137.7470.12... - Page 66 Remote Control - Commands R&S NRP-Z11/21/31/211/221 Command Parameter Unit Remarks :SIZE[?] 1 to 1024 :STATe[?] OFF | ON :SMOothing:STATe[?] OFF | ON :BURSt:DTOLerance[?] 0.0 to 3.0e-3 :TSLot:AVG :COUNt[?] 1 to 128 :WIDTh[?] 10.0e-6 to 100e-3 :RANGe [?] 0 to 2 (NRP-Z11/21/31) or 0 to 1 (NRP-Z211/221) :AUTO[?] OFF | ON...
-
Page 67: Sense:average:count[?] 1 To 65536
R&S NRP-Z11/21/31/211/221 Remote Control - Commands Command Parameter Unit Remarks :TIME[?] 0.0001 to 0.3 SENSe:AVERage:COUNt[?] 1 to 65536 SENSe:AVERage:COUNt sets the number of measured values that have to be averaged for forming the measurement result in the modes Continuous Average, Burst Average and Timeslot Average. The higher this averaging factor, the less the measured values fluctuate and the longer the measurement time lasts. -
Page 68: Sense:average:count:auto:nsratio[?] 0.0
Remote Control - Commands R&S NRP-Z11/21/31/211/221 SENSe:AVERage:COUNt:AUTO:NSRatio[?] 0.0 to 1.0 SENSe:AVERage:COUNt:AUTO:NSRatio determines the relative noise component in the measurement result for the Continuous Average, Burst Average and Timeslot Average modes if auto-averaging is operated in the corresponding mode (SENSe:AVERage:COUNt:AUTO:TYPE NSRatio). The noise component is defined as the magnitude of the level variation in dB caused by the inherent noise of the sensor (two standard deviations). -
Page 69: Sense:average:reset
R&S NRP-Z11/21/31/211/221 Remote Control - Commands SENSe:AVERage:RESet SENSe:AVERage:RESet initializes the averaging filter for the Continuous Average, Burst Average or Timeslot Average modes. This is useful if a high averaging factor is set in the SENSe:AVERage :TCONtrol MOVing filter mode and if the power to be measured has significantly decreased since the previous measurement, e.g. -
Page 70: Sense:correction:dcycle:state[?] Off
Remote Control - Commands R&S NRP-Z11/21/31/211/221 SENSe:CORRection:DCYCle:STATe[?] OFF | ON SENSe:CORRection:DCYCle:STATe ON activates the duty cycle correction and thus the pulse-power measurement whereas SENSe:CORRection:DCYCle:STATe OFF deactivates it. The query yields • 1 for OFF, • 2 for ON. Default setting: OFF SENSe:CORRection:OFFSet[?] –200.0 to 200.0 SENSe:CORRection:OFFSet defines a fixed offset in dB, which is used to correct the measured value. -
Page 71: Sense:frequency[?] 10.0E6 To 8.0E9/18.0E9/33.0E9
R&S NRP-Z11/21/31/211/221 Remote Control - Commands SENSe:FREQuency[?] 10.0e6 to 8.0e9/18.0e9/33.0e9 SENSe:FREQuency transfers the carrier frequency of the RF signal to be measured; this frequency is used for the frequency-response correction of the measurement result. The center frequency is set for broadband signals (spread-spectrum signals, multicarrier signals). -
Page 72: Sense:power:avg:aperture[?] 10.0E-6
Remote Control - Commands R&S NRP-Z11/21/31/211/221 <sensor_function> Description of the measurement mode Burst Average "POWer:BURSt:AVG" This mode is used to measure the average power of bursts. The time interval in which the average power is measured starts when the power exceeds the trigger threshold and stops when the trigger logic detects the end of the pulse. -
Page 73: Sense:power:avg:buffer:size[?] 1 To 1024
R&S NRP-Z11/21/31/211/221 Remote Control - Commands more than 9 periods. With smoothing deactivated, the situation is considerably more unfavorable. In this case, 300 instead of 5 periods are required, and the fluctuations do not disappear completely until there are 3000 or more periods. The query yields the currently set width of the sampling window in seconds. -
Page 74: Sense:power:burst:dtolerance[?] 0.0 To 0.003
Remote Control - Commands R&S NRP-Z11/21/31/211/221 SENSe:POWer:BURSt:DTOLerance[?] 0.0 to 0.003 SENSe:POWer:BURSt:DTOLerance defines the dropout tolerance, a parameter for reliably detecting the burst end in the Burst Average mode with modulated signals (e. g. with digital standards NADC, PDC, PHS, etc.). The dropout tolerance should be selected larger than the longest amplitude drop and smaller than the gap between two consecutive bursts. -
Page 75: Sense:range[?] 0 To 2 (1 For R&S Nrp-Z211/221)
R&S NRP-Z11/21/31/211/221 Remote Control - Commands SENSe:RANGe[?] 0 to 2 (1 for R&S NRP-Z211/221) SENSe:RANGe selects the measurement path of the sensor. The power sensor R&S NRP-Z11/21/31 has three separate measurement paths. Path 1 is the most sensitive, path 2 medium and path 3 the least sensitive. SENSe:RANGe 0 selects path 1, SENSe:RANGe 1 path 2 and SENSe:RANGe 2 path 3. -
Page 76: Sense:sgamma:correction:state[?] Off
Remote Control - Commands R&S NRP-Z11/21/31/211/221 parameter FREQ2. This is provided to suppress interfering low-frequency mixture products from signal components and the sampling frequency. The query yields • 1 for FREQ1, • 2 for FREQ2. Default setting: FREQ1 SENSe:SGAMma:CORRection:STATe[?] OFF | ON SENSe:SGAMma:CORRection:STATe ON initiates the use of the complex reflection coefficient J source of the signal source defined with SENSe:SGAMma:MAGNitude and SENSe:SGAMma:PHASe for the... -
Page 77: Sense:sgamma:magnitude[?] 0.0 To 1.0
R&S NRP-Z11/21/31/211/221 Remote Control - Commands The query yields • 1 for OFF, • 2 for ON. Default setting: OFF SENSe:SGAMma:MAGNitude[?] 0.0 to 1.0 SENSe:SGAMma:MAGNitude defines the magnitude of the complex reflection coefficient of the signal source. A value of 0.0 corresponds to ideal match and a value of 1.0 to total reflection. The query yields the set magnitude. -
Page 78: Sense:trace:average:count[?] 1 To 8192
Remote Control - Commands R&S NRP-Z11/21/31/211/221 Measurement window Trigger level Time START STOP Triggering Triggering (Start) (Stop) Fig. 6-4 Effect of SENSe:TIMing:EXCLude:STARt and :STOP in the Burst Average mode Nominal Width Nominal Width Measurement window Time START STOP Trigger Delay (< 0) Triggering (Start) Fig. -
Page 79: Sense:trace:average:state[?] Off
R&S NRP-Z11/21/31/211/221 Remote Control - Commands The query yields the averaging factor used in the sensor for the Trace mode. Default setting: 4 SENSe:TRACe:AVERage:STATe[?] OFF | ON SENSe:TRACe:AVERage:STATe switches the averaging filter on or off for the Trace mode. The query yields •... -
Page 80: Sense:trace:offset:time[?] - (
Remote Control - Commands R&S NRP-Z11/21/31/211/221 SENSe:TRACe:OFFSet:TIME[?] – (<TRIGger:DELay> + 0.005) to 100.0 SENSe:TRACe:OFFSet:TIME is used to specify the start of recording for the Trace mode. It is identical with the first pixel. The time associated with the last pixel is the time associated with the first pixel plus the trace length. -
Page 81: System
Remarks "MANUFACTURER" "Rohde & Schwarz" Manufacturer "TYPE" "NRP-Z11" for R&S NRP-Z11 Type designation "NRP-Z21" for R&S NRP-Z21 "NRP-Z31" for R&S NRP-Z31 "NRP-Z211" for R&S NRP-Z211 "NRP-Z221" for R&S NRP-Z221 "STOCK NUMBER" "1138.3004.02" for R&S NRP-Z11 Material number "1137.6000.02" for R&S NRP-Z21 "1169.2400.02"... - Page 82 "MAXFREQ" "8e+09" for R&S NRP-Z11/211 The maximum measuring frequency is 8 GHz for the R&S NRP- "1.8e+10" for R&S NRP-Z21/221 Z11/211, 18 GHz for the R&S NRP-Z21/221, and 33 GHz for the "3.3e+10" for R&S NRP-Z31 R&S NRP-Z31. "RESOLUTION" “2.5Ss Ext, 10Ss Int”...
-
Page 83: System:initialize
R&S NRP-Z11/21/31/211/221 Remote Control - Commands Item Information string Remarks "CAL. MISC." "<date>" Date of the calibration of other parameters in the format YYYY- MM-DD. "Invalid Calibration Date" is returned with an invalid date entry. "CAL. TEMP." "not applicable" Temperature response calibration of the R&S NRP- Z11/21/31/211/221 is neither required nor possible. -
Page 84: System:sutime[?] 0.0
Remote Control - Commands R&S NRP-Z11/21/31/211/221 SYSTem:SUTime[?] 0.0 to 10.0 This command is used to reduce the frequency of messages concerning status changes of the sensor from the WAIT_FOR_TRIGGER state to the MEASURING state. Normally this status change is always sent to the control unit. If measurement times are very short and/or trigger events occur at a high frequency, however, this may lead to a heavy load on the remote- control connection which cannot be handled by the control unit (or host). -
Page 85: Test
R&S NRP-Z11/21/31/211/221 Remote Control - Commands TEST Table 6-6 Commands of the TEST system Command Parameter Unit Remarks TEST:SENSor? Query only TEST:SENSor? TEST:SENSor? triggers a selftest of the sensor. In contrast to *TST, this command yields detailed information, which is useful for troubleshooting. No signal may be applied to the sensor while the selftest is running. -
Page 86: Trigger
Remote Control - Commands R&S NRP-Z11/21/31/211/221 TRIGger Table 6-7 Commands of the TRIGger system Command Parameter Unit Remarks ABORt No query INITiate :CONTinuous[?] OFF | ON :IMMediate No query TRIGger :ATRigger:STATe[?] OFF | ON :COUNt[?] 1 to 2 :DELay[?] x to 100.0 :AUTO[?] OFF | ON :HOLDoff[?]... -
Page 87: Initiate:immediate
R&S NRP-Z11/21/31/211/221 Remote Control - Commands After triggering and completion of the measurement, the sensor enters the IDLE state and remains in this state until a new measurement is started with the INITiate:IMMediate command. The query yields • 1 for OFF, •... -
Page 88: Trigger:delay[?] X To 100.0
Remote Control - Commands R&S NRP-Z11/21/31/211/221 TRIGger:DELay[?] x to 100.0 This command is used to set a trigger delay for all measurements in sync with the signal except in the Burst Average mode. It provides a time offset to the physical trigger event equal to the entered value. The trigger can thus be shifted to a point in time of the measurement signal that is significant for the measurement, for example to the start of the first timeslot for the Timeslot Average mode. -
Page 89: Trigger:hysteresis[?] 0.0 To 10.0
R&S NRP-Z11/21/31/211/221 Remote Control - Commands TRIGger:HYSTeresis[?] 0.0 to 10.0 TRIGger:HYSTeresis sets the hysteresis of the internal trigger threshold (parameter TRIGger:LEVel). Hysteresis is the magnitude (in dB) by which the trigger signal level falls below the trigger threshold (with positive trigger edge) to enable triggering again. The case is exactly the opposite with a negative trigger edge. -
Page 90: Trigger:source[?] Hold | Immediate | Internal | Bus | External
Remote Control - Commands R&S NRP-Z11/21/31/211/221 The query yields • 1 for POSitive, • 2 for NEGative. Default setting: POSitive TRIGger:SOURce[?] HOLD | IMMediate | INTernal | BUS | EXTernal | TRIGger:SOURce sets the trigger source. • HOLD: Triggering only with command TRIGger:IMMediate. •... -
Page 91: List Of Remote-Control Commands
R&S NRP-Z11/21/31/211/221 Remote Control - Commands List of Remote-Control Commands The remote-control commands of the R&S NRP-Z11/21/31/211/221 have a syntax based on standard SCPI 1999.0, but they comply with it only to a limited extent. Table 6-8 List of remote-control commands Command Parameter Unit... - Page 92 SENSe:CORRection:SPDevice:STATe[?] OFF | ON OFF (can be 6.10 modified by the user) SENSe:FREQuency[?] 10.0e6 to 8.0e9 (NRP-Z11/211) or 50.0e6 6.11 10.0e6 to 18.0e9 (NRP-Z21/221) or 10.0e6 to 33.0e9 (NRP-Z31) SENSe:FUNCtion[?] "POWer:AVG" | "POWer:AVG" 6.11 "POWer:TSLot:AVG" | "POWer:BURSt:AVG" | "XTIMe:POWer" SENSe:POWer:AVG:APERture[?] 10.0e–6 to 0.3...
- Page 93 R&S NRP-Z11/21/31/211/221 Remote Control - Commands Command Parameter Unit Default setting Page SENSe:TRACe:POINts[?] 1 to 1024 6.20 SENSe:TRACe:REALtime[?] OFF | ON 6.20 SENSe:TRACe:TIME[?] 0.0001 to 0.3 0.01 6.20 SYSTem Commands SYSTem:INFO? [Item] 6.21 SYSTem:INITialize 6.23 SYSTem:MINPower? 6.23 SYSTem:RUTime 0.0 … 10.0 6.23 SYSTem:SUTime 0.0 …...
Need help?
Do you have a question about the NRP-Z21 and is the answer not in the manual?
Questions and answers