Table of Contents

Related Manuals for Quick BT DC-AC


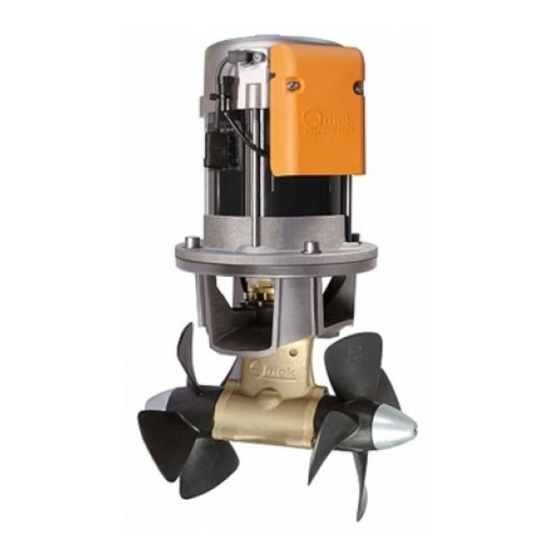
Summary of Contents for Quick BT DC-AC
- Page 1 REV 001A DC-AC DOUBLE PROPELLER BT DC-AC185 BT DC-AC250 BT DC-AC300 ELICHE DI MANOVRA DI PRUA MANUALE D'INSTALLAZIONE E USO pag. 3 BOW THRUSTERS INSTALLATION AND USE MANUAL page 17...
- Page 3 INDICE BT DC-AC185/250/300 1 - Informazioni sul prodotto Pag. 4 1.0 - Requisiti per l'installazione Pag. 4 1.1 - Dati tecnici DC-AC185/250/300 Pag. 4 2 - Fornitura e dotazioni Pag. 5 2.0 - Fornitura di serie e materiale incluso nella confezione Pag.
-
Page 4: Informazioni Sul Prodotto
1 - Informazioni sul prodotto BT DC-AC185/250/300 PRIMA DI UTILIZZARE L’ELICA DI MANOVRA LEGGERE ATTENTAMENTE IL PRESENTE MANUALE D'USO. IN CASO DI DUBBI CONSULTARE IL RIVENDITORE QUICK ® QUICK ® SI RISERVA IL DIRITTO DI APPORTARE MODIFICHE ALLE CARATTERISTICHE TECNICHE DELL'APPARECCHIO E AL CONTENUTO DI QUESTO MANUALE SENZA ALCUN PREAVVISO. - Page 5 • Chiavi maschio esagonale da 4 mm, 5 mm, 8 mm e 12 mm • Chiave a forchetta da 27 mm 3 - Sicurezza BT DC-AC185/250/300 3.0 - Avvertenze • I thruster Quick sono stati progettati e realizzati per asservire all’uso nautico. ® • Non utilizzare questi apparecchi per altri tipi di applicazioni.
- Page 6 4 - Installazione BT DC-AC185/250/300 4.0 - Requisiti per l’installazione Il Tunnel • La posizione del tunnel dipenderà dalla forma interna ed esterna della prua della imbarcazio- • La sistemazione ottimale del tunnel, sarà più a MINIMO 0,75 VOLTE prua e più a fondo possibile, minimo 0,75 volte il Ø...
- Page 7 4 - Installazione BT DC-AC185/250/300 4.1 - Il Tunnel • Le estremità arrotondate del tunnel limitano l’innesco di turbolenze e cavitazione, migliorando le prestazione della spinta dell’elica e riducendo al minimo la rumorosità. • Quando l’imbarcazione è in movimento, la forza prodotta dal flusso dell’acqua produce della resistenza sulla faccia po- steriore del tunnel, che diventa un’area piatta al flusso dell’acqua.
- Page 8 4 - Installazione BT DC-AC185/250/300 4.2 - Il Thruster • Il thruster può essere installato con qualunque angolo all’interno di 90º dalla verticale. • Se il motore elettrico è posizionato per necessità con un angolo superiore a 30º rispetto alla verticale, si rende ne- cessario la realizzazione in opera di un apposito sostegno.
- Page 9 4 - Installazione BT DC-AC185/250/300 4.3 - Il piede riduttore e la flangia di supporto motore • Procedere al montaggio del piede riduttore con la speci- fica guarnizione di tenuta. • Come ulteriore precauzione contro l’ingresso d’acqua, applicare silicone per uso nautico nella zona di contatto tra flangia e tubo.
- Page 10 4 - Installazione BT DC-AC185/250/300 4.5 - Ambiente di installazione del controller Installare il controller in un luogo asciutto e ventilato, fissandolo al piano di appoggio tramite viti idonee a sopportare il peso dell’apparecchio e dei cavi. Il perimetro del controller deve distare da pareti o oggetti minimo 10 cm. ATTENZIONE: serrare correttamente i bulloni dei terminali elettrici.
-
Page 11: Schema Di Collegamento
5 - Schema di collegamento BT DC-AC185/250/300 5.0 - Sistema base BT DC-AC 185/250/300 COMANDO AJ1 THRUSTER CAVO CONTROLLER AC MOTOR CONTROLLER PROLUNGA TELERUTTORE DI LINEA MOTORE ROSSO ELICA DI MANOVRA FUSIBILE RAPIDO 4A BATTERIA MANUALE D’INSTALLAZIONE E USO BT DC-AC185-250-300 IT EN - REV001A... -
Page 12: Avvertenze Importanti
E’ provvisto di protezioni che ne limitano il funzionamento fino ad un tempo massimo, come riportato sul manuale dei comandi. E’ assolutamente vietato bypassare o modificare tali protezioni per aumentare il tempo di funzionamen- to, pena la decadenza della garanzia e di qualsiasi responsabilità da parte di Quick SPA. -
Page 13: Manutenzione
8 - Manutenzione BT DC-AC185/250/300 8.0 - Manutenzione BT DC-AC 185/250/300 I Thruster Quick sono costituiti da materiale resistenti ® all’ambiente marino: è indispensabile, in ogni caso, rimuo- vere periodicamente i depositi di sale che si formano sulle superfici esterne per evitare corrosioni e di conseguenza inefficienza del sistema. - Page 14 9 - Ricambi BT DC-AC185/250/300 BT DC-AC 185 BT DC-AC 250 BT DC-AC 300 N°. DESCRIZIONE CODICE OSP KIT RIDUTTORE BTQ300 FVSGGBBT3000A00 OSP KIT RICAMBIO GIUNTO BTQ 185 FVSGG1851414A00 OSP KIT ELICA D185 RH FVSGEL185R00A00 OSP KIT RICAMBIO GIUNTO BTQ 250...
- Page 15 10 - Dimensioni eliche di manovra BT DC-AC185/250/300 BT DC-AC 185 105 BT DC-AC 250 140 373 (14 265 (10 BT DC-AC 300 300 434 (17 MANUALE D’INSTALLAZIONE E USO BT DC-AC185-250-300 IT EN - REV001A...
- Page 17 INDEX BT DC-AC185/250/300 1 - Information about the product Pag. 18 1.0 - Installation requisites Pag. 18 1.1 - DC-AC185/250/300 Technical data Pag. 18 2 - Supplied parts Pag. 19 2.0 - Package contains the following parts Pag. 19 2.1 - Required components, not supplied with the thruster Pag.
-
Page 18: Information About The Product
1 - Information about the product BT DC-AC185/250/300 BEFORE USING THE THRUSTER, CAREFULLY READ THIS USER MANUAL. IF IN DOUBT, CONTACT YOUR NEAREST QUICK DEALER. ® QUICK ® RESERVES THE RIGHT TO INTRODUCE CHANGES TO THE EQUIPMENT AND THE CONTENTS OF THIS MANUAL WITHOUT PRIOR NOTICE. IN CASE OF DISCREPANCIES OR ERRORS BETWEEN THE TRANSLATED TEXT AND THE ORIGINAL ITALIAN TEXT, PLEASE REFER TO THE ITALIAN TEXT. -
Page 19: Supplied Parts
• Hexagonal male key 4 mm, 5 mm, 8 mm e 12 mm • Fork or polygonal key 27 mm 3 - Safety BT DC-AC185/250/300 3.0 - Warnings • Quick Thrusters have been designed and constructed only for nautical use. ® • Do not use these appliances for other uses. -
Page 20: Installation
4 - Installation BT DC-AC185/250/300 4.0 - Installation requisites • The position of the tunnel will depend on the interior and exterior shape of the boats bow. • Optimal positioning of the tunnel will be in the bow and as low as possible, at least 0.75 times the tunnel diameter from the waterline MINIMUM 0,75 TIMES TUNNEL Ø... - Page 21 4 - Installation BT DC-AC185/250/300 4.1 - The Tunnel • The rounded ends of the tunnel limit the creation of turbulences and cavitations, improving performance of the propeller thrust and reducing noise levels to a minimum. • The force produced by the flow of the water when the boat is moving produces resistance on the rear face of the tunnel, which is an area exposed frontally to the water flow.
- Page 22 4 - Installation BT DC-AC185/250/300 4.2 - The Thruster • The thruster can be installed at any angle within 90° from vertical. • If the electric motor is positioned of necessity at an an- gle of more than 30° from vertical, a special support must be constructed.
- Page 23 4 - Installation BT DC-AC185/250/300 4.3 - Gearleg and motor support flange • Proceed with fitting the gearleg with the special seal gasket. • For further protection against the entry of water, apply silicone for nautical use around the point of contact be- tween flange and tube.
-
Page 24: Controller Installation
4 - Installation BT DC-AC185/250/300 4.5 - Controller installation site Install the controller in a dry, ventilated place. The controller has to be fixed to the bearing surface using screws suitable to bear the weight of the fuseholder plus wires. The controller perimeter must be at least 10 cm (3 15/16 in) from any walls or objects. -
Page 25: Connection Diagram
5 - Connection diagram BT DC-AC185/250/300 5.0 - Basic System BT DC-AC 185/250/300 AJ1 THRUSTER COMMAND CONTROLLER CABLE AC MOTOR CONTROLLER EXTENSION LINE CONTACTOR MOTOR THRUSTER 4A FAST FUSE BATTERY BT DC-AC185-250-300 - INSTALLATION AND USE MANUAL - IT EN - REV001A... - Page 26 It is strongly forbidden to bypass or modify such protections in order to increase the operating time span, lest voiding the warranty and thus lifting any responsibility from Quick SPA. • Make sure no swimmers or floating objects are in the vicinity before switching on the thruster.
-
Page 27: Maintenance
8 - Maintenance BT DC-AC185/250/300 8.0 - BT DC-AC 185/250/300 maintenance Quick Thrusters are made in materials that are resistant ® to the sea environment: In any case, it is indispensable to periodically remove salt deposits that form on the outer surfaces to avoid corrosions and consequent system inef- ficiency. -
Page 28: Spare Parts
9 - Spare parts BT DC-AC185/250/300 BT DC-AC 185 BT DC-AC 250 BT DC-AC 300 DESCRIPTION CODE OSP BTQ300 DP GEARLEG KIT FVSGGBBT3000A00 OSP BTQ 185 ELASTIC COUPLING SPARE PART KIT FVSGG1851414A00 OSP KIT PROPELLER D185 RH FVSGEL185R00A00 OSP BTQ 250 ELASTIC COUPLING SPARE PART KIT... - Page 29 10 - Thruster dimensions BT DC-AC185/250/300 BT DC-AC 185 105 BT DC-AC 250 140 373 (14 265 (10 BT DC-AC 300 300 434 (17 BT DC-AC185-250-300 - INSTALLATION AND USE MANUAL - IT EN - REV001A...
- Page 30 NOTES...
- Page 32 DOUBLE PROPELLERS BT DC-AC185 BT DC-AC250 BT DC-AC300 Codice di serie del prodotto / Product code and serial number QUICK S.p.A. - Via Piangipane, 120/A - 48124 Piangipane (RAVENNA) - ITALY ® Tel. +39.0544.415061 - Fax +39.0544.415047 - www.quickitaly.com - quick@quickitaly.com...
Need help?
Do you have a question about the BT DC-AC and is the answer not in the manual?
Questions and answers