
Related Manuals for Quick BL2 FF Y Series


Summary of Contents for Quick BL2 FF Y Series
- Page 1 REV 003B SALPA ANCORA WINDLASS BL2 FF Y 600 900 1200 MANUALE DI INSTALLAZIONE ED USO IT - Pag. 4 INSTALLATION AND USE MANUAL EN - Pag. 16...
- Page 2 MODELLI DISPONIBILI ● MODELS AVAILABLE BL2 612 FY BL2 624 FY BL2 912 FY BL2 924 FY BL2 1212 FY BL2 1224 FY...
- Page 3 Pag. 5 2.0 - Fornitura di serie e materiale incluso nella confezione Pag. 5 2.1 - Attrezzi necessari per l'installazione Pag. 5 2.2 - Accessori Quick consigliati non in dotazione Pag. 5 3 - Introduzione Pag. 5 3.0 - Note importanti Pag.
-
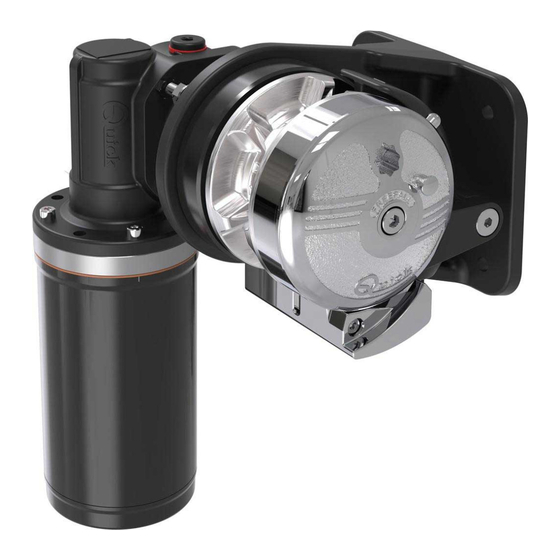
Page 4: Informazioni Sul Prodotto
SUPPORTATA (¹) (1) I valori in tabella si riferiscono ad una cima in poliestere a 3 legnoli con la giunzione cima/catena secondo il sistema “Quick®”. (*) Per i codici dei barbotin fare riferimento all’esploso a pag. 13 (**) ISO EN 818-3. -
Page 5: Note Importanti
I salpa ancora Quick® sono stati progettati e realizzati per salpare l'ancora • Non utilizzare questi prodotti per altri tipi di operazioni. • Quick® non si assume alcuna responsabilità per i danni diretti o indiretti causati da un uso improprio del prodotto. -
Page 6: Requisiti Per L'installazione
• L’uso di questo dispositivo non è inteso da parte di persone (bambini inclusi) con ridotte capacità fisiche, sensoriali o mentali. QUICK® SpA non si assume alcuna responsabilità per danni diretti o indiretti causati da un uso improprio dell’apparecchio. - Page 7 La poca profondità del gavone potrebbe provocare inceppamenti. 90° 40cm (16”) 4.1 Procedura installazione Stabilita la posizione ideale praticare i fori utilizzando la dima di foratura fornita a corredo. MANUALE D’INSTALLAZIONE ED USO QUICK BL2 - REV003B...
- Page 8 Fori sensori MOTORE ELETTRICO: Collegare i cavi di alimentazione e il cavo sensore provenienti dal salpa ancora al teleruttore/ teleinvertitore. (vedi schema di collegamento a pag.9) MANUALE D’INSTALLAZIONE ED USO QUICK BL2 - REV003B...
-
Page 9: Collegamento Elettrico
MOD. 900U E 900D NERO MARRONE BATTERIA FUSIBILE 4A (12V) 2A (24V) INTERRUTTORE MAGNETO IDRAULICO (VEDI TABELLA PAG. 4) CASSETTA TELEINVERTITORI MOD. T6415-12 (12V) L = L1 + L2 + L3 + L4 + L5 MANUALE D’INSTALLAZIONE ED USO QUICK BL2 - REV003B... - Page 10 • Riattivare l’alimentazione del salpa ancora. Con il sistema automatico di caduta libera disattivato, la catena può essere ca- lata esclusivamente con accompagnamento elettrico oppure manualmente (vedi paragrafo USO - USO DELLA FRIZIONE). MANUALE D’INSTALLAZIONE ED USO QUICK BL2 - REV003B...
-
Page 11: Avvertenze Importanti
NON attivare elettricamente il salpa ancora con la leva inserita nella campana o nel coperchio del barbotin. Quick® consiglia di utilizzare una protezione tipo fusibile/magnetotermico/magnetoidraulico di potenza ade- guata a seconda del motore utilizzato per salvaguardare il motore da surriscaldamenti o corto-circuiti. -
Page 12: Risoluzione Dei Problemi
DAL 2 AL 27 (8B - 9B) FVSSTBL2F9Y7A00 OSP TOP BL2 F 9/1200W 1/4” DAL 2 AL 27 (8B - 9B) FVSSTBL2F9Y8A00 OSP TOP BL2 F 9/1200W 8MM DAL 2 AL 27 (8B - 9B) MANUALE D’INSTALLAZIONE ED USO QUICK BL2 - REV003B... - Page 13 MOTORE 900W 12V MOTORE 900W 24V MOTORE 1200W 12V MOTORE 1200W 24V A - B A - B C - D - E - F C - D - E - F MANUALE D’INSTALLAZIONE ED USO QUICK BL2 - REV003B...
-
Page 14: Manutenzione
I salpa ancora Quick® sono costituiti da materiali resistenti all’ambiente marino: è indispensabile, in ogni caso, rimuovere periodicamente i depositi di sale che si formano sulle superfici esterne per evitare corrosioni e di conseguenza danni all’apparecchio. - Page 15 7.1 - Cluctch use Pag. 12 7.2 - Problem solving Pag. 12 8 - Spare parts Pag. 12 8.0 - Spare parts Pag. 13 9 - Maintenance Pag. 14 Dimensioni/Dimension Pag. 27 INSTALLATION AND USE MANUAL QUICK BL2 - REV003B...
-
Page 16: Information About The Product
1/2" (12,7 mm) 1/2" (12,7 mm) (3) The values in the table refer to a three-strand polyester rope with a rope/chain splice manufactured with the “Quick®” system. (*) Gypsy codes, see engineering drawings on page 13 (**) ISO EN 818-3. -
Page 17: Supplied Parts
The Quick® windlasses are designed to weigh the anchor. • Do not use the equipment for other purposes. • Quick® shall not be held responsible for damage to equipment and/or personal injury, caused by a faulty use of the equipment. -
Page 18: Installation
MAKE INSTALLATION / MAINTENANCE MAKE SURE THAT THE PRODUCT IS DISCONNECTED FROM THE ELECTRICAL SYSTEM Quick takes no responsibility regarding the inadequate connection of the users to the electrical system and to the safety of the same. 4 - Installation 4.0 Installation requisites... - Page 19 90° 40cm (16”) 4.1 Installation The windlass must be positioned with the gypsy aligned with the bow roller. INSTALLATION AND USE MANUAL QUICK BL2 - REV003B...
- Page 20 Sensor Hole ELECTRIC MOTOR: Connect the supply cables and sensor cables from the windlass to the contactor/reversing contac- tor unit. (connection diagram a pag.9) INSTALLATION AND USE MANUAL QUICK BL2 - REV003B...
-
Page 21: Connection Diagram
BATTERY FUSIE 4A (12V) 2A (24V) HYDRAULIC-MAGNETIC CIRCUIT BREAKER (SEE TABLE ON PAGE PAG. 4) REVERSING CONTACTOR UNIT MOD. T6415-12 (12V) L = L1 + L2 + L3 + L4 + L5 INSTALLATION AND USE MANUAL QUICK BL2 - REV003B... - Page 22 • Release the chain. • Turn power to the windlass back on. When the automatic freefall system is deactivated, the chain can be lowered only electrically or manually (see paragraph USAGE - CLUTCH USE). INSTALLATION AND USE MANUAL QUICK BL2 - REV003B...
-
Page 23: Usage & Warning
DO NOT operate the windlass by using the electrical power when the handle is inserted in the drum or into the gypsy cover. Quick® suggests the use of a protection such as a fuse/thermal-magnetic/ hydraulic-magnetic circuit breaker of suitable power according to the motor chosen, in order to protect it from any overheating or short circuits. -
Page 24: Problem Solving
OSP MOTOR 1200W 24V FVSSTBL2F9Y7A00 OSP TOP BL2 F 9/1200W 1/4” FROM 2 TO 27 (8B - 9B) FVSSTBL2F9Y8A00 OSP TOP BL2 F 9/1200W 8MM FROM 2 TO 27 (8B - 9B) INSTALLATION AND USE MANUAL QUICK BL2 - REV003B... - Page 25 GEARBOX MOTOR 1200W 12V GEARBOX MOTOR 1200W 24V MOTOR 600W 12V MOTOR 600W 24V MOTOR 900W 12V MOTOR 900W 24V MOTOR 1200W 12V MOTOR 1200W 24V A - B A - B INSTALLATION AND USE MANUAL QUICK BL2 - REV003B...
-
Page 26: Maintenance
Carefully remove the rope from the gypsy. Quick® windlasses are manufactured with materials resistant to marine environments. In any case, any salt de- posits on the outside must be removed periodically to avoid corrosion and damage to the equipment. The parts where salt may have built up should be washed thoroughly with fresh water. - Page 27 Dimension BL2 600 239 (9 13/32) 140 (5 33⁄64) 99 (3 57⁄64) 9,5 (3/8) X 4 Dimension BL2 900 - 1200 246,5 (9 13/32) 140 (5 33/64) 99 (3 57⁄64) 9,5 (3/8) X 4 INSTALLATION AND USE MANUAL QUICK BL2 - REV003B...
- Page 28 MANUALE D'INSTALLAZIONE ED USO INSTALLATION AND USE MANUAL Codice di serie del prodotto / Product code and serial number QUICK S.p.A. - Via Piangipane, 120/A - 48124 Piangipane (RAVENNA) - ITALY ® Tel. +39.0544.415061 - Fax +39.0544.415047 - www.quickitaly.com - quick@quickitaly.com...
Need help?
Do you have a question about the BL2 FF Y Series and is the answer not in the manual?
Questions and answers