Table of Contents
Advertisement
Quick Links
Advertisement
Table of Contents

Subscribe to Our Youtube Channel
Related Manuals for SXT Monster EEC


Summary of Contents for SXT Monster EEC
- Page 1 Vehicle Manual - Version Download SXT_MAMNSTREEC_V1.3 Current manual...
-
Page 2: Table Of Contents
CONTENTS Page Scope of delivery Technical data Important information Before driving Serial Number Vehicle parts Operating elements Display Assembly Preparing to drive Charging the battery Maintenance, care Troubleshooting Recycling the battery Warranty | 2 | MANUAL... -
Page 3: Scope Of Delivery
SCOPE OF DELIVERY E-Scooter Saddle and seat tube Exterior mirrors Turn signal bracket Fuses Mudguards Fahrzeug Handbuch - Version Download SXT_MAMNSTREEC_V1.3 Aktuelles Handbuch Charger Toolkit Manual COC Paper | 3 | MANUAL... -
Page 5: Technical Data
TECHNICAL DATA Max. speed: 45 km/h Type of drive: Chain Max. payload: 134 kg Length, width, height: 135 cm x 64 cm x 99 cm Length, width, height / folded: 135 cm x 35 cm x 57 cm Operating voltage: 48 Volt Battery removable for charging: yes Operation: Rotary throttle Suspension: Shock absorbers front and rear... -
Page 6: Important Information
SXT Monster EEC accurately & safely. It is import- ant that you understand all the points and features of your new SXT Monster EEC so that you can enjoy riding your new electric scooter from the first minute. For the first ride, you should select a large open area to familiarize yourself with the riding habits and features of the scooter. - Page 7 IMPORTENT INFORMATION 1. The SXT Monster EEC may only be driven from the age of 16 with a driving license class A1, AM - never use vehicle with 2. Persons at the same time. Always check the vehicle before driving. Regular main- tenance and care will minimize the risk of damage, accidents and possible injury.
-
Page 8: Before Driving
If they do, please contact your dealer or technical support! Check the brakes and all mechanical functions before each ride. 1. Get to know the SXT Monster EEC - before you ride it. Familiarize yourself with its driving behavior. Do not make tight turns, drive slowly and pay attention to your braking distance. -
Page 9: Serial Number
Make a note of the vehicle identification number of your e-scooter. Keep it in a safe place. Each SXT Monster EEC has an individual number. This can be used to clearly identify your vehicle, e.g. in the event of theft. -
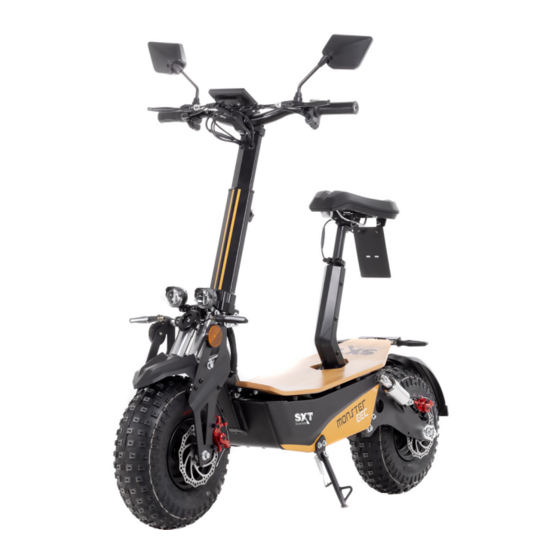
Page 10: Vehicle Parts
VEHICLE PARTS Exterior mirror Brake Display Steering wheel lock Handlebars Quick release Front light Clamp Shock absorbers Running board Charging socket Charging bucAttention: Mech. disc brakes The vehicle cannot be started as long as the side stand is folded out. | 10 | MANUAL... - Page 11 VEHICLE PARTS Taillight License plate holder Seat quick release clamp Turn signal Batterie (inside) Shock absorbers Mech. disc brakes | 11 | MANUAL...
-
Page 12: Operating Elements
OPERATING ELEMENTS On/Off switch LED running direction blinker Horn Full battery full Half full battery half empty battery empty Start switch On/Off switch Ignition key | 12 | MANUAL... -
Page 13: Display
DISPLAY On-board voltage or Right Left Ready temperature display High beam Turn signal light Turn signal light km/h Speed Charge status Trip time Trip driven kilometers When turning the ignition key, the total kilometers driven are displayed, then the display switches to Trip. | 13 | MANUAL... -
Page 14: Assembly
ASSEMBLY 1. Vehicle SXT Monster EEC 2. Front mudguard + 4 screws and nut clamps 3. Mudguard rear + 2 screws 4. Reflector rear 5. Tool 6. saddle 7. seat post 8. Turn signal bracket rear 9. Rear view mirror 10. - Page 15 ASSEMBLY 1. First fold the handlebar upwards and lock it in position Fig. 1. Fig. 1 2. Now mount the handlebar rod. First, remove the 4 screws Fig. 2 and the cover. In the next step, place the handlebar in the opening provided for this purpose and fasten it with the cover removed beforehand.
- Page 16 ASSEMBLY 3. To mount the LCD display, remove the two screws Fig. 4 under the handlebar. Then screw the LCD display back on with the two screws Fig. 5. Fig. 4 Fig. 5 4. In the next step, mount the two front turn signals Fig. 6 and fold up the LED lamps Fig.
- Page 17 ASSEMBLY 5. Attach the nut clamps Fig. 8 to the front mudguard and screw it to the vehicle frame as shown in the picture Fig. 9. Fig. 8 Fig. 9 6. The rear mudguard can be easily attached to the vehicle frame with 2 screws Fig.
- Page 18 ASSEMBLY 7. Under the footboard you will find the rear turn signals Fig. 12. Remove the 3 screws Fig. 13 to install the seat bracket. Then screw this to the turn signal bracket Fig. 14. Now connect the first connector for the rear light together Fig.
- Page 19 ASSEMBLY 8. Now plug the clamp fastener Fig. 16 for the seat onto the seat holder and then push the seat into the opening provided for it Fig. 17. Now connect the second plug connection for the rear light Fig. 18. Fig.
- Page 20 ASSEMBLY 9. mount nand the two rear turn signals Fig. 19. Please make sure that the turn signals are mounted correctly (right and left), power up the vehicle and operate the direction indicator. Fig. 19 Direction indicator Attention: The vehicle cannot be started as long as the side stand is folded out! The scope of delivery also includes fuses, which you will need when connecting the battery.
- Page 21 ASSEMBLY When inserting the lithium battery, make sure that the cables are not underneath it. The battery can be tightened with the two Velcro straps. 11. now screw the rear view mirrors to the handlebars. 12. last, remove the protective film from the stickers. | 21 | MANUAL...
-
Page 22: Preparing To Drive
PREPARING TO DRIVE Tire pressure: Please check the tire pressure at least once a month. ( Off road we recommend less air pressure). Chain tensioner: If the chain loosens, use the tools to adjust the chain tensioner. | 22 | MANUAL... - Page 23 PREPARING TO DRIVE Height adjustment of the handlebar: Turn the screw as shown below to adjust the height of the handlebar, do not unscrew more than 3 turns or the lock nut will loosen and may lower into the steering tube. Brakes: Check your brakes regularly, if the screws are loose, please tighten them.
-
Page 24: Charging The Battery
CHARGE BATTERY Fully charge the scooter before using it for the first time. As soon as the charger lights up green, the charging process is complete. Remove the charger after the charging process. CAUTION TO AVOID DAMAGE TO THE BATTERY, USE ONLY THE CHARGER SUPPLIED BY THE DEALER! Charge your scooter after each use. - Page 25 CHARGE BATTERY Loading instructions: 1. First connect the charger to a conventional power outlet, then connect the charging cable to your SXT scooter. 2. The safety protection for the charging port should be replaced after the scooter has been charged.
- Page 26 CHARGE BATTERY Charging instructions lithium batteries: Lithium batteries should never be deep discharged, this will irreparably damage the lithium cells. All lithium batteries should (if possible) always be stored at medium charge. If a battery is not needed for a long time, please do not fully charge it before- hand - this puts the lithium cells in unnecessary „stress“...
- Page 27 CHARGE BATTERY Charging instructions for lead-acid batteries (lead-acid battery): Lead-acid batteries should never be deep discharged, but should always be operated at the highest possible voltage. Lead-acid batteries that have been deeply discharged by running them completely „empty“ or by storing them for a long time without char- ging them (such as over the winter) will cause them to sulfate and damage the cells.
-
Page 28: Maintenance, Care
Perform some braking in a roadworthy location with extreme caution. The water on the braking surfaces reduces the braking performance in the short term. Please keep your SXT Monster EEC away from sun and rain. Regularly check the screws and small parts on your scooter. Do not use alcohol, gasoline, acetone or other chemical solvents to clean the scooter, otherwise it may corrode. - Page 29 MAINTENANCE Maintenance Maintenance parts purpose Brake Check the brake function to avoid accidents caused by braking. to avoid malfunctions. Tire Check the condition and pressure of the tires, if the Tires are flat the power consumption is higher. Tire rim Check the rims, clean the dirt when it is stuck.
-
Page 30: Troubleshooting
TROUBLESHOOTING Error Reason No power assistance when Not switched on. driving the scooter. Range too low. 1. The battery is not fully charged. 2. The tires have too little air. 3. Frequent braking / starting / overload driving. 4. Battery is too old or has reached maximum char- ge cycles. - Page 31 TROUBLESHOOTING Solution 1. Check if the battery is connected correctly. 2. Check if the battery needs to be charged. 1. Check that the charger is working. 2. Check the tire pressure. 3. Drive correctly. 4. Replace the battery. 5. Normal sweating of the battery. 1.
-
Page 32: Recycling The Battery
RECYCLING BATTERIE When properly maintained and used (according to charging and storage guidelines), the battery has a normal life of two to three years. If the battery has not been or can- not be charged, it should be removed from the scooter and disposed of at a recycling facility. -
Page 33: Warranty
WARRANTY Thank you for choosing one of our SXT Monster EEC. You have a warranty of 24 months on your scooter from the date of purchase. Please note that there is no warranty if: 1. When the warranty period has expired. - Page 34 To avoid serious injury, repairs to the battery must only be carried out by trained personnel. If necessary, please contact your dealer or our technical support. You can find all spare parts and accessories on www.sxt-scooters.de CONTACT TECHNICAL SUPPORT POL-Planet GmbH & Co. KG.
- Page 36 POL-Planet GmbH & Co. KG. Marie-Curie Straße 2 79618 Rheinfelden • Tel: +49(0)7623 460 460 info@sxt-scooters.de www.sxt-scooters.de •...
Need help?
Do you have a question about the Monster EEC and is the answer not in the manual?
Questions and answers