Table of Contents
Advertisement
Advertisement
Table of Contents

Related Manuals for Snap-On BK7000


Summary of Contents for Snap-On BK7000
- Page 1 BK7000 High Definition Videoscope Operating Manual...
-
Page 2: General Safety Information
General Safety Information Read and understand all instructions. Failure to follow all instructions listed below may result in electric shock, fire and/or serious personal injury. Work Area Safety Keep your work area clean and well lit. Cluttered benches and dark areas may cause accidents. •... - Page 3 Personal Safety Stay alert, watch what you are doing and use common sense. Do not use video scope while tired or under • the influence of drugs, alcohol, or medications. A moment of inattention while operating tools may result in serious personal injury. Do not overreach.
- Page 4 Use an appropriate power source. Do not attempt to use a step-up transformer or an engine generator. Doing so • may cause damage to the A/C power supply of the BK7000 resulting in electrical shock, fire or burns. Do not allow anything to cover the A/C power supply while in use. Proper ventilation is required for correct •...
- Page 5 Do not use A/C power supply in a damp, wet or explosive environment. Do not expose to rain, snow or dirt. • Contaminants and moisture increase the risk of electrical shock. Do not open the A/C power supply or BK7000 housings. Have repairs performed only at authorized locations. (See • Snap-on Service Center).
- Page 6 Battery Safety The batteries in the BK7000 are NOT user replaceable. Call your Service Center if you believe the BK7000 battery is in • need of service. Properly dispose of the BK7000. Exposure to high temperatures can cause the battery to explode, so do not dispose •...
- Page 7 Battery Safety continued If the BK7000 is damaged, do not plug the A/C power supply into it. Do not attempt to charge. • Never disassemble the BK7000 unit. There are no user-serviceable parts inside. • Disassembling the BK7000 may cause electrical shock or personal injury.
- Page 8 Video Scope Use and Care Use video scope only as directed. Do not operate the inspection unit unless the owner’s manual has been read and • proper training has been completed. Do not immerse the handheld display unit in water. Store in a dry place. Such measures reduce the risk of electric •...
- Page 9 damaged, have the tool serviced before using. Many accidents are caused by poorly maintained tools. Use only accessories that are recommended by the manufacturer for your tool. Accessories that may be suitable for • one tool may become hazardous when used on another tool. Dry your hands before turning the unit ON or OFF.
- Page 10 If you have any questions regarding the service or repair of this machine, call or write to the appropriate repair center location (see "Snap-on Service Center Locations”). Technical questions can be directed to our toll free number at (877) 762-7664 Monday through Friday 6:30 am to 5:00 pm Central Time...
-
Page 11: Specific Safety Information
Specific Safety Information Read this operator's manual carefully before using. Failure to understand and follow the contents of this manual may result in electrical shock, fire and/or severe personal injury. FCC Statement This device complies with Part 15 of the FCC Rules. Operation is subject to the following two conditions: This device may not cause harmful interference. - Page 12 interference to radio or television reception, which can be determined by turning the equipment off and on, the user is encouraged to try to correct the interference by one or more of the following measures: Reorient or relocate the receiving antenna. –...
- Page 13 Video Scope Safety Do not place tool into anything or anywhere that may contain a live electrical charge. • FOR WALLS: For inspecting inside walls, be sure to shut off the circuit breaker to the whole house before using the •...
-
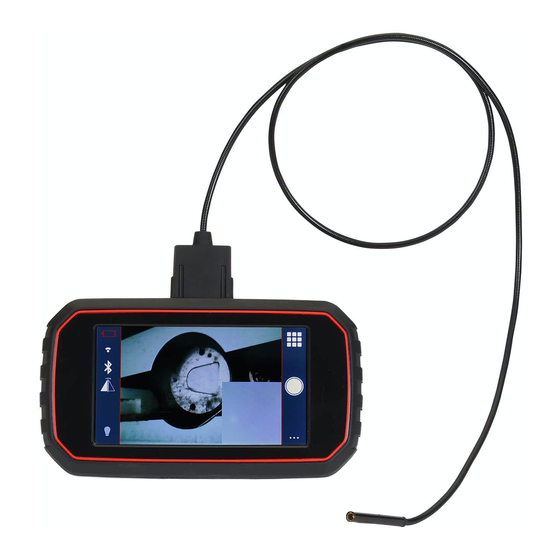
Page 14: Product Description
Product Description The BK7000 digital high definition videoscope provides true HD video thanks to its high resolution imager paired with the high resolution LCD screen. The 5” screen makes any under the hood job easy to see… The BK7000 features a capacitive touch screen display and dual view picture in picture imager…... - Page 15 Included with the BK7000: BK7000 handheld unit 5.5mm Dual view HD PiP imager (attached to unit) Quick start guide Power supply with 4 interchangeable power source adapters USB-C to USB-A power cord BK7000 travel case...
-
Page 16: Specifications
Description The BK7000 video scope displays live color video from an imaging sensor and lighting source connected to a flexible dual view imager cable. The unit is capable of capturing still images and full-motion video, along with audio. It can be used to... - Page 17 Specifications Total Weight........1 lb. (800g) DISPLAY UNIT: Power Supply........Internal Li-Ion Battery, 3.7V, 3000 mAh, 9.6 watt-hours Charge time........1.25 hours Charger Input........5V DC, 1. Amp Length..........1.28" (32.5mm) Width..........6.75" (171.4mm) Height..........3.77" (100mm) Built-in Camera........ 1280 x 720 HD Fixed focus Screen Resolution......
- Page 18 DISPLAY UNIT Specifications: Run-time on battery......2 hours (approximately) Wireless interface......2.4 – 5GHz Wi-Fi - 802.11n Wireless range........ 50 ft. (10m) Operating Temperature....32°F to 140°F (0°C to 60°C) (Batteries will not charge above 113°F (45°C)) Storage Temperature...... -4°F to 140°F (-20°C to 60° C ) 77°F (25°C) is ideal for maximum battery life.
- Page 19 IMAGER: Length..........36 in (0.91m) Forward Camera/Side Camera Field of View........approximately 62° diagonal Optimal Focal Range....... 0.5” to 12” (12cm to 30.5cm) Resolution........1280 x 720 Operating Temperature....32°F to 140°F (0°C to 60°C) Storage Temperature...... -4°F to 140°F (-20°C to 60°C) Relative Humidity......
- Page 20 No Load Standby power ....<0.3W Operating Temperature....32°F to 104°F (0°C to 40°C) Storage Temperature...... 14°F to 167°F (-10°C to 75°C) Relative Humidity......20% to 80% non-condensing NOTE! The charger and internal batteries are not compatible with any other Snap-on Li-Ion Batteries and chargers.
-
Page 21: Available Accessories
Available Accessories BK7000-38FV - 3.8mm diameter, 36 inch forward view imager BK7000-38SV - 3.8mm diameter, 36 inch side view imager The 3.8mm diameter imagers are specifically designed to be able to pass through the glow plug port in a diesel engine. The side view will provide a high definition image of the cylinder walls and image of the valve profile. - Page 22 Feature Outlines...
- Page 23 This unit may create sparks which could ignite fumes or dust. No responsibility will be taken by Snap-on for any resulting damage to the unit or to the operator if it is used with corrosive, explosive, or...
- Page 24 When using the video scope at the inspection site, make certain that you and the work area is safe for the unit to be used. This is not classified as flameproof or intrinsically safe; therefore, it must not be used where explosion hazard may exist.
- Page 25 Set up charger according to these procedures to reduce the risk of injury from electrical shock, fire, and other causes and prevent tool and system damage. Before using the BK7000 for the first time, allow it charge for at least 1.5 hours to ensure that the batteries are fully charged.
-
Page 26: Assembling The Charger
Assembling the Charger The charger is supplied with a selection of power outlet adaptors for use in multiple countries. Before first use, select the appropriate adaptor for your country and attach it by aligning the male notches on the back of the adapter with the female notches on the power block then twist clockwise, the adapter will click and lock into place. - Page 27 Charging the Unit With dry hands, insert the USB-C end of the power cord into the charging port as shown in Figure 3 and insert the USB-A end into the power block. Ensure that the correct adapter is fitted into the power block and insert the charger into a suitable power outlet to charge unit.
- Page 28 0°C and 45°C (32°F and 113°F). Outside of this temperature range the BK7000 may continue to operate but the batteries will not charge, and the Charge Status LED will be off. When the battery is fully charged, status LED will be illuminated solid green.
- Page 29 Be sure to inspect the power cord and power block for any damages. If there are any broken or worn parts, exposed wires or any damage of this nature, do not use until parts are replaced. Be sure to keep the unit clean; free of oils, grease and dirt, as described in the Maintenance section.
-
Page 30: Charging Status
Charging Status Charge LED Status Battery Status Status No power to LED is OFF Charging battery Green Charging Battery is low (blinking) Fully Green Battery is fully Charged (solid) charged... - Page 31 Disconnecting and Connecting Imagers To switch imagers, first, turn the unit off. Then pinch and hold the sides of the connector and pull imager out of the unit. To connect an imager, align the male notches on the imager connector with the female notches on the unit and insert, see Figure 4. Figure 4: Disconnect/Connect Imager...
- Page 32 Powering the Unit No assembly process is required. The unit can be powered on by pressing and holding the power button for 2 seconds. The unit will power on and the indicator light will illuminate. To turn the unit off, press and hold the power button for 2 seconds and the unit will power off.
-
Page 33: Operation
Operation The BK7000 requires an initial registry setup when powered on for the first time. Once the unit is registered, it will be ready use. Power on the unit. Once the splash screen disappears, the language selection page will appear. Scroll through the languages and select one by clicking on the language bar. The... - Page 34 Figure 5: Language Selection...
- Page 35 Set Date/Time After the language has been set, the next page will prompt you to select the time zone. The time zone can be set to your choice or skipped and set later, see Figure 6. Important: Setting the time zone allows for a time and date stamp on important documents and submissions.
- Page 36 Figure 6: Time Zone...
- Page 39 WiFi can be set by selecting an available network and entering a password. The WiFi setup can be skipped and set later, see Figure 7 Figure 7: WiFi Setup...
- Page 40 Once the password is entered, click on “JOIN” in the upper right corner. Important: The time zone will only accurately impact the displayed time on the unit if the unit has an internet connection. Register Device On the next page enter in your name, phone number, and email address. Then, tap the “REGISTER”...
- Page 41 Using the BK7000 Home screen button functionalities Battery Status Media Gallery Wi-Fi Status Bluetooth UI Flip Image Capture Setting Menu LED Control...
- Page 42 LED control Touch the light bulb icon to make the LED Slide appear...
- Page 43 Battery icon on screen shows the status of the battery life Battery Life Battery Icon Icon Color/Pattern Status Fully charged White (solid) battery < 25% battery life (blinking) remaining...
- Page 44 Taking a picture Once satisfied with what is displayed on the screen, click on the shutter button. The screen will flash black, indicating that the picture was successfully taken. To view the screen in full display before taking the picture, tap the screen once; to redisplay screen icons, tap the screen once again.
- Page 45 Taking a video Click on the menu button in the bottom right corner and select the “Video” mode under the “Camera Settings”. Then click the “X” in the top left corner of the menu to exit and return to the home screen. In video mode, the shutter button will be displayed as a red record button with a white circle around it.
- Page 46 Settings Menu – Photos, Video Photo or Video select Camera select Diagnostic Filter select...
- Page 47 Settings Menu Auto shutdown setting Screen Brightness Control On screen Time and Date Stamp...
-
Page 48: Microphone On/Off
Settings Menu Speaker Volume Control Stamp Microphone On/Off Memory Capacity... - Page 49 Settings Menu Wi-Fi Status Bluetooth Status Language Selection...
- Page 50 Settings Menu Time & Date Setting Firmware update Licensing Agreement...
- Page 51 Viewing pictures and videos To view pictures and videos, click on the gallery icon. Media Gallery...
- Page 52 On the next screen you can view and playback pictures and videos by clicking on them. To delete items out of the gallery, click on the “Select” button in the … corner, then tap on each picture or image, a check mark will appear in the selection box of each item, click “Delete”.
- Page 53 Audio Annotation...
- Page 54 Annotating a Picture...
-
Page 55: Renaming A File
Renaming a File... - Page 56 Transferring photos and videos to computer Connect the unit to a computer using the USB-C to USB-A power cord that is included with the unit. Once the external drive appears on the computer, open it. The pictures and videos can be transferred and saved to the location of your choice.
- Page 57 Connecting to Wi-Fi The WiFi can be enabled and disable in the main menu. Click on the main menu button, scroll down to “Connectivity”, click on “Wifi”.
- Page 58 Bluetooth The BK7000 has Bluetooth feature to allow the user to listen to audio portion of a video or annotation on compatible devices like wireless ear phones. Supported Bluetooth Devices All devices that require a passcode for connection are categorically unsupported.
-
Page 59: Connecting To Bluetooth
Connecting to Bluetooth... - Page 60 Connecting to Bluetooth 2...
- Page 61 Connecting to Bluetooth 3...
- Page 62 Resetting BK7000 to factory settings Tap the “Reset” button under the “Factory Reset” header. A pop up will appear, confirming that you would like to continue, tap “OK”. The unit will restart. Once the unit fully reboots, you will be prompted to setup and register the unit.
-
Page 63: Troubleshooting
Troubleshooting SYMPTOM POSSIBLE REASON SOLUTION The imager is not fully inserted into Connect imager securely to Display unit does not the unit unit display image from Damaged imager Replace imager imager Imager camera covered Clean imager lens Units will not switch Battery is critically Charge unit until battery indicator light is solid green... - Page 64 Contact a nearby service Battery does not hold Faulty battery center and start the return charge process. Check power supply Power supply is not connection and secure to plugged in power source. Damaged power supply/power cord Replace power supply. Units will not charge Place the unit in an Operating environment of temperature...
- Page 65 Image on display is frozen Processor locked up Cycle power Contact a nearby service Charging LEDs flashing Faulty battery/unit center and start the return process.
-
Page 66: Warranty
Warranty Limited Two (2) Year Warranty Snap-on Tools Company (the “Seller”) warrants only to the original purchaser that under normal use, care and service, the Equipment (except as otherwise provided herein) shall be free from defects in material and workmanship for two years from the date of original invoice. SELLER’S OBLIGATIONS UNDER THIS WARRANTY ARE LIMITED SOLELY TO THE REPAIR OR, AT SELLER’S OPTION, REPLACEMENT OF EQUIPMENT OR... - Page 67 maintenance (other than specified operator maintenance) of the Equipment or related equipment, attachments, peripherals or optional features by other than Seller’s authorized representatives; (D) improper or negligent use, application, operation, care, cleaning, storage or handling; (E) fire, water, wind, lightening or other natural causes; (F) adverse environmental conditions, including, without limitation, excessive heat, moisture, corrosive elements, or dust or other air contaminants, radio frequency interference, electric power failure, power line voltages beyond those specified for the Equipment, unusual physical, electrical or electromagnetic stress and/or other condition...
-
Page 68: Snap-On Service Center Locations
Snap-on Service Center Locations Eastern Repair Center (USA) Snap-on Tools (Australia) Pty Ltd 6320 Flank Drive National Distribution Centre Harrisburg, PA 17112 USA Unit 6/110 Station Road Toll Free # - (USA only): (800)-848- PO Box 663 5067 Seven Hills, NSW 1730 Australia... - Page 69 Northern Repair Center (USA) Snap-on Tools Singapore PTE, Ltd. 3011 E. RT 176, Dock 8 25 Tagore Lane #01-01 Crystal Lake, IL 60014 Singapore 787602 Toll Free # - (USA only): (877) 777- Telephone: +(65) 6451-5570 4412 Fax: +(65) 6451-5574 Telephone: (815) 479-6850 email: esale.sg@snapon.com...
- Page 70 Western Repair Center (USA) Snap-on Tools Japan, K.K. Snap-on, Bahco, and Cartec 3602 Challenger Way Also serving Taiwan and Micronesia Carson City, NV 89706 USA (Distribution Center and Technical Repair Center) Toll Free # - (USA only): (888) 762- 2-1-6 Shinkiba, Koto-ku,...
- Page 71 Snap-on UK Repair Centre Snap-on Tools of Canada Repair Center Snap-on Tools, Ltd. 7403 48th St. S.E. Telford Way, Kettering Calgary, Alberta T2C 4H6 CANADA Northants, NN16 8UN ENGLAND Toll Free #: (866) 824-0525 Telephone: 01536 413855 Telephone: (403) 720-4525...
Need help?
Do you have a question about the BK7000 and is the answer not in the manual?
Questions and answers